3ASSEMBLY INSTRUCTION
Tools Required Assembling the Machine: Two Adjustable Wrenches and Allen
Wrenches
NOTE: It is strongly recommended two or more people assembling this machine to
avoid possible injury.Do not tighten all the bolts and nuts until getting instruction.
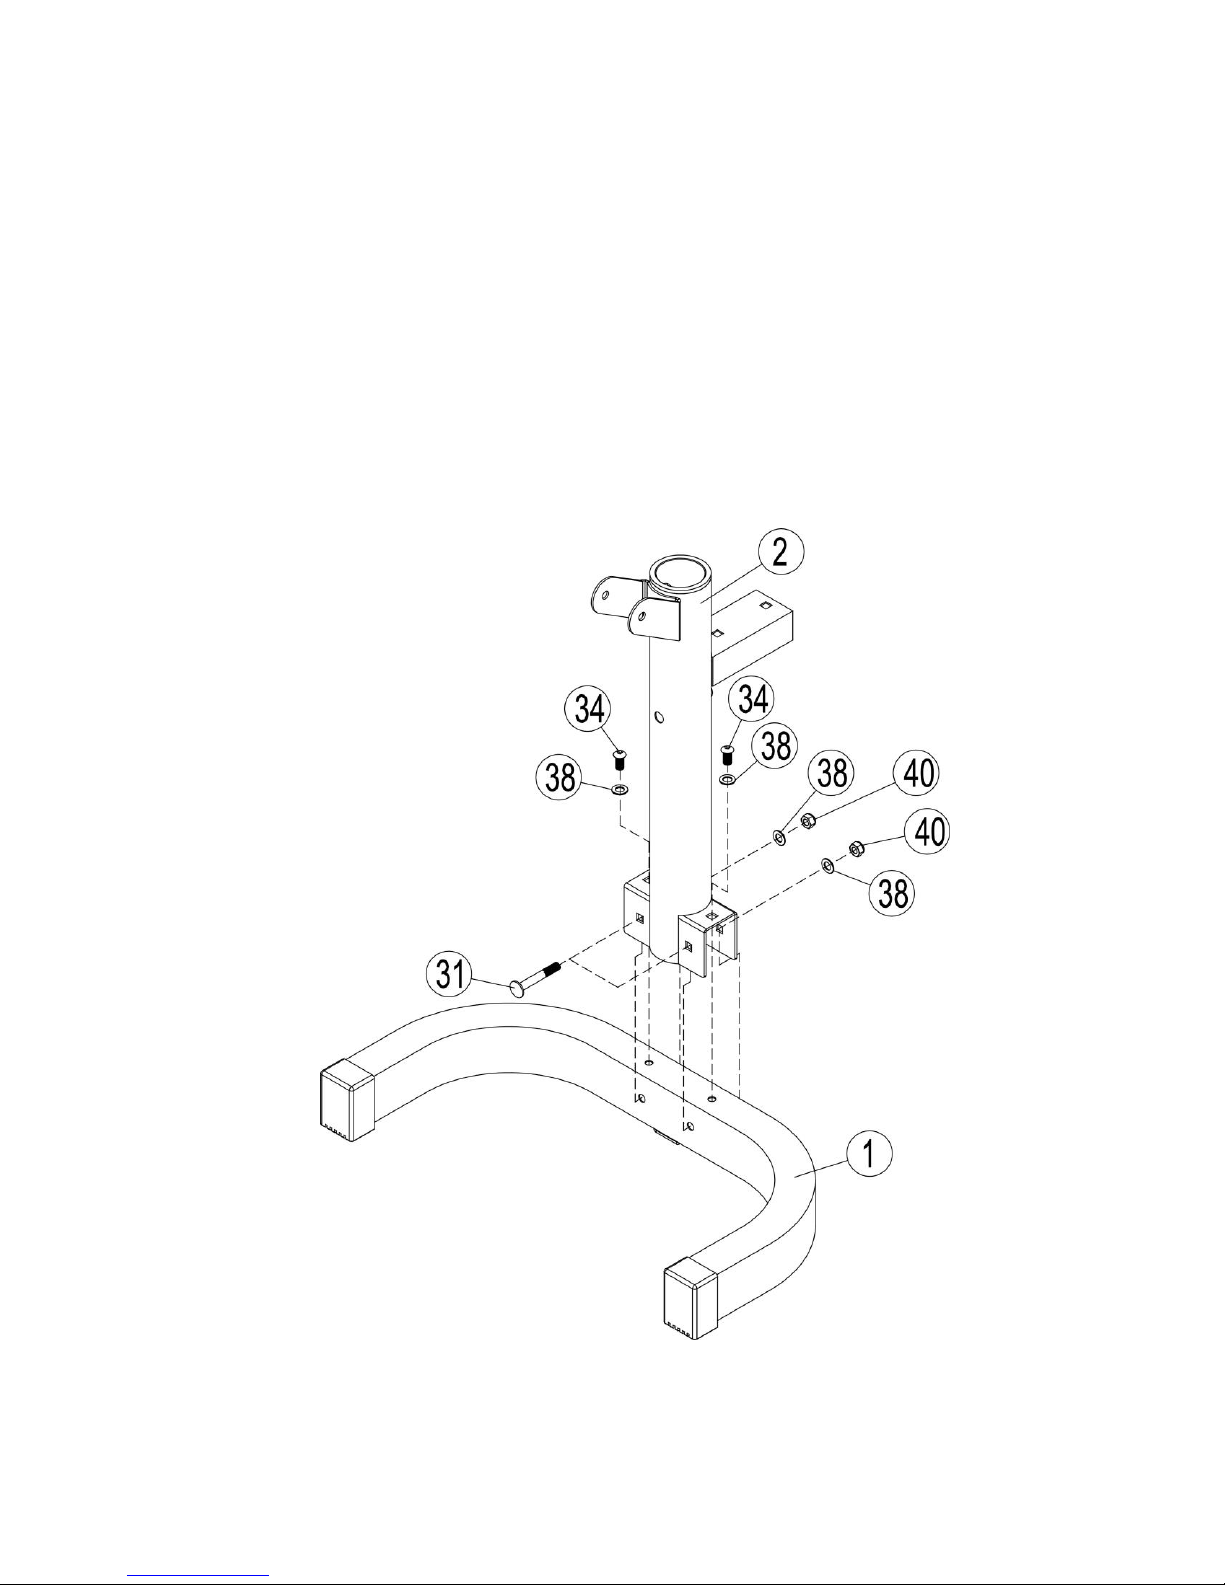
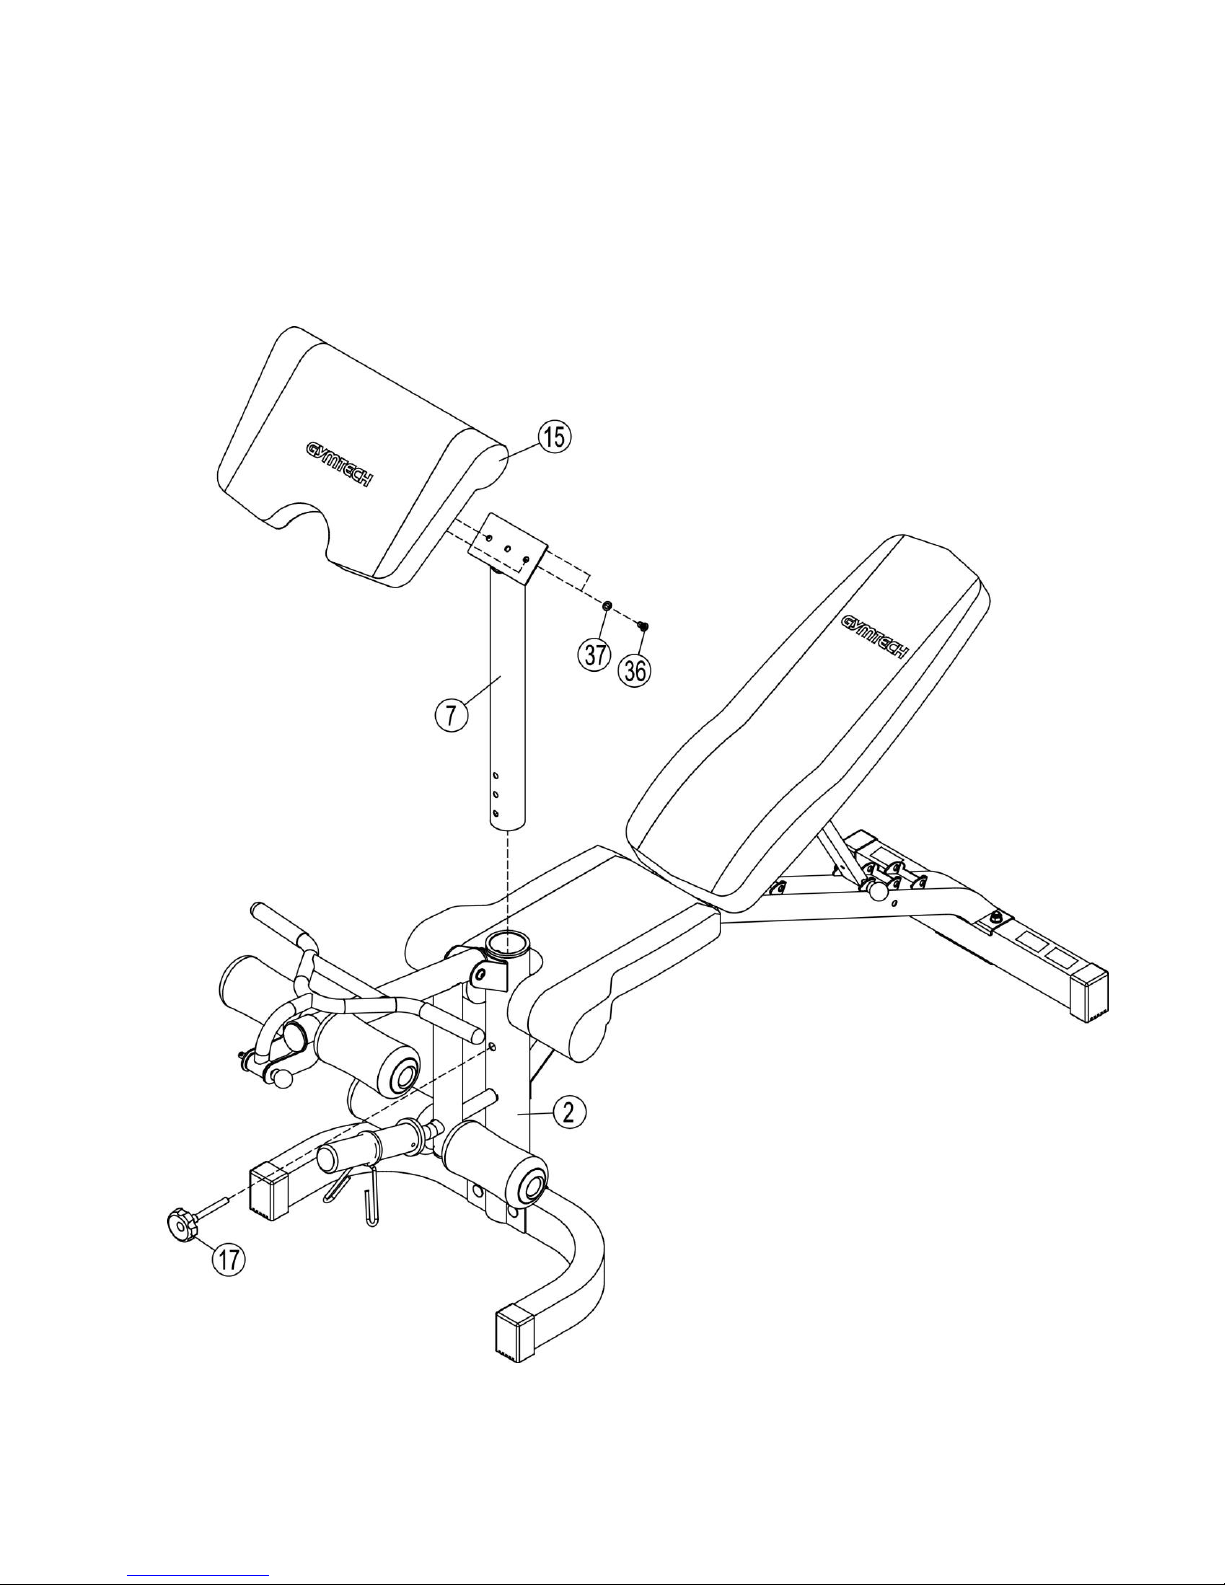
STEP 1 (See Diagram 1)
A. Attach the right upright beam (#2) to the right stabilizer (#1), and secure them with one
flat connection (#9), two M10×90mm carriage bolt (#18), two Ø10 washer (#23), two M10
aircraft nut (#21). And then secure them horizontally with two M10×70mm carriage bolt
(#19), two Ø10 washer (#23), M10 two aircraft nut (#21) again.
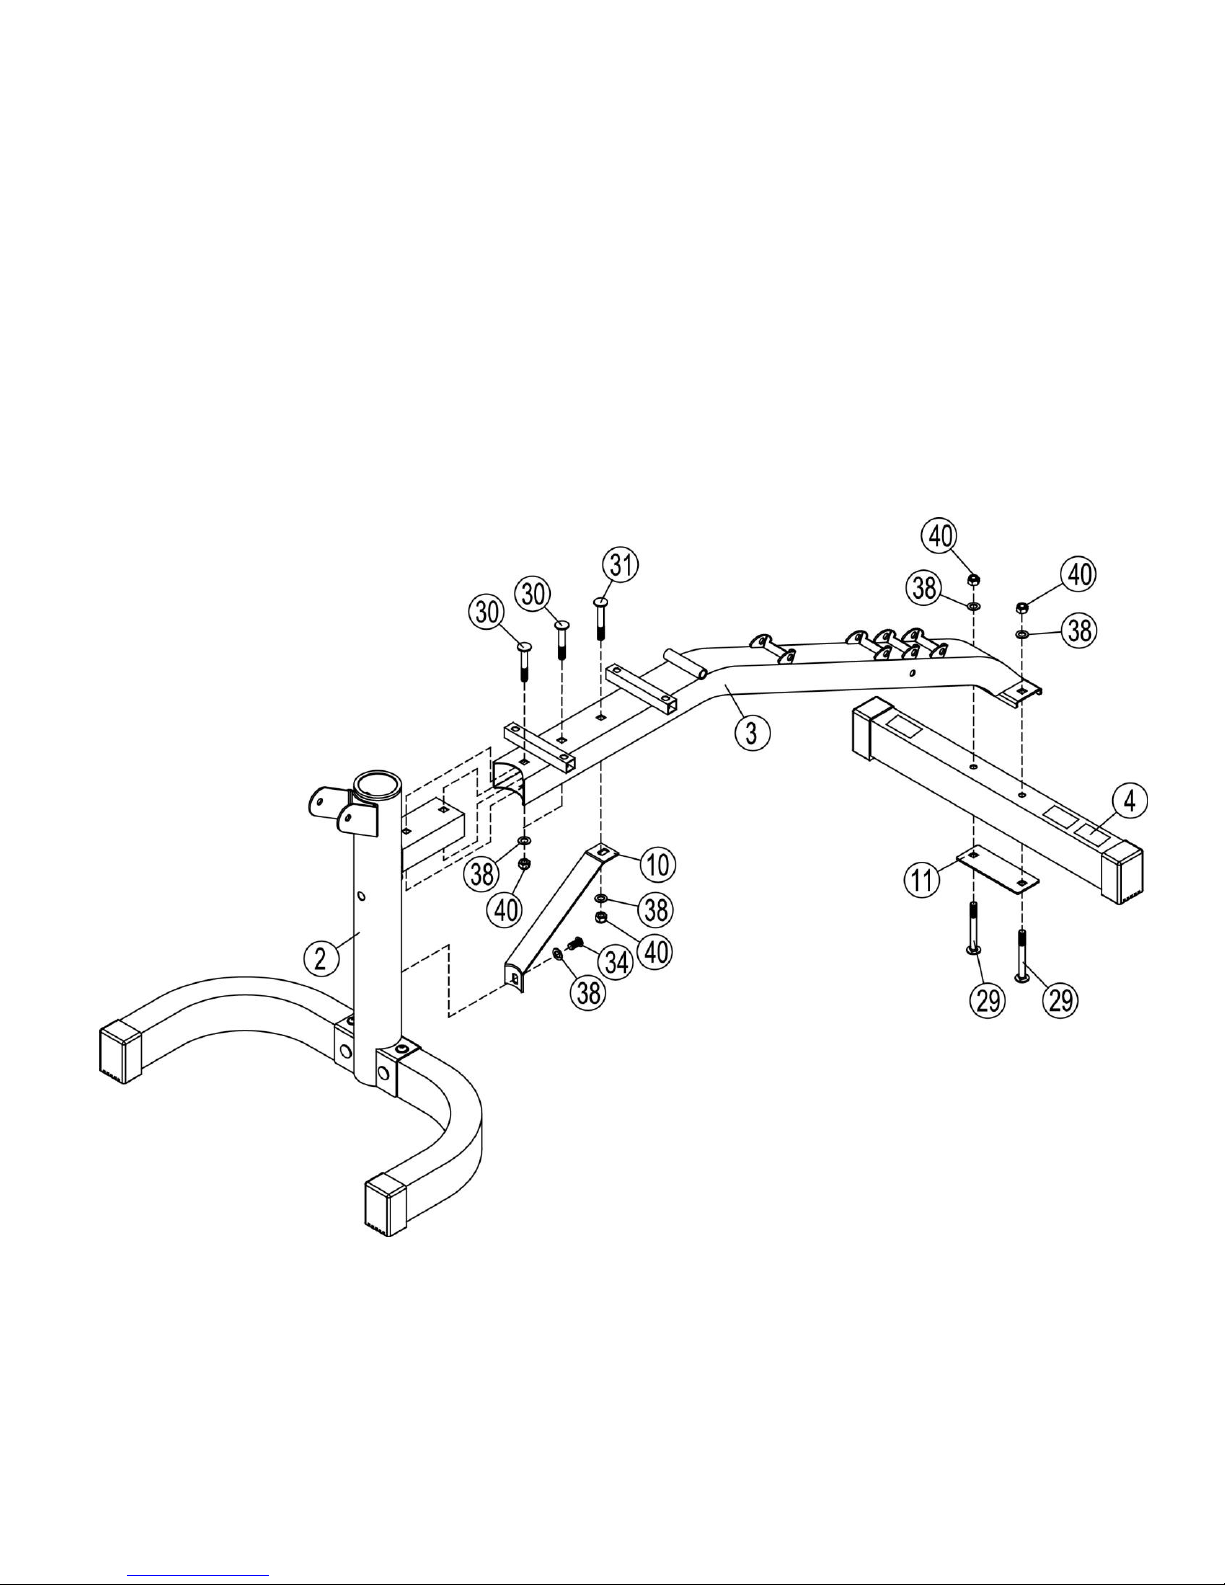
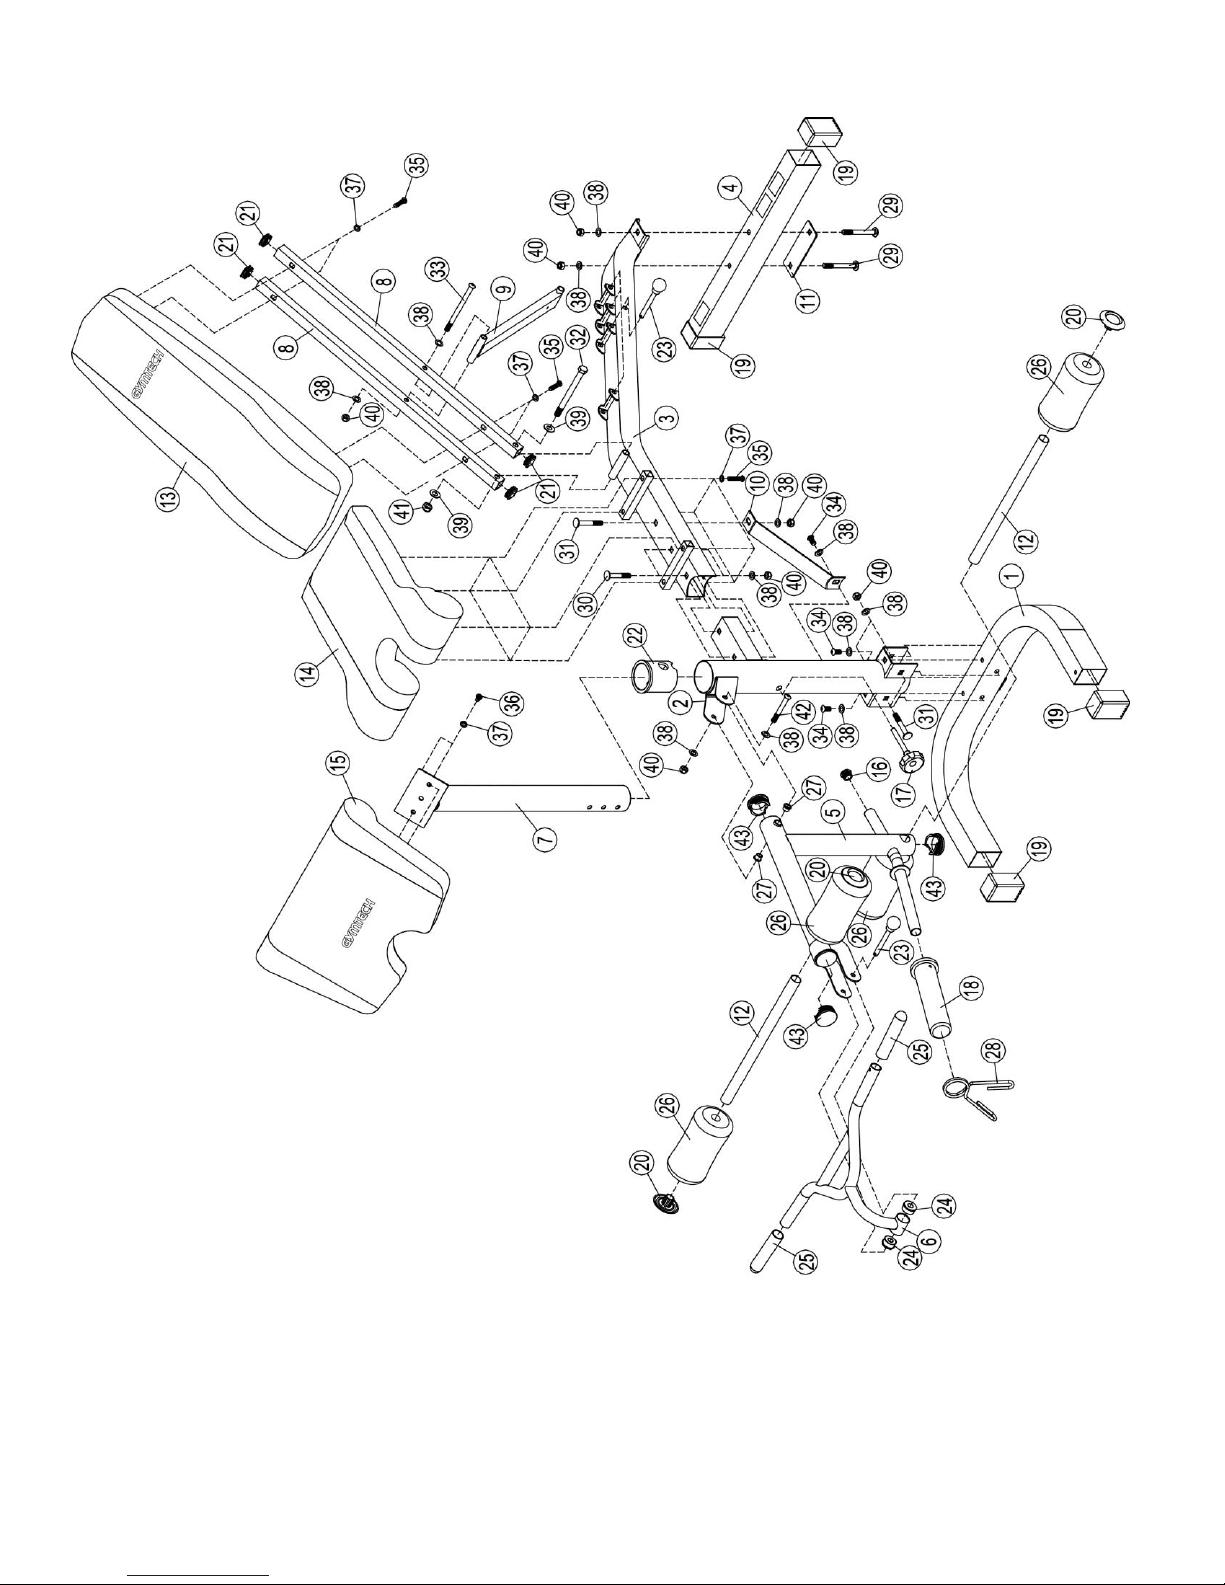
B. Attach the curved end of the triangle support (#4) to the right upright beam (#2), and
secure them with curved bracket (#10), two M10×95mm carriage bolt (#17), two Ø10
washer (#23), two M10 aircraft nut (#21). Attach the other end of the triangle support (#4)
to the right stabilizer (#1). Then secure them with one flat connection (#9), two M10×
90mm carriage bolt (#18), two Ø10 washer (#23), two M10 aircraft nut (#21).
4
STEP 2 (See Diagram 2)