manuals.online logo
Brands
  1. Home
  2. •
  3. Brands
  4. •
  5. OYEN DIGITAL
  6. •
  7. Storage
  8. •
  9. OYEN DIGITAL MiniPro Dura RAID User manual

OYEN DIGITAL MiniPro Dura RAID User manual

Table of Contents
1 Specications
2 Detailed View
3 Power
4 System Setup
5 Formatting the Drives
6 RAID Modes
7 Sleep
8 RAID 1 Rebuild
9 Replacing or Removing Drives
10 Troubleshooting and FAQ
11 Warranty Information
12 Safety and Compliance
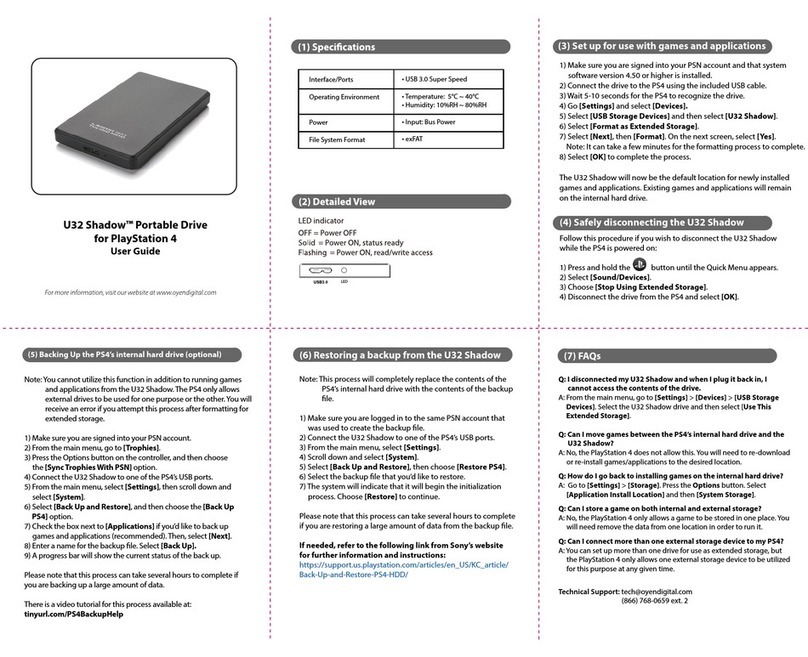
MiniPro Dura RAID System
User Guide
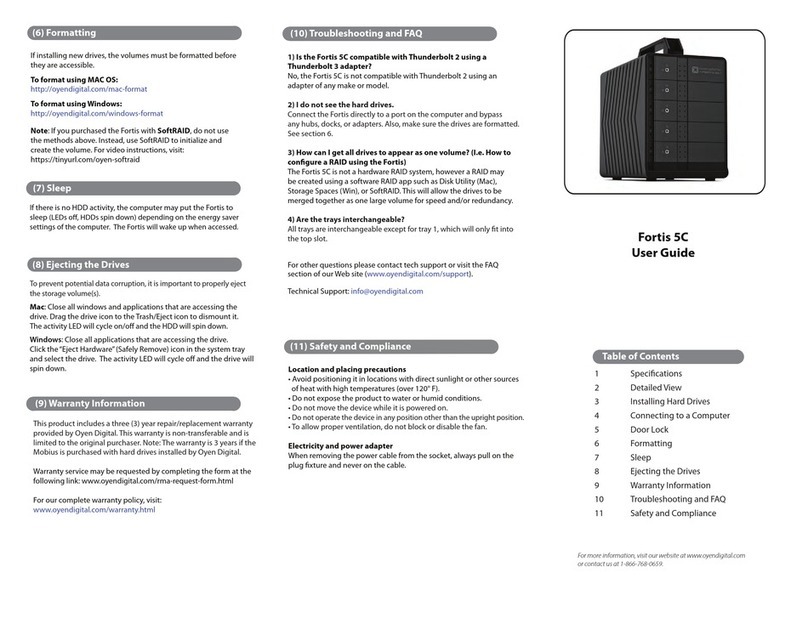
(10) Troubleshooting and FAQ
1) Does a "Clear" procedure delete data from existing RAID 1 or
JBOD drive(s)?
No, if a Clear procedure is performed on RAID 1 or JBOD drives, the
existing data on the drives will not be deleted.
2) Can I remove a drive from the RAID and install it in another
enclosure for access to the les?
Yes, only if using RAID 1(Mirroring) or JBOD.
3) Can I connect the MiniPro Dura RAID to a Thunderbolt 3 port?
Yes, the MiniPro Dura RAID is fully compatible with Thunderbolt 3 as
well as USB 3.1 and 3.0. However, you must use the USB-C cable
included with the MiniPro Dura RAID.
4) Is the MiniPro compatible with Thunderbolt 2 using a
Thunderbolt 3 adapter?
No, the MiniPro is not compatible with Thunderbolt 2 using an
adapter of any make or model.
For other questions please contact tech support or visit the FAQ
section of our Web site (www.oyendigital.com/support.html).
Technical Support: tech@oyendigital.com
Location and placing precautions
• Avoid positioning it in locations with direct sunlight or other sources
of heat with high temperatures (over 120° F).
• Do not expose the product to water or humid conditions.
• Do not move the device while it is powered on.
• Ensure that the device is on a clean, rm, and stable surface.
• To allow proper ventilation, do not block or disable the fan.
Electricity and power adapter
When removing the power cable from the socket, always pull on the
plug xture and never on the cable.
Regulatory Compliance
FCC Class B Information: This device has been tested and found
to comply with the limits of a Class B digital device, pursuant to
Part 15 of the FCC Rules. These limits are designed to provide
reasonable protection against harmful interference in a
residential installation. This unit generates, uses, and can radiate
radio frequency energy and, if not installed and used in
accordance with the instructions, may cause harmful interfer-
ence to radio or television reception. However, there is no
guarantee that interference will not occur in a particular
installation.
(12) Safety and Compliance
Bottom View
d) Slide the drive(s) away from the connector and slide
the new drive(s) in. Use the screws removed in the last
step to secure the drive(s) to the bracket.
e) Slide the bracket back into the shell and secure using the
screws removed in step (b).
f) Securely insert the front end of the MiniPro Dura RAID into
the rubber Dura bumper. Carefully stretch the rear corners
of the bumper around the MiniPro Dura RAID.
c) Flip the bracket over and remove the screws that attach
the drive(s) you wish to remove.
(9) Replacing or Removing Drives
(11) Warranty Information
This product includes a three (3) year repair/replacement
warranty provided by Oyen Digital. This warranty is non-
transferable and is limited to the original purchaser. Warranty
service may be requested at: oyendigital.com/support.html
a) Carefully remove the rubber Dura bumper surrounding the
enclosure. Slowly stretch the bumper over each corner of
the MiniPro Dura RAID until loose.
b) Remove the screws from the bottom of the enclosure
and slide the bracket out of the shell.
D1
D2
(up to 15mm height)
7.0 x 5.7 x 1.4 inches
2 x 2.5” SATA HDDs or SSDs
+12V/2A
Mac OS 10.6 or higher
Linux 3.13 or later
Windows 7 or higher
RAID Modes
RAID 0 Striping
RAID 1 Mirroring
JBOD Clear (independent drives)
BIG (non-RAID single volume)
USB 3.1 C-Type (Up to 10Gbps)
Compatible with Thunderbolt 3
LED indicators
* Note: D1 & D2 LEDs will be OFF when the MiniPro is not
connected to a computer.
D1 D2
Red
Fast rapid blinking
Red
Off
Slow steady blink
Off
Slow steady blink
State Power LED Drive 1 (D1) Drive 2 (D2)
Drive Error or missing
HDD Sleep
RAID 1 Rebuilding
Read/Write activity
Powered & ready
Fast rapid blinking
Power LED Drive LEDs
The default mode is JBOD, which is two independent drives. T
hey are
formatted as exFAT for Windows and Mac. If you are installing your
own drives, and desire
a mode other than JBOD, perform these steps:
Set RAID:
1. Set the switches on the MiniPro to the desired mode.
2. Connect the MiniPro to the host computer.
3. Using the tip of the screwdriver, press the SET button for 5 seconds.
4. Release the SET button. The RAID mode is now congured.
If changing RAID modes, you rst must perform a “Clear” procedure.
Clear RAID:
1. Set the switches on the MiniPro to Clear.
2. Connect the MiniPro to the host computer.
3. Using the tip of the screwdriver, press the SET button for 5 seconds.
4. Release the SET button. Any previous RAID mode is removed
and the drives are now set for JBOD mode.
Note: We recommend performing a “Clear RAID” procedure
when installing previously used JBOD drives. This procedure will
condition the drives for use in the MiniPro and will not delete the
partition or data from the drives.
(4) System Setup
(6) RAID Mode
(5) Formatting the Drives
After setting a new RAID mode, you must format the volume
before it is accessible.
To format using Windows:
http://oyendigital.com/windows-reformat.html
To format using MAC OS:
http://oyendigital.com/mac-reformat.html
(8) RAID 1 Rebuild
(7) Sleep
The MiniPro Dura RAID does not have an auto-sleep timer.
However, it will follow the sleep settings of the computer. When
your computer enters sleep mode, the MiniPro will sleep and the
HDDs will spin down.
USB3.1
Gen.2
DC/USB
The MiniPro Dura RAID can be powered from the included DC
adapter or bus power. To choose the power method, slide the selector
switch to the desired position. DC = External Adapter, USB = Bus Power
Note: We strongly recommend using the power adapter when
connecting to a USB 3.0 port. A USB 3.0 port provides a max. of 5W,
which is not suitable when two drives are installed in the MiniPro.
(3) Power
If one of the drives fail, the D1 or D2 LED will turn RED while
connected to a computer. A new HDD can be installed and will
automatically rebuild with data (if congured for RAID 1 mode).
1. Power down the MiniPro Dura RAID.
2. Remove the failed drive (see section 9).
3. Install the new drive and power up the MiniPro.
4. Connect the MiniPro to a computer.
5. The D1/D2 LED will blink three times per second, which indicates
a rebuild in progress. This can take several hours.
6. You may disconnect the MiniPro from the computer during the
rebuild. This will not interrupt the rebuild.
(2) Detailed View (without Dura Bumper)
RAID 0 (Striping) is a non-redundant data mapping technique. It
combines data evenly across both drives simultaneously; dramati-
cally increasing performance. RAID 0 will be viewed as one single
storage unit. If one disk in the RAID System fails, all data in installed
disks will be lost. The total capacity = smallest drive x the total
number of drives. For example, if the smallest drive is 500GB and the
other is 2TB, the total capacity will be 1TB (500 x 2).
RAID 1 (Mirroring) consists of two drives storing duplicate copies
of the same data. In this mode, the data is simultaneously written to
two disks. The speed of operation is slow in comparison to RAID 0.
RAID 1 (Mirroring) consists of two drives storing duplicate copies
of the same data. In this mode, the data is simultaneously written to
two disks. The speed of operation is slow in comparison to RAID 0.
JBOD (Clear) is simply is a collection of drives that are recognized
as separate drives by the OS. JBOD provides no performance
increase or redundancy. This is the default setting.
Big (Span) combines both hard drives into a single logical unit.
Unlike Striping, it writes data to the rst drive until it reaches full
capacity. When the rst disk reaches full capacity, data is written to
the second disk. Spanning does not increase performance or safety.
“Big”mode is considered a legacy mode and may cause a decrease
in drive performance. It is not recommended for use in most
applications.

Other OYEN DIGITAL Storage manuals

OYEN DIGITAL Mobius Pro User manual

OYEN DIGITAL

OYEN DIGITAL Mobius Pro User manual

OYEN DIGITAL HDX Pro C User manual

OYEN DIGITAL

OYEN DIGITAL HDX Pro C User manual

OYEN DIGITAL Fortis 5C User manual

OYEN DIGITAL

OYEN DIGITAL Fortis 5C User manual

OYEN DIGITAL Mobius User manual

OYEN DIGITAL

OYEN DIGITAL Mobius User manual

OYEN DIGITAL Helix Dura User manual

OYEN DIGITAL

OYEN DIGITAL Helix Dura User manual

OYEN DIGITAL Dash Pro User manual

OYEN DIGITAL

OYEN DIGITAL Dash Pro User manual

OYEN DIGITAL U32 Shadow User manual

OYEN DIGITAL

OYEN DIGITAL U32 Shadow User manual

OYEN DIGITAL Mobius Pro 2C User manual

OYEN DIGITAL

OYEN DIGITAL Mobius Pro 2C User manual

OYEN DIGITAL U32 Shadow User manual

OYEN DIGITAL

OYEN DIGITAL U32 Shadow User manual

OYEN DIGITAL Fortis 5C User manual

OYEN DIGITAL

OYEN DIGITAL Fortis 5C User manual

Popular Storage manuals by other brands

Hitachi Travelstar C4K60 Quick installation guide

Hitachi

Hitachi Travelstar C4K60 Quick installation guide

Skydigital Mini Bee Installation and operation guide

Skydigital

Skydigital Mini Bee Installation and operation guide

Western Digital TN-55 user manual

Western Digital

Western Digital TN-55 user manual

Hitachi HTS541010G9AT00 - Travelstar 100 GB Hard... datasheet

Hitachi

Hitachi HTS541010G9AT00 - Travelstar 100 GB Hard... datasheet

Maxtor MaXLine III Specifications

Maxtor

Maxtor MaXLine III Specifications

Arrow Storage Products FKCS03 Owner's manual & assembly guide

Arrow Storage Products

Arrow Storage Products FKCS03 Owner's manual & assembly guide

Synology DX513 user guide

Synology

Synology DX513 user guide

Hama 00181072 operating instructions

Hama

Hama 00181072 operating instructions

IBM Storwize V3700 Quick installation guide

IBM

IBM Storwize V3700 Quick installation guide

G-Technology G-SATA installation guide

G-Technology

G-Technology G-SATA installation guide

V-Gear LanDisk Advance user guide

V-Gear

V-Gear LanDisk Advance user guide

LaCie Skwarim 301080 user manual

LaCie

LaCie Skwarim 301080 user manual

Kodak USB FLASH DRIVE - DATASHEET REV A datasheet

Kodak

Kodak USB FLASH DRIVE - DATASHEET REV A datasheet

Azio E312-U31 Quick install guide

Azio

Azio E312-U31 Quick install guide

Western Digital Caviar WD1601ABYS Specifications

Western Digital

Western Digital Caviar WD1601ABYS Specifications

morse 400A-96-124 Operator's manual

morse

morse 400A-96-124 Operator's manual

Dell EMC PowerProtect X400 Hardware Configuration and Installation Guide

Dell EMC

Dell EMC PowerProtect X400 Hardware Configuration and Installation Guide

Fujitsu MAY2036RC Product/ Product/maintenance manual

Fujitsu

Fujitsu MAY2036RC Product/ Product/maintenance manual

manuals.online logo
manuals.online logoBrands
  • About & Mission
  • Contact us
  • Privacy Policy
  • Terms and Conditions

Copyright 2025 Manuals.Online. All Rights Reserved.