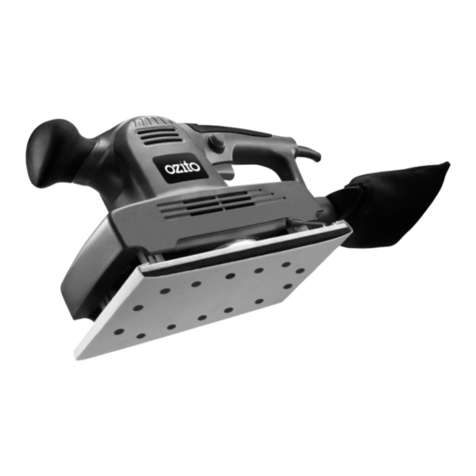
Ozito OZRO450A User manual

Random Orbital
Sander
125mm - 450 Watt
Operation Manual
3 Year Replacement Warranty
OZRO450A
To view the full range visit: www.ozito.com.au
0209

Input voltage: 230V ~ 50Hz
Input power: 450W
Disc diameter: 125mm (5”)
Paper type: Hook & loop
No load speed: 0 - 12,000 /min
Net weight: 2.3kg
Features: Ergonomically designed
Sealed ball bearings
Variable speed
Dust bag
Rubber moulds for anti-vibration
Safety switch lock button
1. Trigger switch 4. Dust bag (not shown)
2. Switch lock button 5. Vacuum adaptor
3. Variable speed control 6. Rubber backing pad
1
2
3
SPECIFICATIONS - MODEL NO. OZRO450A
1
6
5

2
TABLE OF CONTENTS
SPECIFICATIONS - MODEL NO. OZRO450A ………….
TABLE OF CONTENTS………………………………….....
INTRODUCTION…………………………………………...
SAFETY INSTRUCTIONS……………………………….....
OPERATION ………………………………………………..
MAINTENANCE …………….……………………………..
CONTENTS ………………………………………………..
WARRANTY………………………………………………...
Page 1
Page 2
Page 3
Page 3
Page 7
Page 9
Page 10
Page 11

INTRODUCTION
3
SAFETY INSTRUCTIONS
Congratulations on purchasing the Ozito Random Orbital
Sander. We aim to provide quality tools at an affordable price.
We hope you will enjoy using this product for many years.
Your Ozito Random Orbital Sander OZRO450A has been
designed for sanding timber, metal and plastics. It is intended
for DIY use only.
Warning! When using mains-powered equipment, basic safety precautions,
including the following, should always be followed to reduce risk of fire,
electric shock, personal injury and material damage.
Read and understand the complete manual prior to operating this tool.
Save these instructions and other documents supplied with this machine for
future reference.
The electric motor has been designed for 230-240V only. Always check that the
power supply corresponds to the voltage on the rating plate.
Note: The supply of 230V and 240V on Ozito tools are interchangeable for
Australia and New Zealand.
This tool is double insulated in accordance with AS/NZS 3160: 1996;
therefore no earth wire is required.
If the supply cord is damaged, it must be replaced by an electrician or a power tool
repairer in order to avoid a hazard.
Note: Double insulation does not take the place of normal safety precautions
when operating this tool. The insulation system is for added protection against
injury resulting from a possible electrical insulation failure within the tool.
Using an Extension Lead
Always use an approved extension lead suitable for the power input of this tool.
Before use, inspect the extension lead for signs of damage, wear and ageing.
Replace the extension lead if damaged or defective.
When using an extension lead on a reel, always unwind the lead completely. Use of
an extension lead not suitable for the power input of the tool or which is damaged
or defective may result in a risk of fire and/or electric shock.
ELECTRICAL SAFETY

4
GENERAL SAFETY RULES
Warning! Read all instructions, Failure to follow all instructions listed below may
result in electric shock, fire and/or serious injury. The term “Power Tool” in all of
the warnings listed below refers to your mains operated (corded) power tool or
battery operated (cordless) power tool.
SAVE THESE INSTRUCTIONS
1) WORK AREA
a) Keep work area clean and well lit. Cluttered and dark areas invite accidents.
b) Do not operate power tools in explosive atmospheres, such as in the
presence of flammable liquids, gases, or dust. Power tools create sparks which
may ignite the dust or fumes.
c) Keep children and bystanders away while operating a power tool. Distractions
can cause you to lose control.
2) ELECTRICAL SAFETY
a) Power tool plugs must match the outlet. Never modify the plug in any way.
Do not use any adapter plugs with earthed (grounded) power tools.
Unmodified plugs and matching outlets will reduce risk of electric shock.
b) Avoid body contact with earthed or grounded surfaces such as pipes,
radiators, ranges and refrigerators. There is an increased risk of electric shock if
your body is earthed or grounded.
c) Do not expose power tools to rain or wet conditions. Water entering a power
tool will increase the risk of electric shock.
d) Do not abuse the cord. Never use the cord for carrying, pulling or unplugging
the power tool. Keep cord away from heat, oil, sharp edges or moving parts.
Damaged or entangled cords increase the risk of electric shock.
e) Replacement of the supply cord. If the supply cord is damaged, it must be
replaced by an electrician or a power tool repairer.
f) When operating a power tool outdoors, use an extension cord suitable for
outdoor use. Use of a cord suitable for outdoor use reduces the risk of
electric shock.
g) Have your tool repaired by an electrician or a power tool repairer. This power
tool complies with relevant safety requirements. To avoid danger, electrical
appliances must only be repaired by qualified personnel using original spare parts;
otherwise this may result in considerable danger to the user.
3) PERSONAL SAFETY
a) Stay alert, watch what you are doing and use common sense when operating a
power tool. Do not use a power tool while you are tired or under the influence
of drugs, alcohol or medication. A moment of inattention while operating power
tools may result in serious personal injury.
b) Use safety equipment. Always wear eye protection. Safety equipment such as
dust mask, non-skid safety shoes, hard hat, or hearing protection used for
appropriate conditions will reduce personal injuries.

5
GENERAL SAFETY RULES (cont.)
c) Avoid accidental starting. Ensure the switch is in the off position before
plugging in. Carrying power tools with your finger on the switch or plugging in
power tools that have the switch on invites accidents.
d) Remove any adjusting key or wrench before turning the power tool on. A
wrench or a key left attached to a rotating part of the power tool may result in
personal injury.
e) Do not overreach. Keep proper footing and balance at all times. This
enables better control of the power tool in unexpected situations.
f) Dress properly. Do not wear loose clothing or jewellery. Keep your hair,
clothing and gloves away from moving parts. Loose clothes, jewellery or
long hair can be caught in moving parts.
g) If devices are provided for the connection of dust extraction and collection
facilities, ensure these are connected and properly used. Use of these
devices can reduce dust related hazards.
4) POWER TOOL USE AND CARE
a) Do not force the power tool. Use the correct power tool for your
application. The correct power tool will do the job better and safer at the rate
for which it was designed.
b) Do not use the power tool if the switch does not turn it on and off. Any
power tool that can not be controlled with the switch is dangerous and must
be repaired.
c) Disconnect the plug from the power source before making any
adjustments, changing accessories, or storing power tools. Such preventive
safety measures reduce the risk of starting the power tool accidentally.
d) Store idle power tools, unplugged & out of the reach of children and do
not allow persons unfamiliar with the power tool or these instructions to
operate the power tool. Power tools are dangerous in the hands of
untrained users.
e) Maintain power tools. Check for misalignment or binding of moving parts,
breakage of parts and any other condition that may affect the power tools
operation. If damaged, have the power tool repaired before use. Many
accidents are caused by poorly maintained power tools.
f) Keep cutting tools sharp and clean. Properly maintained cutting tools with
sharp cutting edges are less likely to bind and are easier to control.
g) Use the power tool, accessories and tool bits etc., in accordance with
these instructions and in the manner intended for the particular type of
power tool, taking into account the working conditions and the work to
be performed. Use of the power tool for operations different from intended
could result in a hazardous situation.
5) SERVICE
a) Have your power tool serviced by a qualified repair person using only
identical replacement parts. This will ensure that the safety of the power tool
is maintained.


SAFETY INSTRUCTIONS FOR RANDOM ORBITAL SANDERS
6
Do not run the tool with pad removed. The resulting vibration could cause loss
of control.
Warning! Lead-based paint should only be removed by a professional.
Always unplug the sander cord from the mains before changing the sanding disc.
Do not attach cutting discs or blades. This tool is not designed for such accessories.
Keep the work area well ventilated. Open the windows and put an exhaust fan in
one of them. Make sure the fan is moving air from inside to outside.
Remove or cover any carpets, rugs, furniture, clothing, cooking utensils and air ducts.
Furnishings should be removed or placed in the centre of the room and covered. Work
areas should be sealed off from the rest of the dwelling by sealing doorways with
drop sheets.
Empty the dust bag frequently and after the completion of sanding. Be extremely
careful of dust disposal. Materials in fine particle form may be explosive. Do not throw
sanding dust on an open fire. Spontaneous combustion, may in time, result from a
mixture of oil or water with dust particles.
Always wear eye protection and a dust mask for dusty applications and overhead
sanding. Sanding particles can be absorbed by your eyes and inhaled easily and may
cause health complications.
Use special precautions when sanding chemically pressure treated timber, paint
that may be lead based or any other materials that may contain carcinogens.
A suitable breathing respirator and protective clothing must be worn by all persons
entering the work area.
Do not “wet sand” with this sander. Liquids entering the motor housing are an
electrical shock hazard.
Warning! Some dust created by power sanding, sawing, grinding, drilling and
other construction activities contain chemicals known to cause cancer, birth
defects or other reproductive harm.
Some examples of these chemicals are:
•Lead from lead-based paints;
• Crystalline silica from bricks, cement and other masonry products, and;
•Arsenic and chromium from chemically-treated timber.
The risk from these exposures varies, depending on how often you do this type of
work. To reduce your exposure to these chemicals; work in a well ventilated area, and
work with approved safety equipment, such as those dust masks that are specifically
designed to filter out microscopic particles.
Before attempting to use your sander be sure to familiarise yourself with all its
operating features and safety requirements.

7
OPERATION
Warning! Prior to connecting the sander to the mains power supply, ensure the
switch is in the off position. If it is in the on position when connecting to a live
mains power supply, the tool could potentially result in injury or material damage.
Switch
The sander has a lock-on, variable speed switch. To turn the sander on, squeeze
the variable speed trigger. To turn the sander off, simply release the trigger. To
engage the lock-on function, squeeze the trigger first and then push the lock-on
button. To disengage the lock-on function, simply squeeze and release the variable
speed trigger.
Sanding
Always wear a dust mask when sanding.
Secure the work to prevent it from moving during the sanding operation. When
sanding do not apply excessive pressure as this will slow down the pads action. If
faster removal is required, coarser grit sandpaper should be used rather than
applying more pressure. Move the sander in long overlapping strokes. Tipping the
sander or stopping in one spot can cause an uneven finish. When the job has been
completed, remove the sander from the work piece and release the trigger switch.
Warning! The sander should always be disconnected from the power supply
when assembling parts, making adjustments, cleaning or when the tool is not
in use. Disconnecting the tool will prevent accidental starting that could cause
serious injury.
Backing Pad Accessory Installation
Your random orbital sander is equipped with a hook and loop rubber backing pad.
This uses hook and loop backed accessories, which firmly grip the backing pad
when applied with moderate pressure.
To change, merely peel off the old accessory, remove dust from the backing pad if
necessary and press the new accessory in place. Be sure to align the sanding disc
holes with the holes in the backing pad to allow the dust extraction system to
function effectively. After considerable use, the backing pad surface will become
worn and must be replaced when it no longer offers a firm grip. If the backing pad
facing is wearing prematurely, decrease the amount of pressure applied during the
operation of the tool. Damage to the pad is not covered by the warranty.
Note: Ensure you always have paper attached to the pad prior to sanding. Failure
to do so will destroy the hook and loop material on the backing pad and the
paper will no longer grip to the pad.

8
OPERATION (cont.)
Dust Bag
The dust extraction system extracts sanding dust from the work piece through the
holes in the backing pad. The dust is then transferred through the dust extraction port
on the rear of the sander housing. To capture this dust, it is best to attach the dust
bag included. To attach the dust bag, simply slide the dust bag adaptor over the dust
extraction port on the rear of the sander housing. For the dust bag to work at its
optimum level, it is best emptied when it becomes 1/3rd full. This allows air to flow
through the bag freely thus increasing its effectiveness. To remove the bag, simply pull
the dust bag and adaptor away from the dust extraction port.
Vacuum adaptor
The vacuum adaptor will enable a standard vacuum cleaner hose to be fitted to the
sander for efficient dust extraction.
Operating Tips
This machine is designed for two-handed operation. Always be certain that smaller
work pieces are securely clamped to a bench or other support. Larger panels may be
held in place by hand on a bench or sawhorses.
NEVER FORCE THE SANDER. The weight of the sander supplies adequate pressure,
so let the sandpaper and the sander do the work. Applying additional pressure only
slows the motor, rapidly wears the sandpaper and greatly reduces the sander speed.
Excessive pressure will overload the motor causing possible damage from motor
overheating and can result in inferior work.
Warning! Guide the cord during sanding to prevent it being caught on timber,
other tools or objects.
Any finish or resin on wood may soften from frictional heat. This will cause the material
to rapidly clog the sandpaper, rendering it useless. Do not allow sanding on one spot
too long, as the sander's rapid action may remove too much material, particularly
when using only one corner of the pad, making the surface uneven.
Sandpaper Selection
Rough sandpaper (60 grit) generally removes the most material and fine sandpaper
(120 grit) is used for a smooth finish. It is advised that with a rough finish you start with
60 grit paper then move to 80 grit and finally 120 grit for a smooth finish.
THIS PRODUCT IS NOT INTENDED FOR USE ON PLASTER. USING THIS
PRODUCT ON PLASTER WILL VOID THE WARRANTY.
Sanding lead based paint
Sanding of lead based paint is NOT RECOMMENDED due to the dangers of
lead poisoning.

9
MAINTENANCE
Environmental Safety
• Paint should be removed in such a manner so as to minimize the amount of
dust generated.
• Areas where paint removal is occurring should be sealed with plastic sheeting.
• Sanding should be done in a manner to reduce tracking of paint dust outside
the work area.
• When not in use the sander should be stored in a dry, frost free location not
within the reach of children.
• Keep ventilation slots of the sander clean at all times and prevent any foreign
matter from entering.
• If the sander housing requires cleaning do not use solvents but a moist soft
cloth only.
•Blow out the unit through the rear ventilation slots with compressed air
periodically to ensure a dust free area around the switch.
Note: Ozito Industries will not be responsible for any damage or injuries caused by
repair of the sander by an unauthorised person or by mishandling of the tool.
OPERATION (cont.)
LABELS ON YOUR TOOL

1 x Random Orbital Sander OZRO450A
1 x Hook and loop sanding sheet
1 x Vacuum Adaptor
1 x Dust Bag
1 x Instruction manual
10
CONTENTS
OZITO INDUSTRIES PTY LTD
Petrol tools that are no longer usable should not be disposed
of with household waste but in an environmentally friendly
way. Please recycle where facilities exist. Check with your
local council authority for recycling advice.
Recycling packaging reduces the need for landfill and raw
materials. Reuse of recycled material decreases pollution in the
environment. Please recycle packaging where facilities exist.
Check with your local council authority for recycling advice.
AUSTRALIA (Head Office)
1 - 23 Letcon Drive, Bangholme, Victoria, Australia 3175
Telephone: 1800 069 486
Facsimile: +61 3 9238 5588
Website: www.ozito.com.au
CARING FOR THE ENVIRONMENT

WARRANTY
THIS WARRANTY FORM AND CONFIRMED BUNNINGS REGISTER RECEIPT SHOULD
BE RETAINED BY THE CUSTOMER AT ALL TIMES
The warranty is only made available by returning the product to your nearest
Bunnings Warehouse with a confirmed Bunnings register receipt.
PURCHASED FROM:________________________________________________
DATE PURCHASED: ________________________________________________
3 YEAR REPLACEMENT WARRANTY
Your Ozito tool is guaranteed for a period of 36 months from the original date of
purchase and is intended for DIY (Do it yourself) use only.
WARNING
The following actions will result in the warranty being void.
•Professional, Industrial or high frequency use.
• If the tool has been operated on a supply voltage other than that specified on
the tool.
• If the tool shows signs of damage or defects caused by or resulting from abuse,
accidents or alterations.
• If the tool is disassembled or tampered with in any way.
Note: Warranty excludes consumable parts such as brushes, batteries, sanding
pads, blades, discs, drill bits, collets and router bits.
YOUR WARRANTY FORM SHOULD BE RETAINED
BY YOU AT ALL TIMES.
SHOULD YOU HAVE ANY QUESTIONS PRIOR TO
RETURNING YOUR PRODUCT FOR WARRANTY OR
REPAIR PLEASE TELEPHONE OUR CUSTOMER
SERVICE HELPLINE:
Australia 1800 069 486
New Zealand 0508 069 486
TO ENSURE A SPEEDY RESPONSE PLEASE HAVE THE MODEL NUMBER
AND DATE OF PURCHASE AVAILABLE. AN OZITO CUSTOMER SERVICE
REPRESENTATIVE WILL TAKE YOUR CALL AND ANSWER ANY QUESTIONS
YOU MAY HAVE RELATING TO THE WARRANTY POLICY OR PROCEDURE.
Other manuals for OZRO450A
1
Table of contents
Other Ozito Sander manuals

Ozito
Ozito SPG-160VK User manual

Ozito
Ozito MBDS-125 User manual

Ozito
Ozito bsr-800 User manual

Ozito
Ozito FSR-3000 User manual

Ozito
Ozito OZRO450A User manual

Ozito
Ozito OZDS280WA User manual

Ozito
Ozito PXBSPS-180 User manual

Ozito
Ozito PXBPS-254 User manual

Ozito
Ozito QSS-1000 User manual

Ozito
Ozito PXROS-125 User manual

Ozito
Ozito ROG-191 User manual

Ozito
Ozito DSG-172K User manual

Ozito
Ozito ROS-2000 User manual

Ozito
Ozito OZBP110WAU User manual

Ozito
Ozito bsv-9000 User manual

Ozito
Ozito RANDOM ORBITAL SANDER User manual

Ozito
Ozito BSR-1000 User manual

Ozito
Ozito PXMSS-700 User manual

Ozito
Ozito THIRD SHEET SANDER User manual

Ozito
Ozito OSG-120K User manual