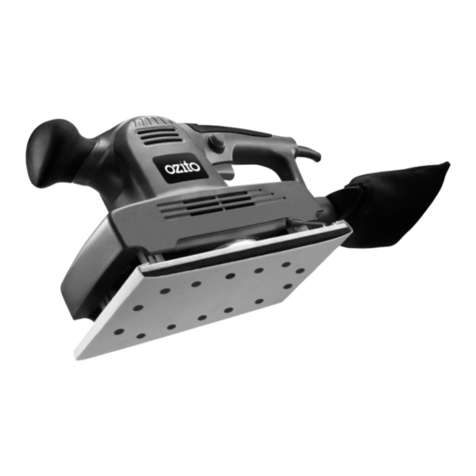
Ozito DSR-2500 User manual

DETAIL
SANDER
180W
INSTRUCTION MANUAL
SPECIFICATIONS
Motor: 180W
No Load Speed: 15,000/min
Pad Size: 140x140x80mm
Paper Fitment: Hook & Loop
Power Cord: 2m
Weight: 1.5kg
DSR-2500
WHAT’S IN THE BOX
Detail Sander
20 x Sanding Paper
Dust Canister
IN ORDER TO MAKE A CLAIM UNDER THIS
WARRANTY YOU MUST RETURN THE PRODUCT
TO YOUR NEAREST BUNNINGS WAREHOUSE WITH
YOUR BUNNINGS REGISTER RECEIPT. PRIOR TO
RETURNING YOUR PRODUCT FOR WARRANTY
PLEASE TELEPHONE OUR CUSTOMER SERVICE
HELPLINE:
Australia 1800 069 486
New Zealand 0508 069 486
3 YEAR REPLACEMENT WARRANTY
Your product is guaranteed for a period of 36 months from
the original date of purchase. If a product is defective it will
be replaced in accordance with the terms of this warranty.
Warranty excludes consumable parts, for example: carbon
brushes, dust bags, backing pads and sanding sheets.
WARNING
The following actions will result in the warranty being void.
• If the tool has been operated on a supply voltage other
than that specified on the tool.
• If the tool shows signs of damage or defects caused
by or resulting from abuse, accidents or alterations.
• Failure to perform maintenance as set out within the
instruction manual.
• If the tool is disassembled or tampered with in any way.
WARRANTY
TO ENSURE A SPEEDY RESPONSE PLEASE
HAVE THE MODEL NUMBER AND DATE OF
PURCHASE AVAILABLE. A CUSTOMER SERVICE
REPRESENTATIVE WILL TAKE YOUR CALL
AND ANSWER ANY QUESTIONS YOU MAY
HAVE RELATING TO THE WARRANTY POLICY
OR PROCEDURE.
OZITO Australia/New Zealand (Head Office) 1-23 Letcon Drive, Bangholme, Victoria, Australia 3175.
The benefits provided under this warranty are in addition
to other rights and remedies which are available to you at law.
Our goods come with guarantees that cannot be excluded
at law. You are entitled to a replacement or refund for a major
failure and for compensation for any other reasonably foreseeable
loss or damage. You are also entitled to have the goods repaired
or replaced if the goods fail to be of acceptable quality and the
failure does not amount to a major failure.
Generally you will be responsible for all costs associated with
a claim under this warranty, however, where you have suffered
any additional direct loss as a result of a defective product you
may be able to claim such expenses by contacting our customer
service helpline above.
ozito.com.au
0417

ONLINE MANUAL
Scan this QR Code with your
mobile device to take you to
the online manual.
KNOW YOUR PRODUCT
1. HOOK AND LOOP SANDING SHEET
1 Whenttingsandingpaper,aligntheholesonthesandingsheet
withtheholesonthesandingpad.
5 Dust Canister 6 SandingPaperx20
(6x60g,8x80g,6x120g)
ACCESSORIES
1 Hook&LoopSandingPad
2 On/OSwitch
3 SoftGrip
4 DustCanisterAdapter
DETAIL SANDER
SETUP & PREPARATION
2 Replacethesandingsheetwhenitisworn.
3 Replacehook&
loopbackingpad
when worn (see
maintenancesection).
WARNING: ENSURE THE TOOL IS DISCONNECTED
FROM THE POWER SUPPLY BEFORE PERFORMING
ANY OF THE FOLLOWING OPERATIONS..

2. DUST BAG 3. ON/OFF SWITCH
2 Toturnon,presstheon/oswitchtotheonposition“I”.
3 Toturno,presstheon/oswitchtotheoposition“0”.
Toremove,pullthedustcanister
awayfromtheextractionport.
Push the dust canister onto the dust
extractionport.
OPERATION
1 / 3 Full
1 / 3 Full
1 / 3 Full
1 Connectthetooltothemainspowersupply.
Emptydustcanisterwhenitbecomes1/3fullforoptimumdust
extraction.
Install
Removal
Empty
WARNING: THE TOOL IS RECOMMENDED FOR
USE WITH A RESIDUAL CURRENT DEVICE WITH A
RATED RESIDUAL CURRENT OF 30MA OR LESS.
CAUTION: GUIDE THE POWER CORD DURING
SANDING TO PREVENT IT BEING CAUGHT ON THE
WORKPIECE OR OTHER OBJECTS.
Foreasyemptyingandcleaningofthedustcanister.Removetherear
ofthedustcanisterbypushinginthetabsatbothsidesandpullingthe
rear section out.

DSR-2500
4.
SANDING
2 Firmlygraspthesanderandturnthesanderon.
Side to Side
3 Letthemotorbuildup
tomaximumspeed.
Gradually lower it
ontotheworkpiece
withaslightforward
movement.
4 Foroptimumresults,useeitherofthesestrokes.
5 Uponcompletionofthesandingoperation,removethesander
fromtheworkpieceandthenturnothesander.
1 Secure the material to be sanded.
Backward/ Forward
WARNING: THIS PRODUCT IS NOT
RECOMMENDED FOR SANDING DRYWALL OR
PLASTER DUE TO THE ULTRA-FINE SANDING
PARTICLES PRODUCED. DRYWALL SANDERS IN
CONJUNCTION WITH DUST EXTRACTION ARE
RECOMMENDED FOR DRYWALL AND PLASTER
SANDING APPLICATIONS.

MAINTENANCE
DESCRIPTION OF SYMBOLS
CARING FOR THE ENVIRONMENT
TROUBLE SHOOTING
Powertoolsthatarenolongerusableshouldnotbedisposedof
with household waste but in an environmentally friendly way. Please
recyclewherefacilitiesexist.Checkwithyourlocalcouncilauthority
forrecyclingadvice.
Recyclingpackagingreducestheneedforlandllandrawmaterials.
Reuseofrecycledmaterialdecreasespollutionintheenvironment.
Pleaserecyclepackagingwherefacilitiesexist.Checkwithyour
localcouncilauthorityforrecyclingadvice.
•Keeptheventilationventsofthesandercleanatalltimes,ifpossible,prevent
foreignmatterfromenteringthevents.
•Aftereachuse,blowairthroughthesanderhousingtoensureitisfreefrom
alldustparticleswhichmaybuildup.Buildupofdustparticlesmaycausethe
drill to overheat and fail.
•Iftheenclosureofthedrillrequirescleaning,donotusesolventsbutamoist
softclothonly.Neverletanyliquidgetinsidethedrill;neverimmerseanypart
of the drill into a liquid.
Replacing the Hook & Loop Backing Pad
Afterconsiderableuse,thehookandloopbackingpadsurfacewillbecome
worn,andmustbereplacedwhenitnolongeroersarmgrip.The
replacementbackingpadcanbeorderedthroughtheSpecialOrdersDeskat
anyBunningsstore.
1. Toreplace,removethefourphilipsheadscrewsbyrotatinganti-clockwise.
2. Placenewbackingpadonthetoolandretightenthefourphilipshead
screwsbyrotatingclockwise.
Note: Ozito Industries will not be responsible for any damage or injuries
caused by the repair of the tool by an unauthorised person or by mishandling
of the tool.
Sparking visible through the housing air vents
Asmallamountofsparkingmaybevisiblethroughthehousingvents.
Thisisnormalanddoesnotindicateaproblem.
Excessive sparking visible through the housing air vents
and/or the drill failing to operate
Mayindicatethecarbonbrusheshavewornoutandneedtobereplaced.Carbon
brushesshouldonlybereplacedbyaqualiedelectricianorpowertoolrepairer.
Sandpaper Selection
Selectingthecorrectgritofsandpaperisanimportantstepinachieving
optimumresults.Coarsegritwillremovethemostmaterial.Finergritwill
produceasmoothernish.Theconditionoftheworkpiecewilldeterminethe
gritofthesandpapertobeused.Thehigherthegritnumber,thenerthe
gradeofsandpaper.
Ifthesurfaceisrough,startwithacoarsegritandsanduntilthesurfaceis
uniform.Mediumgritmaythenbeusedtoremovescratchesleftbythecoarser
grit.Finergritisthenusedtonishthesurface.Alwayscontinuesandingwith
eachgradeofsandpaperuntilthesurfaceisuniform.
MATERIAL APPROPRIATE GRIT
Coarse Sanding Fine Sanding
Paintwork 180 400
Wood: Softwood 60 240
Hardwood 60 180
Veneer 240 320
Note:Ifintermediatesandingisrequired,chooseagritratingbetweencoarseand
ne.Theabovetableisintendedasaguideonly.Toensureasatisfactoryresult,
asmall,inconspicuousareashouldrstbetestedtoensurethegritofsandpaper
chosenissuitableforthedesirednish.
Sanding Tips
Neverforcethesander.Theweightofthesandersuppliesadequatepressure,
allowingthesandpapertodothework.Applyingadditionalpressurewillslowthe
motor,rapidlywearthesandpaper,andgreatlyreducethesanderspeed.Thiswill
slowtheremovalrateandproduceaninferiorqualitysurface.
CAUTION:Excessivepressurewilloverloadthemotor,causingpossibledamage
tothesanderbyoverheatingthemotor;ordamagetotheworkpiece.
Besuretocheckyourworkpieceoften.Thesanderiscapableofremoving
materialrapidly,especiallywithcoarsepaper.
Theorbitalactionofyoursanderallowsyoutosandwiththegrain,oratanyangle
acrossitformostsandingjobs.Inthenalstagesabetternishwillbeachieved
bysandingwiththegrain.
Donotsandononespotfortoolong.Thesander’srapidactionmayremovetoo
muchmaterial,creatinganunevensurface.
Spare parts can be ordered from the Special Orders Desk
at your local Bunnings Warehouse.
For further information, or any parts not listed here, visit
www.ozito.com.au or contact Ozito Customer Service:
Australia 1800 069 486
New Zealand 0508 069 486
E-mail: [email protected]
SPARE PARTS
Warning Read instruction manual
Wear eye protection
Double insulated
/min Revolutions or
reciprocation per minute n0No load speed
V Volts Hz Hertz
~ Alternating current W Watts
Diameter
Regulator compliance mark
Wear ear protection
mm Millimetres

WARNING!
• Hold power tool by insulated gripping surfaces, because the sanding pad
may contact its own cord.Cuttinga“live”wiremaymakeexposedmetalpartsof
thepowertool“live”andcouldgivetheoperatoranelectricshock.
Recommendation that the tool always be supplied via a residual current device
with a rated residual current of 30 mA or less.
Unplug the sander before changing accessories.Accidentalstart-upsmayoccurif
thesanderispluggedinwhilechanginganaccessory.
Disposing of dust.Beextremelycarefulofdustdisposal,materialsinneparticle
formmaybeexplosive.Donotthrowsandingdustonanopenre.Spontaneous
combustion,mayintime,resultfromamixtureofoilorwaterwithdustparticles.
Always wear eye protection and a dust mask for dusty applications and when
sanding overhead.Sandingparticlescanbeabsorbedbyyoureyesandinhaled
easilyandmaycausehealthcomplications.
Use special precautions when sanding chemically pressure treated timber,
paint that may be lead based, or any other materials that may contain
carcinogens.Asuitablebreathingrespiratorandprotectiveclothingmustbeworn
byallpersonsenteringtheworkarea.Workshouldbesealedbyplasticsheetingand
personsnotprotectedshouldbekeptoutuntilworkareaisthoroughlycleaned.
Do not ‘wet sand’ with this sander.Liquidsenteringthemotorhousingarean
electrical shock hazard.
Do not use sandpaper intended for larger sanding pads. Largersandpaperwill
extendbeyondthesandingpadcausingsnagging,tearingofthepaperorkick-back.
Extrapaperextendingbeyondthesandingpadcanalsocauseseriouslacerations.
WARNING!
Somedustcreatedbypowersanding,sawing,grinding,drillingandother
constructionactivitiescontainchemicalsknowntocausecancer,birthdefectsorother
reproductiveharm.
Someexamplesofthesechemicalsare:
• Leadfromlead-basedpaints;
• Crystallinesilicafrombricks,cementandothermasonryproducts,and;
• Arsenicandchromiumfromchemically-treatedtimber.
Yourriskfromtheseexposuresvaries,dependingonhowoftenyoudothistypeof
work.Toreduceyourexposuretothesechemicals:workinawellventilatedareaand
workwithapprovedsafetyequipment,suchasdustmasksthatarespeciallydesigned
tolteroutmicroscopicparticles.
DETAIL SANDER SAFETY WARNINGS
WARNING! When using mains-powered tools, basic safety precautions, including the
following, should always be followed to reduce risk of re, electric shock, personal injury
and material damage.
Readthewholemanualcarefullyandmakesureyouknowhowtoswitchthetooloinanemergency,before
operatingthetool.
Savetheseinstructionsandotherdocumentssuppliedwiththistoolforfuturereference.
Theelectricmotorhasbeendesignedfor230Vand240Vonly.Alwayscheckthatthepowersupply
correspondstothevoltageontheratingplate.
Note:Thesupplyof230Vand240VonOzitotoolsareinterchangeableforAustraliaandNewZealand.
This tool is double insulated therefore no earth wire is required.
Ifthesupplycordisdamaged,itmustbereplacedbyanelectricianorapowertoolrepairerinordertoavoid
a hazard.
Note:Doubleinsulationdoesnottaketheplaceofnormalsafetyprecautionswhenoperatingthistool.The
insulationsystemisforaddedprotectionagainstinjuryresultingfromapossibleelectricalinsulationfailure
within the tool.
Using an Extension Lead
Alwaysuseanapprovedextensionleadsuitableforthepowerinputofthistool.Beforeuse,inspectthe
extensionleadforsignsofdamage,wearandageing.Replacetheextensionleadifdamagedordefective.
Whenusinganextensionleadonareel,alwaysunwindtheleadcompletely.Useofanextensionleadnot
suitableforthepowerinputofthetoolorwhichisdamagedordefectivemayresultinariskofreandelectric
shock.
WARNING! Read all safety warnings and all instructions. Failuretofollowthewarningsand
instructionsmayresultinelectricshock,reand/orseriousinjury.
Save all warnings and instructions for future reference. The term “power tool” in the
warnings refers to your mains-operated (corded) power tool or battery-operated (cordless) power
tool.
1. Work area safety
a. Keep work area clean and well lit. Cluttered or dark areas invite accidents.
b. Do not operate power tools in explosive atmospheres, such as in the presence of ammable
liquids, gases or dust.Powertoolscreatesparks
whichmayignitethedustorfumes.
c. Keep children and bystanders away while operating a power tool. Distractions can cause you to
lose control.
2. Electrical safety
a. Power tool plugs must match the outlet. Never modify the plug in any way.
Do not use any adapter plugs with earthed (grounded) power tools.Unmodiedplugsandmatching
outlets will reduce risk of electric shock.
b. Avoid body contact with earthed or grounded surfaces, such as pipes, radiators, ranges and
refrigerators. There is an increased risk of electric shock
ifyourbodyisearthedorgrounded.
c. Do not expose power tools to rain or wet conditions.Waterenteringapowertoolwillincreasethe
risk of electric shock.
d. Do not abuse the cord. Never use the cord for carrying, pulling or unplugging the power tool.
Keep cord away from heat, oil, sharp edges or moving parts.Damagedorentangledcordsincrease
the risk of electric shock.
e. When operating a power tool outdoors, use an extension cord suitable
for outdoor use. Use of a cord suitable for outdoor use reduces the risk of electric shock.
f. If operating a power tool in a damp location is unavoidable, use a residual current device (RCD)
protected supply. Use of an RCD reduces the risk of electric shock.
3. Personal safety
a. Stay alert, watch what you are doing and use common sense when operating a power tool. Do
not use a power tool while you are tired or under the inuence of drugs, alcohol or medication. A
momentofinattentionwhileoperatingpowertoolsmayresultinseriouspersonalinjury.
b. Use personal protective equipment. Always wear eye protection.Protectiveequipmentsuchasdust
mask,non-skidsafetyshoes,hardhat,orhearingprotectionusedforappropriateconditionswillreduce
personalinjuries.
c. Prevent unintentional starting. Ensure the switch is in the o-position before connecting to
power source and/or battery pack, picking up or carrying the tool. Carryingpowertoolswithyour
ngerontheswitchorenergisingpowertoolsthathavetheswitchoninvitesaccidents.
d. Remove any adjusting key or wrench before turning the power tool on.
Awrenchorakeyleftattachedtoarotatingpartofthepowertoolmayresult
inpersonalinjury.
e. Do not overreach. Keep proper footing and balance at all times. This enables better control of the
powertoolinunexpectedsituations.
f. Dress properly. Do not wear loose clothing or jewellery. Keep your hair, clothing and gloves away
from moving parts.Looseclothes,jewelleryorlonghaircanbecaughtinmovingparts.
g. If devices are provided for the connection of dust extraction and collection facilities, ensure
these are connected and properly used.Useofdustcollectioncanreducedust-relatedhazards.
4. Power tool use and care
a. Do not force the power tool. Use the correct power tool for your application. Thecorrectpowertool
willdothejobbetterandsaferattherateforwhichitwasdesigned.
b. Do not use the power tool if the switch does not turn it on and o.Anypowertoolthatcannotbe
controlledwiththeswitchisdangerousandmustberepaired.
c. Disconnect the plug from the power source and/or the battery pack from the power tool before
making any adjustments, changing accessories, or storing power tools.Suchpreventivesafety
measuresreducetheriskofstartingthepowertoolaccidentally.
d. Store idle power tools out of the reach of children and do not allow persons unfamiliar with the
power tool or these instructions to operate the power tool.Powertoolsaredangerousinthehands
of untrained users.
e. Maintain power tools. Check for misalignment or binding of moving parts, breakage of parts and
any other condition that may aect the power tool’s operation. If damaged, have the power tool
repaired before use.Manyaccidentsarecausedbypoorlymaintainedpowertools.
f. Keep cutting tools sharp and clean.Properlymaintainedcuttingtoolswithsharpcuttingedgesare
less likely to bind and are easier to control.
g. Use the power tool, accessories and tool bits etc. in accordance with these instructions, taking
into account the working conditions and the work to be performed. Useofthepowertoolfor
operationsdierentfromthoseintendedcouldresultinahazardoussituation.
5. Service
a. Have your power tool serviced by a qualied repair person using only identical replacement
parts. Thiswillensurethatthesafetyofthepowertool
is maintained.
GENERAL POWER TOOL SAFETY WARNINGS
ELECTRICAL SAFETY

Table of contents
Other Ozito Sander manuals

Ozito
Ozito OZDS280WA User manual

Ozito
Ozito ROS-2000U Operation instructions

Ozito
Ozito DSR-3000 User manual

Ozito
Ozito QSS-1000 User manual

Ozito
Ozito OZRO450A User manual

Ozito
Ozito OSG-120K User manual

Ozito
Ozito TSS-3100U User manual

Ozito
Ozito SPG-7000 User manual

Ozito
Ozito BSR-7000U User manual

Ozito
Ozito bsr-800 User manual

Ozito
Ozito ORBITAL SANDER User manual

Ozito
Ozito MBDS-125 User manual

Ozito
Ozito OZRO450A User manual

Ozito
Ozito OZOS300WA User manual

Ozito
Ozito MSK-001 User manual

Ozito
Ozito PXROS-125 User manual

Ozito
Ozito PXMSS-700U User manual

Ozito
Ozito RANDOM ORBITAL SANDER User manual

Ozito
Ozito PXMSS-700 User manual

Ozito
Ozito OZBP110WA User manual