manuals.online logo
Brands
  1. Home
  2. •
  3. Brands
  4. •
  5. Ozito
  6. •
  7. Sander
  8. •
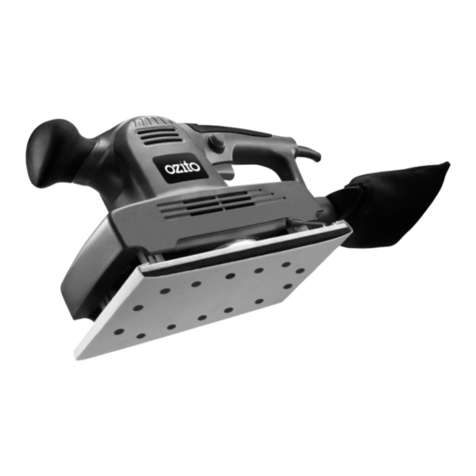
  9. Ozito PXROS-125 User manual

Ozito PXROS-125 User manual

oz1to
HANGE
1BV
LITHIUM
ION
RANDOM
ORr;
äT
AL
SANDER
INSl
'RUCTION MAl~UAL
SPECIF•: ,-
Input
No
Load
S
pee
:i
min
Pad
Size
:
Paper
Fitment:
Weight
ozito.com.au
-
-
·"
~~.
5ve
.. '
,
...
"
s
......
~ I
1
"'
\
-L
WHAT'S
IN
THE
BOX
Random Orbital
Sander
Dust
Bag
0 0 0
0
r.,ndpape:- x
,,
I
Battery
&
Charger
sold separately
PXROS-125
KNDW
YOUR
PRODUCT
CORDLESS
RANDOM
ORBITAL
SANDER
1
Dust
Sealed
On
/
Off
Switch
2
Sure
Grip
Handle
4
Battery
Seating
5
Hock
&
Loop
Sanding
Pad
6
Dust
Bag
3
Variable
Speed
Dia!
ACCESSORIES
7
Sandpaper
(BOgritl
BATTERY
&
CHARGER (sold separatelyJ
This
tool
is
compatible
with
all
batteries
and
chargers
from
the
Ozito
Power
X
Change
Range
.
ONLINE
MANUAL
Scan
this
QR
Co
de
with
your
mobile
dev
i
ce
to
ta
ke
you
to th
e
onl
i
ne
manual.
SYEAR
SETUP
&
PREPARATION
1.
ASSEMBLY
ENSURE
THE
TOOL
IS
SWITCHEO
A
□
1
scoNNECTE
□
FROM
THE
POWER
SUPPLY
~ffai~o
PERFORMING
ANY
OF
THE
FOLLOWING
TASKS.
Attaching
the
Sandpaper
1
Align
the
s
andpaper
with
the
pad
and
pre
ss
on.
e
2
Replace
the
sandpaper
once
it
is
warn
.
Fitting and Removing
the
Dust Bag
1
1
1
;
1
1
1
1
1
1
1
1
\
Ai
ign
t
he
op
~
~;
,n'lf
the
d
~~
•~
ag
w
ith
the
du
st
er i
ction
a· 1r
J
nd
push
or
~·
--
1
2
Ta
r~.
the
du
:,
a
the
sa
ndei.
n
1
1
1
1
1
1
1
1
2. BAlTERY & CHARGING
(sold
separatelyJ
THE
CHARGER
FOR
THIS
PRODUCT
SHOULD
BE
PAOTECTEo
BY
A
RESIDUAL
CURRENT
DEVICE
(AATED
AT
30MA
CR
LESSJ
.
The
purchased
battery
w
,11
be
sh
d
ip
pe
In
alow
cha
d
p
rior
to
use
A
llow
severa
l
cycl
f rge
con
I1
I0n
.
an
d
requ
I
res
c
hargmg
for
the
battery
to
rea
ch
its
I
es
O
tha
rgmg
a
nd
disc
ha
rgmg
(t
h
rough
u
se
of
th
e
tooll
op
i
mum
Perf
orm
ance
/
runtIme
Charging your lithium
ion
battery -Fast Charger
1
Connec
t
the
charger
into
a
ma
i
ns
powe
r
outlet.
2
Th
e
c~ar
g
er
L
ED
wi
ll
flash
gr
een
showmg
power
is
b
em
gs
up
pl
i
ed
to
the
charger
.
3
W1th
t
he
ch
arg
er sitting onaflat
surface
, al
ign
the
raised
ribs
on
the
batte
ry
with the
recess
in
the
ch
a
rge
r andslide
onto
t
he
c
ha
r
ger
ensur
inga
firm
connect
io
n.
4
The
charge
r L
ED
will i
llum
in
ate
red
signifying
tha
t the battery
is
charging
.
5The
cha
r
ger
LED
will
illum
i
nate
gr
ee
non
ce
th
e
battery
is
f
ull
y
charged
.
Charger
LED
lndicator
LBl
lnd
icator
Situation
.,
..
GREEN
(Fl
ashmg
)
Stand
By
(no
battery
pack
is
in
senedJ
RED
(Fl
ash
i
ng
l
Battery
is
c
ha
r
ging
(low
charge)
RED
(
lllu
mi
natedl
Battery
is
charging
(m1
dc
harge)
GR
EEN
(lll
um
i
nated
)
Ba
ttery
is
fully
charge
d
BOTH
(lll
um
i
nated
)
Batt
ery
pack
is
too
hot
or
too
cold
(charging
will
b
egin
automatically
when
battery
reaches
correc
t
cha
rgmg
temperat
ure)
80TH
(Fl
ash
i
ng)
Defective
battery
.
Never
cha
rge
a
defec
tive
batte
ry
pack
1
Re
mov
e
ba
ttery
pa
ck
from
charger
.
Charging your lithium
ion
battery -Eco Charger
1
Connec
t
the
charger
mro
am
ain
s
power
outlet
2
The
ch
a
rge
r
LED
will
fl
ash
gr
ee
n
showing
po
wer
Is
being
su
pplied
tot
he
charger
3
W1th
the
banery
sining
on
a
flat
surface
,
align
t
he
ra
1
sed
ribs
on
th
e
battery
with
t
he
r
ecess
mt
he
charger
a
nd
slideon
ro
the
battery
ens
u
ring
a
firm
connect
io
n.
4
The
cha
r
ger
LED
will illumi
nate
red
signifying
that
th
eba
nery
is
ch
arg
ing
.
5
When
r
emo
vi
ng
the
char
g
er
from
t
he
banery
,first pr
ess
the
ba
nery
re
lea
se
ta
b, th
en
sl
i
de
the
char
ger
from
its
p
osition
.
Charger
LED
lndi
cator
,
LE
D
lndicator
Situation
GR
EEN
(Flash1ngJ
Stand
By
(no
battery
pack
Is
msened)
RED
(llluminat
e
d)
Battery
is
chargmg
(lo
w
charg
e)
GREEN
(lllummated)
Battery
is
fully
charged
RED
(flashmg)
Battery
or
Charger
fault
RED
&
GRE
EN
(
Flashm
g) B
attery
pack
is
too
hot
or
100
cold
(remove
battery
from
charg
er
and
store
at
r
oom
temperature
20"C
.
lns
en
battery
aga
in
wh
en
at
correct
chargmg
tempe
r
at
ure)
.
II
th
1s
happens
agam
,
the
battery
is
defective
and
needs
to
be
repla
ce
d.
Battery Charge lndicator
The
purcha
se
db
attery
Is
equ
1p
pe
dw1
th
a
battery
c
harg
e
ind
ic
ator
to
show
the
state
of
the
battery
charge
Press
the
charge
mdicator
button
and
l
ook
to
see
wh
1
ch
LED
lights
/□
□
-,
i
'
-
~
/
□□
■
~
/
□
■-
~
/
■■-
~
Battery
req
u
Ires
immediate
chargi
ng
Low
state
of
charge
,
require
s
cha
rging
soon
Mid
state
of
charge
Full
s
tate
ot
c
harge
Note:
The
batt
ery
need
s
tobe
rem
oved
from
the too
l to
check
t
he
s
tate
of
charge
--
3.
BATTERY
& DUST BAG
lnserting
the Battery (not
included)
SIide
the
grooves
of
the
battery
mt
o
the
r
ecess
at
th
e
back
of
the
tool,
unt1I
1t
chcks
mlo
pl
ace
Removing
the Battery (not
included)
P
ress
a
nd
hold
the
battery
re
l
ease
tab
2
Sil
de
the
banerv
out
ot
the
tool
to
remove
.
Emptying
the Dust
Bag
The
d
us
t
bag
shou
ld
be
empt1ed
w
hen
it
become
s
1
/3
full
for
opt
i
mum
dust
ex
tr
ac
uon.
P
os
1t
1
on
the
sand
er
ove
r
ad
us
t
bm
and
re
m
ove
t
he
dusl
bag
.
2
Empty
the
dust
bag
1nto
a
bm
and
then
refit
the
dust
bag
onto
t
he
dus
t
ext
ra
c
uon
adaptor
OPERATION
4 . CONTROLS
Switching
On
and
Off
To
st
art
th
e
san
der
pres
s
the
on/off
sw1tch
i
nt
o
the
on
posit1on
"I"
2
Ta
st
op
operat
ion.
press
the
on/off
switch
int
o
the
off
pos1tion
"O'
'.
Variable Speed Dial
Ta
m
crease
the
r
otatio
ns
peed
of
the
tool.
ro
tate
the
di
al
to
a
h1g
h
er
number
2
Ta
decrease
th
e
rotation
spe
ed
of
the
to
ol.
ro
tate
the
d1al
to
a
lower
numbe
r
'
'
1
--
5. SANDING
Sec
u
re
the
sandin
material
to
be
g
Where
POS
SJble
2
W1th
a
firm
grIp
h
on
I
es
an
der
.
sw1tch
the
sander
an
1
,1
3
Gradu
ally
lower
the
sander
onto
the
w
orkp
1ece
with
a
shght
forw
a
rd
movement
4
For
optImum
resu
lt
s.
use
e1ther
of
th
ese
strokes
Backward/ Forward
Side
to
Side
L
6. SANDING TIPS
Neve
r
force
the
s
ander
The
we19ht
of
th
e
sander
sup
p
lies
adequat
e
pre
ssu
re
allowIn
g
the
sand
paper
to
do
the
work
App
ly1
ng
add11
1
ona
l
pres
su
re
w
,11
slow
the
motor
,
ra
p
1dly
wear
th
es
andpap
er
.
and
greatly
red
u
ce
the
sander
speed
Th
1swill
slow
the
r
emoval
rat
e
an
d
produce
an
i
nferio
r
qua
li
ty
sur1a
ca
CAUTION
:
bcess1ve
pressu
re
will
overload
the
motor
,
cau
s
ing
poss
1ble
damage
to
the
sande
r
by
overheating
th
e
motor
;or
dam
age
to
the
workp
1
ece
Be
sure
to
check
your
workp1ece
o
ften
The
s
ander
Is
capab
le
of
rem
ov
1ng
material
rap1dly,
espec1ally
w1th
coar
se
paper
The
random
orbi
ta
l
acllon
of
you
r
sa
n
der
allow
syou
to
sand
w1
th
the
gra
in
.
or
at
any
angle
acros
s
11
f
or
most
sand
mg
Job
s
In
the
fina
l s
tage
sa
be
ner
fi
ms
h
will
be
ach1ev
ed
by
sanding
w1th
t
he
gra
in
Do
n
ot
s
an
d
on
one
spot
for
too
lang
The
sander's
rap
id
actIo
n
may
remove
too
much
material.
creating
an
uneven
surface
A
DO
NOT
USE
FOR
SANDING
PLASTER
AS
~
THIS
WILL
VOJD
THE
WARRANTY
.
, PXROS-125
MAINTENANCE
ALWAYS
ENSURE
THE
TOOL
HAS
A
COMPLETELY
STOPPED
AND
THE
BATTERY
IS
REMOVED
PRIOR
TO
ANY
MAINTENANCE.
•
Keep
vent
1
lat1on
sI01s
ol
the
sande
,
cle
an
al
all
1
,me
s10
en
su
re
e
tfic,en
t op
era
1
Ion
•
Atte
,
eacll
use,
blow
au
ltuo
ugh
th
et
oo
l h
ous,
ng
to
ensu
re
11
,s
fr
ee
from
all
d
ust.
d,
11
.etc
Bu
,l
d
upof
dusL
d,
11
pa111c
l
es
may
cause
l
he
t
ool
to
overhe
a1
a
nd
sh
o,ten
1he
lifeoft
he
t
oo
l
• lft
he
hous
,
ng
of
the
sander
re
q
uires
cl
e
anmg.
do
no
t use
so
lv
emsbut amo,s1s
ofl
cfot
h01
so
h
b
rus
ho
nlv
• N
ever
le
t
any
li
quid
g
e1
,ns,de
lhe1
00
1.n
eve
r
Imme1se
an
y
palt
of
1he 100
1
inlo
li
qu
id
• No
lu
b11ca1,
on
Is
necessary
as
1h
et
ool
ha
s
sealed
be
a
,mg
s
•
When
not
in
use
the
sander
sho
uld
be
s1or
ed
,n
a
dry,
fro
s1
fr
ee
lo
ca1
1on
not
w11h
in
1
he
reachof
ch
I
ld
r
en
Battery
protection
system
Tue
t
oo
l
Is
equ
1
pped
w,th
the
banery
protec~on
system
.
wh
i
ch
he
l
ps
to
en
s
ur
ea
long
seM
ce
hfe
Tue
output
powe
r
aut
o
maucally
cut
s
off
dunng
operation
when
the
t
ool
and/
or
banery
are
pl
aced
Ufl
derthe
fo
ll
owmg
sIl\JatI0flS
• When the
tool
is
overloaded:
lf
th
1s
occur
s,
relea
se
the
tngge
r
sw1tch
and
remove
ca
u
ses
of
ove
r
load
,
then
pull
the
sw1tch
tngge
r
agam
to
restart
.
• When the remai
ni
ng batter,capacity becomes
low
:
Recha
rge
the
banery
pac
k.
N
ote
:
Th
e
banery
protect1on
system
does
not
m
any
wa
y
damage
the too
l.
N
ote
:
The
mdi
cated
capac
1
ty
may
be
lower
than
the
actual
level
dunng
use
or
1mmed
1
ately
al1er
us
ing
th
e
too
l
TROUBLESHOOTING
LED
li
ghts
do
not
ill
um
inate
an
charge
r
Ch
eck
thc
chargmg
adao
tor
1s
sec
ure
ly
p
lug
g
ed
1nto
the
wall
out
let
Che
ck
the
bat
te
ry
1s
fi
rm
ly
co
nnec
ted
to
lh
e
chargm
gc
rad
le
C
he
ck
tha
t
the
chargmg
1a
ck1ss
ecu
ref
y
con
nect
ed
to
the
c
hargmg
cr
a
dle
The
battery
has
a short run time
Ensure
the
battery
1s
properly
cha
rg
ed
II
wi
ll
take
4-5
cha
rgmgcyc
le
s
bef
ore
t
he
ba
n
ery
r
eaches
op1
1
mum
c
harge
and
run
time
On
1he
m11
1
al
c
harge
,t
he
ba
ne
ry
re
qu
,re
s
5
h
ours
of
charg
i
ng
Subsequent
chargmg
on
lyr
equI
res
3-5
hou
rs
Sparking
visible
thr
ough
t
he
hous
i
ng
air
vents
A
small
amount
of
s
park1ng
ma
ybev
1s
1ble
th
r
ough
the
ho
usm
g
ven
ts
T
h1s
1sn
or
ma
l
and
does
not
in
d1
c
at
eapr
obl
em
Sandpaper
Sele
cti
on
Selec11ng
lhe
co
n
ect
911
1
of
sand
pa
per
,s
an
,mporlilnl
s
lep
in
ach
,
ev
in
g
op1tmum
resul1s
C
oa
r
se
g
,11
wi
ll r
em
o
ve
the
mos
l
ma
1
e11
al
rmer
gril will
PlodUCf
a
smoolhel
finish
Jhe
cond
1
1Ion
of
tne
w
or
k
p,ec
ew
,11
del
e
rmine
t
he
9
111
of
t
he
sandpape,
tobe
used
T
he
h19
he1
lhe
gm
numbei
.
1/le
fi
ne,
t
he
gra
de
of
sand
pap
e,
lf
th
e
surfa
ce
1s,o
ug
h,
start
w11
ha
coarse
9111
and
sand
unt,
I
1/l
e
surf
a
ce
Is
u
ni
form
Med
ium
grot
ma
y
th
en
be
u
sed
10
r
emove
scra
t
ch
es
le
fl
by
the
coarser
g11t
finer
g
111
,s
then
used
10
fin
,
sh
the
su
rfa
ce
Alwa
ys
co
n
tinue
san
d,
ng
w,thea
ch
g
rade
of
sandpaper
uot,1
lhe
surtace
,s
uniform
MATERIAL
APPROPRIATE
GRIT
C
oarse
Sa
ndi
ng
Fina
Sand
i
ng
Pa
intwork
1
80
40
0
Wood
So
f
twood
60
24
0
H
ardwoo
d 60
180
Veneer
2
40
3
20
N
ote
lf m
1e,
m
ed
1
a1
e
sand,ng
,s
r
equue
d.
choose
a9
111
,a
ting
between
coarse
and
fi
ne
The
a
bove
tab
le
,s
,ntend
ed
as
ag
uIde
onfy
To
ensur
e
a
sa1,sfac1orv
resu
lt,as
ma
ll,
1nconspIcuous
area
shou
ld
füs
t
be
tested
10
•nsure
th
i 1
111
of
Yndpap?•
ch
osen
,s
su,ta
b
le
for
the
desued
fin1
sh
SPARE
PARTS
Spare parts can be ord
Desk
at
your local 8 ~red from the Special Orders
F f .
unnmgs
Warehouse.
or
urther
mformati
· ·
on,
or
any
parts not listed here
VISlt
WWW
ozito
•
Se
. . .com.au
or
contact
Ozito
Customer
nnce:
Australia
1800
069
486
New
Zealand
0508
069
486
E-mail: [email protected]
CARING
FDR
THE
ENVIRONMENT
Power
tools
that
are
no
longer
usable
should
not
be
disposed
of
w1
th
househo
ld
waste
but
m
an
environmentally
fnendly
way
Pl
ease
recycle
wher~
fac
I
ht1es
exI
s1
Che
ck
w1th
your
l
oca
l
counc1I
authonty
for
r
ecych
ng
ad
vice
.
Recycling
p
ack
aging
reduce
s
the
need
for
landfill
a
nd
raw
ma
t
er
1als
Reu
se
of
recycled
material
de
creases
pollut1on
in
the
env,ronment
P
le
ase
recycle
pack
agmg
where
fa
c
,ltt
ies
exist
Check
w
1th
yo
ur
local
counc1l
authority
for
rec
yclin
g
ad
v
1ce
.A
BATIERY
AND
CHARGER
SAFnY
WARNINGS
THI
SMAN
UAL
CO
NT
AINS
IMPORTANT
S
AFETY
AND
OPERATI
NGIN
STRUCTIO
NS
FOR
YOUR
BATTERY
C
HAR
GER
Beiare
us,ng
the
charget
r
cad
all
,nstruc
t
,ons
and
caur,onar,'
markmg
s
on
the
chargcr
baner,'
pack
and
rhc
pto
ducr
us
,ng
lho
banery
pac
k
n
11
s
chargct
,s nor
,n
r
ended
1
01
anv
uses
o
ther
th
an
charg,ng
rechargeable
batte11
es
Anv
othat
use
mav
,esult
in
115k
ol
fii
e
elecrnc
shock
or
elecuocu
t
,o
n
Da
no
r
placc
a
nv
001ec
r
an
top
ol
l
he
c
harger
01
place
rhe
cha1ge1
on
a
sof
t
su
t1
ac
e
lhal
m
av
re
sult
,n
excess,ve
,nrerna
l
he
al
Place
lhe
cha1ge
1,na
po5r
1
1on
awav
ft
om
any
heat
sou
r
ce
10
tcduce
tr5k
ot
damage
ro
tho
elect11
c
plug
and
cord
,p
ull
by
the
pl
ug
rat
her
t
han
the
cor
d
when
d,
sconneclln
gt
he
c
ha
r
ger
Make
s
ure
t
he
cord
,s
l
oc
ated
so
that
,r
w,
11
no
t
be
ste
pped
on.
t
11
ppe
d
ove
r,
01
ot
herw
,se
s
uo1e
cted
to
damage
or
s
tre
ss
6
An
e
xt
ens,on
cord
should
no
t
be
u
sed
unless
absol
utely
necessar,'
Use
of
an
~
extmsron
COid
could
r
esult
"'
the
nsk
ot
r,re
.
eloonc
shoclc
er
e
lectrocutJon
Da
no
t
operat
e
lhe
c
harger
,1
,t
has
rece
rve
da
shar
p
blow
.
been
dropped
01
oth
erw,
se
damaged
in
anv
way
Have
,1
chec
k
ed
by
an
elect11c
,
an
01
pewer
t
ool
repa11e1
s
Do
not
d,sassemble
cha
r
ger
Take
,t
to
an
elec
r
11c,an
01
pow
er
tocl
re
pa
11er
whe
n
serv
,
ce
or
re
pa
ir
,s
1eou11ed
lncorrect
roa
5
5emb
ly
mav
rcsult
,n
a
115
kote
lec
trlC
sh
ock.
elec
tr
oc
ut
,on
or
fite
9 Ta
red
u
ce
11sk
otel
ect11c
shoc
k.u
np
lug
rhe
cha
rg
er
l
r01n
the
outlet
before
att
emp
t
,ng
any
cleamng
Aemovm
g
tne
batterv
patk
w,
11
no
tr
educe
th
,s
115
k
10
Never
attemp
t
to
con
ne
ct 2
charger
5
together
t1
00
NOT
stere
er
u
se
the
rool
a
nd
baner,'
pack
in
rocarlOflS
w!lefe
the
tempe,arure
ma
v
reach
or
exceed
40'C
J
such
as
1ns1
de
shed5
or
metal
bu,ldtng
s
,n
summer)
t2
The
cha
rger
15
de5
1
gned
too
perate
an
s
tandard
h
ouseh
old
electnca
l
power
1240
v
oltsl
Oo
not
atte
mpt
to
us
e
11
an
any
other
vo
ltage
1
13
lhe
batter,'
pack
,s
no
l
tu
lly
c
harged
o
ut
ot
1he
carton
F
,rs
t
re
ad
the
sa
tety
,ns
truct,on
5
and
th
en
t
ollow
the
c
harg,ng
no
tes
a
nd
pr
oc
edure
s
14
The
l
ang
es
t h
ie
and
best
perfotm
a
nc
e
can
be
obta,ned
,t
t
he
batter,'
pack
15c
harged
when
the a
,r
t
emperarure
,s
betwee
n
18
•
24
'C
Da
n
ot
c
harge
t
he
batter,'
pack
,n
an
a
ir
te
moerature
belov
,
lCfC
or
a
bove
40'C
Th
,s
15
,mportant
and
wi
ll
prevent
damage
to
the
batter,'
pack
15
Do
not
,rcinerare
the
batterv
pad<
even
,t
11
15
senously
damaged
or
,s
ccrnpletely
wom
out T
he
bat
terv
can
e,plode
,n a
fire
16
N
ever
anempt
to
open
the
batt
er,'
pack
tor
any
reason
lt
the
ptast,c
housr
ng
otthe
batter,'
padc
bfeakS
01
cracks
.
,mmediately
d
1scon
11nue
u
se
and
da
not
recharge
17
Dur1ng
charg,
ng
.
the
baller,'
must
be
p
lace
d
,n
a w
eil
venttlated
area
DESCRIPTION
OF
SYMBOLS
V
Volts
Hz
Hertz
ac/-
Altemat,ng cu
rr
ent w Watts
de/=
D1rect
current -Diam
ete
r
mA
M
illiam
peres
Ah
A
mp
hour
® Do notexpose to rain.
no
No l
oad
speed
/min
Revolutions or re
c1
proca
t1on
per
m1n
ute
C Electr
ic
al
Em
,ss,ons ® Transformer Energy
Conform,ty (
EMC)
·-
Rating
(ME
PS
)
1.
-twlP'll
Lß Warning
(1
Read
instruct,
on
manual
191
Double ,nsul
ated
0 lnd
oor
use
on
ly
-E3- Thermal cut-out protect,on
0---<----0
1 Polanty
•
L1
th
1um
Ion battery ~i Do not use or store battery ,n
L.....,
--
~
temperatures exceedmg
50-C
~
Re
cycle battery
~
Do not put
,n
the rubb,sh
OlCV
).( Do not
in
ctnerate
~
Do not
get
batte
ry
wet
A
ELECTRICAL
SAFETY
WARNING1 - -
-~
- · -
Nlo<y
preauta\S
,
,ncludonll
u,.,
~
lhould
~
bo
-
ta
reduca
nak
of
In
,
~""°""
~.,,....,
.,,.,,,,...c1emege
,_,,.~
~c.n•
...
~
nsrwt
Vt
'f'Ji
'
"°"
frowrunt.
'm"""t.»
c
tt•.,,~
~
bt
knOOlltlttn;ritlOOI
S,,,
NSf'
1'Gf'\C'JY1
at\1
ort•
~ •s
J..U',
..0
'lw-
11
l"I
\
tco:
f
ti
l1.,'1!J'f
rt1Wtfftl
n.d'W91'
1W
taln
OH
9'1d
l
'1
:ll\
,ra;
~
c,-,
1
At"'
".,,
L
'W
l
tN
tl
htD(M«A,Clt
1con
~loh-.oltJQI'
.... ltlef'll
lf")
-
-
n.,-
01
T»i
rdl
l0\'"'0."""""'
..
"'""""9Nbl<
""
A.,11,;..,1"<1
1\t,,
l
e1
""'
111tw
MJX.
"-
tord1
1.dr'4ICJl'd
11
11'\1Slbl ~f'Ctiy
.,,t'f
t·•, ·~·,
"'ll'l~tw
"'Ol
„
11
_,
~ b Nlld,
Nota
Oout·lt
l
l~
..
•
'-<""
ooes
ro1
ta.
lt
1t1t Dtc.t
r,
,,..,
M.)
s.11,""
CJ1t1ut,cn,
..,.,.
CICIP1
' ="I
~
acia..,J
p,n
l
"(
l11"
J19.1
!'ttllfl,
~~'1~t
ur
-.
..
pm
.t.,-
ef
1e,.t•
,u
l
!'\lwl10,
l
,._.,.
A,
,.
lft
.:;:.Of.,I
t(l0I
llit
~O'l\'l
!r
-s •
.:
U
-onE.ttanMJnl.Md
Atw.>,
,
lJI
In~
f.ll.ln.lM
lt«I
.RMtJIDtl
l(lf
lf'IC
flC'wl,f'I
•
"Cu1
r,.
! ,..1
'OQI
8rt4JI
~
'A
,..
,,
'\11-Jtf'9
Afi:t
uthttAl
~
t.11'
e.t
'
dr'
~ ,
i,e•ec1,
,.
U1l
fllOICt
thl
11
tansc,,.ac1:rlilT1
,.
'l,.
t,c,,u,
·
1Q
.1"IC
•l•ns
011ua
~
1r1t
l
1l..1VS
\IM
ind
ftwleoiOC1>'liCM1....,
U.Of
ar1.,,.
......,,,,,
,i.:-.,
1
r•"
tw•"'
""
itt
~
~
o,
oei
ed
N'I
m,-,
'
Mu
:t
m•n
sa-
ot
~
N
tlectzlC.
INl:1
_,
l1lt
"-
taoie
cy
h
~
~
~'!"
1..DOl
f
fo
this
tJ
\.IQj(t\
~
WOU!d
be
CI
Ol«ttd
by1
,u.~
tvJtm
O,,,.:t
t•
itld
--..
•
dr,,
~t'
/eGI.U$
1
1'11
r\U
oleiectrll
~
•1
Jl,,lf\;I
r,
lttsi
A
'"
d.al
~f
r'!
A
GENERAL
POWER
TOOL
SAFETY
WARNINGS
WARNING
1
Rud
all
Nfety
warnang1
ond
oll
.-uctions
f
lll11oto
l
ollowtr11wam,r,plr<!
IIIS1J\ClJQl1Sma,result
mt1«1Jc!lullnl'lll/111.....,,W\jlll)
Sowo
..
~
ond iMtructiono
for
hJb.n
...i..nc.
.
The
torm
·-
_,
•
.,
tho
_,.....,...
to
your
"'""'"
op•-
,-1_
_,
...
-.
,
__
(--,lleM)
_..
taof.
1.
War1t
.....
..
,.,,
,
Kaop
_...,...
dun
ond -lit
Cluttdod"
11111.
area1
...,,.
«x1C1en11
D
Do
not
--
- - In
uploolvo otrnollphoreo,
ouch
H
In
IM
prflOftCO
ol
n■
mmablo
llquida,
g-
or
dust.
--
O'fAII
'l)lll•
....,,_
moy
q,te
tlle
M I
m
1_ ,
1(-
■
p-
ond
bywlor,cfer's-
■y
whilo
~
o
-tool
.
0,~IIC11111\SCOll<Me,OUl<llose
""
'
'"'
2. Electncal
N~
, - tool
ph,gs
m-
matdl
tho
outlot.
~
modily
lhtt
plug
In
ony
wey
.
Do
not
UN ony
odaptor
pk,gs
wilh
■--
(groundocl) -toolo.
Ll'onodllied
olug
s
IOd
match".J
out1111
w,
11
rodln
'"'
ololecr<,hocl.
-
body
oontoct
with
■■-
or
groundld
surloca,
IIUCh
o
■
pipoo,
r~rs
. nongH ond
retrigel
atora
.
There
1
11111measecl
mk
ol
tleetnc
VO:k
1f
ytkJf
body
u unhed
or
g,Ol.l'ded
Do
not
upo1i11
power
toola
to
rain
or
wet
canditiona.Watrr
ffltmng
I
pow9f
lOOI
will
1nct~
1ht
111•
ol
electr<shocl
Do
not
-tho
conf
~
UM
lhe
conf
for
tan"jing,
pulling
or unpluggmg
u,.,
_.-
tool.
l<Np
conf
-
■yfrom
'-
·
oil,
ohorp
edges
or
mcwing
porto
.
Oamaged01tn1Jn;il<dcco1Jrna,a1tthl
111.,otNctrcUIIX.t.
•
wi-
~
• _
_,
outdoors,
UM
on
-.ion
con1
ouitoble
lcr
outdocr
- .
useot
1
m
s.,ilablt
fu
outdocw
ust
rtdl.as
~
r
u:\
ol
etec
uc
~
tt
~
•-taol.,.
damp
locobor,.
u-
.
-·
-
curront
dNce
(ACO)
~
8Upllly
.
Ust
ot
"'RCO
ll<MIS
tllo
n,1.
ol
elecloc
,hocl.
3
.
Pw--
■
IMll&lf
, a..y
~
--'fOU
■
re
dolng
end
-
common
- -
--.
• _
_,
_
Do
,-
-
·---'jOU.,..
_
...
...-.--
..
dnJg,, olcohol
OI'
medication.
A
noTllffl
of
.,.n.entoi
~le
oper1t,ng
P'M9
ll>Ols
rtalY
rewti
in
JltllOul
pe1
SO'\J6
lfl
,
ur,
b
Uoo~~oquipme,,LAA,ays_...,.p,otectlon
PI01
1<
t""--"M
I
ru:,l,,.
""""sbd
u
1
tty
shan hlrd
Nlt
o,
hNtlng
P'Ot«hon
used
t
o,
,PPDPN
tt
C'O'ldi
tJOos
"A
~IIt~
Ptß(N
I
in,urtn
- -
oc.ting
.
EnoYre
tho
_,
is
In
IN
olf._;on
belort1
connectong
ta
-
_,,.,.
ond/or
tie=--i
pock.
pic1<ing
up
or
con-,ing
IN
tool
C.:,,y,ng-
1oo1,
-,u,
'°"'
tnge,
on
IN
ni,,tch
«
tnf9SO'lG
~
toot,
lNI
NVe
tht
sv.,ld'I
cwi
ltlWttes
ac:ooenu
R
■
-
ony
-,,u.ting
koy
or
...-.nt:h
before
tuming lho -
cool
on
.
Aw
rtneh
or,
\,v
1th
lttxhed
tu
I
rot•I~
Pi"!olthe
l)Owef
tool
ffllV
1esull
11'1
petlOl'WI
W'I
JUIY
Do
not...........,,
,
1(-
■
p
-
loot,ng
ond bolonce
ot
oll
bmN
.
Th
,, l'Nb
lO>
bo
nto
controlol
•~
~
tool
tn
~eo
SttlatOU
Dreso propeny.
Do
not
_.
loou
dallling
or
jowolrf.
Kaop
yaor
hoir
,
c1ot1w,g
ond
glo,,N
-
■
y
from
~
p■
IU
.
Loostdoellel
)IWllllry"
1111'9hwClftbo.....,.
.,
~..,.
tt
dowicoo
ore
pn,,idad
lcr
lho
connocCion
ol
duot011nc1ion
ond
co1octian
fac:iboo
....,.
-
....
connec:tedondpropenyUMd
.Uwot°""_'°",_.Ml
·
IIIOtld-
'
4.
"-'
taof
UN
oncf
c■
re
Do
not
larco
tho -
tool.
u..
u,.,
cornoct
-
COOi
lar
yaor
oppficaCion.
11w""""-
toolwllldD1NfOb1Jette<ord11l•llhrattlor"'1dlrt-°"'9'e!
D
Do
not
UN
lho
_.-
taof •
111
■
Mitch
dooe
not
t,n,
lt
on
ond
oll
.
Alrf-
mlhil
cna
bt
con1rv11<d
witll
me
,...,lth
ß
""1Jl,uu,
n"""
1>o
•-od
DioconMct
tho
plug
lrom
tho
-
-.rco
ond
/
or
tho
boUory
podt lrom
lho
- -
belore
molcing
ony
....._
,
chonging
_._
,
or
.c,n,g--.
Sia,,._
11lety......,..l!<M:ethlr<Slol~tl,e-tool"""-11111,
d
Stor1I
idlo
- -
out
ol
lho
f'MCh
ol
cl1ilhn
ond
do
not
ollow
-
unf-
with
U.-toolorthno~i:o.,,.._lho_lOOl
,
_tool,ndqlruut
u,
~hnl!
of
unt~IOld
lßft'S
•
Moi,,toln
_,.
tools.
Chock
lar
mlulignmont
or
bindlng
ol
moving
po,ta,
bruuge
ol
po,ta
end
ony
-
conditian
lhot
moy
ollact
thtl
-
toofo
--
■
tian
,
lf
domoged,
,-.
tho
_
tool
,..pond
belore - ·
Moto,-n<Medo,
Plllll1',...,..KWf
_._
Knp
cUUing
tools
lhorp
ond - ·
Pn,c,,ttvm1
,
,_Mlf'l
ll)QlswrflN11J"'""'11dget
••
Im
laly
t<I
btM
ana
are
w
1er
to
control
u..
u,., _ toaf,
.,.._
ond
tool bito
IIC.
In
---
-·
toking
onto
occount
tho
-1<ing
conditiono
ond
lho
_..
to
be
.,.-formMf.
Ibo
ol
IN-
IOOI
lor
opera!IOl"d
diffff!flt
from
ame
ll'lt!rd!ld
COIJd
muh
an
•
t'tillJld0l,s
1t11.auon
5.
~
taof
,_
ond
c..e
1
Aochorgo
onfy
wilh
tho
cloffgor
opoafiod
by
lho
--....
. A
0.V-
11111
G-
IOI
cre
'"10
ol
bine,y
p,ci
moycrwe• rr,t
ol
1r,_,
_
.,u,
woo1!W
,anr,
IIICl
u..--
only-
opociflcolly
~
boaarypocu. Uwol
......
bl!IM'f-ffll\'
0Nlflmtot....,n
1t1
,
--'Y---•-'"-
·
"-il-1,-,..u-
.....
~
.
....
-
.......
""""'
·
koys
,
Nlilll
,
..,._
or
othr
llffl
■
II
,_
......._
,
---
■
-lromone
terminal
to
•nc:iitt.-.
StotJng
1he
~r.arw
~
UJOlthlr
ffll'f'
ta\a
tMna
ar
11ft
d
Undr
.,._
condibono
,
llquod
moy
be
.,..-
1n>m
tho
--,;
■-
-.
II
coruox
acadentollyoc:c.n
,
ftush
_,__._
II
loquid
c:ontodO-
~-maicol
holp
.
ltQUICI
t,ectfd
trom
me
b.lni!IY
ffllY
tlUst
m
t.11
1
111
or
bi.rns
6
5oNoce
e
Hovo
yotr
_
taol
_
byo
quo
lrlled
___
anly
ldontical
,.......,,_,.
parta
.
Thi
s
~;II
ensu-1
tNI
the
~er,
ot
N
~
tllOI
11
NWttJtned
A
RANDDM
ORBITAL
SANDER
SAFETY
WARNINGS
~
WARNI
NG
!
•
Hold
power
tool
by
inaul
■
ted
gripping
surfaces,
because
the
s
■
nding
pad
may
contact
lt
■
own
cord.
C
um
ng
a
·1t
ve·
wire
ma
y
make
exposed
metal
pans
of
the
power
t
ool
·1
,ve
·
and
could
gM!
the
operator
ane
lectnc
shock.
Dispolling
af
duat.
Be
e
xtr
emely
ca
reful
ol
du
st
d1sposa
l,
mate
11
al
s
in
fi
ne
pan,c
le
form
ma
y
be
explosiv
e
Oo
not
throw
sa
nd,ng
dust
on
an
011811
fire
Spontaneous
combust,on
,
may
111
time
,
resull
f
rom
a
m,
xture
of
o,I
or
water
w1th
du
st
paru
cles
Always
wear eye
protection
end
■
dust
mask
for dusty
applic
■
tions
■
nd
when sanding
overh
■■
d.
S
and,ng
panicles
can
be
absorbed
by
you
r
eyes
and
,nhaled
eas,ly
and
may
cause
health
comphca
1
1ons
Uae
speci
■
I
precaution• when sanding
chemic
■
lly
pressure
treated
timb
■
r
,
p
■
int
that
m
■
y
be
lead
bas
■
d,
or
any
other
materiale
that
may contain
carcinogene
.
Asu
1table
breath1ng
resp,
r
ato
r
an
d
protect,
vecl
ot
h•
ng
mus
tbe
worn
by
all
persons
enter111g
t
he
work
area
W
ork
should
be
sealed
by
plasoc
sheet111g
and
persons
no
t
prot
ec
t
ed
should
be
kl!pt
out
unt1I
work
area
,s
thorough
ly
cleaned
Do
not
'Wllt
send'
with
thia
sand
■
r
.
uqu1ds
ente11ng
the
motor
ho
us,
ng
are
an
elect11cal
shoc
k
hazard
Do
not
uae
san
dpaper
intand
■
d
for
larger
s■
nding
pads
.
Larger
sandpaper
w
ill
exteod
beyond
the
sand1ng
pad
caus1ng
snagg,ng
,
teanng
of
the
pape
r
or
k1ck
-
back
Eioua
pape
r
exteod1ng
beyond
the
sand,ng
pad
ca
n
also
ca
use
senous
lacerat,ons
&
WA
RNING!
Some
dus
t
created
by
power
sandrng
,
saw1119
,
gnnd1ng
,
d11l
h
ng
and
other
construct,on
act,v111es
conta111
chem1ca
ls
known
to
cause
cancer
,
b1nh
delect.s
or
other
rep,oduct1ve
ha
rm
Some
examples
of
these
chem1ca
lsa
1e
•
Lead
l
rom
lead-based
pa1nts
,
•
Crystalhne
s1
hca
from
bocks
,
cement
and
other
masomy
p,oducts
.
and
,
•
Arsemc
and
chrom,
um
from
them,cally
-
treated
t1mbe
r
Your
ris
k
from
lhese
exposures
vanes
,
depend
in
g
on
how
ohen
yo
u
do
th
,s
type
of
work
To
reduce
you
r
expos
u
re
to
lhe
se
chem,cals
w
ork
111
a
well
venlll
at
ed
area
and
work
Wtth
a
pproved
salety
equ,pme
nt
.
suc
has
dust
masks
!hat
are
spec,ally
d
es,gned
to
filter
out
m1croscop,c
pan,cles

Other Ozito Sander manuals

Ozito bsv-9000 User manual

Ozito

Ozito bsv-9000 User manual

Ozito OSG-101 User manual

Ozito

Ozito OSG-101 User manual

Ozito OZBP110WA User manual

Ozito

Ozito OZBP110WA User manual

Ozito SPG-7000 User manual

Ozito

Ozito SPG-7000 User manual

Ozito OSG-120K User manual

Ozito

Ozito OSG-120K User manual

Ozito OZDS280WA User manual

Ozito

Ozito OZDS280WA User manual

Ozito RANDOM ORBITAL SANDER User manual

Ozito

Ozito RANDOM ORBITAL SANDER User manual

Ozito DSL-4000 User manual

Ozito

Ozito DSL-4000 User manual

Ozito FSR-3000 User manual

Ozito

Ozito FSR-3000 User manual

Ozito PXBPS-254 User manual

Ozito

Ozito PXBPS-254 User manual

Ozito DETAIL SANDER User manual

Ozito

Ozito DETAIL SANDER User manual

Ozito OZRO450A User manual

Ozito

Ozito OZRO450A User manual

Ozito THIRD SHEET SANDER User manual

Ozito

Ozito THIRD SHEET SANDER User manual

Ozito SPG-160VK User manual

Ozito

Ozito SPG-160VK User manual

Ozito DSR-2500 User manual

Ozito

Ozito DSR-2500 User manual

Ozito SPG-160VK User manual

Ozito

Ozito SPG-160VK User manual

Ozito OSG-120K User manual

Ozito

Ozito OSG-120K User manual

Ozito QSS-1000U User manual

Ozito

Ozito QSS-1000U User manual

Ozito ROS-2000U Operation instructions

Ozito

Ozito ROS-2000U Operation instructions

Ozito DSR-2000 User manual

Ozito

Ozito DSR-2000 User manual

Ozito BGBS-240 User manual

Ozito

Ozito BGBS-240 User manual

Ozito OZDS280WA User manual

Ozito

Ozito OZDS280WA User manual

Ozito PDS-2000 User manual

Ozito

Ozito PDS-2000 User manual

Ozito OZOS300WA User manual

Ozito

Ozito OZOS300WA User manual

Popular Sander manuals by other brands

Craftsman 900.11683 instruction manual

Craftsman

Craftsman 900.11683 instruction manual

Workzone WDS-130 Original manual

Workzone

Workzone WDS-130 Original manual

Milwaukee 6148 Operator's manual

Milwaukee

Milwaukee 6148 Operator's manual

Far Tools S 150C Original manual translation

Far Tools

Far Tools S 150C Original manual translation

MIRKA OS 383CV manual

MIRKA

MIRKA OS 383CV manual

Siemens Sinorix al-deco STD Operating handbook

Siemens

Siemens Sinorix al-deco STD Operating handbook

Craftsman 315.277171 owner's manual

Craftsman

Craftsman 315.277171 owner's manual

DeWalt DCM849 Original instructions

DeWalt

DeWalt DCM849 Original instructions

Parkside PBS 600 A1 Operation and safety notes

Parkside

Parkside PBS 600 A1 Operation and safety notes

Makita 9227C instruction manual

Makita

Makita 9227C instruction manual

Metabo SR 2185 operation instruction

Metabo

Metabo SR 2185 operation instruction

Sealey SM31.V3 instructions

Sealey

Sealey SM31.V3 instructions

Stanley FME440 Original instructions

Stanley

Stanley FME440 Original instructions

Rac MV008 user manual

Rac

Rac MV008 user manual

EASTMAN WorkerBee WB Instructions-parts list

EASTMAN

EASTMAN WorkerBee WB Instructions-parts list

WilTec 61117 Operation manual

WilTec

WilTec 61117 Operation manual

Narex EBU 230-26 HD Original operating manual

Narex

Narex EBU 230-26 HD Original operating manual

Makita M901 instruction manual

Makita

Makita M901 instruction manual

manuals.online logo
manuals.online logoBrands
  • About & Mission
  • Contact us
  • Privacy Policy
  • Terms and Conditions

Copyright 2025 Manuals.Online. All Rights Reserved.