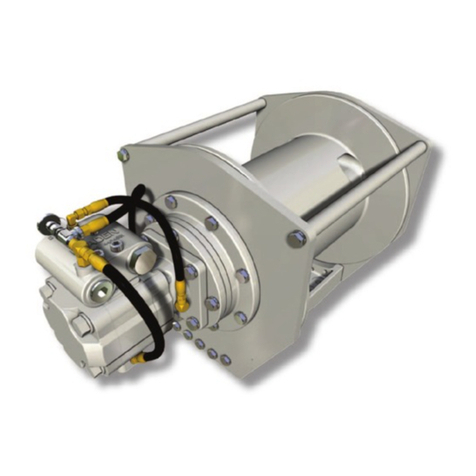
Paccar CARCO 50B User manual

CARCO<
MODELS 50B & 70A
WITH ELECTRONIC CONTROL
SERVICE
MANUAL
LIT2055 R4
5/2010
Printed in U.S.A.
PACR WINCH DIVISION
P.O. BOX 547 BROKEN ARROW, OK U.S.A.74013
PHONE (918) 251-8511 FAX (918) 259-1575
www.paccarwinch.com
2010 PACCAR Winch Division
All rights reserved.


1
FOREWORD
Please read and understand this entire manual BEFORE operating or performing service on your CARCO winch.
Retain this publication for future reference.
This manual contains instructions for the service and repair of CARCO Models 50B & 70A power shift winches with
electronic controls.
Some illustrations in this manual may show details or attachments that may be different from your winch. Also, some
components may have been removed for clarity.
Continuing product improvements may cause changes in your winch, which are not included in this manual. Whenever
a questions arises regarding your CARCO winch or this publication, please contact the CARCO Service Department
at 1-918-251-8511, Monday - Friday, 0800 hrs - 1630 hrs CST, or by fax at 1-918-259-1575, or by e-mail at
winch.service@paccar.com. Provide the complete winch MODEL NUMBER and SERIAL NUMBER when making
inquiries. Refer to MODEL DESCRIPTION section for location of model and serial number.
This complete service manual is available for viewing and/or downloading as a .PDF file on our internet
website - http://www.paccarwinch.com/literaturelist.asp
TABLE OF CONTENTS
GENERAL SAFETY RECOMMENDATIONS . . . . . . . . . . . . . . . . . . . . . . . . . . . . . . . . . . . .2
MODEL DESCRIPTION . . . . . . . . . . . . . . . . . . . . . . . . . . . . . . . . . . . . . . . . . . . . . . . . . . . .3
PREVENTIVE MAINTENANCE & SPECIFICATIONS . . . . . . . . . . . . . . . . . . . . . . . . . . . . .4
CONTROL SYSTEM OPERATION & TROUBLE SHOOTING . . . . . . . . . . . . . . . . . . . . . .9
WINCH REMOVAL & INSTALLATION . . . . . . . . . . . . . . . . . . . . . . . . . . . . . . . . . . . . . . . .27
WIRE ROPE INSTALLATION & WELDING SPECIFICATIONS . . . . . . . . . . . . . . . . . . . . .28
BEVEL PINION & HYDRAULIC PUMP SERVICE . . . . . . . . . . . . . . . . . . . . . . . . . . . . . . .29
CLUTCH SHAFT SERVICE . . . . . . . . . . . . . . . . . . . . . . . . . . . . . . . . . . . . . . . . . . . . . . . .33
CLUTCH ASSEMBLY SERVICE . . . . . . . . . . . . . . . . . . . . . . . . . . . . . . . . . . . . . . . . . . . .40
BRAKE ASSEMBLY SERVICE . . . . . . . . . . . . . . . . . . . . . . . . . . . . . . . . . . . . . . . . . . . . . .43
IDLER SHAFT GROUP . . . . . . . . . . . . . . . . . . . . . . . . . . . . . . . . . . . . . . . . . . . . . . . . . . .46
FOURTH SHAFT GROUP . . . . . . . . . . . . . . . . . . . . . . . . . . . . . . . . . . . . . . . . . . . . . . . . .50
CABLE DRUM GROUP . . . . . . . . . . . . . . . . . . . . . . . . . . . . . . . . . . . . . . . . . . . . . . . . . . .52
CONTROL VALVE SERVICE . . . . . . . . . . . . . . . . . . . . . . . . . . . . . . . . . . . . . . . . . . . . . . .55
ACCUMULATOR SERVICE . . . . . . . . . . . . . . . . . . . . . . . . . . . . . . . . . . . . . . . . . . . . . . . .58
WARNING - This emblem is used to warn against haz-
ards and unsafe practices that COULD result in severe
personal injury or death if proper procedures are not
followed.
CAUTION - This emblem is used to warn against
potential or unsafe practices that COULD result in per-
sonal injury and product or property damage if proper
procedures are not followed.
i
CAUTION
Safety and informational callouts used in this manual include:
This emblem is used to indicate an informational note or service tip.

2
1. Read all warning tag information and become familiar
with all controls BEFORE operating the winch.
2. Never attempt to clean, oil or perform any mainte-
nance on the winch with the tractor engine running,
unless specifically instructed to do so in this manual.
3. Before starting the tractor engine, be certain all con-
trols move freely and are placed in the "Brake On"
(neutral) position.
4. Never operate the winch controls unless you are
properly seated at the operator's station on the trac-
tor and you are sure all personnel are clear of the
work area.
5. Never attempt to handle winch cable when the hook
end is not free. Keep all parts of body and clothing
clear of winch drum, cable rollers and entry area of
fairleads and arches.
6. Ground personnel should stay in clear view of the
tractor operator and clear of the winch drum. Do not
allow ground personnel near a winch line under ten-
sion. A safe distance of 1 ½ times the working length
of the cable should be maintained. Never allow any-
one to stand under a suspended load.
7. Avoid sudden "shock" loads or attempting to "jerk" a
load free. This type of operation may cause heavy
loads in excess of the rated winch capacity, which
may result in the failure of the cable and/or winch.
8. Use only GENUINE CARCO parts. Do not use parts
from other winch manufacturers on your CARCO
winch. Do not use CARCO parts on winches from
other manufacturers.
9. Use the correct size ferrule for the cable and pocket
in the winch drum. Never use knots to secure or
attach cable to the winch drum, or the hook to the
cable. The cable anchor or ferrule pocket in the cable
drum is designed to provide a self release in the
event a back-sliding load must be released from the
tractor in an emergency situation. The cable anchor
or ferrule alone will NOT support the rated capacity of
the winch. Therefore, a minimum of five (5) complete
wraps must be maintained on the winch drum.
NOTE: We suggest painting the last five wraps of
cable bright red to serve as a visual warning.
RECOMMENDED OPERATING PRACTICES
1. Leather gloves should be used when handling winch
cable.
2. Operate the winch to match line speeds to job condi-
tions.
3. Assure that personnel who are responsible for hand
signals are clearly visible and that the signals to be
used are thoroughly understood by everyone.
4. Inspect winch cable, rigging, winch and tractor at the
beginning of each work shift. Defects should be cor-
rected immediately.
5. Position the tractor for the straightest line of pull to
reduce the wear on the winch cable and ensure even
spooling.
6. When winding winch cable on the winch drum, never
attempt to maintain tension by allowing the winch
cable to slip through the hands. Always use the
"hand-over-hand" technique, being careful to keep
hands and clothing away from winch drum and fair-
lead rollers.
7. Be sure of tractor ground stability before winching in
a load.
8. Store unused chokers, slings and rigging in a neat
and orderly fashion to prevent damage to equipment
or injury to personnel.
9. Do not operate the winch under loads that exceed the
maximum rated bare drum line pull. If excessive
loads are encountered, use a multi-part line and
sheave blocks. Any attempt to exceed the capacity of
one winch (such as coupling 2 or more tractors
together) is extremely hazardous.
10. The factory approved adaptions for CARCO winches
are designed and intended for use on specific models
of crawler tractors. Changing winches between trac-
tors is not possible in some cases because of differ-
GENERAL SAFETY RECOMMENDATIONS
Safety for operators and ground personnel is of prime concern.Always take the necessary precautions to ensure safe-
ty to others as well as yourself. To ensure safety, the tractor and winch must be operated with care and concern by the
operator for the equipment, and a thorough knowledge of the machine's handling and performance capabilities. The
following recommendations are offered only as a guide for the operator. Local rules and regulations will also apply.
Failure to obey the following safety recommendations
may result in property damage, injury or death.
i

3
ences in tractor models. Some changes cannot be
approved by CARCO because of safety limitations.
Call a CARCO dealer or the CARCO factory prior to
attempting winch modifications or before mounting on
a different tractor.
11. CARCO power shift winches are equipped with
hydraulic accumulators. Discharge the accumulator
stored oil supply before removing any hydraulic lines
or fittings or servicing winch. Personal injury may
result from the sudden release of oil pressure. To dis-
charge the accumulator, stop the engine, turn the key
switch “on” then slowly cycle the Power Shift control
handle into full Reel-In then Reel-Out positions a min-
imum of five (5) times.
12. On machines having hydraulically, mechanically
and/or cable controlled equipment, be certain the
equipment is either lowered to the ground or blocked
securely before servicing, adjusting and/or repairing
the winch. Always apply the tractor parking brakes
and lower any equipment to the ground before dis-
mounting the tractor.
13. The winches described in this manual are neither
designed nor intended for use or application in the lift-
ing or moving of persons.
14. Install guarding to prevent personnel from getting any
part of their body or clothing caught at a point where
the cable is wrapped onto the drum or drawn through
the fairlead rollers.
15. Keep equipment in good operating condition. Perform
the scheduled servicing and adjustments defined in
the "Preventive Maintenance" section of this manual.
Use of proper lubricants is crucial.
16. An equipment warm-up procedure is recommended
for all tractor start-ups, and is essential at ambient
temperatures below +40°F (+5°C). Refer to the
"Warm-Up Procedure" listed in the "Preventive
Maintenance" section of this manual.
The CARCO Power Shift Winch is a single drum unit
which mounts on the rear of a crawler tractor. It is driven
by engine power through the tractor PTO (Power Take-
Off). The winch may be operated independently or with
the tractor transmission engaged. When operated prop-
erly, it is capable of utilizing maximum engine horsepow-
er. The winch has equal speed gearing, power-in and
power-out, using multiple-disc oil actuated friction clutch-
es and a spring applied hydraulically released multiple-
disc oil brake.
The winch may be manufactured as a Standard PTO or
Low PTO configuration, depending on tractor application.
In the Standard PTO configuration, the bevel gear group,
clutch and brake components are located in the upper
bores of the winch case.
The Low PTO winch design has the bevel gear group,
clutch and brake components located in the lower bores
of the winch case.
The Model 50B & 70A may have either a 3-shaft or 4-
shaft gear train configuration depending upon the tractor
horsepower, PTO speed and line speed requirements of
the winch application.
The standard Power Shift (PS) Winch is primarily used in
logging, land clearing and general utility applications. The
PS Model has gear ratios which match the cable drum
rotation in Reel-In (forward) to reverse track speeds for
optimum advantage in tractor recovery.
Optional features increase the winches ability to meet
specific application requirements. Options available for
the 50B & 70A series winches include:
• Free Spool
• Gear Ratios
• Three or Four Roller Fairleads
The winch model number is an important reference as to
what optional components were used when the winch
was manufactured. The winch identification plate is locat-
ed on the right hand side of the winch case. The serial
number is also stamped into the upper right hand mount-
ing pad.
MODEL DESCRIPTION
3-Shaft
Standard PTO
shown

4
Important: Always refer to the serial number and model
number when requesting information or service parts.
The winch model number contains the following configu-
ration data:
MODEL
C 0 0 0 0 0 E
50B, 70A,
PS
Bevel Gear
Ratio
A - 1:1
B - 1.27:1
C - 1.64:1
D - 2.11:1
E - 2.79:1
0 - Overwind
1 - Underwind
0 - Standard Brake
0 - Without Freespool
1 - With Freespool
0 - Four Shaft winch
1 - Three Shaft winch
0 - No Fairlead
3 - Three Roller Fairlead
4 - Four Roller Fairlead
PREVENTIVE MAINTENANCE & SPECIFICATIONS
A regular program of preventive maintenance for your
CARCO winch will minimize the need for emergency
servicing and promote long product life and trouble-free
service.
The service intervals suggested in this manual will opti-
mize component service life. The intervals may be grad-
ually increased or decreased with experience of a partic-
ular lubricant and evaluation of your application.
1.Oil Level
Check oil level at the beginning of each work shift, with
Discharge accumulator oil supply before removing any
hydraulic lines or servicing winch. Personal injury may
result from sudden release of oil under pressure. To
discharge the accumulator, stop engine, slowly cycle
Power Shift control handle into full Reel-In position then
full Reel-Out position, a minimum of five (5) times.
CAUTION
WARNING
! !
Identification
Plate
Vent
Plug
Filter
Access
Cover
Oil
Level
Oil Drain
Plug
Serial
Number
E - Electronic Controls
Record the information below for future reference.
Always include the model and serial numbers when
inquiring or ordering parts.
Model No.
Serial No.
In-Service Date

5
tractor and winch in level position. Oil must be visible in
the upper half of the sight gauge. If an oil level plug is
used in place of the sight gauge, the oil level should be at
the bottom of the level plug hole. Add oil as required
through the fill plug at top of winch case.
2. Oil Change, Filter and Strainer Service
Under normal operating conditions, the oil and pressure
circuit filter should be changed and suction strainer
cleaned after the first 100-250 hours of operation, then
every 1000 hours or six months, whichever occurs first, or
when the filter bypass indicator light remains on after ini-
tial warm up.
To drain oil, place tractor and winch in level position and
remove drain plug located at lower right hand side of
winch case. Drain oil into a suitable container and recycle
or dispose of used oil in an environmentally responsible
manner. Install plug securely after oil has been drained.
After oil has drained, remove four suction strainer cover
capscrews and cover. Remove suction strainer from
winch case then remove metal band and magnetic rods
from suction strainer. Thoroughly wash strainer in clean
safety solvent and blow dry with compressed air, inspect
wire mesh for damage or clogging with debris. Do not
reuse a damaged suction strainer.
All 50B/70A winches serial number 9101599 and up are
equipped with a suction strainer shield which reduces the
potential for pump cavitation when operating on extreme-
ly steep slopes. The suction strainer shield may be
installed on earlier serial number winches. Refer to
CARCO Service Bulletin 97.
NOTE: If the suction strainer shield or shield seal
rings are removed for any reason, reinstall them by
following the procedure listed below:
1. Install shield. Part Number 29020, between connector
and strainer as shown above, with open side facing
downward.
2. Measure distance “X”, from shield to strainer cover
mounting surface.
3. If “X” dimension is between 0.720 in. and 0.783 in.
(18.3 – 19.9 mm), add one seal, 29023, outboard of
seal 29021.
4. If “X” dimension is greater than 0.783 in. (19.9 mm),
add two seals, 29023, outboard of seal 29021.
Seal 29021 is .25 in. (6.4 mm) thick
Seal 29023 is .06 in. (1.5 mm) thick
Install magnetic rods onto suction strainer using metal
band. Lubricate o-ring and install in groove on cover.
Install strainer, spring and cover into winch case.
Refill winch to proper level with recommended oil.
Winches adapted to Komatsu power shift tractors are
equipped with an adapter gear box (drop box) assembly.
Later units are lubricated with a captive supply of 90-wt.
gear oil which should be drained through a plug found at
the bottom of the housing. Refill gear box to the oil level
plug found approximately 1/3 of the housing length from
the bottom with 90-wt. gear oil which meets API specifi-
cation GL5 or MIL-L-2105C.
The pressure filter is located behind the right hand, eight-
Hot oil may cause severe injury. Make certain the oil
has cooled to a safe temperature (less than 110°F or
43°C) before servicing.
X
Shield 29020
Seal 29021
Seal 29023
i
To prevent serious damage to the winch, DO NOT run
engine while oil is drained from the winch.
CAUTION
Oil Fill
Plug
Suction
Strainer

6
bolt access cover. Remove the cover, locate the spin-on
pressure filter and remove the filter element with a strap
wrench.
Lubricate the filter gasket and adapter threads with winch
oil and install new filter element onto filter head. Tighten
½ - ¾ turn after seal ring makes contact with filter head.
Start tractor and operate engine at low idle. Correct any
leaks.
The filter bypass indicator light may come on for a short
time during initial cold start-up but should go out as the oil
warms up. If the light stays on, this indicates a restricted
filter element, sending unit stuck in the bypass position or
accidentally grounded sending unit wire.
3. Control Cable and Pressure Adjustment
While the access cover is removed, it is advisable to
check control cable adjustment and hydraulic main relief
pressure. Place the Power Shift control lever in the cen-
ter “Brake-On” (neutral) position. Install the yoke pins into
the cable yokes/control valve spools and secure with
hitch pins. The yoke pins should slip easily into the bores
without any binding. The control valve spools are spring
centered. If you notice any binding, turn the cable
adjusters in or out until you obtain a “free pin” condition.
Make certain accumulator stored oil supply has been dis-
charged as described earlier. Install an accurate 0-600
psi (0-4137 kPa) gauge onto the – 4 J.I.C. gauge port
next to the control cables. Start tractor and operate
engine at approximately 800-1000 RPM until pressure
stabilizes. Maximum pressure during “charging” mode
should peak at 400 psi (2758 kPa). Pressure will slowly
fall back approximately 15-20% from the relief setting
then quickly return to 400 psi (2758 kPa) when the valve
cycles.
If adjustment is required, locate the adjustment screw
hole behind port “P” of the control valve. With a ¼ in.Allen
key, loosen the outer lock screw. Insert a 3/16 in. Allen
key through the lock screw and turn the adjusting screw
clockwise to increase peak pressure; counterclockwise to
decrease peak pressure. Tighten the lock screw.
TIP: It may be helpful to place the controls in
Brake-Off to use some oil in the control circuit and
cause the valve to slowly “cycle” so that peak pres-
sure may be more easily observed.
Stop engine, discharge accumulator stored oil supply as
described earlier and move hydraulic gauge to the “B”
test port on the brake housing. A ¼ in. NPT adapter will
be required.
Start tractor and operate engine at approximately 800-
1000 RPM. Place Power Shift lever in the Brake-Off posi-
tion and observe BRAKE-RELEASE oil pressure. Loosen
cable adjuster or cable yoke jam-nut and adjust brake
control cable to achieve approximately 300 PSI BRAKE-
RELEASE pressure.
Stand away from service access of winch and return
Power Shift lever to the BRAKE-ON (neutral) position.
BRAKE RELEASE pressure must return to 0 with the
controls in BRAKE-ON (neutral) position.
TIP: Optimum BRAKE-RELEASE pressure is the
highest pressure you can achieve while ensuring
pressure ALWAYS drops to 0 when controls are
returned to BRAKE-ON. Excessive heat and accel-
erated brake and hydraulic component wear will
result if BRAKE-RELEASE pressure does not
return to 0.
With control in Brake-On (neutral) remove gauge from “B”
port and securely install plug into brake housing.
Discharge accumulator stored oil supply as described
earlier. Remove pressure filter element to gain access to
accumulator. Install gauge assembly to accumulator and
observe pressure. Recharge unit to 190-210 psi (1310-
1448 kPa) with dry nitrogen. If the accumulator will not
hold a gas charge, then the unit should be replaced by
the spring/piston type accumulator. Order kit P/N 62138,
reference Carco Service Bulletin 95. The spring/piston
accumulator requires no periodic service.
Reinstall the filter element as described earlier.
Install access cover plate and tighten eight ½ in. cap-
screws/nuts to 75 lb•ft. (102 N•m) torque.
4. Vent Plug
The vent is located next to the power shift control harness
on all 50B & 70A model winches. It is very important to
keep this vent clean and unobstructed. Whenever the oil
is changed, remove vent plug, clean in safety solvent and
reinstall. Do not replace with a solid plug.
5. PTO Shaft
Winches adapted to J.I. Case, John Deere and Komatsu
powershift tractors are driven by a long, automotive-type
driveline PTO shaft.
The PTO shaft u-joints, slip-joint, flanges and fasteners
must be inspected, tightened and lubricated as required
at least once every three months or 500 tractor hours,
whichever occurs first.
Inadequate PTO shaft maintenance may result in the
accelerated wear of the PTO shaft, U-joint, bearings and
the adapter gear box components.
i
i
Maintenance of the PTO shaft assembly is essential to
reliable winch operation. As the PTO shaft turns at
approximately engine speed and torque, a failure of a u-
joint, shaft or adapter gear box component may result in
property damage or injury.
CAUTION

7
6. Winch Cable (wire rope)
Inspect entire length of wire rope, chokers and hooks
according to wire rope and rigging manufacturers recom-
mendations.
7. Mounting Fasteners
Check/tighten all winch mounting fasteners to recom-
mended torque after the first 100-250 hours of operation,
then every 1000 operating hours or six (6) months,
whichever occurs first.
8. Warm-Up Procedure
Start tractor engine and operate at low idle for five min-
utes.
Shift the control lever to the freespool position (if
equipped). Then, with the tractor engine at low idle, place
Power Shift lever in Reel-In (forward) position. The winch
gear train will rotate and warm the oil to operating tem-
perature.
If not equipped with Free Spool, operate winch alternate-
ly in Reel-Out and Reel-In with little or no load to warm
the oil and lubricate the gear train.
A warm-up procedure is recommended at each start-up
and is essential at ambient temperatures below +40°F
(4°C). Failure to warm-up winch hydraulic system may
result in erratic clutch/brake operation which may result
in property damage, injury or death.
Do not shift Freespool lever and attempt to engage
cable drum while the cable drum or gear train is rotat-
ing. Winch gear train damage may result.
CAUTION
Basic Oil Requirements
15,000 SUS maximum allowed viscosity at cold start-up; requires extended equipment warm-up. 3,000 SUS maxi-
mum allowed viscosity at cold start-up; requires normal equipment warm-up. 60 SUS minimum allowed viscosity at
maximum winch operating temperature, assuming ambient plus 80°F (27°C).
Oil must possess high temperature oxidation stability, rust corrosion protection, good dispersant and detergent char-
acteristics, anti-wear additives and remain compatible with nitrile base seals.
RECOMMENDED OIL
We have published the following specifications to help you determine which lubricant is best suited to your application.
Your lubricant supplier should assure you his product meets this specification. If there is any doubt as to the suitabil-
ity of a lubricant, contact the Carco Winch Service Department, providing a detailed copy of the product specifications.
Cold start-up in this ambient temperature range requires extended equipment warm-up to prevent erratic
clutch and brake operation which may result in property damage, injury or death.

8
SPECIFICATIONS
Unit weight (without oil, cable or specific tractor adapters) . . . . . . . . . . . . . . . . . . . . . . . . . . . . . 1,960 lbs (885 kg)
Gear Ratio Available
Bevel Gear Ratio 1.00:1 1.27:1 1.64:1 2.11:1 2.78:1
Overall Ratio (3-Shaft Gear Train) 22.3:1 28.3:1 36.6:1 47.0:1 62.2:1
Overall Ratio (4-Shaft Gear Train) 40.4:1 51.4:1 66.3:1 85.3:1 112.8:1
Multiply above overall ratios by 1.29 for the adapter gear box used on Komatsu Power Shift tractors.
Barrel Diameter 10 in. (254 mm) 3/4 in. (19 mm) 319 ft (97 m)
Flange Diameter 19-7/8 in. (504 mm) 7/8 in. (22 mm) 226 ft (69 m)
Barrel Length 12-3/8 in. (314 mm) 1 in. (25 mm) 154 ft (47 m)
Throat Clearance approx. 9 in. (229 mm)
3/4 in. (19 mm) 29424
7/8 in. (22 mm) 29425
1 in. (25 mm) 29426
Cable Drum Dimensions
Cable Storage Capacity
Cable Ferrule Part Numbers
B
AD
C
Cable Ferrule Dimensions
A - 2-3/16 in. (56 mm)
B - 2-1/32 in. (52 mm)
C - 2-5/8 in. (67 mm)
D - To match cable diameter
Dry Lubed Dry Lubed Dry Lubed Dry Lubed
Torque (LB-FT)
Grade 5
Grade 8
1/4
20
28
5/16
3/8
18
24
16
24
7/16
1/2
9/16
5/8
8
6
12
9
17
13
24
18
45
35
70
50
23
31
50
35
80
110
80
150
110
110
55
75
150
115
210
160
14
20
13
20
12
18
11
18
265
200
Torque (LB-FT)
Grade 5
Grade 8
380
280
7/8
9
14
420
325
600
450
3/4
10
16
680
1 1/8
7
12
790
590
1290
970
1
8
14
640
7
12
1120
835
910
485
1460
1820
1360
1 3/8
6
12
1460
1095
2385
1790
1 1/4
3160
2370
Q
Bolt Dia.
Inches
Thds Per
Inch
Bolt Dia.
Inches
Thds Per
Inch
1 1/2
6
12
1940
To convert lb•ft to kg•m, multiply lb•ft value by 0.1383.
RECOMMENDED FASTENER TORQUE
Higher or lower torque values for special applications will be specified; such as the use of spanner nuts, nuts on
shaft ends, jam nuts and where distortion of parts or gaskets is critical.
Lubricated torque values based on use of SAE 30wt engine oil applied to threads and face of bolt or nut.
Avoid using thread lubricants as the applied torque may vary by 10 - 40%, depending upon the product used.
Hydraulic System
Oil Capacity (Standard PTO) . . . . . . . . . . . . . . . . . . . . . . . . . . . . . . . . . . . . . . . . . . . . . . . . . 78 qt (74 L)
Oil Capacity (Low PTO) . . . . . . . . . . . . . . . . . . . . . . . . . . . . . . . . . . . . . . . . . . . . . . . . . . . . . 66 qt (63 L)
Differential Unloading Valve Cut-out Pressure . . . . . . . . . . . . . . . . . . . . . .390-410 psi (2,690-2,830 kPa)
Typical Operating Oil Temperature . . . . . . . . . . . . . . . . . . . . . . . . . . . .Up to Ambient Plus 80°F (26.7°C)
Adapter Gear Box Oil Capacity and Type (Komatsu Adaptions Only)
50B & 70A . . . . . . . . . . . . .1.8 qt (1.7 L) . . . . . . . . . . . . . . . . . . . . . . . . . .90 wt API-GL5 Gear Oil

9
CONTROL SYSTEM OPERATION AND TROUBLESHOOTING
BASIC OPERATION
The winch contains an independent, internal hydraulic
system. The winch case serves as a reservoir and stores
filtered oil for the internally mounted hydraulic pump. The
pump is driven by a gear pressed onto the bevel pinion
gear, and supplies oil as long as the tractor PTO shaft is
turning. Oil from the pump is then routed through a pres-
sure filter then directed to the control valve where a
stand-by system pressure is maintained at 320-410 PSI
(2210-2830 kPa).
The system oil pressure is routed through the control
valve body to the solenoid actuated valve cartridges.
When energized by the electronic control system, the
solenoids direct oil to apply the Reel-In and Reel-Out
clutches, release the spring-applied brake and shift the
spring-engaged freespool mechanism. The electronic
winch control system includes a sealed, solid-state joy-
stick control lever and a sealed, solid-state control mod-
ule installed under the RH console of the tractor, an elec-
tric solenoid operated control valve installed within the
winch case, with a wiring harness connected between
them.
The hydraulic control system is equipped with an accu-
mulator. The spring-loaded accumulator stores a small
amount of oil at system pressure to assist the application
of the clutches and release of the brake under all operat-
ing conditions. The stored oil supply may also be used to
release the spring-applied brake whenever the tractor
engine or torque converter is stalled. The accumulator-
stored oil supply is continuously refilled by the pump and
pressure maintenance system in the control valve when-
ever the PTO shaft is turning.
On tractors that supply PTO power through a torque con-
verter, it is possible to cause the torque converter to stall
if the tractor engine speed is too low. It is important that
engine idle speeds be set to factory specifications to
maintain proper operation.
The solid-state joystick control lever has no contact points
to wear out or need adjustment, aside from the small
push-button switch on the top of the lever. This button
MUST be depressed to enable the electronic control sys-
tem to perform any winch function. This feature prevents
accidental or unwanted winch actuation.
The joystick produces a signal by a magnetically induced
voltage as the control lever is moved near the sensing
devices on the circuit board beneath the lever. The small,
induced voltage is transmitted to the control module
mounted beneath the console. The job of the control
module is to receive 24V DC power from the tractor, filter
this power supply to protect the electronics, then produce
the correct combination of 24V DC signals to energize the
appropriate solenoid cartridges in the control valve. The
control valve is mounted inside the winch case behind the
large access cover on the RH side. When energized by
the control module, the solenoids send control oil pres-
sure to perform the specific winch functions based on the
position of the joystick lever. An additional terminal built
into the winch end of the wiring harness allows for diag-
nostics and troubleshooting of electrical problems and
components. A small red indicator light, installed next to
the joystick, will illuminate to indicate that the hydraulic oil
filter is beginning to bypass and should be serviced if the
light remains on.
A small volume of oil is stored in the spring-type accumu-
lator at control system pressure. This stand-by pressure
ensures quick response to the operator's commands,
regardless of engine speed or winch load. The stand-by
pressure is maintained by the joint operation of a pres-
sure switch and a main pressure control solenoid valve.
The pressure switch will be closed and send current to
the main pressure solenoid until stand-by pressure reach-
es 370 PSI (2550 kPa). When the cutout pressure is
reached, the pressure switch de-energizes the solenoid
valve. The stand-by pressure is contained in the control
valve housing by a check valve, and slowly decreases to
315 PSI (2170 kPa), where it will close the pressure
switch contacts and start the charging process again.
When the operator selects a winch function, the pressure
switch is not used and the control module activates the
main pressure solenoid. A relief valve limits the main sys-
tem pressure to approximately 400 PSI (2760 kPa) during
clutch and brake actuation.
The wiring harness provides the vital connection between
the control module and the control valve. The connecting
pins and sockets are numbered for identification and trou-
ble-shooting. The pin and socket numbers are referenced
in the following descriptions of winch functions.

10
CONTROL OPERATION
A thorough understanding of the control system is need-
ed before any trouble-shooting is begun. Please review
the following descriptions of the control system to
become familiar with the interaction of all of the control
circuit components.
All control diagnostic tests should be performed with an
accurate 0-600 PSI (0-7000 kPa) hydraulic pressure
gauge and an accurate digital or analog multi-meter. A
diagnostic connector is incorporated into the wiring har-
ness and may be found near the winch end of the har-
ness. The main hydraulic test port is located on the RH
side of the winch case next to the wiring harness con-
nector. A female quick disconnect coupler is required for
using the gauge.
Discharge accumulator oil supply before removing any
hydraulic lines or servicing winch. Personal injury may
result from sudden release of oil pressure. To discharge
the accumulator, stop the engine, turn the key switch on,
then slowly cycle the joystick lever into full REEL-IN and
REEL-OUT positions a minimum of five (5) times.
NOTE: The tractor electrical system must be ON.

WIRING HARNESS
(70A for D6R Series II)
11

12
WIRING HARNESS
(50B for D5N/D6N)

13
BLACK
RED
RED
BLUE
BLUE
WHITE/BLACK ST
WHITE/BLACK ST
BROWN
BROWN
WHITE
WHITE
ORANGE
ORANGE
GREEN
GREEN
BLACK
BLACK
A
B
C
D
E
F
G
H
J
K
L
M
N
O
P
Q
R
S
T
U
V
W
X
RED
BLUE
WHITE/BLACK ST
BROWN
WHITE
ORANGE
GREEN
TAN
BLACK
123456789101112
BLACK
RED
BLUE
WHITE/BLACK ST
BROWN
WHITE
ORANGE
GREEN
TAN
BARE
X
X
11
1
2
3
4
5
6
7
8
9
10
12
RED
BLACK
BLUE
WHITE/BLACK ST
BROWN
YELLOW (OPT)
WHITE
ORANGE
GRAY (OPT)
TAN
1 RED
2 BLACK
3 ORANGE
4 PURPLE
5 BLUE
6 YELLOW
+5V
GND
DECODE
ENABLE
Y AXIS
X AXIS
CONNECTOR
2
1
PIN
NO
RED
GREEN TO FILTER LIGHT LED
+
-
BLACK
RED BLACK -
ORANGE + (-) 24 VDC
(+) 24 VDC
9 AMP
SYSTEM FLOW
REEL IN
BRAKE
REEL OUT
FREESPOOL
PIN
NO
PIN
LTR
CONNECTOR CONNECTOR
WINCH
DIAGNOSTIC
CONNECTOR
PIN NO. ---
FUNCTIONS
315/370
PSI
A
CC ISOLATION
BLACK
TRACTOR HARNESS
A
SYS
C2
BR
C1
FS
FILTER BYPASS
INDICATOR
GROUND ONTO
VALVE HOUSING
CONTROL
MODULE
EXTERNAL HARNESS
HARNESS WITHIN WINCH CASE
POWER
SUPPLY
CONNECTOR
JOYSTICK
CONTROL
VALVE
WIRING HARNESS
(Early D6R, D5M/D6M)

14
P
390/410 PSI
15 PSI
FLG L
BRAKE LUBE
& COOLING
ORIFICE
LUBE
FS
315/370
PSI
PS
A
1
C2 BR C1
15 PSI
REEL OUT
CLUTCH
BRAKE
REEL IN
CLUTCH
ORIFICE ORIFICE
PRESSURE
SWITCH
ACCUMULATOR
FS
BULL GEAR
PUMP
FILTER
SUCTION
STRAINER
A
C2 BR C1
SYS
23
13
4
6
7
11
9
12
OOOOOOO LOW PRESSURE
HIGH PRESSURE
10
GREEN (9)
FILTER
HEAD
A
A
PS
BR
C2
FS
C1
RED (1)
BROWN (4)
ORANGE (7)
BLACK (11) - GROUND
BLUE (2)
WHITE (6)
WHITE W/ BLACK STRIPE (3)
BLACK (11) - GROUND
12 11 10 9 8 7
6
54
321
(-) GROUND
(+) 24 VDC (+) 24 VDC, SLOWLY
CYCLING ON-OFF
(ON WHILE CHARGING,
BREAK-ON (NEUTRAL) "CHARGING"
When "charging", 24 volts DC will be seen at the red and
blue wire within the winch case, and at terminals 1 and
2 at the diagnostic connector. The blue wire and pin 2
will be de-energized when the circuit is "unloaded".
The pressure maintenance system operates continuous-
ly to maintain a stand-by supply of oil pressure for the
control system. The pressure maintenance system con-
sists of the following components:
Item 9 - Check Valve
Item 10 - Main Pressure Solenoid Valve
Item 11 - Stand-by System Pressure Switch
Item 13 - Accumulator Holding Cartridge (not
found on early units)
Item A - Accumulator
Oil from the pump passes through the filter and enters
the valve housing, passing through the check valve (9)
and holding cartridge (13) on its way to the accumulator
(A). When charging first occurs, the pressure switch (11)
contacts are closed producing a signal to energize the
main pressure solenoid (10) to block the flow of oil to the
lubrication circuit.At this time, all of the oil from the pump
is directed to fill the accumulator and the pressure
gallery in the control valve.
CONTROL VALVE DIAGNOSTICS PLUG
BRAKE ON (NEUTRAL) “CHARGING”

15
P
390/410 PSI
15 PSI
FLG L
BRAKE LUBE
& COOLING
ORIFICE
LUBE
FS
315/370
PSI
PS
A
1
C2 BR C1
15 PSI
REEL OUT
CLUTCH
BRAKE
REEL IN
CLUTCH
ORIFICE ORIFICE
PRESSURE
SWITCH
ACCUMULATOR
FS
BULL GEAR
PUMP
FILTER
SUCTION
STRAINER
A
C2 BR C1
SYS
23
13
4
6
7
11
9
12
OOOOOOO LOW PRESSURE
HIGH PRESSURE
10
PS
BR
C2
FS
C1
RED (1)
BROWN (4)
ORANGE (7)
BLACK (11) - GROUND
BLUE (2)
WHITE (6)
WHITE W/ BLACK STRIPE (3)
BLACK (11) - GROUND
GREEN (9)
FILTER
HEAD
A
A
12 11 10 9 8 7
6
54
321
(-) GROUND
(+) 24 VDC (+) 24 VDC, SLOWLY
CYCLING ON-OFF
(ON WHILE CHARGING,
When the pressure at the pressure switch (11) reaches
approximately 370 PSI (2550 kPa), the switch opens and
the main pressure solenoid (10) is de-energized. In the
de-energized position, the main pressure solenoid valve
(10) allows pump oil to flow through the lube circuit and
return to the winch sump. The oil stored in the accumu-
lator is trapped by the check valve (9) and the accumu-
lator holding cartridge (13). This oil is available for clutch
application and brake release.
When the pressure at the pressure switch (11) decreas-
es to approximately 315 PSI (2170 kPa), either through
system demand or internal system leakage, the pres-
sure switch (11) contacts will close producing a signal to
energize the main pressure solenoid valve (10). When
energized, the main pressure solenoid valve (10) blocks
the flow of oil to the lube circuit and the pump will refill
the accumulator to approximately 370 PSI (2550 kPa).
In the "unloaded" mode, the main pressure solenoid is
de-energized and the oil from the pump is flowing back
to sump through the lube circuit. There is very little load
on the winch pump at this time, thus reducing wear and
heat.
CONTROL VALVE DIAGNOSTICS VALVE
BREAK ON “UNLOADED”

16
P
390/410 PSI
15 PSI
FLG L
BRAKE LUBE
& COOLING
ORIFICE
LUBE
FS
315/370
PSI
PS
A
1
C2 BR C1
15 PSI
REEL OUT
CLUTCH
BRAKE
REEL IN
CLUTCH
ORIFICE ORIFICE
PRESSURE
SWITCH
ACCUMULATOR
FS
BULL GEAR
PUMP
FILTER
SUCTION
STRAINER
A
C2 BR C1
SYS
23
13
4
6
7
11
9
12
OOOOOOO
LOW PRESSURE
HIGH PRESSURE
10
PS
BR
C2
FS
C1
RED (1)
BROWN (4)
ORANGE (7)
BLACK (11) - GROUND
BLUE (2)
WHITE (6)
WHITE W/ BLACK STRIPE (3)
BLACK (11) - GROUND
GREEN (9)
FILTER
HEAD
A
A
12 11 10 9 8 7
6
54
321
(-) GROUND
(+) 24 VDC (+) 0 TO 24 VDC
CONTROL VALVE DIAGNOSTICS PLUG
BRAKE-OFF
During BRAKE-OFF, 24 volts DC will be seen at the red and
blue wires within the winch case, and at pins 1 and 2 of the
diagnostics connector on the wiring harness. As the joystick
lever moves from the BRAKE-ON position into the full BRAKE-
OFF position, the voltage at the brown wire and pin 4 increase
proportionally from 0 to 24 volts DC.
To release the spring-applied brake requires the following com-
ponents:Item 2 - Brake Control Solenoid
Item 6 - Relief Valve
Item 10 - Main Pressure Solenoid Valve
Item 13 - Accumulator Holding Valve
Item A - Accumulator
In BRAKE-OFF, only the brake is released; the directional
clutches are not affected. The brake circuit is unique in that the
brake release oil pressure is proportional to the movement of
the joystick lever into the BRAKE-OFF position. All other winch
functions receive full control pressure, 400 PSI (2760kPa) and
full 24 volts DC to the solenoid valves. The main pressure sole-
noid valve (10) and the accumulator holding valve (13)
receives 24 volts DC through the blue wire within the winch
case. The full flow of the pump is directed to the oil pressure
gallery in the control valve. The pressure switch (11) is not
used to control the maximum control system oil pressure when
a winch function is selected. Instead of the pressure switch
(11), the relief valve (6) limits the maximum pressure in the
control circuit to approximately 400 PSI (2760 kPa).
After first pressing the enable switch, the movement of the joy-
stick lever toward the BRAKE-OFF position will cause an
increase in the voltage sent to the brake control solenoid (2)
through the brown wire and pin 4 on the diagnostics plug. As
voltage increases, the valve opens further to send higher con-
trol pressure to release the spring-applied brake. When the joy-
stick lever is placed in the full BRAKE-OFF position, full 24 volt
DC current is sent to the control valve and full 400 PSI (2760
kPa) oil pressure is sent to fully release the brake.
When the joystick lever is released, the electrical signal to the
solenoids is lost, the solenoid valves exhaust the control oil
pressure to the winch sump, and the spring-applied brake
reapplies to hold the load. The control valve returns to the
BRAKE-ON mode and the pressure maintenance system
begins slowly cycling to maintain a stand-by supply of control
oil pressure.
BRAKE-OFF
Voltage is proportional to control handle move-
ment. If a test light is used, brightness will be
proportional to control handle movement.

17
P
390/410 PSI
15 PSI
FLG L
BRAKE LUBE
& COOLING
ORIFICE
LUBE
FS
315/370
PSI
PS
A
1
C2
BR C1
15 PSI
REEL OUT
CLUTCH
BRAKE
REEL IN
CLUTCH
ORIFICE ORIFICE
PRESSURE
SWITCH
ACCUMULATOR
FS
BULL GEAR
PUMP
FILTER
SUCTION
STRAINER
A
C2 BR C1
SYS
23
13
4
6
7
11
9
12
OOOOOOO
LOW PRESSURE
HIGH PRESSURE
10
REEL-IN
GREEN (9)
FILTER
HEAD
A
A
PS
BR
C2
FS
C1
RED (1)
BROWN (4)
ORANGE (7)
BLACK (11) - GROUND
BLUE (2)
WHITE (6)
WHITE W/ BLACK STRIPE (3)
BLACK (11) - GROUND
12 11 10 9 8 7
6
54
321
(-) GROUND
(+) 24 VDC
CONTROL VALVE DIAGNOSTICS PLUG
REEL-IN
During REEL-IN, 24 volts DC will be seen at the red, blue,
brown and white with black stripe wires within the winch case,
and at pins 1, 2, 3 and 4 of the diagnostics connector on the
tractor wiring harness.
To apply the REEL-IN clutch and release the spring-applied
brake requires the following components:
Item 1 - C2 Clutch Control Solenoid
Item 2 - Brake Control Solenoid
Item 6 - Relief Valve
Item 10 - Main Pressure Solenoid
Item 13 - Accumulator Holding Valve
Item A - Accumulator
With the enable button pressed and the joystick lever moved to
the REEL-IN position, a signal is sent to the control module to
initiate a sequence of 24 volt DC signals to energize the prop-
er solenoids of the control valve within the winch case. The
main pressure solenoid valve (10) is energized to bring the
control system oil pressure from stand-by pressure up to full
pressure, 400 PSI (2760 kPa), by blocking the path to the lube
circuit. The control system pressure is limited by the relief valve
(6). The accumulator holding solenoid valve (13) is opened to
allow the stored oil in the accumulator to enter the pressure
gallery of the control valve. This action improves the response
time and consistency of the REEL-IN clutch. The brake control
solenoid (2) will be energized to begin the release of the brake
as the C2 clutch control solenoid (1) is energized to begin the
application of the REEL-IN clutch. The timing of the brake
release and clutch application is electronically controlled to
provide a shift with a minimal amount of load "fall-back" for
good load control while minimizing clutch/brake disc scrubbing
due to overlap.
When the joystick lever is released and returned to BRAKE-
ON, the signal to the control module is cleared and the 24-volt
DC signals to energize the solenoids are switched off. The
clutch releases as the brake applies to hold the load. The pres-
sure maintenance system will return to slowly cycling to main-
tain a stand-by supply of control oil pressure.

18
BR C1
15 PSI
REEL OUT
CLUTCH
BRAKE
REEL IN
CLUTCH
ORIFICE ORIFICE
PRESSURE
SWITCH
ACCUMULATOR
FS
BULL GEAR
PUMP
FILTER
SUCTION
STRAINER
A
C2 BR C1
SYS
23
13
4
6
7
11
9
12
OOOOOOO
LOW PRESSURE
HIGH PRESSURE
10
P
390/410 PSI
15 PSI
FLG L
BRAKE LUBE
& COOLING
ORIFICE
LUBE
FS
315/370
PSI
PS
A
1
C2
GREEN (9)
FILTER
HEAD
A
A
PS
BR
C2
FS
C1
RED (1)
BROWN (4)
ORANGE (7)
BLACK (11) - GROUND
BLUE (2)
WHITE (6)
WHITE W/ BLACK STRIPE (3)
BLACK (11) - GROUND
12 11 10 9 8 7
6
54
321
(-) GROUND
(+) 24 VDC
REEL-OUT
CONTROL VALVE DIAGNOSTICS PLUG
REEL-OUT
For REEL-OUT, 24 volts DC will be present at the red, blue,
brown and orange wires within the winch case, and at pins 1,
2, 4 and 6 of the diagnostics connector on the wiring harness.
To apply the REEL-OUT clutch and release the spring-applied
brake requires the following components:
Item 2 - Brake Control Solenoid
Item 3 - C1 Clutch Control Solenoid
Item 6 - Relief Valve
Item 10 - Main Pressure Solenoid
Item 13 - Accumulator Holding Valve
Item A - Accumulator
With the enable button pressed and the joystick lever moved to
the REEL-OUT position, a signal is sent to the control module
to initiate a sequence of 24 volt DC signals to energize the
proper solenoids of the control valve within the winch case.
The main pressure solenoid valve (10) is energized to bring the
control system oil pressure from stand-by pressure up to full
pressure, 400 PSI (2760 kPa), by blocking the path to the lube
circuit. The control system pressure is limited by the relief valve
(6). The accumulator holding solenoid valve (13) is opened to
allow the stored oil in the accumulator to enter the pressure
gallery of the control valve. This action improves the response
time and consistency of the REEL-IN clutch. The brake control
solenoid (2) will be energized to begin the release of the brake
as the C2 clutch control solenoid (1) is energized to begin the
application of the REEL-IN clutch. The timing of the brake
release and clutch application is electronically controlled to
provide a shift with a minimal amount of load "fall-back" for
good load control while minimizing clutch/brake disc scrubbing
due to overlap.
When the joystick lever is released and returned to BRAKE-
ON, the signal to the control module is cleared and the 24-volt
DC signals to energize the solenoids are switched off. The
clutch releases as the brake applies to hold the load. The pres-
sure maintenance system will return to slowly cycling to main-
tain a stand-by supply of control oil pressure.
Other manuals for CARCO 50B
1
This manual suits for next models
1
Table of contents
Other Paccar Winch manuals