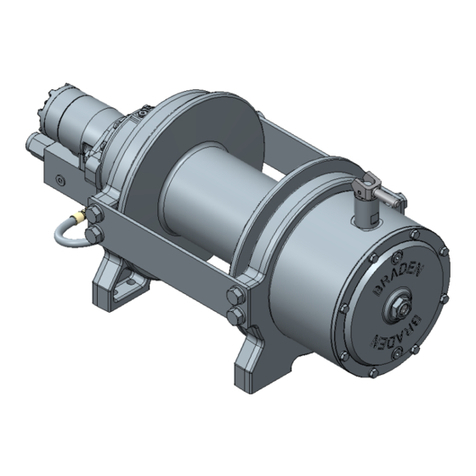
Paccar CARCO 50B User manual

OPERATION &
PREVENTIVE MAINTENANCE
MANUAL
WINCH MODELS 50B & 70A
WITH ELECTRONIC
CONTROLS
LIT2089 REV 2
10/2008
Printed in U.S.A. Copyright 2008 PACCAR Winch Division
All rights reserved.
PACR WINCH DIVISION
P.O. BOX 547 BROKEN ARROW, OK U.S.A. 74013
PHONE (918) 251-8511 FAX (918) 259-1575
www.paccarwinch.com
CARCO®


Please read and understand this entire manual
BEFORE operating or servicing your CARCO winch.
Retain this manual for future reference.
This manual contains instructions for the operation of
CARCO Models 50B & 70A power shift winches. When
instructions apply to only one series of winch, the spe-
cific model number (i.e. 50B or 70A only) will appear at
the beginning of the pertinent text. If not identified in this
manner, the text applies to BOTH series of winches;
50B & 70A.
Some illustrations in this manual may show details or
attachments which may be different from your winch.
Also, some components may have been removed for
illustrative purposes.
Continuing product improvement may cause changes in
your winch which may not be included in this manual.
Whenever a question arises regarding your CARCO
winch or this manual, please contact your nearest
CARCO dealer or the CARCO SERVICE DEPART-
MENT at 1-918-251-8511, Monday - Friday, 0800 hrs -
1630 hrs CST or by FAX at 1-918-259-1575. Provide
the complete winch MODEL NUMBER and SERIAL
NUMBER when making inquiries.
FOREWORD
TABLE OF CONTENTS
General Safety Recommendations . . . . . . . . . . . . . . . . . . . . . . . . . .2
Model Description . . . . . . . . . . . . . . . . . . . . . . . . . . . . . . . . . . . . . . .3
Winch Operation . . . . . . . . . . . . . . . . . . . . . . . . . . . . . . . . . . . . . . . .4
Control Operation . . . . . . . . . . . . . . . . . . . . . . . . . . . . . . . . . . . . . . .5
Freespool Adjustment . . . . . . . . . . . . . . . . . . . . . . . . . . . . . . . . . . . .7
Preventive Maintenance & Specifications . . . . . . . . . . . . . . . . . . . . .8
Recommended Oil . . . . . . . . . . . . . . . . . . . . . . . . . . . . . . . . . . . . . .10
Metric Conversion Chart . . . . . . . . . . . . . . . . . . . . . . . . . . . . . . . . .12
WARNING - This emblem is used to warn against
hazards and unsafe practice which COULD result in
severe personal injury or death if proper procedures
are not followed.
CAUTION - This emblem is used to warn against
potential or unsafe practices which COULD result in
personal injury, and product or property damage if
proper procedures are not followed.
CAUTION
Safety and informational callouts used in this manual include:
1
CAUTION
WARNING
! !

Safety for operators and ground personnel is of prime
concern. Always take the necessary precautions to
ensure safety to others as well as yourself. To ensure
safety, the tractor and winch must be operated with
care, concern by the operator for the equipment and a
thorough knowledge of the machine's performance
capabilities.The following recommendations are offered
as a general safety guide. Local rules and regulations
will also apply.
1. Read all warning tag information and become
familiar with all controls BEFORE operating winch.
2. Never attempt to clean, oil or perform any mainte-
nance on a machine with the engine running,
unless instructed to do so in the Service Manual.
3. Before starting tractor, be certain all controls move
freely and are placed in the "Brake-On" (neutral)
position.
4. Never operate winch controls unless you are prop-
erly seated at the operators station on the tractor
and you are sure personnel are clear of work area.
5. Operate winch line speeds to match job conditions.
6. Assure that personnel who are responsible for
hand signals are clearly visible and that the signals
to be used are thoroughly understood by everyone.
7. Never attempt to handle winch cable when the
hook end is not free.
8. Leather gloves should be used when handling
winch cable.
9. Ground personnel should stay in view of tractor
operator and clear of winch drum. Do not allow
ground personnel near winch line under tension. A
safe distance of at least 1½ times the length of the
cable in use should be maintained.
10. When winding cable on the winch drum, never
attempt to maintain tension by allowing cable to
slip through hands. Always use "hand-over-hand"
method.
11. Use correct size ferrule for cable and pocket in
winch drum. Never use knots to secure or attach
cable.
12. Inspect rigging, winch and tractor at the beginning
of each work shift. Any cable with broken strands
of rigging worn or damaged should be replaced.
13. Position tractor for straightest line of pull. Use fair-
lead if side pulls are frequently encountered.
14. The cable anchor or ferrule pocket in the cable
drum is designed to provide a self release in the
event a back-sliding load must be released from
the tractor in an emergency situation. The cable
anchor or ferrule alone will NOT support rated
linepull. Therefore, a minimum of five (5) complete
wraps of cable must be maintained on winch drum.
15. Be sure of tractor ground stability before winching
in load.
16. Store unused chokers, slings and rigging in a neat
and orderly fashion to prevent damage to equip-
ment or injury to personnel.
17. The maximum rated bare drum line pull of the
CARCO 50B is 69,200 LB (307.8 kN)* and 89,800
lb (399.4 kN)** for the CARCO 70A. Do not oper-
ate the winch under loads that exceed the maxi-
mum rated bare drum line pull. If excessive loads
are encountered, use a multi-part line and sheave
blocks. Any attempt to exceed the capabilities of
one winch (such as coupling 2 or more tractors
together) is extremely hazardous.
* Breaking strength of 7/8 in. (22 mm) IPS wire rope.
**Breaking strength of 1 in. (25 mm) IPS wire rope.
18. The factory approved adaptions for CARCO winch-
es are designed and intended for use on specific
models of crawler tractors. Changing winches
between tractors is not possible in some cases
because of differences in tractor models. Some
changes cannot be approved by CARCO because
of safety limitations. Call a CARCO dealer or the
Factory prior to attempting winch modifications or
before mounting on a different tractor.
19. CARCO power shift winches are equipped with
hydraulic accumulators. Discharge accumulator
stored oil supply before removing any hydraulic
lines or fittings or servicing winch. Personal injury
may result from the sudden release of oil pressure.
To discharge the accumulator, stop the engine,
slowly cycle the Power Shift control handle into full
Haul-In then Pay-Out positions a minimum of five
(5) times.
20. On machines having hydraulically, mechanically
and/or cable controlled equipment, be certain the
equipment is either lowered to the ground or
blocked securely before servicing, adjusting and/or
repairing the winch. Always apply tractor parking
brakes and lower equipment before dismounting
the tractor.
GENERAL SAFETY RECOMMENDATIONS
FAILURE TO OBEY THE FOLLOWING SAFETY
RECOMMENDATIONS MAY RESULT IN PROPER-
TY DAMAGE, INJURY OR DEATH.
2
CAUTION
WARNING
! !

The CARCO Power Shift Winch is a single drum unit
that mounts to the rear of a crawler tractor. It is driven
by engine power through the tractor PTO (Power Take-
Off). The winch may be operated independently or with
the tractor transmission engaged. When operated prop-
erly, it is capable of utilizing maximum engine horse-
power. The standard winch is equipped with equal
speed gearing, power-in and power-out multi-disc oil
actuated friction clutches and a spring applied, hydrauli-
cally released multi-disc oil brake.
The winch may be manufactured as a Standard (or High) PTO
orLowPTOconfiguration,dependingonthetractorapplication.
IntheStandardPTOconfiguration,thebevelgeargroup,clutch-
es and brake assembly are located in the upper bores of the
winch case.
The Low PTO configuration has the bevel gear group,
clutches and brake assembly located in the lower bores
of the winch case.
The 50B winches may have either a 3-shaft or 4-shaft
gear train configuration depending on the tractor horse-
power, PTO speed and winch line speed requirements
of the winch application. The 70Awinches are manufac-
tured in a 4-shaft configuration, except when used in a
very limited number of special applications.
Standard and Low PTO winch configurations are avail-
able with either standard or slow speed gear ratios. The
standard speed winch is primarily used in logging, land
clearing and general utility applications. The standard
speed models have gear ratios which closely match the
cable drum rotation speed in Reel-In (forward) to the
tractor reverse track speeds for optimum advantage in
tractor recovery applications.
The slow speed winch configuration is similar to the
standard speed unit, but uses slow speed gearing for
greater load control. A slow speed winch is well suited
for oil and gas field, mining and pipeline applications.
Optional features increase the ability of the winch to
meet specific application requirements. Options avail-
able for the 50B & 70A series winches include:
• Free Spool
• Gear Ratios
• Three or Four Roller Fairleads
The winch model number is an important reference as
to the optional components included when the winch
was manufactured. The identification plate located on
the RH side of the winch contains this code, as well as
the winch serial number.
MODEL DESCRIPTION
MODEL
C 0 0 0 0 0 E
Bevel Gear
Ratio
A-1:1
B-1.27:1
C-1.64:1
D-2.11:1
E-2.79:1
50B & 70A
0-Overwind
1-Underwind
0-Standard Brake
0-Without Free Spool
1-With Free Spool
0-Four shaft winch
1-Three shaft winch
0-No fairlead
3-Three roller fairlead
4-Four roller fairlead
E-Electronic controls
The winch model number contains the following con-
figuration data:
Standard PTO Shown
Important: Always refer to the serial number and model num-
ber when requesting information or service parts.
ID PLATE S/N LOCATIONS
3

WINCH OPERATION
HYDRAULIC SYSTEM
The winch contains an independent, internal hydraulic
system. The winch case serves as a reservoir and
stores filtered oil for the internally mounted hydraulic
pump. The pump is driven by a gear pressed onto the
bevel pinion gear, and supplies oil as long as the tractor
PTO shaft is turning. Oil from the pump is then routed
through a pressure filter then directed to the control
valve in the winch case where a stand-by system pres-
sure is maintained at 320-410 PSI (2210-2830 kPa).
Movement of the control lever initiates electrical signals
which are routed to solenoids on the control valve in the
winch. Oil is then routed to the appropriate Reel-In or
Reel-Out clutch, Brake pack or Freespool cylinder to
perform the selected winch function.
The winch hydraulic system is equipped with a piston-
type accumulator. The accumulator stores a small
amount of oil at system pressure to assist the applica-
tion of clutches and release the brake under all operat-
ing conditions.
The stored oil supply may also be used to release the
spring-applied brake whenever the tractor engine or
torque converter is stalled. The accumulator-stored oil
is continuously refilled by the winch pump and valve
whenever the tractor PTO is turning.
NOTE: On tractors which supply PTO power
through the torque converter, it is possible to
cause the torque converter to stall if the tractor
engine speed is too low. It is important that engine
idle be set to factory specifications.
GEAR TRAIN
The winch bevel pinion, bevel gears, hydraulic pump
and clutch friction discs are rotating whenever the trac-
tor PTO shaft is rotating. Application of a clutch, Reel-
In or Reel-Out, and the simultaneous release of the
brake will cause rotation of the remaining gear train and
cable drum. See illustrations below.
Discharge the accumulator oil supply BEFORE
removing any hydraulic lines or servicing the winch.
Personal injury may result from the sudden release of
oil under pressure. To discharge the accumulator,
shut the engine off, then slowly cycle the Power Shift
control lever into full Reel-In and Reel-Out positions a
minimum of five (5) times. The tractor master switch
and ignition must be ON.
CAUTION
Low PTO
4 Shaft
Gear Train
Standard PTO
3 Shaft
Gear Train
4
i
The clutch shaft assembly (with bevel gears) must turn
40.4 times for one (1) rotation of the cable drum on a 4
shaft gear train winch and 22.3 times on a 3 shaft gear
train winch.
The direction of the tractor PTO shaft rotation and the
right and left hand clutch location is determined by fac-
ing the rear of the tractor.
The cable drum rotation may be easily changed from
overwind (standard) to underwind by reversing clutch
pressure lines at ports C1and C2on the control valve in
the winch, and installing the wire rope in the opposite
cable drum ferrule pocket.

Two actions are required to initiate any winch operation.
First, the button on top of the control lever MUST be
depressed. Next, move the lever into one of four direc-
tions to select a winch function. Movement of the lever
without first depressing the button will NOT result in
winch function and is intentional to prevent inadvertent
winch function.
The winch functions available with this control lever are
Reel-In (forward), Reel-Out (reverse), Brake-Off and
Freespool. The spring-centered, neutral position of the
lever is Brake-On. Note that it is NOT possible to con-
trol winch cable drum speed in the Reel-In and Reel-
Out functions with the control lever. The speed of cable
drum rotation must be controlled by varying the tractor
engine RPM. Sufficient hydraulic pressure will be avail-
able to fully apply the clutches at engine (PTO) speeds
above low idle. If the winch is installed on a direct drive
tractor, the tractor master clutch MUST be engaged
BEFORE moving the winch control lever. The internal
winch pump is only driven when the PTO shaft is turn-
ing. A continuous supply of oil is needed to provide reli-
able clutch and brake operation.
Brake-On. The control lever is spring-
centered to Brake-On. The brake is
applied by spring force. The cable drum
and load is held secure by the spring-
applied brake.
Reel-In (forward). Depress the button
and move the lever forward into the
fully engaged position. The winch
brake is hydraulically released and the
Reel-In clutch is hydraulically applied.
Reel-Out (reverse). Depress the
button and move the lever toward the
rear of the tractor into the fully
engaged position. The winch brake is
hydraulically released and the Reel-
Out clutch is hydraulically applied.
CONTROL OPERATION
5

Brake-Off. Depress the button and
move the lever toward the opera-
tor, hydraulically releasing the
winch brake. Partial brake release
may be achieved by slowly moving
the control lever in the Brake-Off direction. The amount
of brake release is proportional to the distance the lever
is moved.
Full brake release is achieved by mov-
ing the lever fully toward the operator
into the lock position. With the brake
released, the tractor may drive away
from the load. Always return the lever
to the Brake-On position when the
operation is complete.
Freespool. Depress
the button and move
the lever fully away
from the operator.
When Freespool is
selected, the cable
drum drive gears are
disengaged, allowing
wire rope to be easily pulled off the cable drum by hand.
The brake is automatically released in Freespool.
NOTE: Freespool is to be used for handling wire
rope by hand ONLY. Do NOT attempt to release
a load with Freespool, or to engage the gear train
while the cable drum is rotating or while the trac-
tor is in motion.
FREE SPOOL CONTROL OPERATION
6
i

FREESPOOL ADJUSTMENT
Using a long screw driver or pry bar, turn the threaded
adjuster clockwise until tight. Tap the adjuster with a
hammer to seat the bearing and continue turning until
the adjuster can no longer be tightened. Back the
adjuster out no more than 1/16 turn maximum and
secure with lock plate and capscrews. Tighten the cap-
screws to 75 lb•ft (102 N•m) torque.
NOTE: Tightening the threaded adjuster pushes
the tapered bearing cup (outer race) into closer
contact with the bearing cone and increases the
bearing drag; much like tightening a wheel bear-
ing nut on an automobile or truck. The snug fit-
ting bearing cup will NOT move outward with the
threaded adjuster when the adjuster is loosened.
The winch must be operated under load for a
brief period to allow the gear train load to push
the outer bearing cup out against the threaded
adjuster before a reduction in bearing drag can
be noticed.
Freespool is ONLY to be used when the tractor is
stopped for pulling wire rope off the cable drum by
hand. DO NOT use Freespool when the tractor is in
motion, to release a load or to move away from a
load that is attached to the wire rope. Damage to the
gear train and loss of load control may result. Loss
of load control may result in property damage, injury
or death.
To release a load, or to move away from a load, the
Reel-Out function or the Brake-Off function MUST
be used. Remove any load from the winch cable
BEFORE selecting Freespool.
The tractor and the winch cable drum MUST be
stopped BEFORE engaging the gear train. Gear
train damage will result from attempting to engage
the gear train when the cable drum is rotating.
Do not back off adjuster more than 1/16 turn as this
allows excessive shaft end play and may cause gear
train misalignment, accelerated wear and noise.
CAUTION
7
i
CAUTION
WARNING
! !

PREVENTIVE MAINTENANCE & SPECIFICATIONS
A regular program of preventive maintenance for your
CARCO winch will minimize the need for emergency
servicing and promote long product life and trouble-free
service.
The service intervals suggested in this manual will opti-
mize component service life. The intervals may be grad-
ually increased or decreased with experience of a par-
ticular lubricant and evaluation of your application.
1. OIL LEVEL
Check the oil level at the beginning of each work shift,
with the tractor and winch in a level position. The oil
must be visible in the upper half of the sight gauge
located on the RH side of the winch. If an oil level plug
is used in place of the sight gauge, the oil level should
be at the bottom of oil level port. Add oil as required
through the fill port on the top LH side of the winch case.
2. OIL CHANGE, FILTER AND STRAINER
SERVICE
Under normal operating conditions, the oil and pressure
circuit filter should be changed, and the suction strainer
cleaned after the first 100-250 hours of operation.
Follow-up oil and filter changes should occur after every
1000 hours or 6 months of operation, whichever occurs
first, or when the filter bypass light remains on after ini-
tial warm-up.
To drain the oil, place the tractor and winch in a level
position and remove the drain plug located on the lower
RH side of the winch case. Drain the oil into a suitable
container and recycle or dispose of used oil in an envi-
ronmentally responsible manner. Install the drain plug
securely after all oil has been drained. Next, remove the
suction strainer cover, compression spring and seal
rings. Remove the suction strainer from the winch case,
then remove the metal band and magnetic rods from
the strainer. Thoroughly wash the strainer in clean sol-
vent and blow dry with compressed air or clean shop air.
Inspect the wire mesh for damage or clogging with
debris. Do NOT reuse a damaged suction strainer.
Discharge the accumulator oil supply BEFORE
removing any hydraulic lines or servicing the winch.
Personal injury may result from the sudden release of
oil under pressure. To discharge the accumulator, shut
the engine off, then slowly cycle the control lever into
full Reel-In and Reel-Out positions a minimum of five
(5) times. The tractor master switch and ignition must
be ON.
CAUTION
Hot oil may cause severe injury. Make certain the oil
has cooled to safe temperature (less than 110°F or
43°C) before servicing.
FILTER
ACCESS
COVER
OIL DRAIN
OIL
LEVEL
VENT
PLUG
OIL
FILL
PLUG
SUCTION
STRAINER
Hot oil may cause severe injury. Make certain the oil
has cooled to safe temperature (less than 110°F or
43°C) before servicing.
8

Install the magnetic rods onto the strainer and secure
with the metal band. Lubricate the O-ring and install the
strainer, seal rings, spring and cover back into the
winch.
Refill the winch to the proper level with the recommend-
ed oil. Refer to page 10 for oil recommendations.
OIL CAPACITY:
50B & 70A Std. PTO - 78 qt. (74 L)
50B & 70A Low PTO - 66 qt. (63 L)
The pressure filter is located inside the large RH access
cover. Remove the cover, locate the spin-on filter and
remove the filter element with a filter wrench.
Lubricate the filter seal and adapter threads with
hydraulic oil and install the new filter onto the filter head.
Tighten the filter ½ - ¾ turn by hand after the seal con-
tacts the filter head.
Start the tractor and operate the engine at low idle. BE
SURE the winch has been filled with oil BEFORE start-
ing the engine. Correct any leaks.
The indicator lamp may come on for a short time during
the initial cold start-up, but should go out as the oil
warms up. If the light remains on, possible conditions
are a restricted filter element, the filter sending unit
stuck in the bypass position, or an accidentally ground-
ed sending unit wire.
3. VENT PLUG
The vent is located on the RH side of the winch next to
the electrical connector. It is very important to keep this
vent clean and unobstructed to limit leakage and winch
seal damage. When changing the winch oil, remove the
vent and thoroughly clean in safety solvent and rein-
stall. Do NOT replace with a solid plug.
4. WINCH CABLE (WIRE ROPE)
Inspect the entire length of wire rope, and the chokers
and hooks according to the wire rope and rigging man-
ufacturer's recommendations.
5. MOUNTING FASTENERS
Check/tighten all winch mounting fasteners to recom-
mended torque after the first 100-250 hours of opera-
tion, then every 1000 hours or six months, whichever
occurs first.
6. WARM-UP PROCEDURE
Start the tractor engine and operate at low idle for five
minutes.
To prevent serious damage to the winch gear train,
do NOT operate the tractor engine while the oil is
drained from the winch.
CAUTION
A warm-up procedure is recommended at each start-
up, and is essential at ambient temperatures below
+40°F (+4°C). Failure to warm the oil and the winch
hydraulic system may result in erratic clutch/brake
operation may result in property damage, personal
injury or death.
9

RECOMMENDED OIL
We have published the following specification to help you determine which lubricant is best suited to your applica-
tion. Your lubricant supplier should assure you that his product meets this specification. If there is still any doubt
as to the suitability of a lubricant, contact the PACCAR Winch Service Department, providing a detailed copy of the
product specifications.
10

Dry Lubed Dry Lubed Dry Lubed Dry Lubed
Torque (LB-FT)
Grade 5
Grade 8
1/4
20
28
5/16
3/8
18
24
16
24
7/16
1/2
9/16
5/8
8
6
12
9
17
13
24
18
45
35
70
50
23
31
50
35
80
110
80
150
110
110
55
75
150
115
210
160
14
20
13
20
12
18
11
18
265
200
Torque (LB-FT)
Grade 5
Grade 8
380
280
7/8
9
14
420
325
600
450
3/4
10
16
680
1 1/8
7
12
790
590
1290
970
1
8
14
640
7
12
1120
835
910
485
1460
1820
1360
1 3/8
6
12
1460
1095
2385
1790
1 1/4
3160
2370
Q
Bolt Dia.
Inches
Thds Per
Inch
Bolt Dia.
Inches
Thds Per
Inch
1 1/2
6
12
1940
SPECIFICATIONS:
Unit Weight w/o oil, cable or specific tractor adapters . . . . . . . . . . . . . . . . . . . . . .Approximately 1960 lb. (885 kg)
Gear Ratios
3 - Shaft Gear Train
Bevel Gear Ratio . . . . . . . . . . . . . . . . . . . . . . . . . . . . .1.00:1 . . . . .1.27:1 . . . . .1.64:1 . . . . .2.11:1 . . . . .2.78:1
Overall Ratio . . . . . . . . . . . . . . . . . . . . . . . . . . . . . . . . .22.3:1 . . . . .28.3:1 . . . . .36.6:1 . . . . .47.0:1 . . . . .62.2:1
4 - Shaft Gear Train
Bevel Gear Ratio . . . . . . . . . . . . . . . . . . . . . . . . . . . . .1.00:1 . . . . .1.27:1 . . . . .1.64:1 . . . . .2.11:1 . . . . .2.78:1
Overall Ratio . . . . . . . . . . . . . . . . . . . . . . . . . . . . . . . . .40:4:1 . . . . .51.4:1 . . . . .66.3:1 . . . . .85.3:1 . . . .112.8:1
Cable Drum Dimensions Cable Storage Capacity
Barrel Diameter . . . . . . . . . . . . . . . .10 in. (254 mm) 3/4 in. (19 mm) . . . . . . . . . . . . . . . .319 ft. (97 m)
Flange Diameter . . . . . . . . . . . .19 7/8 in. (504 mm) 7/8 in. (22 mm) . . . . . . . . . . . . . . . .226 ft. (69 m)
Barrel Length . . . . . . . . . . . . . . .12 3/8 in. (314 mm) 1 in. (25 mm) . . . . . . . . . . . . . . . .154 ft. (47m)
Throat Clearance . . . . . . . . .approx. 9 in. (229 mm)
Cable Ferrule Part Number - L Series
3/4 in. (19 mm) . . . . . . . . . . . . . . . . . . . . . . . .29424
7/8 in. (22 mm) . . . . . . . . . . . . . . . . . . . . . . . .29425
1 in. (25 mm) . . . . . . . . . . . . . . . . . . . . . . . . . .29426
Hydraulic System
Oil Capacity
Standard PTO . . . . . . . . . . . . . . . . . . . . . . . . . . . . . . . . . . . . . . . . . . . . . . . . . . . . . . . . . . . . . . . . . .78 qt. (84 I)
Low PTO . . . . . . . . . . . . . . . . . . . . . . . . . . . . . . . . . . . . . . . . . . . . . . . . . . . . . . . . . . . . . . . . . . . . .66 qt. (64 I)
Operating Pressure . . . . . . . . . . . . . . . . . . . . . . . . . . . . . . . . . . . . . . . . . . . . . . . . . .390-410 PSI (2689-2827 kPa)
Stand-by Pressure . . . . . . . . . . . . . . . . . . . . . . . . . . . . . . . . . . . . . . . . . . . . . . . . . . .315-370 PSI (2172-2551 kPa)
Typical Operating Temperature . . . . . . . . . . . . . . . . . . . . . . . . . . . . . . . . . . . . .Up To Ambient Plus 80°F (26.7°C)
A
B
C
A - 2.12 in. (45 mm)
B - 2.56 in. (65 mm)
C - To match cable dia.
RECOMMENDED FASTENER TORQUE
Higher or lower torques for special applications will be specified such as the use of spanner nuts, nuts on shaft
ends, jam nuts and where distortion of parts or gaskets is critical.
Lubricated Torque values based on use of SAE 30wt engine oil applied to threads and face of bolt or nut.
Avoid using thread lubricants as the applied torque may vary by 10-40% depending upon product used.
To convert lb ft to kg•m, multiply lb ft value by 0.1383.
11

inches (in.) X 25.4 = millimeters (mm) millimeters (mm) X 0.3937 = inches (in.)
feet (ft.) X 0.3048 = meters (m) meters (m) X 3.281 = feet (ft.)
miles (mi.) X 1.6093 = kilometers (km) kilometers (km) X 0.6214 = miles (mi.)
inches
2
(sq.in.) X 645.15 = millimeters
2
(mm
2
) millimeters
2
(mm
2
)X 0.000155 = inches
2
(sq.in.)
feet
2
(sq.ft.) X 0.0929 = meters
2
(m
2
) meters
2
(m
2
)X 10.764 = feet
2
(sq.ft.)
inches
3
(cu.in.) X 0.01639 = liters (l) liters (l) X 61.024 = inches
3
(cu.in.)
quarts (qts.) X 0.94635 = liters (l) liters (l) X 1.0567 = quarts (qts.)
gallons (gal.) X 3.7854 = liters (l) liters (l) X 0.2642 = gallon (gal.)
inches
3
(cu.in.) X 16.39 = centimeters
3
(cc) centimeters3 (cc) X 0.06102 = inches
3
(cu.in.)
feet
3
(cu.ft.) X 28.317 = liters (l) liters (l) X 0.03531 = feet
3
(cu.ft.)
feet
3
(cu.ft.) X 0.02832 = meters
3
(m
3
)meters3 (m3) X 35.315 = feet
3
(cu.ft.)
fluid ounce (fl.oz.) X 29.57 = millileters (ml) milliliters (ml) X 0.03381 = fluid ounce (fl.oz.)
ounces (oz.) X 28.35 = grams (g) grams (g) X 0.03527 = ounces (oz.)
pounds (lbs.) X 0.4536 = kilograms (kg) kilograms (kg) X 2.2046 = pounds (lbs.)
tons (2000 lbs.) X 907.18 = kilograms (kg) kilograms (kg) X 0.001102 = tons (2000 lbs.)
tons (2000 lbs.) X 0.90718 = metric tons (t) metric tons (t) X 1.1023 = tons (2000 lbs.)
tons (long) (2240 lbs.) X 1013.05 = kilograms (kg) kilograms (kg) X 0.000984 = tons (long) (2240 lbs.
)
inches Hg (60
o
F) X 3600 = kilopascals (kPa) kilopascals (kPa) X 0.2961 = inches Hg (60
o
F)
pounds/sq.in. (PSI) X 6.895 = kilopascals (kPa) kilopascals (kPa) X 0.145 = pounds/sq.in. (PSI)
pounds/sq.in. (PSI) X 0.0703
= kilograms/sq.cm. (kg/cm
2
)kilograms/sq.cm. (kg/cm2) X 14.22 = pounds/sq.in. (PSI)
pounds/sq.in. (PSI) X 0.069 = bars bars X 14.5 = pounds/sq.in. (PSI)
inches H2O (60
o
F) X 0.2488 = kilopascals (kPa) kilopascals (kPa) X 4.0193 = inches H2
O (60
o
F)
bars X 100 = kilopascals (kPa) kilopascals (kPa) X 0.01 = bars
horsepower (hp) X 0.746 = kilowatts (kW) kilowatts (kW) X 1.34 = horsepower (hp)
ft.-lbs./min. X 0.0226 = watts (W) watts (W) X 44.25 = ft.-lbs./min.
pound-inches (in.-lbs.) X 0.11298 = newton-meters (N-m) newton-meters (N-m) X 8.851 = pound-inches (in.lbs.)
pound-feet (ft.-lbs.) X 1.3558 = newton-meters (N-m) newton-meters (N-m) X 0.7376 = pound-feet (ft.-lbs.)
pound-feet (ft.-lbs.) X .1383 = kilograms/meter (kg-m) kilogram/meter (kg-m) X 7.233 = pound-feet (ft.-lbs.)
miles/hour (m/h) X 0.11298 = kilometers/hour (km/hr) kilometers/hour (km/hr) X 0.6214 = miles/hour (m/h)
feet/second (ft./sec.) X 0.3048 = meter/second (m/s) meters/second (m/s) X 3.281 = feet/second (ft./sec.)
feet/minute (ft./min.) X 0.3048 = meter/minute (m/min) meters/minute (m/min) X 3.281 = feet/minute (ft./min.)
mega (M) = 1,000,000 or 106 deci (d)
= 0.1 or 10
-1
kilo (k)
= 1,000 or 10
3
centi (c) = 0.01 or 10
-2
hecto (h)
= 100 or 10
2
milli (m) = 0.001 or 10
-3
deka (da)
= 10 or 10
1
micro (m
) = 0.000.001 or 10
-6
o
Celsius = 0.556 (
o
F - 32)
o
Fahrenheit = (1.8
o
C) + 32
COMMON METRIC PREFIXES
TEMPERATURE
POWER
TORQUE
VELOCITY
VOLUME
MASS
PRESSURE
METRIC CONVERSION TABLE
LINEAR
AREA
English to Metric
Metric to English
12
Other manuals for CARCO 50B
1
This manual suits for next models
1
Table of contents
Other Paccar Winch manuals