manuals.online logo
Brands
  1. Home
  2. •
  3. Brands
  4. •
  5. Palmgren
  6. •
  7. Saw
  8. •
  9. Palmgren 9683315 Instructions for use

Palmgren 9683315 Instructions for use

EN
Operating Instructions & Parts Manual
9643242.01
10” Horizontal
Mitering
Band Saw
Model 9683315
PLEASE READ AND SAVE
THESE INSTRUCTIONS.
READ CAREFULLY
BEFORE ATTEMPTING
TO ASSEMBLE, INSTALL,
OPERATE OR MAINTAIN THE
PRODUCT DESCRIBED.
PROTECT YOURSELF AND
OTHERS BY OBSERVING ALL
SAFETY INFORMATION. FAILURE
TO COMPLY WITH INSTRUCTIONS
COULD RESULT IN PERSONAL
INJURY AND/OR PROPERTY
DAMAGE! RETAIN INSTRUCTIONS
FOR FUTURE REFERENCE.
PLEASE REFER TO BACK COVER
FOR INFORMATION REGARDING
DAYTON’S WARRANTY
AND OTHER IMPORTANT
INFORMATION.
Model #: ___________________
Serial #: ___________________
Purch. Date: _______________
© 2018 Palmgren / a C.H. Hanson Brand
All Rights Reserved
3
GETTING STARTED SAFETY / SPECIFICATIONS ASSEMBLY / INSTALLATION OPERATION TROUBLESHOOTING MAINTENANCE /REPAIR
GETTING STARTED
Save this manual
You will need the manual for the safety warnings and precau-
tions, assembly instructions, operating and maintenance
procedures, parts list and diagram. Keep your invoice with this
manual. Write the invoice number on the inside of the front cover.
Keep this manual and invoice in a safe and dry place for future
reference.
Structural requirements
Make sure all supporting structures and load attaching
devices are strong enough to hold intended loads. If in
doubt, consult a qualified structural engineer.
Electrical requirements
The power supply to the Model 9683315, 10” Band Saw
needs to be 220V AC, 3-phase, 3.2 amps, 60 HZ.
Tools needed
Standard professional mechanic’s hand tool set (socket set,
pliers and spirit level, etc.).
UNPACKING
When unpacking, check to make sure all parts listed below are
included. If any parts are missing or broken, please contact your
local retailer.
IMPORTANT: Many unpainted steel surfaces have been
coated with a protectant. To ensure proper fit and operation,
remove coating. Coating can be easily removed with mild
solvents, such as mineral spirits, and a soft cloth. Avoid getting
solution on paint or any of the rubber/plastic parts. Solvents may
deteriorate these finishes. Use soap and water on paint, plastic
or rubber components. After cleaning, cover all exposed surfaces
with a light coating of oil.
Never use highly volatile solvents. Non-
flammable solvents are recommended to
avoid possible fire hazard.
Contents of Model 9683315 10” Band Saw
• Complete Band Saw
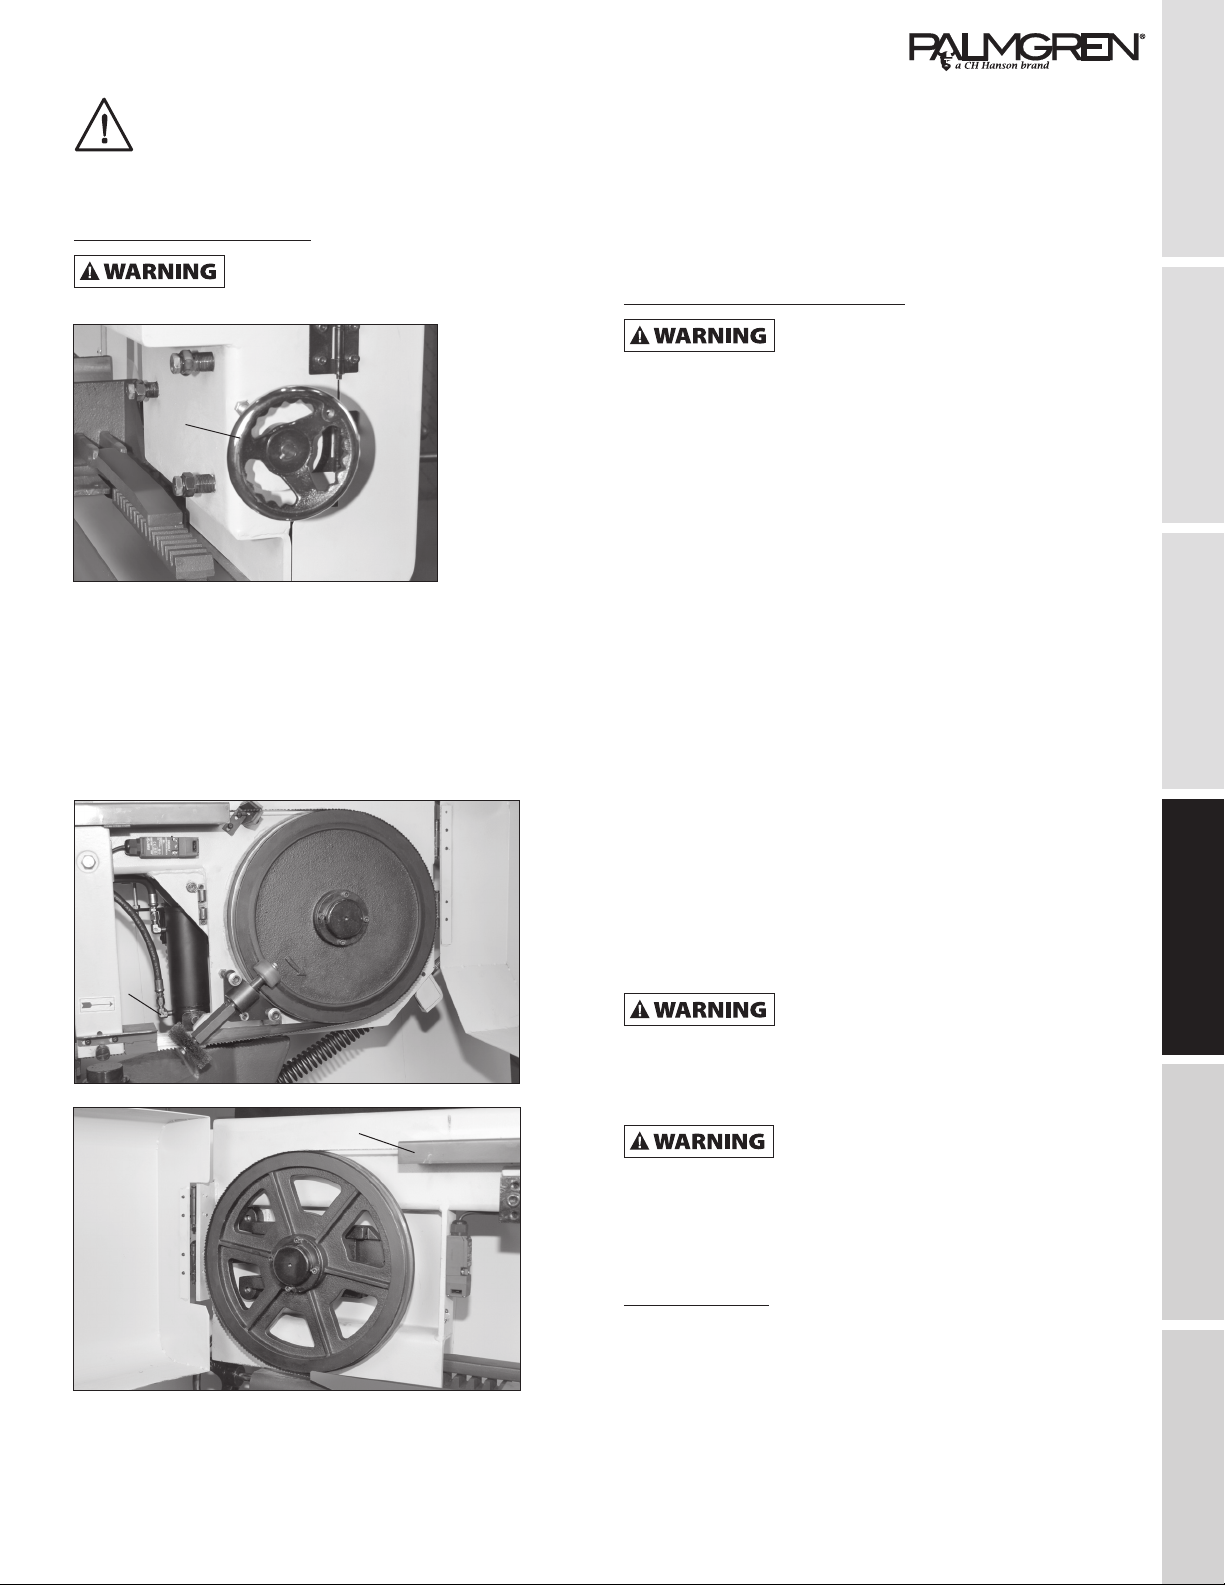
• Depth Stop Rod (for assembly see page 6)
• Depth Stop (for assembly see page 6)
• Operating instructions
Unpack
Remove all the over packing materials, but leave unit
attached to its pallet. Do not discard packing materials
until after the machine has been inspected for damage and
completeness. Locate loose parts and set aside.
Inspect
After unpacking the unit, carefully inspect for any
damage that may have occurred during transit. Check
for loose, missing, or damaged parts. Shipping damage
claims must be filed with the carrier.
This machine and its accessories should be visually inspected
before use, in addition to regular periodic maintenance
inspections. Be sure that the voltage labeled on the unit matches
your power supply.
SAFETY RULES
For you own safety, read all of the
instructions and precautions before
operating the tool.
Always disconnect the machine from its
power source before changing blades or
carrying out any maintenance procedure even in the case of
irregular machine operation.
PROPOSITION 65 WARNING: Some dust created by
using power tools contain chemicals known to the state
of California to cause cancer, birth defects or other
reproductive harm. Some examples of these chemicals are:
• Lead from lead-based paints
• Crystalline silica from bricks and cement and other masonry
products
• Arsenic and chromium from chemically-treated lumber
Your risk from these exposures varies, depending on how often
you do this type of work. To reduce your exposure to these
chemicals: work in a well ventilated area and work with approved
safety equipment. Always wear OSHA/NIOSH approved, properly
fitting face mask or respirator when using such tools.
Always follow proper operating
procedures as defined in this manual even
if you are familiar with the use of this or similar tools.
Remember that being careless for even a fraction of a
second can result in severe personal injury.
Read all instructions before using this tool
• Dress properly. Do not wear loose clothing, shirts with
sleeves that are too long, gloves that are too big, jewelry or
chains as they can be caught in moving parts. Protective,
electrically non-conductive clothes and non-skid footwear are
recommended when working. Wear restrictive hair covering
to contain long hair.
• Use eye and ear protection. Always wear ANSI approved
impact safety goggles.
• Stay alert. Watch what you are doing, use common sense.
Do not operate any tool when you are tired.
• Guard against electrical shock. Prevent body contact with
grounded surface such as pipes, radiators, ranges and
refrigerator enclosures.
• Do not operate tool if under the influence of alcohol or drugs.
Read warning labels on prescriptions to determine if your
judgement or reflexes will be impaired. If there is any doubt,
do not operate the tool.
Prepare work area for job
• Keep work area clean and free of equipment, tools or other
objects. Cluttered areas invite injuries.
• Observe work area conditions. Do not use machines or
power tools in damp or wet locations. Do not expose to rain.
MAINTENANCE /REPAIR TROUBLESHOOTING OPERATION ASSEMBLY / INSTALLATION SAFETY / SPECIFICATIONS GETTING STARTED
4
SAFETY RULES - CONTINUED
• Keep work areas well-lit. Do not use electrically powered
tools in the presence of flammable gases or liquids.
• Keep children away. Children must never be allowed in
the work area. Do not let them handle machines, tools or
extension cords.
• All internal operations, maintenance, or repairs must be
performed in a well-lit area
Tool should be maintained
• Maintain this machine with care. Use a clean sharp cutting
blade for better and safer performance. Follow instructions
for lubricating and changing accessories. Inspect the power
supply cables periodically and if damaged, have them
repaired by an authorized technician. The bow handle must
be kept clean, dry and free from oil and grease at all times.
• When servicing, use only identical replacement parts. Use of
any other parts will void the warranty. Only use accessories
intended for use with this tool. Approved accessories are
available from your local retailer.
• The machine must be completely disconnected from
its power source before any maintenance or service is
performed. Follow OSHA lock-out, tag-out procedures to
prevent accidental machine starts.
• Immediately replace any damaged or obscured warning
labels that are attached to the machine.
• For your safety, service and maintenance should be
performed by a qualified technician.
• Band saw blades are sharp. Use suitable gloves when
changing the blade or other adjustments that involve the
blade.
Know how to use tool
• The blade must not move when the saw head (bow) is in a
suspended mode (or raised).
• Only the blade section used for cutting can be exposed. Use
the blade guides to adjust the blade guards.
• Never use the machine without its guards in place and
working properly.
• Never put your hands or arms near the cutting area while the
machine is operating.
• Keep the area free of equipment, tools, or any other objects.
• Perform only one operation at a time.
• Never have several objects in your hands at the same time.
• Keep your hands as clean as possible.
• Do not force tool. It will do the job better and more safely at
the rate for which it was intended. Do not use inappropriate
attachments in an attempt to exceed the tool capacity.
• Use the right tool for the job. Do not attempt to force a small
tool or attachment to do the work of a large industrial tool.
There are certain applications for which this tool was
designed. Do not modify this tool and do not use this tool for
a purpose for which it was not intended.
• Do not overreach. Keep proper footing and balance at
all times. Do not reach over or across machines while in
operation.
• Remove adjusting keys and wrenches. Check that keys and
adjusting wrenches are removed from the tool or machine
work surface before attaching it to a power supply.
• Avoid unintentional starting. Be sure the switch is in the OFF
position when not in use and before attaching the machine to
a power supply.
• Check for damaged parts. Before using any tool, any
part that appears damaged should be carefully checked
to determine that it will operate properly and perform its
intended function. Check for alignment and binding of
moving parts; any broken parts or mounting pieces should
be properly repaired or replaced by a qualified technician.
Do not use the tool if any switch does not turn ON and OFF
properly.
The warnings, cautions and instructions
discussed in this instruction manual
cannot cover all possible conditions and situations that may
occur. It must be understood by the operator that common
sense and caution are factors which cannot be built into this
product, but must be supplied by the operator.
SPECIFICATIONS
Model 9683315 - 10” Band Saw
Motor 2 HP, 1725 RPM, 220V,
3-phase, 3.2 amps, 60HZ
Coolant Pump 1/8 HP
Cutting Capacity Rectangle 10" x 18"
Cutting Capacity Round 10”
Maximum Cut Thickness 10"
Miter Capacity 0 - 45 degrees with angle
locks at 0, 15, 30 and 45
degrees
Blade Width Range 1" to 1-1/16”
Blade Thickness 0.035”
Minimum Blade Length 157”
Maximum Blade Length 158-1/2”
Blade Speed 125 to 246 FPM
Coolant Tank (liters) 22
Dimensions (L x W x H) 81" x 27" x 48"
Weight (lbs.) 1,100
ASSEMBLY/INSTALLATION
• In the event of incorrect operation or dangerous
conditions, the machine may be stopped immediately
by pressing the red emergency shut off button on the
operator control panel.
• The casual or voluntary opening of the flywheel
covers causes a safety switch activation that
automatically stops all machine functions. The
flywheel cover doors MUST be closed tightly to
de-activate the safety switches.
5
GETTING STARTED SAFETY / SPECIFICATIONS ASSEMBLY / INSTALLATION OPERATION TROUBLESHOOTING MAINTENANCE /REPAIR
Power source
• The motor on this machine is designed for operation on
the voltage and frequency specified. Normal loads will be
handled safely on voltages not more than 10% above or
below specified voltage.
• Running the unit on voltages which are not within the range
may cause overheating and motor burn-out. Heavy loads
require that the voltage at the motor terminals be no less
than the voltage specified. Power supply to the motor is
controlled by a double pole locking rocker switch. Remove
the key to prevent unauthorized use.
Electrical connections
Make sure unit is off and disconnected
from power source before any service or
maintenance being made to the machine.
This machine must be grounded. To avoid
electrocution or fire, any repairs to
electrical system should be done only by a qualified
electrician, using genuine replacement parts.
Electrical safety
1 This machine must be grounded in accordance with the
National Electrical Code and local codes and ordinances.
Any electrical work must be handled by a professional,
qualified electrician. To help prevent and protect the user
from shock, this machine must be properly grounded.
2. Confirm that power supply matches power requirements of
the machine before any electrical connection is made to the
machine. Before connecting the machine to a power source,
ensure that the switch is in the off position.
Lifting and setting up your machine
Make certain that slings, cables, chains,
forklifts or other load suspending gear or
machines used to move this unit are properly rated to handle
the weight. The machine is extremely heavy.
The machine must be properly secured
and anchored before use. Make sure that
it is supported equally on all four corners.
Remove any crating or overpacking materials which may be
covering the machine. Leave the machine attached to the pallet.
NOTE: The Model 9683315 Band Saw weighs 1100 lbs. Be
certain any machine or devices used to lift the machine
are capable of handling this weight.
1. Remove all accessory items from the pallet or machine table.
Compare these items with the listed on page 3.
2. Check and lock any handles, covers or moving parts.
4. Remove all the nuts and/or bolts securing the machine to the
pallet.
5. Center an overhead crane or other suitable overhead lifting
device and sling arrangement over the machine.
6. Carefully lift the machine off the pallet. Lift the machine no
higher than necessary to clear the hold-down hardware and
pull the pallet out of the way. DO NOT get your hands or feet
underneath the machine when removing the pallet.
7. Place the machine into its final location where it will be
anchored to the floor. Anchor bolts of sufficient size and
length must be fastened to the floor.
8. While it is not recommended, the machine may be mounted
to a wooden floor. The floor must be sturdy and properly
braced to ensure a solid foundation for safety and machine
accuracy.
8. When the machine is over its anchor location, level the
machine using shims under the corners needing them. A
highly accurate spirit or digital level should used for leveling.
Leveling should be done on the table top since it is the
reference standard for both side-to-side and front-to-back
leveling. It is very important that the machine be properly
leveled for accurate performance.
NOTE: The following diagrams the reasonable approximate
dimensions of the machine and its parts. When determining
a final location for your machine ensure there is enough
clearance for both the operator and for technicians who will
service the machine. Also, consider any larger workpieces
that would extend beyond the machine’s table and require
extra space.
Dimensions
48”
81”
Front View
48”
End View
27”
MAINTENANCE / REPAIR TROUBLESHOOTING OPERATION ASSEMBLY / INSTALLATION SAFETY / SPECIFICATIONS GETTING STARTED
6
ASSEMBLY/INSTALLATION - CONTINUED
The Model 9683315 Band Saw is fully assembled with exception
of the measuring rod and measuring bracket / depth stop. To
attach these items:
1. Locate the measuring rod that is packed with the machine.
A
2. Insert the threaded end of the measuring rod into the
threading hole under the support table (A).
3. Tighten the measuring rod so it is secure and does not move.
B
C
4. Slide the measuring bracket / depth stop attachment (B) over
the measuring rod and tighten it using the set knob (C).
Filling up the coolant tank
Before starting up the band saw, the coolant tank must be filled.
The coolant is used to cool the blade and materials being cut.
During operation coolant flows from the tank to the bottom of
the blade guide post. Coolant is dispersed on the blade during
operation and flows into the catch basin. The basin drains into
the chip tray on the right end of the machine. Under the chip tray
is the tank. To fill the tank:
D
E
1. Remove the knob (D) that holds the chip tray to the tank.
2. Grab the handles on the left and right (E) of the chip tray and
lift the tray off to reveal the tank (F).
F
3. Clean the tank of any dust or dirt that may have accumulated
during transit.
4. Fill the tank with a suitable cutting coolant. The tank holds 22
liters of coolant.
5. Replace the chip tray and chip tray knob.
OPERATION GENERAL
Keep your hands away from all cutting
edges and moving parts. Never reach
under the saw or workpiece. The blade is exposed in these
areas and the guards cannot protect your body there. Be
alert to the possibility of blade binding and kickback
occurring.
The blade covers have safety switches
that stop the band saw from operating if
the covers are open. Do not override or disable the switches.
To prevent damage to the band saw,
speed changes must be made when the
machine is running.
G
H
NOTE: The blade wheel covers (M) must be shut
securely for the safety switches to deactivate; allowing
the machine to operate. The deactivation tab (G) must
be completely inserted into the switch receiving slot (H).
7
GETTING STARTED SAFETY / SPECIFICATIONS ASSEMBLY / INSTALLATION OPERATION TROUBLESHOOTING MAINTENANCE / REPAIR
General preparation for use
1. All covers and guards must be in place, doors must be
closed, and operator understands the safety rules and
operation of the machine.
2. Fill coolant reservoir with coolant with a suitable industrial
lubricant.
3. Be sure that all other points listed in the Lubrication Chart
listed on page 18 have been serviced.
Band saw functioning parts
The saw head (bow)
I
J
L
K
M
M
N
The saw bow is a collection of machine parts consisting:
I. Operator control panel
J. Drive members (motor and belt)
K. Blade wheel blade tension system
L. Blade guides
M. Bladewheel covers
N. Mechanical motor speed adjustment
This model also uses a hydraulic cylinder and adjustable
counter-balance spring to lower and raise the bow.
Controls
R S T UO P Q
The controls on top of the saw bow operate the machine:
O. Power indicator light
P. Starts the blade
Q. Emergency stop button. Once pressed, it must be
rotated to release.
R. Control panel rotation knob. Loosen the knob to rotate
the control panel. This feature is helpful when making
angle cuts.
S. Starts the coolant pump
T. Speed adjustment for saw bow descent
U. Saw bow descend / On-Off
OPERATION SET-UP
Keep your hands away from all cutting
edges and moving parts. Never reach
under the saw or workpiece. The blade is exposed in these
areas and the guards cannot protect your body there. Be
alert to the possibility of blade binding and kickback
occurring.
The blade covers have safety switches
that stop the band saw from operating if
the covers are open. Do not override or disable the switches.
To prevent damage to the band saw, speed
changes must be made when the machine
is running.
In case of an emergency situation
• Push the emergency shut off button down to
stop all functions. To release the emergency shut
off button rotate the mushroom shaped button
clock-wise. The button will pop up and machine
operation can normally resume.
Setting the workpiece cut length
V
W
You can control the depth of cut on the Model 9683315 by
using the depth stop attachment (V). The attachment slides on
to the measuring rod. The bracket (W) can be rotated so that
the rod contacts the end of your workpiece. This allows you to
conveniently make repetitive cuts at the same length
Vise adjustment - clamping the workpiece
• Place the work piece between the vise jaws and have it rest
next to the fixed vise jaw on the left. If your workpiece is
close to the size of the vise jaws, rotate the vise handwheel
(Y) clockwise to tighten the vise.
Y
X
• If your workpiece is smaller than the vise opening you can
use the vise rack claw (X) to quickly close up the open space.
MAINTENANCE /REPAIR TROUBLESHOOTING OPERATION ASSEMBLY / INSTALLATION SAFETY / SPECIFICATIONS GETTING STARTED
8
OPERATION SET-UP - CONTINUED
Lift the vise rack claw and position the movable vise jaw so
that is close to the workpiece.
• Place the tab of the vise rack claw into the rack. Tighten the
handwheel to secure your workpiece.
• Rotate the hand wheel (Y) clockwise to tighten and
counter-clockwise to loosen the vise jaws and release your
workpiece.
Cutting angle adjustment
X
Y
The Model 9683315 Band Saw can cut 15˚, 30˚ and 45˚ angles
by rotating the saw bow. To change the angle of the saw bow
perform the following steps.
• Pull the unlock lever (X). This will release the saw bow.
• Move the saw bow to the desired angle. The angle scale
(Y) shows the angle being set
• Push the lock lever back in to secure the saw bow and
set the angle
• The saw bow can be set at any angle between 15˚ and
45˚. Be aware the blade may cut into the workpiece
table.
Saw blade guide insert adjustment
Z
The adjustment knobs for the saw guide inserts are located
on the lower portion of each saw guide arm (Z). Follow these
adjustment procedures:
• Turn the adjustment knob clockwise until the guide is
tight against the saw band (do not over tighten)
• Turn the adjustment knob back counterclockwise
1/4 turn
Saw guide arm adjustment
AA
The machine’s right saw guide arm is fixed. The left saw guide
arm can be adjusted to accommodate varying stock widths. The
saw guide need to be adjusted while setting up and clamping
your workpiece for cutting. The best results are achieved by
leaving a very small gap between the saw guide arm and work
piece. To adjust the guide arm.
• Loosen the saw guide insert adjustment knob (Z) by
turning it counterclockwise
• Loosen the left arm’s locking handle (AA) by turning it
counterclockwise
• Move the arm along the slide bar until it is as close as
possible to the stock
• Turn the saw guide arm locking handle clockwise to
tighten
• Tighten the insert adjustment knob as previously
instructed
Coolant application
BB
1. Coolant is supplied by means of a reservoir and pump to
the cutting area through a valve and then the saw guide
inserts on the left saw guide arm (BB). Turn the valve
counterclockwise until coolant completely covers both sides
of the saw band.
2. Used coolant flows back to the reservoir through the open
end of the base pan. The screening and straining within the
reservoir removes metal particles and other impurities before
the coolant is recirculated.
3. Coolant reservoir capacity is 22 liters. The pump will not
operate correctly unless it is completely submerged in
coolant.
9
GETTING STARTED SAFETY / SPECIFICATIONS ASSEMBLY / INSTALLATION OPERATION TROUBLESHOOTING MAINTENANCE / REPAIR
NOTE: You may find it better to cut certain materials
(such as cast iron, aluminum, magnesium, etc.) without
coolant. When dry cutting these materials, follow the
same operating procedures used when cutting with coolant. Dry
cutting will reduce the overall life of the saw band blade.
Band saw blade removal
Take care when working around and on
the saw blade. Band saw blades are very
sharp. Wear kevlar gloves.
CC
1. Push the red emergency stop button on the control panel.
2. Turn the band tension handwheel (CC) on the left end of the
saw head counterclockwise. This moves the idler bandwheel
to the right and loosens the blade tension
3. Grasp the band tension handwheel and manually lift the saw
head so there is approximately five (5) inches of clearance
under the saw guide arms.
DD
EE
FF
DD
4. Open the right and left bandwheel doors (DD).
5. If necessary, remove or reposition the blade brush (EE).
6. Loosen and remove the top blade guard (FF).
7. Loosen the saw guide inserts by turning the adjusting knob
counterclockwise.
8. Grasp the on the non-cutting edge of the saw blade between
the saw guide arms with your gloved hands and push the
saw blade downward to free it from the saw guide inserts.
8 Grasp the saw band near the idler bandwheel and remove it.
Remove the saw band from around the drive bandwheel.
Band saw blade replacement
Take care when working around and on
the saw blade. Band saw blades are very
sharp. Wear kevlar gloves.
1. Remove the saw band as described in the previous section.
Clean metal chips and other foreign materials and debris
from around the saw guides and both bandwheels. Remove
the new saw blade’s protective cap if necessary.
2. Form the saw blade into a loop and slip the blade under the
saw guide arms and into approximate position for placement.
With the saw blade’s teeth facing towards you, place the
blade around the drive and idler bandwheels.
3. Twist the saw blade 90° so that its teeth between the saw
guide arms point down and to the right.
4. Insert the saw blade into the saw guide inserts and pull up
against the back-up bearing
5. Check the saw blade’s position around the bandwheels (its
back edge must rest against each bandwheel’s rear flange).
6. Apply correct blade tension by turning the band tension
handwheel clockwise.
7. Turn the saw guide insert adjustment knobs clockwise until
tight (do not over tighten). Turn each adjustment screws back
counterclockwise 1/4 turn.
8. Reposition or mount the band brush and top guard. Close
both bandwheel doors.
OPERATING THE BAND SAW
Keep your hands away from all cutting
edges and moving parts. Never reach
under the saw or workpiece. The blade is exposed in these
areas and the guards cannot protect your body there. Be
alert to the possibility of blade binding and kickback
occurring.
Always wear safety glasses complying
with United States ANSI Z87.1 before
beginning power tool operation.
Before operating the machine, all the main parts of the machine
must be set up correctly as per the directions in the previous
Assembly/Installation Section.
Blade break-in
When cutting for the first time, it is good practice to break in the
blade by making a series of cuts at a low advance speed
(= 12-14 in2/min on material of average dimensions compared
to the cutting capacity and solid section of normal steel with
R = 410-510 Nimm2), Generously spray the cutting area with
lubricating coolant during the break-in.
MAINTENANCE / REPAIR TROUBLESHOOTING OPERATION ASSEMBLY / INSTALLATION SAFETY / SPECIFICATIONS GETTING STARTED
10
OPERATING THE BAND SAW - CONTINUED
Making a cut
II JJ KKHH
After your workpiece(s) have been secured and bandsaw
properly adjusted as described previously, you can make your
cut.
1. Push the blade start button (HH)
2. Turn on the coolant flow (II)
3. Set the saw bow descent speed (JJ)
4. Activate the saw bow descent (KK)
5. When the cut is finished the saw will stop. Manually lift the
saw bow.
Saw blade tension
Do not start the blade drive motor without
proper tension on the band saw blade.
LL
1. Blade tension is applied by turning the handwheel
which protrudes from the saw head’s left side (LL). Turn
the handwheel clockwise to increase band tension;
counterclockwise to decrease it.
2. Correct band tension for the machine’s standard one (1) inch
(25.4 mm) wide by 0.035-inch (0.89 mm) saw blade is 27,000
to 30,000 psi (1900 to 2100 kg/cm2).
This tension setting is established when the preset stop
bolt contacts the large washer. An escutcheon near the
band tension handwheel describes the washer to stop bolt
relationship in a setting of 30,000 psi (2100 kg/cm2).
3. Important factors which influence band tension settings are
the size of stock to be cut and desired blade life. General
rules-of-thumb are: (a) Lower tensions will increase saw
blade life; (b) Greater tension is required as spacing is
increased between the saw guide arms; (c) Higher band
speeds require greater tension.
Blade speed adjustment
To prevent damage to the band saw,
speed changes must be made when the
machine is running.
MM
NN
NN
The blade speed is infinitely variable between 125 and 246 fpm.
Use lower speeds for harder materials and high speeds for softer
materials.
1. To adjust, turn the band speed adjusting handwheel (MM) on
the right end of the saw head clockwise to “INCREASE” band
speed. Turn it counterclockwise to “DECREASE” the blade
speed.
2 A speed indicator pointer and scale provided on your
machine will show you the blade speed based on the
handwheel’s adjustment (NN).
Blade brush
OO
A powered blade brush (OO) removes metal particles from the
saw blade teeth. The blade brush is located inside the right
bandwheel door.
The brush must be properly adjusted to clean the blade tooth
gullets without touching the bottom of the gullets for optimum
sawing performance. As bristles wear down, adjust brush position
by loosening the mounting bolts holding the brush assembly
to the bracket on the saw head. Move the brush to the correct
cleaning position and retightening the mounting bolts.
11
GETTING STARTED SAFETY / SPECIFICATIONS ASSEMBLY / INSTALLATION OPERATION TROUBLESHOOTING MAINTENANCE / REPAIR
OPERATION - BLADE SELECTION
GUIDELINES
Types of materials and blade choices
To obtain the best cutting performance from your band saw,
various parameters such as material hardness, material shape
and thickness, cross cutting section of the part to be cut,
selection of the type of cutting blade, cutting speed and the
control of saw frame lowering all must be considered.
These specifications must therefore be harmoniously
combined in a single operating condition according to practical
considerations and common sense, so as to achieve an optimum
condition that does not require countless operations to prepare
the machine when there are many variations in the job to be
performed. The various problems that crop up from time to lime
will be solved more easily if the operator has a good knowledge
of these specifications.
The tables below lists characteristics of materials to be cut so
that the correct blade can be chosen.
Thickness Inches Z continuous
tooth design
Z combo
tooth design
Till .059” 14 10/14
From .039” to .078” 88/12
From .078” to .118” 66/10
From .118” to .196” 65/8
From .157” to .236” 64/6
More than .236” 44/6
S = Thickness
Solid Ø or L Inches Z continuous
tooth design
Z combo
tooth design
Till 1.181” 85/6
From 1.181” to 60 64/6
From 1.574” to 3.149” 44/6
More than 3.54331” 33/4
S = Thickness L=Width
SS
S
ø
L
Blade teeth per inch (tpi)
Choose a blade with the proper number of teeth per in (TPI)
for the material being cut. The following factors should be
considered:
• Parts with a thin and/or variable section such as profiles,
pipes and plate, need closely space teeth, so that the
number of teeth used simultaneously in cutting ranges
from 3 to 6.
• Parts with large crosscut sections and solid cores need
widely spaced teeth to allow for the greater volume of the
shavings and better tooth penetration.
• Parts made of soft material or plastic (light alloys, mild
bronze, Teflon, wood, etc. also require widely spaced teeth.
• Pieces cut in bundles require combo tooth design.
Cutting and advance speed
The cutting speed (in/min) and the advance speed (in2/min =
area traveled by the blade teeth when removing shavings) are
limited by heat build up on the tips of the teeth.
• The cutting speed is dictated by the resistance of the
material (R N/mm2), its hardness (HRC) and its dimensions
in the widest section.
• An advance speed (= lowering of the saw bow) set too fast
tends to cause the blade to deviate from the ideal cutting
path, producing misaligned cuts on both the vertical and the
horizontal plane.
• The best way to determine the proficiency of these two
parameters is to examine the chips from the cut.
• Long spiral-shaped chips indicate ideal cutting.
• Very fine or pulverized chips indicate lack of feed and/or
cutting pressure.
• Thick and/or blue chips indicate overload of the blade.
Blade break-in
When cutting for the first time, it is good practice to break in the
blade by making a series of cuts at a low advance speed
(= 12-14 in2/min on material of average dimensions compared
to the cutting capacity and solid section of normal steel with
R = 410-510 Nimm2), Generously spray the cutting area with
lubricating coolant during the break-in.
Blade structure
Bi-metal blades are the most commonly used. They consist of a
silicon-steel blade backer along with a laser welded high speed
steel (HSS) cutting edge. These type of blades are classified by a
M2, M42, M51 designation. They differ from each other because
of their hardness due to the percentage of Cobalt (Cc) and
molybdenum (Mo) contained in the metal alloy.
Blade type
Blades differ because of their construction characteristics,
such as:
• Shape and cutting angle of tooth
• Pitch
• Set shape
• Angle (rake) of the teeth
MAINTENANCE / REPAIR TROUBLESHOOTING OPERATION ASSEMBLY / INSTALLATION SAFETY / SPECIFICATIONS GETTING STARTED
12
TEETH PITCH AND RAKE
Regular tooth
0° rake and constant pitch.
Regular tooth blades are typically used for crosscut or
inclined cutting in small solid and average cross-section cuts
in or pipes, laminated mild steel, gray iron or general metal.
Positive rake tooth
9°-10° positive rake and constant pitch.
This blade is used for crosscut or inclined cuts in solid
sections or large pipes, including all harder materials (highly
alloyed and stainless steels, special bronze and forge pig
iron).
Combo tooth
This blade has pitch variations between teeth and variations
in teeth size along with variable gullet depths. These unique
parameters ensures a smoother, quieter cut, and longer
blade life due to the lack of vibration.
Another advantage offered by the use of this blade is its
ability to cut wide range of different material sizes and
shapes.
Combo tooth
9°-10° positive rake.
This blade type is suitable for the cutting of section bars and
large and thick pipes as well as for the cutting of solid bars at
machine capacity. Available pitches: 3-4, 6-8.
TEETH SET
Saw teeth are slightly bent out of the plane of the saw body,
resulting in a wide cut in the workpiece. This parameter is called
“tooth set.”
Regular or raker set
The cutting teeth are set right and left, alternated by a
straight tooth.
For use for materials with dimensions greater than .2”.
Used for the cutting of steel, castings and hard nonferrous
materials.
Wavy set (in smooth waves).
This tooth set is associated with very fine teeth and is mainly
used for the cutting of pipes and thin section bars (from .04”
to .118”).
Alternate set (grouped teeth)
Teeth are set in alternate groups of both right and left
separated by a straight tooth.
This tooth set is used for smooth cuts in extremely thin
materials (less than .04”).
Alternate set (individual teeth)
The cutting teeth are individually set right and left.
This type of tooth set is used for the cutting of nonferrous soft
materials, plastics and wood.
OPERATION - BLADE SELECTION
GUIDELINES
13
GETTING STARTED SAFETY / SPECIFICATIONS ASSEMBLY / INSTALLATION OPERATION TROUBLESHOOTING MAINTENANCE / REPAIR
TROUBLESHOOTING GUIDE
Symptom Possible Cause(s) Corrective Action
Motor will not start; fuses or circuit
breakers blow
1. Short circuit in line cord or plug
2. Short circuit in motor or loose
connection
3. Incorrect fuses or circuit breakers in
power line
4. Motor overloaded
5. Bandwheel door covers are open
1. Inspect line cord or plug for damaged
insulation and shorted wires. Replace
damaged wires and/or components.
2. Inspect all lead terminals on motor for loose
or worn insulation on wires. Tighten any
loose connections. Replace or repair motor.
3. Install correct fuses or circuit breakers
4. Reduce load on motor
5. The bandwheel doors must be completly
closed and latched
Motor fails to develop full power (power
output of motor decreases rapidly) with
decreased voltage at motor terminals
1. Power Line overloaded
2. Undersized wires or cords too long
3. General overloading at power
company’s facilities
1. Reduce the load on the power line
2. Increase the wire sizes or reduce the length
of cords
3. Request a voltage check from the power
company
Motor overheats 1. Motor overloaded 1. Reduce load on motor
2. Air circulation around motor is
restricted
2. Clean motor to provide normal air circulation
around motor
Motor stalls (resulting in blown fuses or
tripped circuit breakers)
1. Short circuit in motor; connections
loose; or shorted terminals; or worn
insulation on lead wires
2. Low voltage line conditions
3. Incorrect fuses or circuit breakers in
power line
4. Motor overloaded
1. Inspect all lead terminals on motor for loose
or worn insulation on wires. Tighten any
loose connections. Replace or repair motor.
2. Correct low voltage line conditions
3. Install correct fuses or circuit breakers
4. Reduce load on motor
Frequent opening of fuses or circuit
breakers
1. Motor overloaded
2. Incorrect fuses or circuit breakers
1. Reduce load on motor
2. Install correct fuses or circuit breakers
Motor problems in general Various causes To troubleshoot and service the motor consult a
qualified technician
Motor running too hot 1. Blade tension too high
2. Blade too coarse for work (especially
when cutting pipes)
3. Blade too fine for work (heavier, soft
materials)
4. Gears need lubrication
1. Reduce tension on the blade
2. Change the type of blade. See OPERATION
- BLADE SELECTION GUIDELINES
beginning on page 11.
3. Change the type of blade. See OPERATION
- BLADE SELECTION GUIDELINES
beginning on page 11.
4. Check oil bath and add lubrication as needed
NOTES
MAINTENANCE / REPAIR TROUBLESHOOTING OPERATION ASSEMBLY / INSTALLATION SAFETY / SPECIFICATIONS GETTING STARTED
14
Symptom Possible Cause(s) Corrective Action
Tooth breakage Cut advancing too quickly Decrease cutting advance, exerting less cutting
pressure. Adjust the braking device.
Wrong cutting speed Change speed and/or type of blade.
See OPERATION - BLADE SELECTION
GUIDELINES beginning on page 11.
Wrong tooth pitch Replace blade choosing the proper tooth pitch.
See OPERATION - BLADE SELECTION
GUIDELINES beginning on page 11.
Chips sticking to the teeth and in the
gullets or material that gums
Check to ensure the coolant outlet hole on the left
blade guide is not clogged and the coolant flow is
adequate to remove of chips from the blade.
Defects on the material or material too
hard
Material surfaces can be oxidized or covered with
impurities making these areas harder than the
blade itself. Materials may have hardened areas
or inclusions inside the section due to production
materials such as castings and welding wastes,
etc. Avoid cutting these materials. In a situation
where a cut has to be made use extreme care,
cleaning and removing hard impurities as quickly
as possible.
Ineffective gripping of the part in the vise. Check the gripping of the part being cut. Tighten
the vise as needed.
The blade gets stuck in the material Decrease the cutting advance and exert less
cutting pressure.
Starting cut on sharp or irregular
section bar
Pay more attention when you start cutting. Slowly
and carefully start the cut.
Poor quality blade Switch to a superior quality blade.
Previously broken tooth left in the cut Remove in the broken tooth from the cut.
Resuming a cut on a previously made
groove
Make the cut elsewhere, turning the part over.
Vibrations Check the grip of the part being cut to ensure it is
being held securely in the vise.
Wrong tooth pitch or shape Replace blade choosing the proper tooth pitch or
shape. See OPERATION - BLADE SELECTION
GUIDELINES beginning on page 11. Adjust blade
guides.
Insufficient lubricating, refrigerant, or
wrong lubricant viscosity
Check level of liquid in the tank. Increase the
flow of lubricant. Check to ensure the hole and
the liquid outlet pipe are not blocked. Check the
lubricant viscosity.
Teeth positioned in the direction opposite
the cutting direction
Remove the blade and reinstall it with the teeth
cutting in the proper direction.
TROUBLESHOOTING GUIDE
15
GETTING STARTED SAFETY / SPECIFICATIONS ASSEMBLY / INSTALLATION OPERATION TROUBLESHOOTING MAINTENANCE / REPAIR
TROUBLESHOOTING GUIDE
Symptom Possible Cause(s) Corrective Action
Premature blade wear Faulty running-in of blade See OPERATION - BLADE SELECTION
GUIDELINES beginning on page 11.
Teeth positioned in the direction opposite
of the cutting direction
Remove the blade and reinstall it with the teeth
cutting in the proper direction.
Poor quality blade Switch to a superior quality blade.
Cut advancing too quickly Decrease cutting advance, exerting less cutting
pressure. Adjust the braking device.
Wrong cutting speed Change speed and/or type of blade. See
OPERATION - BLADE SELECTION
GUIDELINES beginning on page 11.
Defects on the material or material too
hard
Material surfaces can be oxidized or covered with
impurities making these areas harder than the
blade itself. Materials may have hardened areas
or inclusions inside the section due to production
materials such as castings and welding wastes,
etc. Avoid cutting these materials. In a situation
where a cut has to be made use extreme care,
cleaning and removing hard impurities as quickly
as possible.
Insufficient lubricating refrigerant or wrong
emulsion
Check level of liquid in the tank. Increase the
flow of lubricant. Check to ensure the blade
guide outlet hole and the liquid outlet pipe are not
blocked. Check the lubricant viscosity.
Blade breakage/damage Faulty welding of blade Switch to a superior quality blade.
Cut advancing too quickly Decrease cutting advance, exerting less cutting
pressure. Adjust the braking device.
Wrong cutting speed Change speed and/or type of blade. See
OPERATION - BLADE SELECTION
GUIDELINES beginning on page 11.
Wrong tooth pitch Replace blade choosing the proper tooth pitch.
See OPERATION - BLADE SELECTION
GUIDELINES beginning on page 11.
Ineffective gripping of the part in the vice Check the gripping of the part being cut. Tighten
the vise as needed.
Blade touching material at beginning of
cut
At the beginning of the cutting process, never
lower the saw bow into the material before
starting the machine.
MAINTENANCE / REPAIR TROUBLESHOOTING OPERATION ASSEMBLY / INSTALLATION SAFETY / SPECIFICATIONS GETTING STARTED
16
Symptom Possible Cause(s) Corrective Action
Blade breakage/damage Blade guide pads not adjusted properly or
dirty because of lack of maintenance
Check the adjustment of the blade guides.
See OPERATION SET-UP / Blade guide insert
adjustments on page 8. Extremely tight tolerance
guiding may cause cracks and breakage of teeth.
Use extreme care when cleaning.
Blade guide block too far from material to
be cut
Set the left blade guide arm closely to the material
being cut so that only the blade section used in
the cut is free, this will prevent deflections that
stress the blade,
Improper position of blade on flywheels The back of blade rubs against the support due
to deformed or poorly welded bands (tapered),
causing cracks and swelling of the back contour.
Replace the defective blade with a new one.
Insufficient lubricating coolant or wrong
emulsion
Check level of lubricating coolant level in the tank.
Increase the flow of lubricating coolant, checking
to ensure the hole and the liquid outlet pipe are
not blocked. Check the emulsion percentage.
Blade cuts crooked Blade not parallel in relation to the
counter vise
Check the blade guide blocks to ensure they are
fastened tightly to the counter vice. Adjust the
blocks vertically and if necessary adjust the stop
screws of the degree cuts.
Blade not perpendicular due to the
excessive play between the guide pads
and misalignment of the blocks
Check and adjust the blade guides for proper
tolerances. See OPERATION SET-UP / Blade
guide insert adjustments on page 8.
Cut advancing too fast Decrease the speed of the cut advance, exerting
less cutting pressure. Adjust the braking device.
Worn out blade Move the blade close to material being cut so that
only the blade section used in the cut is free, This
will prevent deflections that would excessively
stress the blade. Replace the blade.
Wrong tooth pitch Replace blade choosing the proper tooth pitch.
See OPERATION - BLADE SELECTION
GUIDELINES beginning on page 11.
Broken teeth The lack of teeth can cause deflection during the
cut; check the blade for broken teeth and replace
it if necessary.
Insufficient lubricating coolant or wrong
emulsion
Check level of lubricating coolant level in the tank.
Increase the flow of lubricating coolant, checking
to ensure the outlet hole on the left blade guide
arm and the liquid outlet pipe are not blocked.
Check the emulsion percentage.
Streaked or etched bands Damaged or chipped blade guide pads Replace the blade guide pads.
Tight or loose blade guide bearings Correctly adjust the guide bearings. See
OPERATION SET-UP / Blade guide insert
adjustments on page 8.
TROUBLESHOOTING GUIDE
17
GETTING STARTED SAFETY / SPECIFICATIONS ASSEMBLY / INSTALLATION OPERATION TROUBLESHOOTING MAINTENANCE / REPAIR
TROUBLESHOOTING GUIDE
NOTES
Symptom Possible Cause(s) Corrective Action
Faulty cut Worn out bandwheels. Flywheel housing
full of chips
The support and guide flange of the bandwheels
are so worn they cannot maintain the proper
alignment of the blade causing’ faulty cutting.
The blade rolling and drawing tracks can have
become tapered. Replace the bandwheels. Clean
out chips with compressed air.
Streaked cutting surface Cut advancing too fast Decrease the speed of the cut advance, exerting
less cutting pressure. Adjust the braking device.
Poor quality blade Replace blade with a superior quality blade.
Worn out blade or with chipped and/or
broken teeth
Replace it with a new blade.
Wrong tooth pitch The teeth in the blade being used are probably
large. Use a blade with higher TPI. Replace
blade choosing the proper tooth pitch.
Blade guide block too far from material to
be cut
Move the blade close to material being cut so that
only the blade section used in the cut is free, This
will prevent deflections that would excessively
stress the blade. See OPERATION SET-UP /
Blade guide insert adjustments on page 8.
Insufficient lubricating coolant or wrong
emulsion
Check level of lubricating coolant level
in the tank.
Increase the flow of lubricating coolant, checking
to ensure the hole and the liquid outlet pipe are
not blocked. Check the emulsion percentage.
Noise on guide blocks Chipped bearings Dirt and/or chips have come between the blade
and guide bearings. Replace the chipped
bearings.
MAINTENANCE /REPAIR TROUBLESHOOTING OPERATION ASSEMBLY / INSTALLATION SAFETY / SPECIFICATIONS GETTING STARTED
18
The maintenance jobs are listed below, divided into daily, weekly,
monthly and six-monthly intervals. If the following operations are
neglected, the result will be premature wear of the machine and
poor performance.
Daily maintenance
• General clean the machine to remove accumulated
shavings.
• Clean the lubricant coolant drain hole to avoid excess
fluid.
• Top off the level of lubricating coolant.
• Check blade for wear.
• Check to ensure the proper functionality of the
bandwheel doors and emergency stop.
Weekly maintenance
• Thoroughly clean the machine to remove shavings,
especially from the lubricant fluid tank.
• Use compressed air to clean the blade guides (guide
bearings and drain hole of the lubricating cooling).
• Clean the bandwheel housings and blade sliding
surfaces on bandwheels.
Monthly maintenance
• Check to ensure the motor bandwheel bolts are tight.
• Check to ensure blade guide bearings on the heads are
in perfect running condition.
• Check to ensure the motor, pump, and accident
protection guarding fasteners are tight.
• Check and adjust the blade brush as needed.
Six-month maintenance
Continuity test of the equipment potential protection circuit.
Coolant system
• Check the coolant often for signs of contamination
or breakdown. Drain the entire system and clean
it thoroughly when coolant becomes unsuitable for
further use.
• Empty the reservoir periodically and clean the
coolant screens.
• Flush the entire coolant system with a suitable cleaning
agent when changing coolants.
Drive belt
RR
PP
1. To install or remove the band drive belt, turn the
disconnect switch to “OFF”. Turn the band speed
handwheel (PP) clockwise as far as possible
2. Take off the drive cover by removing the knobs holding it
to the cover’s back-up plate (RR).
2. Slip the old drive belt from around the drive pulley, then
from around the variable speed pulley. Carefully place a
new drive belt into the drive pulley groove. Pull the belt
around and into the variable speed pulley groove.
3. Check the new belt’s tracking in the pulley grooves
by turning the band speed handwheel slowly
counterclockwise. If tracking is correct, replace the drive
cover.
MAINTENANCE - MODEL 9683315 – 10” BAND SAW
GETTING STARTED SAFETY / SPECIFICATIONS ASSEMBLY / INSTALLATION OPERATION TROUBLESHOOTING MAINTENANCE/ REPAIR
19
LUBRICATION SCHEDULE - MODEL 9683315 – 10” BAND SAW
REF. NO. LOCATION DESCRIPTION
and SERVICE RECOMMENDATIONS
LUBRICATION
INTERVAL*
1. Band Tension Screw. Clean and apply grease. MONTHLY
2. Vise Clamp Screw. Clean and apply grease. MONTHLY
3. Drive Motor Slide. Clean and apply grease. 3 MONTHS
4. Head Feed Cylinder. 1 pint (0.47 liter) capacity.
Check oil level if head fall rate is not uniform. Add oil if necessary
CHECK 6 MONTHS.
CHANGE YEARLY
5. Saw Guide Arm Slide. Clean and apply oil. MONTHLY
6. Head Pivot Shaft Bearing Surfaces. Apply Oil MONTHLY
7. Micellaneous: Vise Slide, Hinges, Pivot Points, etc. Clean and apply oil 3 MONTHS
8. Coolant Reservoir. (22 liter) capacity. AS REQUIRED
1.
2.
3.
4.
5.
6.
7.
8.
* Lubrication intervals are based on an 8-hour day, 40-hour work week. Lubricate more often with heavier use.
MAINTENANCE /REPAIR TROUBLESHOOTING OPERATION ASSEMBLY / INSTALLATION SAFETY / SPECIFICATIONS GETTING STARTED
20
WIRING DIAGRAM - MODEL 9683315 – 10” BAND SAW

Other Palmgren Saw manuals

Palmgren 83116 Installation and operation manual

Palmgren

Palmgren 83116 Installation and operation manual

Palmgren 9683338 Instructions for use

Palmgren

Palmgren 9683338 Instructions for use

Palmgren PALM9683295 User manual

Palmgren

Palmgren PALM9683295 User manual

Palmgren 9683127 User manual

Palmgren

Palmgren 9683127 User manual

Palmgren 9683120 User manual

Palmgren

Palmgren 9683120 User manual

Palmgren 9683408 User manual

Palmgren

Palmgren 9683408 User manual

Palmgren CS 250 User manual

Palmgren

Palmgren CS 250 User manual

Palmgren 9683311 User manual

Palmgren

Palmgren 9683311 User manual

Palmgren 83118 User manual

Palmgren

Palmgren 83118 User manual

Palmgren 83115 User manual

Palmgren

Palmgren 83115 User manual

Palmgren 9683122 User manual

Palmgren

Palmgren 9683122 User manual

Palmgren 9684486 Instructions for use

Palmgren

Palmgren 9684486 Instructions for use

Palmgren 9683314 User manual

Palmgren

Palmgren 9683314 User manual

Popular Saw manuals by other brands

Makita 2704 technical information

Makita

Makita 2704 technical information

Milwaukee 6176-20 Operator's manual

Milwaukee

Milwaukee 6176-20 Operator's manual

Feider Machines FSOR17210 user guide

Feider Machines

Feider Machines FSOR17210 user guide

Woodstock SHOP FOX M1113 owner's manual

Woodstock

Woodstock SHOP FOX M1113 owner's manual

Sealey SCS1400 instructions

Sealey

Sealey SCS1400 instructions

Husqvarna 5000 Operator's manual

Husqvarna

Husqvarna 5000 Operator's manual

Chicago Electric 3733 Assembly and operating instructions

Chicago Electric

Chicago Electric 3733 Assembly and operating instructions

King Canada KC-1702FXR Service manual & parts list

King Canada

King Canada KC-1702FXR Service manual & parts list

Makita 2414DB instruction manual

Makita

Makita 2414DB instruction manual

PEGAS-GONDA PEGAS 235 Manual instructions

PEGAS-GONDA

PEGAS-GONDA PEGAS 235 Manual instructions

IKH XW010 instruction manual

IKH

IKH XW010 instruction manual

Charnwood W650 Adjustment

Charnwood

Charnwood W650 Adjustment

CMi C-HKS-1200/185 Original instructions

CMi

CMi C-HKS-1200/185 Original instructions

Power Craft PKZ-210 user manual

Power Craft

Power Craft PKZ-210 user manual

Feider Machines FSOR254S2L instruction manual

Feider Machines

Feider Machines FSOR254S2L instruction manual

Black & Decker BES720 Original instructions

Black & Decker

Black & Decker BES720 Original instructions

Gude FP 600 PLUS Translation of the original instructions

Gude

Gude FP 600 PLUS Translation of the original instructions

Janome JEM GOLD 660 instruction manual

Janome

Janome JEM GOLD 660 instruction manual

manuals.online logo
manuals.online logoBrands
  • About & Mission
  • Contact us
  • Privacy Policy
  • Terms and Conditions

Copyright 2025 Manuals.Online. All Rights Reserved.