manuals.online logo
Brands
  1. Home
  2. •
  3. Brands
  4. •
  5. Palram
  6. •
  7. Patio Furniture
  8. •
  9. Palram EZ Link Kit User manual

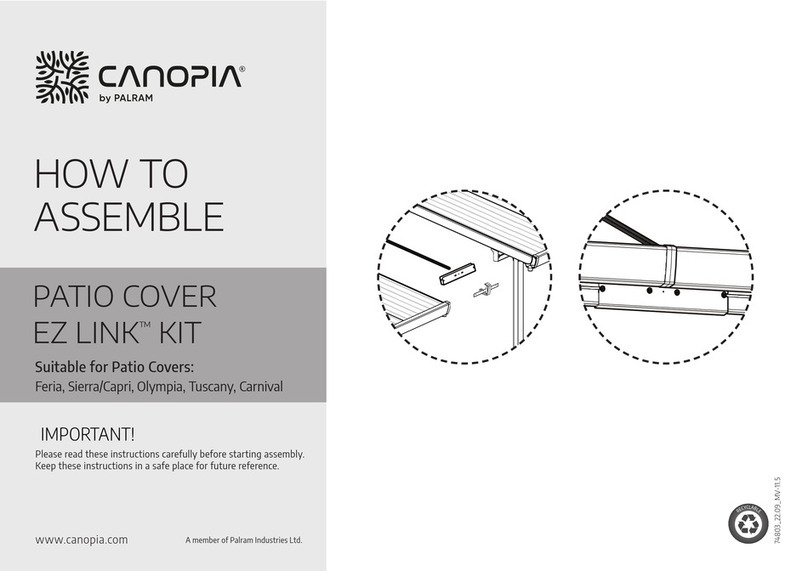
Palram EZ Link Kit User manual

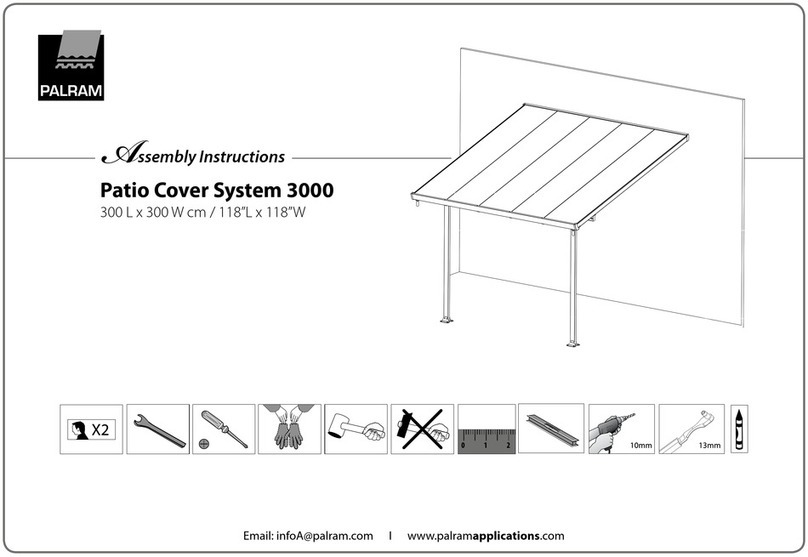
Assembly Instructions
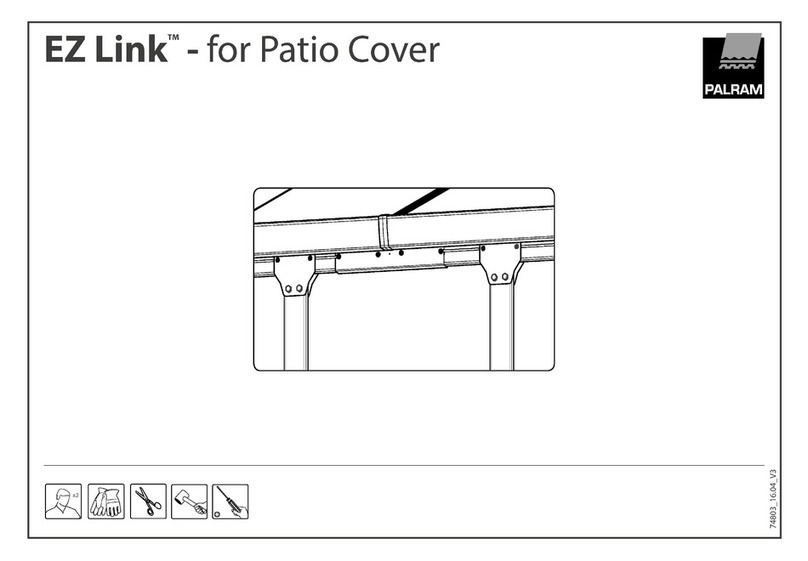
EZ Link KitTM - for Patio Cover
IS IS -
1 . 1A . 1 1 :1
1 :1 : :
www.palramapplications.com
PIeaSe'readthese instructio s tatefu beforyou'start to.
irsSeqt4ethisprocluft
ease Carxy Out the stePs4n .theori;fet 'set Outin leinstrati(Its,
these 'Asiructions gireptacefor future refere.nce,
.
When encountering the information icon, please refer to the relevant
assemblystep for additional comments and assistance.
This icon indicates that the installer should be inside the product.
To assemble this product
(these items not supplied)
koe
twe
ko0
4I
Some parts may have sharp edges. Please be careful when handling
components.
Always wear gloves, eye protection, and long sleeves when assembling
or performing any maintenance on your product.
To prevent injuries, do not allow children to play under the product
during assembly.
This product is suitable for Palram's Patio Covers range
It is highly recommended to be assisted by a second person in some steps.
Sort the parts and check according to the contents parts list.
ye Prior to the installation, several parts from the Patio cover needs to be
dismantle, it is recommend to keep them in a safe place for future need.
* Periodically check the kit components to assure that it remains stable.
In case that you already own Palram Patio cover it is necessary to
dismantle parts as described in Step 1 in the kit assembly manual.
Option No. 1
Step 4: Select option no. 1 if you would like to mount the supporting poles
in different position than the merged position (using part #7431). Please
continue from this position until step 6. (skip step 7&8) continue to step no. 9.
Step 6: Please make sure that distance from the poles and the kit connection
to original patio cover not exceeds 60 cm.
Option No. 2
Step 4: Select option no. 2 if the setting position of the mounting poles is not
relevant. Please follow from step 7.
Step 7: It is optional to use the existing pole to support the connection
between the new extension and the original patio cover.
In such case please store the extra pole for future use or dispose properly.
S!:ap 11: Tightening ofthe bolts is done from the back side of the gutter.
Pay attention: while installing the kit, alignment with original
patio cover is important.
Tighten all screws when completing assembly.
Ann-0.10mq: &tie lesenSie diese An1 eitwIgen. sorgfattig dutc knclos:'
!Tilt defn.Auftmiii (Ohken' Sie die St ite
Erti% wte 4,16 in fief Retenforae an*egeben Ar En
eViatitin Sie dieseAn lei:N.11g 46 einem sitheren ,uf.fOr res'
N actIV '
Wenn Sie dieses Infozeichen Begegnen, dann achten Sie bitte bei dem
entsprechenden Montageschritt auf zusatzliche Kommentare und
Helfende Zusatzinformation
Dieses Symbol zeigt an, dass der Einbauer im Innenraum des Produktes
sein sollte
Sie benotigen folgendes fiir den Aufbau dieses Produktes
(Diese Gegenstande sind nicht enthalten).
4411
Einige Teile haben scharfe Kanten. Bitte gehen Sie beim Anfassen der
Teile vorsichtig vor.
Tragen Sie beim Aufbau oder beim Arbeiten an dem Produkt stets
Augenschutz und lange Armel.
Um Unfalle zu vermeiden sollten Kinder davon abgehalten werden
unter dem Produkt zu spielen.
Dieses Produkt eignet sich fur alle Pergolen der Firma Palram
Es wird dringend empfohlen, von einer zweiten Person in einigen Schritten
assiestiertzu werden.
Sortieren Sie die Teile aus und prufen Sie diese nach dem Inhaltverzeichnis.
Das Produkt muss auf einer ebenen Oberflache positioniert und fixiert werden.
Vor der Installation, mussen mehrere Teile aus der Patio Abdeckung abmontiert
werden, es wird empfohlen, diese an einem sicheren Ort fur den zukunftigen
Gebrauch aufzubewahren.
Oberprufen Sie regelmaBig die Bauteile dieses Sets, urn sicherzustellen, dass es
stabil bleibt.
Falls Sie bereits Ober ein Palram Patio Abdeckung Produkt verfugen, ist es notwendig,
Teile abzumontieren, wie im Schritt 1 der Bauinstruktionen zum Setsaufbau
beschrieben wird.
Option Nr. 1
Schritt 4: Wahlen Sie die Option Nr. 1, falls Sie die unterstutzenden Pfosten in einer
anderen Position als die vorhandene Position montieren wollen (mit dem Teil # 7431).
Bitte fahren Sie fort von dieser Position ab bis auf Schritt 6. (Oberspringen Sie Schritte
7 u. 8) fahren Sie fort mit Schritt. 9.
Schritt 6: Bitte stellen Sie sicher, dass zwischen den Pfosten und Verbindungsset an die
ursprungliche Patio Abdeckung die Entfernung von 60 cm nicht iiberschritten wird
Option Nr. 2
Schritt 4: Wahlen Sie die Option Nr. 2, falls die Einstellungsposition der Pfosten fur Sie
nicht relevant ist. Bitte folgen Sie ab Schritt 7.
Schritt 7: Es ist moglich den bereits existierenden Pfosten zu verwenden, urn
die Verbindung zwischen der neuen Erweiterung und der ursprunglichen
Terrassenabdeckung zu unterstutzen.
In einem solchen Fall bewahren Sie auf und lagern Sie bitte den zusatzlichen Pfosten
fur zukunftigen Gebrauch oder entsorgen Sie diesen.
Schritt 11: Das Festziehen der Schrauben erfolgt von der Ruckseite der Rinne.
Bitte Beachten Sie: Bei der Installation des Bausatzes, ist die Ausrichtung zur
original Patio Abdeckung sehr wichtig
Ziehen Sie alle Schrauben fest an, nach dem Sie die Montage beendet haben.
4 4
" 6 6 Z, * ' * '^-
6 $ w4
Lorsque vous rencontrez Hanle d'information, veuillez vous referer a
l'etape d'assemblage approprie pour remarque et assistance additionnels.
Cette ic6ne indique que le constructeur doit ce placer a l'interieur du
produit.
Pour assemblage de ce produit (ces elements ne sont fournis)
Certaines pieces peuvent etre coupantes.
Soyez prudent lorsque vous manipulez les elements.
Porter toujours des gants, des lunettes de protection et des vetements
a manches longues lors de l'assemblage ou toute operation de
maintenance sur votre produit.
Pour eviter les blessures ne laisser pas les enfants jouer autour et dans
l'objet lors de l'assemblage.
Ce produit est adapte pour les Gamme Couvres Patio de Palram.
II est vivement recommande thetre assister par une deuxieme personne
lors de Hnstallation.
"Ne Triez les pieces et verifiez selon la liste de contenu.
Avant l'installation, certaine parties du couvre Patio doivent etres demonte,
il est recommande de les conserver dans un endroit si- pour besoin ulterieurs.
Verifiez les elements du kit regulierement afin de s>assurer qu>il reste stable.
Dans le cas ou vous avez déjà un Couvre Patio Palram il est necessaire de de-
monter les pieces comme decrit a l'etape 1 dans la notice de montage du kit
Option No. 1
Etape 4: Choisissez option no. 1 Si vous voulez monter les poteaux de soutien
en differente emplacement que celle
de l'emplacement fusionne (en utilisant la piece #7431). Continuez s'il vous
plait a partir de cette position jusqu'a l'etape 6 (passez les etapes 7 & 8)
et continuez a l'etape no. 9
Etape 6 : Assurez-vous s'il vous plait que la distance des poles et le kit
connexion a votre couvre patio initiale ne depasse pas les 60 cm
Option No. 2
Etape 4: Choisissez option no. 2 En cas ou la position de reglage des poles ne
sont pas applicables. Continuez s'il vous plait de l'etape 7
Etape 7 : II est possible d'utiliser le pole actuel pour soutenir la connexion
entre la nouvelle extension et le couvre patio initial. Dans ce cas
veuillez s'il vous plait conserver le pole supplementaire pour usage ulterieur
ou disposez en correctement.
Etape 11 : Renforcement des vis se fait du cote arriere de la gouttiere.
Attention: Lors de l'installation du kit il est important d'aligner le
couvre patio original.
Renforcez toutes le vis des que l'assemblage est acheve.
SV
.10.6d gt til.tristr
i.11.6fiterS tienN Rnadakt:
Fag atla 'stek) t den cuthing soni dC avgiVeta tnstruktioner
Spar41. tn-sttuktii:morna ttt sEkert statefiir feaniticia, brutk.
nowtant Innan du
Nar du under monteringens gang ser informationssymbolen som visas sa
hanvisas du till det relevanta monteringsmomentet f6r vidare kommentarer
och assistans.
Denna symbol indikerar att installatoren skall befinna sig pa insidan av
produkten.
For att montera denna produkt (detta är ej inkluderat.)
Vissa delar har skarpa kanter. Var forsiktig nar du handskas med dessa.
Anvand alltid handskar, ogonskydd och langarmat plagg nar du monterar
eller utfor underhall av din produkt.
Far att forhindra olyckor, lat inte barn leka under konstruktionen nar den
monteras.
Denna produkt passar Palrams Patio Covers produktlinje.
.sf Det är ytterst rekommenderat att du far assistans av ytterligare en person
nar du utfor installationen.
Sortera alla delar och kontrollera dem i enlighet med
innehallsforteckningen.
Innan installation sa behover flera av Patiotackningens delar tas isar. Vi
rekommenderar dig att farvara dem pa en sakert stalle far framtida bruk.
Kontrollera periodvis delarna i konstruktionen far att vara forsakrad om att
den star stadigt.
Om du redan ager en Palram Patio tackning sa är det nodvandigt att ta isar delar
(beskrivet i steg 1 i monteringsmanualen.)
Alternativ 1
Steg 4: Valj alternativ 1 om du vill montera stodpalarna i olika positioner an den
sammanfogade positionen (anvand del #7431.)
Fran detta moment sa fortsatter du upp till steg 6. Hoppa aver steg 7och 8 och
fortsatt till steg 9.
Steg 6: Kontrollera att avstandetfran palarna och satsanslutningen till patiots
originaltacke inte overstiger 60 cm.
Alternativ 2
Steg 4: Valj alternativ nummer 2 om monteringspalens position inte ar relevant.
Fortsatt sedan att montera fran steg 7.
Steg 7: Det är valfritt att anvanda den befintliga Olen far att stodja farbindelsen
mellan den nya farlangningen och den originella patiotackningen. Ar sa fallet sa
forvara den extra Olen farframtida bruk eller gar dig av med den.
Steg 11: Fastdragningen av muttrarna gars fran backsidan av rannan.
Viktigt: Nar du installerar satsen ar det viktigt att patiotackningen anpassas.
Dra at alla skruvar nar du är fardig med monteringen.
Als u een informatiepictogram opmerkt, lees dan de relevante
montagestap voor extra opmerkingen en hulp.
Dit pictogram geeft aan dat de installateur in het product moet staan.
Dit product te monteren
(deze zaken worden niet meegeleverd)
Sommige onderdelen hebben scherpe randen. Wees voorzichtig bij het
hanteren van de componenten.
Draag steeds handschoenen, oogbescherming en lange mouwen bij de
montage oftijdens onderhoudstaken aan uw product.
Laat kinderen tijdens de montage niet spelen onder hetproduct om
letsels te voorkomen.
Dit product is geschikt voor de Palram's Patio Cover serie.
Het is sterk aan te raden u te laten bijstaan door een tweede persoon
tijdens het installatieproces.
Sorteerde onderdelen en controleer de inhoudslijst.
Voor de installatie ervan, moeten verschillende onderdelen van de
Patio cover gedemonteerd worden; het wordt aangeraden om ze op een
veilige plaats te bewaren voor later gebruik.
Controleer regelmatig de onderdelen van het pakket om zeker te zijn dat
het stabiel blijft.
In het geval dat u reeds beschikt over een Palram Patio cover, is het noodzakelijk
om de onderdelen beschreven in Stap 1 in de montagehandleiding van het
pakket te demonteren.
Optie Nr. 1
Stap 4: kies optie nr. 1 als u de steunpalen op een andere positie wilt monteren
dan de samengevoegde positie (gebruik van onderdeel #7431). Ga vanuit deze
positie verder tot en met stap 6. (sla stap 7 en 8 over) en vervolg met stap nr. 9.
Stap 6: zorg ervoor dat de afstand van de palen en het verbindingstukvan het
pakket tot de oorspronkelijke patio niet groter is dan 60 cm.
Optie Nr. 2
Stap 4: kies optie nr. 2 als de montagepositievan de steunpalen niet relevant is.
Vervolg met stap 7.
Stap 7: eventueel kan de bestaande paal gebruikt worden om de verbinding te
ondersteunen tussen de nieuwe uitbreiding en de oorspronkelijke patio cover.
In dergelijk geval, bewaar de extra paal voor later gebruik of verwijder hem naar
behoren.
Stap 11: het aandraaien van de bouten gebeurt aan de achterkant van de goot.
Opgelet: bij het installeren van het pakket, is de uitlijning met de originele
patio cover erg belangrijk.
Draai alle schroeven vast bij het voltooien van de montage.
Contents
Item
411
461
466
7335
7029
UV
Qty. Item
9 7431
(+1)
4(+1) 7334
13
1
7039
7440 0
----*-,,......_........, 0 0-."---
o . \s.
I I
1 /1
...
Qty.
1
1
2
1
4.6
.
-110.-me
. .
2
7039 1
a.
Et.
ah
7335 1
3
7334 1
1).
4".
411
466
OR
5 Option
1
411
466
1
4
4
7431 1
0+10
®®
461
466
Option 1
4
4
t-
max-
600mm
1'119A"
o-
max-
600mm
1'11 9A6"
i Option 2
9 Options 1+2
7440 1
10
7029
Options 1+2
1 7039 1
411
466
e,
4
4

Other manuals for EZ Link Kit

2

Other Palram Patio Furniture manuals

Palram Palermo 3000 User manual

Palram

Palram Palermo 3000 User manual

Palram EZ Link Feria User manual

Palram

Palram EZ Link Feria User manual

Palram SideWall 3 User manual

Palram

Palram SideWall 3 User manual

Palram Canopia MILANO 10x10 Administrator Guide

Palram

Palram Canopia MILANO 10x10 Administrator Guide

Palram Sierra 3x5.46 User manual

Palram

Palram Sierra 3x5.46 User manual

Palram EZ Link Kit User manual

Palram

Palram EZ Link Kit User manual

Palram CANOPIA EZ LINK KIT Administrator Guide

Palram

Palram CANOPIA EZ LINK KIT Administrator Guide

Palram Olympia User manual

Palram

Palram Olympia User manual

Palram CANOPIA STOCKHOLM Administrator Guide

Palram

Palram CANOPIA STOCKHOLM Administrator Guide

Palram Feria User manual

Palram

Palram Feria User manual

Palram Feria User manual

Palram

Palram Feria User manual

Palram Feria Quick start guide

Palram

Palram Feria Quick start guide

Palram Curtain Set User manual

Palram

Palram Curtain Set User manual

Popular Patio Furniture manuals by other brands

Country Living Country Living AKS02315 owner's manual

Country Living

Country Living Country Living AKS02315 owner's manual

L.L.Bean HOME 9’ Aluminum Collar Tilt Umbrella quick start guide

L.L.Bean

L.L.Bean HOME 9’ Aluminum Collar Tilt Umbrella quick start guide

Treasure Garden USA459 Assembly and operation guide

Treasure Garden

Treasure Garden USA459 Assembly and operation guide

Woodline Mistral Assembly instructions

Woodline

Woodline Mistral Assembly instructions

EAST OAK EO-CS001 owner's manual

EAST OAK

EAST OAK EO-CS001 owner's manual

Hanover Brigantine Dining Table owner's manual

Hanover

Hanover Brigantine Dining Table owner's manual

AmazonBasics B07YNGHH6K manual

AmazonBasics

AmazonBasics B07YNGHH6K manual

PATIOJOY HW69298 Instruction booklet

PATIOJOY

PATIOJOY HW69298 Instruction booklet

Scolaro Alu Poker/Double White Assembling Instruction

Scolaro

Scolaro Alu Poker/Double White Assembling Instruction

Royalcraft 735340 Assembly instructions

Royalcraft

Royalcraft 735340 Assembly instructions

Glatz Suncomfort Varioflex instruction manual

Glatz

Glatz Suncomfort Varioflex instruction manual

BCP SKY5389 instruction manual

BCP

BCP SKY5389 instruction manual

PATIOJOY HW71133 manual

PATIOJOY

PATIOJOY HW71133 manual

PATIOJOY HW65357 manual

PATIOJOY

PATIOJOY HW65357 manual

Safavieh Outdoor PAT7051A manual

Safavieh Outdoor

Safavieh Outdoor PAT7051A manual

Glatz SUN COMFORT SUNFLEX Instructions for use

Glatz

Glatz SUN COMFORT SUNFLEX Instructions for use

kingsley-bate Ipanema Settee IP55 Assembly instructions

kingsley-bate

kingsley-bate Ipanema Settee IP55 Assembly instructions

Garden Oasis 50-34332-A owner's manual

Garden Oasis

Garden Oasis 50-34332-A owner's manual

manuals.online logo
manuals.online logoBrands
  • About & Mission
  • Contact us
  • Privacy Policy
  • Terms and Conditions

Copyright 2025 Manuals.Online. All Rights Reserved.