manuals.online logo
Brands
  1. Home
  2. •
  3. Brands
  4. •
  5. Panasonic
  6. •
  7. Bread Maker
  8. •
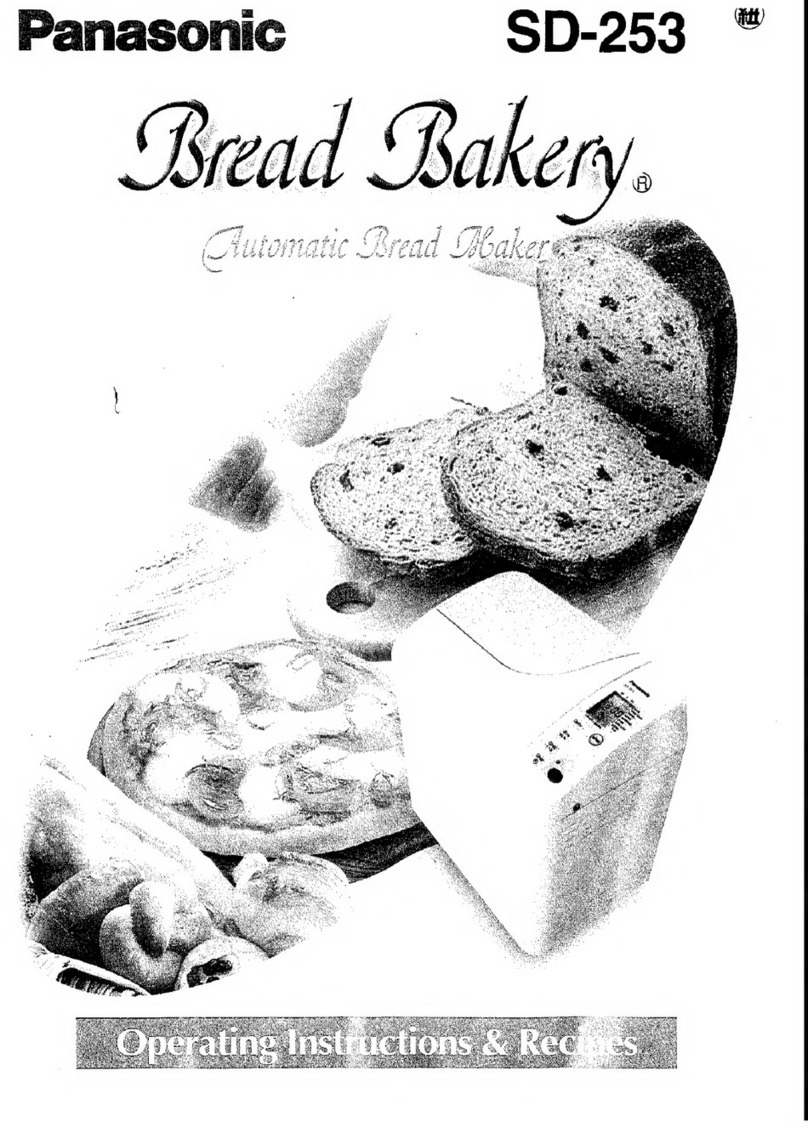
  9. Panasonic Bread Bakery SD-251 User manual

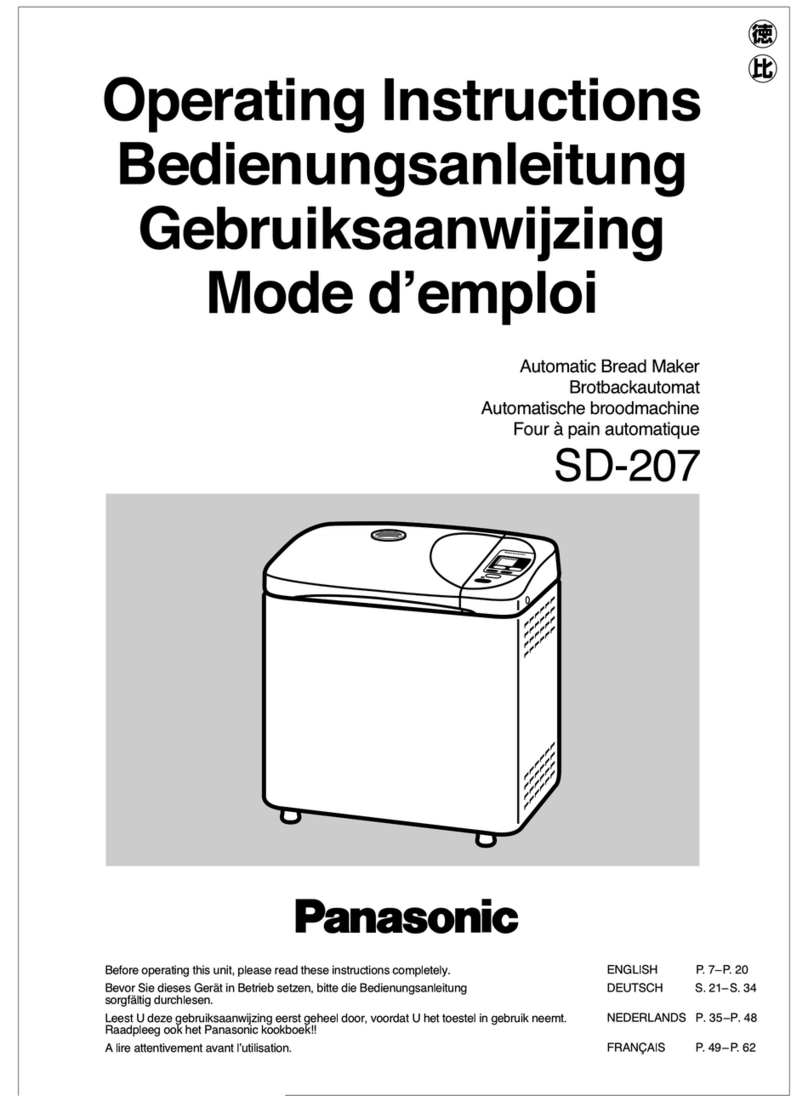
Panasonic Bread Bakery SD-251 User manual

®
Operating
Instructions
™
Bedienungsanleitung
Gebruiksaanwijzing
Mode
d’emploi
Automatic
Bread
Maker
Brotbackautomat
Automatische
broodmachine
Four
a
pain
automatique
SD-251
Panasonic
Before
operating
this
unit,
please
read
these
instructions
completely.
ENGLISH
P.
7-P.
20
Bevor
Sie
dieses
Gerat
in
Betrieb
setzen,
bitte
die
Bedienungsanleitung
DEUTSCH
S.
21-S.
34
sorgfaltig
durchlesen.
Leest
U
deze
gebruiksaanwijzing
eerst
geheel
door,
voordat
U
het
toestel
in
gebruik
neemt.
NEDERLANDS
P.
35-P.
48
Raadpleeg
ook
het
Panasonic
kookboek!!
A
lire
attentivement
avant
l'utilisation.
FRANCAIS
P.
49—P.
62
Table
of
Contents
Placement,
IMPORTANT
TIPS.......ssssssssssssssssesevsssssseeses
2
Sate
NOMMALON
sy
asssevactisiccnstesratAcatevanctenanucinn
3
Basic
Principles
when
Baking
with
Bead
Bakeryo
.......7
BASIC:
FRAEUILOS:
&
cssteverccccstsostaawstssabasevonit
tows
taeraastasbetters
7
BaKili)
PROTEINS
.ce.cdccciccinsisrssdarcntiastanapiencarnnninies
8
Parts
identification.......sssssssssssssssscesscsscecscesssesssesssssseee
9
Control
panel-display/fUNctiOns.........ssssssssssevssssesssees
10
HOWTO
sHISE
4c
5
acs
ctsslnapnetwamecnntnsenacrtnbuatminite
11-16
-To
use
the
timer
for
baking
loaves
only
with
the
BAKE
Option
.............csssssssesssssecsssseeeueesseeeee
14
-Using
the
BAKE
RAPID
Option
.........scssesccccssesenees
14
“Using
the
DOUGH
Option
.......ssseccscccscsssssssseesesssssesses
15
-Using
the
BAKE
ONLY
Option
uu...
15-16
FHOW
10:
CIGAN
23s.
heen
iieenuitinumednula
tiateetes
16
Slicing
and
storing
the
Dread
oo...
17
Leakage
of
bread
ingredients
from
the
bread
pan.........17
SPECI
CaN
ONS
casas
tasascscvcsizpceasAvadventbevesdulerseasaceslettstune
17
Display
Indications
for
Abnormal
Conditions................
18
Before
Calling
fOr
SCrViC€
.....ssssssccsssssssestessesescsesessee
19-20
inhoudstafel
Plat
SIG
i
asvastsneis
etic
Rutin
tivcthasscaneceetst
eee
5
BELANGRIIKE
TIPS
cssssssnissssccsouscnsestasustivetsavecttaseraeeptases
5
Basisprincipes
bij
het
bakken
met
de
Bread
Bakerya
....35
BaSiSk@nMerken
.......ccssscsssesesseesseecsessssssssseassssssessneeees
35
Verloop
van
het
bakproces
......cessceseseeseerereeessee
36
COMBI
CBIEN
«2
cesressecncenssetentpabeeaatonieeinittaniaana
37
Bedieningspaneel-Display/FUNKTIAS
..............sscseescees
38
GeDrUikSAANWIIZING
.........ccssecsessessesseecseeeseeeeeesees
39-44
“Gebruiken
van
de
timer....eeecsssssscsssssseessseessecssesseseessees
42
-Gebruik
van
de
BAKE
RAPID
mOdUS
..........:.ssseeseeen
42
-Gebruik
van
de
DOUGH
MOdUS
..........ceccsesseeeeeeen
43
-Gebruik
van
de
BAKE
ONLY
mOdUS............sssseeee:
43-44
Het
toestel
SCHOONMAKEN
.......c.sscessecssssssessesseeseeeeen
44
Snijden
en
bewaren
van
het
bDrOOd
............eesseecceeeeee
45
De
ingrediénten
lopen
over
in
het
bakblik
.............-++
45
T@ChniSche
QeQeVens
............cssscessessesssesssseecsteesesseens
45
Aanduidingen
op
het
display
bij
ongewone
situaties.....46
Alvorens
een
beroep
te
doen
op
een
Service
Center
(dieNSt-Ma-VEFKOOD).......secsssseccsstssrssteseosetecesneesees
47-48
Inhaltsubersicht
Aufstellen
des
Brotbackautomaten..........csssssssccssesseen
4
WIGHTIGE
HINWEISE..sicsiscsitsisssssissesducsicovatescieslascancian
4
Brot-
UNd
TeigprOQraMmMe.....escscsssccsssssseeesesesssesssesees
21
-
Wahl
der
Brotgr6Be
und
des
Braunungsgrads..........
21
Zubereitungsphasen
der
Programme
inkl,
der
Brite
/TEIOtV
PAM
ssscscissscussdastscsscasnsnentusanistenisianeetanun:
22
Schematische
Ansicht
deS
Gerates........ssessseesscscees
23
BednGHTBlE:
cc,.c20cs
cats
caennmuipiuansranieuctdare
eid
24
Bedienung
des
Brotbackautomaten..........scssse
25-30
-Brotbacken
mit
ZeitVOrWall.........ccscssssssesessssseeesecen
28
-Der
Betrieb
mit
"Brot
SCHNEI
........ecsssssssssessscsssseeses
28
PDB
ET
CIUDCWICU
stiaoe
tts
2s.
cantecacmabemauniiane
29
-Das
Programm
"Backen'’.........ssssssesssssessseeeeeeees
29-30
Reiniguing
UNd
PF
EGE
...........ssssssssseessesscssssssseeresscessseen
30
LAQ@FUNG
COS
BrOtes...........cssssssssssssssssssssssssesecssssssseeee
31
Austreten
von
Zutaten
aus
der
BackfOrm...........sses.
31
TOGHMISCHE
Dalehl::.24cesirsirnigaancaeentncuts
31
Anzeige
Dei
FUNKtIONSSTOFUNGEN
........ssssessecsseseeesseesssees
32
Uberpriifungstabelle...esssssssssesssssssssssesseses
33-34
Table
des
matiéres
WIStANAUON
sos
cttiittecatn
nanos
eaveat
eaestenndii
6
CONSEILS
IMPORTANTS
.......cecssesssesssscsssssstessnesssen
6
Principes
de
base
pour
la
cuisson
du
pain
Al'aide
du
Bread
Bakery
...scsssesssesseeeeesee
49
Caractéristiques
dé
DASE
.......c.sescssssessssseesseesseeseeenee
49
PFOCECUIES
CE
CUISSON.......cecsesssecsstecseecssecsseeseesses
50
Nomenclature
des
PiGCeS
......c.sscecssecsssecssesssssesseses
51
Fonctions
du
panneau
de
commande/Panneau
d’affichage...52
MOG6-C'
CIA
DION
secivssidscdoseispcncrscoansnivavanuaietitas
53-58
“Utilisation
GU
programMmMateUr.......sssssecsscecsssssssneeesees
56
-Utilisation
du
mode
BAKE
RAPID
..........c.ssssseeesecees
56
-Utilisation
du
Mode
DOUGH
.........ecseessescseecsecens
57
-Utilisation
du
mode
BAKE
ONLY...
5/-58
Nettoyage
de
l'appareil...
58
Découpage
du
pain
en
tranches
et
conservation.........
59
Fuites
AU
NIVEAU
CU
MOUIG.........c.scsseesssesseessesssseeeesees
59
Caractéristiques
teChniqUeS..........cscssessesssessseees
59
Indications
en
cas
de
éfaillANCe...........sscecsecseenen
60
Mesures
a
prendre
avant
d’appeler
le
SCrViCE
TECHMIQUE............essscecseessecssessssseessserssees
61-62
a
eites
Thank
you
for
purchasing
a
Panasonic
Bread
Bakeryo,
SD-251.
For
your
own
safety
and
convenience,
please
read
these
instructions
carefully
before
operating.
Installation
of
the
Bread
Bakeryo.
IMPORTANT:
THIS
UNIT
HAS
TO
BE
EARTHED
FOR
PERSONAL
SAFETY!
lf
your
AC
outlet
is
not
grounded,
it
is
the
personal
responsibility
of
the
customer
to
have
it
replaced
with
a
properly
ground
wall
socket
of
230V
50Hz
(230-240V
50Hz
for
U.
K.).
The
Brad
Bakery
has
to
be
installed
to
a
minimum
10-ampere
(T)
fuse.
Placement
1.
Do
not
use
the
appliance
outdoors.
This
appliance
was
manufactured
for
Domestic
Use
only.
2.
Place
the
appliance
on
a
firm,
dry,
flat
worktop
and
avoid
putting
it
on
textiles
(e.
g.
tablecloths,
carpets,
etc.)
or
unstable
bases.
3.
In
order
to
guarantee
satisfactory
baking,
the
appliance
should
not
be
used
in
the
immediate
vicinity
of
heat
sources
or
in
rooms
where
humidity
is
high.
4.
During
the
baking
process,
the
casing
heats
up.
A
distance
of
at
least
5
cm
(2
inches)
from
walls
and
other
objects
should
therefore
be
maintained.
ee
TIPS
.
If
the
supply
cord
is
damaged,
it
must
be
replaced
by
the
manufacturer
or
its
service
agent
or
a
similarly
trated
person
in
order
to
avoid
a
hazard.
2.
Never
try
to
repair
the
appliance
by
yourself.
If
it
requires
checking,
adjusting
or
repairing,
take
the
appliance
to
your
Panasonic
dealer
and
have
it
serviced
by
an
authorised,
trained
technician.
3.
Do
not
immerse
the
appliance,
the
supply
cord
or
the
plug
in
water
or
other
liquids.
4.
Do
not
let
the
supply
cord
hang
over
the
edge
of
table
or
counter
or
touch
hot
surfaces.
5.
Never
remove
the
bread
pan
or
unplug
the
appliance
when
it
is
in
use.
If
you
do,
the
program
sequence
stops
and
cannot
be
continued
unless
it
is
restarted
within
10
minutes.
The
appliance
has
a
10
minute
memory.
If
the
power
is
returned
within
10
minutes,
the
program
will
resume.
6.
When
in
use,
do
not
block
the
air
vents
of
the
appliance.
Do
not
place
any
covers
or
cloths
on
the
appliance.
7.
Itis
possible
to
lift
the
lid
briefly
to
check
the
progress
of
the
loaf,
but
it
is
not
advisable
to
keep
opening
the
lid
as
this
can
affect
the
rise
and
baking
results.
8.
When
removing
the
hot
bread
pan
with
the
baked
bread,
use
an
ovencloth
or
oven
gloves,
as
the
body
and
the
bread
pan
are
very
hot.
9.
Make
sure
that
the
interior
of
the
appliance
and
the
bread
pan
are
always
clean
in
order
to
guarantee
a
satisfactory
program
sequence.
10.
Keep
the
appliance
out
of
the
reach
of
children.
Only
allow
children
to
use
the
appliance
under
close
supervision
of
adults
and
only
after
adequate
instructions
have
been
given
so
that
the
child
is
able
to
use
the
appliance
safely
and
understands
the
hazards
of
improper
use.
11.
This
appliance
is
to
be
used
for
the
making
of
bread,
dough
and
teabreads
as
explained
in
the
following
instructions.
FOR
U.K.
ONLY
CLASS
I
FOR
BS415/BS3456
FOR
YOUR
SAFETY
PLEASE
READ
THE
FOLLOWING
TEXT
CAREFULLY.
This
appliance
is
supplied
with
a
moulded
three
pin
mains
plug
for
your
safety
and
convenience.
A
13
amp
fuse
is
fitted
in
this
plug.
Should
the
fuse
need
to
be
replaced
please
ensure
that
the
replacement
fuse
has
a
rating
of
13
amps
and
that
it
is
approved
by
ASTA
or
BSI
to
BS1362.
Check
for
the
ASTA
mark
i)
or
the
BSI
mark
Y
on
the
body
of
the
fuse.
If
the
plug
contains
a
removable
fuse
cover
you
must
ensure
that
it
is
refitted
when
the
fuse
is
replaced.
If
you
lose
the
fuse
cover
the
plug
must
not
be
used
untill
a
replacement
cover
is
obtained.
A
replacement
fuse
cover
can
be
purchased
from your
local
Panasonic
Dealer.
IF
THE
FITTED
MOULDED
PLUG
IS
UNSUITABLE
FOR
THE
SOCKET
OUTLET
IN
YOUR
HOME,
THEN
THE
FUSE
SHOULD
BE
REMOVED
AND
THE
PLUG
CUT
OFF
AND
DISPOSED
OF
SAFELY.
THERE
IS
A
DANGER
OF
SEVERE
ELECTRICAL
SHOCK
IF
THE
CUT
OFF
PLUG
IS
INSERTED
INTO
ANY
13
AMP
SOCKET.
If
a
new
plug
is
to
be
fitted
please
observe
the
wiring
code
as
shown
below.
If
in
any
doubt
please
consult
a
qualified
electrician.
WARNING...THIS
APPLIANCE
MUST
BE
EARTHED.
IMPORTANT
The
wires
in
this
mains
lead
are
coloured
in
accordance
with
the
following
code;
Green-and-yellow:
Earth
Blue:
Neutral
Brown:
Live
As
the
colours
of
the
wire
in
the
mains
lead
of
this
appliance
may
not
correspond
with
the
coloured
markings
identifying
the
terminals
in
your
plug,
proceed
as
follows:
The
wire
which
is
coloured
GREEN-and-YELLOW
must
be
connected
to
the
terminal
in
the
plug
which
is
marked
with
the
letter
E
or
by
the
Earth
symbol
=
or
coloured
GREEN
or
GREEN-and-YELLOW.
The
wire
which
is
coloured
BLUE
must
be
connected
to
the
terminal
in
the
plug
which
is
marked
with
the
letter
N
or
coloured
BLACK.
The
wire
which
is
coloured
BROWN
must
be
connected
to
the
terminal
in
the
plug
which
is
marked
with
the
letter
L
or
coloured
RED.
How
to
replace
the
fuse.
Open
the
fuse
compartment
with
a
screwdriver
and
replace
the
fuse.
*
This
appliance
requires
a
13
AMP
fuse.
¢
This
apparatus
was
produced
to
BS
800
(1983).
Herzlichen
Gliickwunsch.
Sie
haben
mit
dem
Panasonic
Brotbackautomaten
SD-251
ein
ideales
Gerat
zum
Zubereiten
von
selbstgebackenen
Broten
und
Hefeteigen
erworben.
Lesen
Sie
vor
Gebrauch
des
Brotbackautomaten
die
Bedienungsanleitung
sorgfaltig
durch.
Der
Brotbackautomat
ist
nur
fiir
die
Zubereitung
von
Broten
und
Teigen
laut
Bedienungsanleitung
bzw.
beiliegendem
Rezeptheft
geeignet.
AnschlieBen
des
Brotbackautomaten
Erdungsvorschriften
:
WICHTIG:
ZUR
SICHERHEIT
VON
PERSONEN
MUSS
DIESES
GERAT
GEERDET
SEIN!
Ist
die
Steckdose
nicht
geerdet,
muB
der
Kunde
die
Steckdose
durch
eine
ordnungsgemaBe
Schutzkontakt-
steckdose
mit
einer
Netzspannung
von
230V/50Hz
(230
-
240V
50Hz
fir
U.K.)
ersetzen
lassen.
Deutsch
Der
Brotbackautomat
muB
an
das
Netz
liber
eine
mindestens
10-A-(T)
Installationssicherung
angeschlossen
werden.
Aufstellen
des
Brotbackautomaten
1.
Benutzen
Sie
das
Gerat
nicht
im
Freien.
Der
Brotbackautomat
ist
nur
fiir
den
Haushaltsgebrauch
konzipiert.
2.
Stellen
Sie
das
Gerat
auf
eine
feste,
trockene
und
ebene
Arbeitsflache.
Plazieren
Sie
es
nicht
auf
Tischttcher,
Tisch-Sets,
Teppiche
usw.
3.
Um
einen
einwandfreien
Backvorgang
zu
gewahrleisten,
sollte
das
Gerat
nicht
in
unmitteloarer
Nahe
von
Gas-
oder
Elektroherden
und
nicht
in
Raumen
mit
hoher
Luftfeuchtigkeit
in
Betrieb
genommen
werden.
4.
Wahrend
des
Backvorganges
erwarmt
sich
das
Gehause.
Halten
Sie
daher
einen
Mindestabstand
von
5
cm
zu
Wanden
und
anderen
Gegenstanden
ein.
WICHTIGE
HINWEISE
1.
Wenn
das
Netzkabel
beschadigt
ist,
mu8
es
durch
den
Hersteller,
den
kundendienst
oder
eine
person
mit
der
entsprechenden
Qualifikation
ersetzt
werden,
um
eventuelle
Gefahren
zu
eliminieren.
2.
Dieses
Gerat
sollte
nur
durch
einen
qualifizierten
Kundendienst
gewartet
werden.
Setzen
Sie
sich
mit
dem
nachsten
autorisierten
Kundendienst
in
Verbindung,
um
das
Gerat
Uberprtifen,
reparieren
oder
einstellen
zu
lassen.
3.
Das
NetzanschluBkabel
oder
den
Netzstecker
nicht
in
Wasser
tauchen.
4.
Das
NetzanschluBkabel
nicht
mit
heiBen
Oberflachen
in
Bertihrung
bringen
und
nicht
Uber
Tisch-oder
Thekenkanten
hangen
lassen.
5.
Ziehen
Sie
wahrend
des
Geratebetriebs
den
Netzstecker
nicht
heraus.
Der
Programmablauf
wird
dadurch
unterbrochen.
Ist
dies
jedoch
der
Fall,
erméglicht
eine
Stromausfallsicherung
automatisch
den
Neustart,
wenn
der
Ausfall
kiirzer
als
10
Minuten
ist.
Nehmen
Sie
die
Backform
wahrend
des
Betriebs
nicht
heraus.
6.
Wahrend
des
Betriebs
keine
Decken,
Tuicher
oder
andere
Gegenstande
auf
das
Gerat
legen.
Die
Luftungsdffnungen
dirfen
nicht
verdeckt
werden.
7.
Offnen
Sie
das
Gerat
nicht
mehr
nach
dem
ersten
Knetvorgang
(siehe
Zubereitungsphasen
Seite
22),
das
Back-
bzw.
Teigergebnis
kénnte
dadurch
beeintrachtigt
werden.
8.
Benutzen
Sie
nach
dem
Backvorgang
unbedingt
Topflappen
bzw.
Topfhandschuhe
zur
Entnahme
der
Backform,
da
sowohl
die
Backform
als
auch
das
Gerat
sehr
heifs
sind.
9.
Achten
Sie
darauf,
daB
der
Innenraum,
die
Backform
und
der
Knethaken
stets
sauber
sind,
um
einen
einwandfreien
Programmablauf
zu
gewahrleisten.
10.
Grundsatzlich
ist
Kindern
die
Benutzung
des
Gerates
nicht
gestattet.
Kindern
darf
die
Benutzung
des
Gerates
nur
unter
Aufsicht
eines
Erwachsenen
erlaubt
werden,
wenn
eine
ausreichende
Anweisung
gegeben
wurde,
die
das
Kind
in
die
Lage
versetzt,
das
Gerat
in
sicherer
Weise
zu
bedienen
und
die
Gefahr
einer
falschen
Bedienung
verstehen
zu
kénnen.
11.
Nehmen
Sie
das
Gerat
nie
ohne
Lebensmittel
in
Betrieb.
-4-
spueapey
Onze
dank
voor
de
aankoop
van
de
Panasonic
broodbakautomaat,
SD-251.
Neem
uit
veiligheidsoverwegingen
en
voor
het
beste
resultaat
deze
handleiding
aandachtig
door.
Installatie
van
de
broodbakautomaat
BELANGRIJK:
DIT
TOESTEL
DIENT
IN
HET
BELANG
VAN
UW
EIGEN
VEILIGHEID
TE
WORDEN
AANGESLOTEN
OP
EEN
GEAARD
STOPCONTACT
Indien
uw
stopcontact
niet
geaard
is,
is
het
de
persoonlijke
verantwoordelijkheid
van
de
gebruiker
om
het
te
laten
vervangen
door
een
geaard
stopcontact
van
230V/50Hz
(230-240V
50Hz
voor
het
Verenigd
Koninkrijk)
De
broodbakautomaat
dient
te
worden
aangesloten
aan
een
bij
minimum
10
ampére
beveiligde
elektrische
kring.
PLAATSING
Gebruik
de
broodbakautomaat
enkel
binnenshuis.
Het
toestel
werd
uitsluitend
ontwikkeld
voor
huishoudelijk
.
gebruik.
=
2.
Plaats
het
toestel
op
een
stevig,
effen
en
droog
werkvlak.
Plaats
het
niet
op
een
wankel
opperviak
of
op
een
stuk
stof
(tafelkleed,
tapijt,...).
3.
Bedek
het
toestel
niet
tijdens
het
gebruik.
Wilt
u
een
perfekt
resultaat,
plaats
de
broodoven
dan
niet
in
de
buurt
van
een
warmtebron
of
in
een
te
vochtige
ruimte.
4.
Tijdens
het
bakken
wordt
het
toestel
warm;
laat
dus
een
ruimte
van
ong.
5
cm
tussen
de
wand
of
omliggende
voorwerpen
en
de
broodoven.
a
eduhunduais
TIPS
.
Als
het
netsnoer
beschadigd
is,
moet
u
dit
door
de
fabrikant,
een
servicemonteur
of
een
andere
bevoegde
persoon
laten
vervangen
om
een
gevaarlijke
situatie
te
voorkomen.
2.
Tracht
niet
zelf
herstellingen
uit
te
voeren.
Reparaties
mogen
uitsluitend
en
alleen
worden
uitgevoerd
door
daartoe
gekwalificeerd
service
personeel.
3.
Dompel
het
toestel,
het
netsnoer
of
de
stekker
nooit
onder
in
water
of
in
eender
welke
andere
vioeistof.
4.
Laat
het
netsnoer
niet
hangen
over
de
oppervilak
waarop
het
toestel
zich
bevindt
en
houdt
het
snoer
uit
de
buurt
van
warme
of
hete
oppervlaktes.
5.
Haal
de
stekker
niet
uit
het
stopcontact
en
verwijder
het
bakblik
nooit
terwijl
het
toestel
in
gebruik
is.
Doet
u
dat
wel,
dan
zal
het
programma
stopgezet
worden
en
pas
na
10
minuten
terug
opgestart
kunnen
worden.
De
broodbakautomaat
heeft
bij
sttoomonderbreking
een
geheugen
van
10
minuten.
6.
De
ventilatie-openingen
van
de
broodbakautomaat
moeten
vrij
bliiven
en
mogen
niet
geblokkeerd
worden.
Leg
geen
papier,
kleding
of
andere
materialen
op
het
toestel.
7.
Het
toestel
na
het
kneedproces
niet
openen.
Dit
kan
leiden
tot
een
verminderd
rijs-
en
bakresultaat.
8.
Om
het
warme
bakblik
met
het
gebakken
brood
te
verwijderen,
gebruikt
u
best
een
isolerende
doek
of
draagt
u
isolerende
wanten,
zoniet
loopt
u
het
risico
u
te
verbranden
aan
het
blik
of
aan
de
broodoven.
9.
Zorg
ervoor
dat
het
bakblik
en
het
binnenste
van
de
broodoven
steeds
proper
zijn,
teneinde
een
optimaal
verloop
van
het
bakproces
te
garanderen.
10.
Houd
het
toestel
buiten
bereik
van
kinderen.
Laat
het
gebruik
van
het
toestel
door
kinderen
enkel
en
alleen
toe
onder
toezicht
van
een
volwassene
en
enkel
na
de
kinderen
te
hebben
gewezen
op
de
risico's
die
een
verkeerd
gebruik
met
zich
meebrengen.
11.
Uw
broodoven
is
enkel
bestemd
om
brood
of
deeg
te
maken,
zoals
verder
wordt
uitgelegd.
Dit
toestel
is
conform
met
de
E.E.G.
richtlijn
89/336,
93/68
(Enkel
de
E.E.G.
lidstaten.)
-5-
Nous
vous
remercions
d’avoir
fait
achat
du
four
a
pain
automatique
Panasonic,
modéle
SD-251.
Pour
des
résultats
optimaux
et
une
sécurité
maximale,
veuillez
lire
attentivement
ces
instructions
avant
toute
utilisation.
Installation
du
four
4
pain
Bead
Bakerye
IMPORTANT
:
CET
APPAREIL
DOIT
ETRE
RACCORDE
A
LA
TERRE
POUR
VOTRE
SECURITE.
Si
votre
prise
secteur
n’est
pas
raccordée
a
la
terre,
c’est
votre
responsabilité,
en
tant
qu’utilisateur,
de
la
faire
remplacer
par
une
prise
secteur
230
V/50
Hz
(230-240
V
50
Hz
en
Royaume
Uni)
correctement
raccordée
a
la
terre.
Le
four
a
pain
Bead
Bakerye
doit
étre
installé
sur
une
ligne
protégée
par
un
fusible
d’au
moins
10
amperes
(T).
Installation
1.
N'utilisez
pas
cet
appareil
a
l’extérieur.
Il
est
exclusivement
congu
pour
étre
utilisé
a
l'intérieur.
2.
Posez
l'appareil
sur
une
surface
de
travail
plane,
ferme
et
séche.
Evitez
de
le
poser
sur
une
surface
instable
ou
sur
du
textile
(nappe,
tapis,
etc.).
3.
Pour
que
la
cuisson
soit
parfaite,
l'appareil
ne
doit
jamais
étre
utilisé
dans
le
voisinage
immédiat
de
sources
de
chaleur
ou
dans
une
piéce
oti
'humidité
est
élevée.
4.
Comme
son
coffret
chauffe
pendant
la
cuisson,
l'appareil
doit
toujours
se
trouver
42
5
cm
minimum
du
mur
et
des
objets
environnants.
CONSEILS
IMPORTANTS
Si
le
cordon
d'alimentation
est
endommagé,
il
devra
étre
remplacé
par
le
fabricant
ou
son
d'entretien
ou
par
une
personne
de
compétence
similaire
afin
d'éviter
tout
danger.
Francais
2.
N'essayez
jamais
de
réparer
vous-méme
cet
appareil.
S'il
doit
étre
vérifié,
réglé
ou
réparé,
déposez-le
chez
votre
revendeur
Panasonic
qui
le
confiera
4
un
technicien
compétent
et
agréé.
3,
Ne
plongez
pas
l'appareil,
sa
fiche
ou
son
cordon
d'alimentation
dans
l'eau
ou
d'autres
liquides.
4.
Ne
laissez
jamais
le
cordon
d’alimentation
pendre
depuis
le
bord
de
la
table
ou
de
la
surface
de
travail.
Veillez
a
ce
qu'il
n’entre
pas
en
contact
avec
des
surfaces
chaudes.
5.
Ne
retirez
jamais
le
moule
4
pain
et
ne
débranchez
pas
l'appareil
pendant
l'utilisation.
Le
programme
en
cours
s’arréte
alors
et
ne
peut
reprendre
que
si
le
four
est
remis
en
marche
dans
les
10
minutes,
puisquill
posséde
une
mémoire
de
10
minutes.
S'il
est
remis
sous
tension
endéans
ce
laps
de
temps,
le
déroulement
du
programme
reprend
automatiquement.
6.
Pendant
la
marche,
n’obstruez
pas
les
orifices
de
ventilation
de
l'appareil.
Ne
posez
jamais
un
vétement
ou
toute
autre
couverture
sur
l'appareil.
7.
N’ouvrez
pas
l'appareil
une
fois
que
le
pétrissage
de
la
pate
terminé.
Cela
pourrait
altérer
la
levée
et
la
cuisson
du
pain.
8.
Lorsque
vous
retirez
le
moule
a
pain
encore
chaud,
alors
qu'il
renferme
le
pain
qui
vient
d'étre
cuit,
munissez-
vous
d'un
linge
ou
de
gants
isolants,
car
le
moule
et
le
corps
de
l'appareil
sont
tres
chauds.
9.
Veillez
a
ce
que
l'intérieur
de
l'appareil
et
le
moule
a
pain
soient
toujours
propres
afin
de
préserver
le
bon
déroulement
du
programme
de
cuisson.
10.
Placez
l'appareil
hors
de
portée
des
enfants.
N’autorisez
son
utilisation
par
des
enfants
que
sous
la
surveillance
étroite
d’adultes
et
pour
autant
que des
instructions
précises
aient
été
préalablement
données
aux
enfants
afin
qu’ils
puissent
utiliser
l'appareil
en
toute
sécurité
en
comprenant
bien
les
dangers
inhérents
a
une
mauvaise
utilisation.
1
4
.
Cet
appareil
doit
étre
utilisé
pour
la
préparation
de
la
pate
a
pain
ou
a
brioche,
de
la
maniére
indiquée
dans
les
instructions
qui
suivent.
Cet
appareil
est
conforme
a
la
directive
C.E.E.
89/336,
93/68
(Pays
membres
de
la
C.E.E.
uniquement)
=
6
=
Basic
Principles
when
Baking
with
Bead
Bakeryo
)
Choices
available:
BASIC.
............
For
producing
loaves
of
bread
using
white,
brown
or
soft
grain
strong
flour
as
the
major
ingredient.
WHOLE
WHEAT.....
For
loaves
using
wholemeal
strong
flour
as
the
main
ingredient.
MULTIGRAIN.......
For
breads
with
cereals/grains
such
as
rye,
etc.
mainly
using
wholemeal
strong
flour.
FRENCH..........
For
loaves
with
crisp
crust
and
open
texture.
It
has
crisp
taste
because
sugar
is
not
included
in
the
ingredients.
A
rapid
dough
mode
for
pizza,
focaccia
and
other
Italian
breads.
A
program
for
baking
cakes
only.
The
unit
automatically
mixes
ingredients,
kneads
the
dough,
rises
it
and
bakes
it.
The
unit
mixes
ingredients,
kneads
the
dough,
rises
it
and
automatically
bakes
it
faster
than
the
standard
BAKE
option.
BAKE
SANDWICH.
.
.
The
unit
automatically
makes
a
medium
size
loaf
of
bread
with
a
soft
crust
suitable
for
sandwich
slices.
BAKE
RAISIN.......
The
unit
automatically
makes
bread
as
in
the
BAKE
option.
A
beeper
sounds
to
let
you
know
when
to
add
dried
fruits,
such
as
raisins.
This
is
to
prevent
them
from
being
crushed
during
the
kneading
process.
DOUGH...........
The
unit
automatically
prepares
dough
for
pizzas,
dinner
rolls,
doughnuts,
croissants,
etc.
DOUGH
RAISIN.....
The
unit
automatically
prepares
dough
as
in
the
DOUGH
option.
A
beeper
sounds
to
let
you
know
when
to
add
dried
fruits
as
in
the
BAKE
RAISIN
option.
—A
13-hour
timer
allows
you
to
prepare
everything
the
night
before
and
wake
up
to
the
aroma
of
freshly
baked
bread.
(Certain
BAKE
options
only).
The
result
may
differ
when
the
timer
is
used.
The
beep
sounds
eight
times
when
baking
on
the
BAKE
option
or
rising
of
dough
on
the
DOUGH
option
is
completed.
—The
beep
also
sounds
in
the
BAKE
RAISIN
and
DOUGH
RAISIN
option,
when
the
machine
pauses
for
1
minute
during
the
kneading
process
to
add
the
raisins,
chopped
dried
fruits
and
/
or
nuts.
Choices
The
choice
of
size
and
crust
colour
is
possible
for
the
following
options:
If
not
selected,
the
Bead
Bakerye
will
automatically
select
XL
size with
a
medium
crust.
oe
ee
Size
Selection
—*+|_—_—sCrrust
Colour
Selection
basic
BAKE
basic
BAKE
RAPID
basic
BAKE
RAISIN
|
whole
wheat
BAKE
whole
wheat
BAKE
RAPID
whole
wheat
BAKE
RAISIN
VJ
*
Size
and
crust
colour
will
be
affected
by
the
room
temperature
and
the
quality
of
flour
and/or
other
ingredients.
Baking
Programs
NOTE:
«The
duration
of
each
process
is
only
approximate
and
will
vary
according
to
the
ambient
temperature.
The
following
time
is
when
the
timer
is
not
used.
(The
availability
to
choose
the
timer
is
indicated
with
a
tick
(-~)
in
the
“timer”
column.)
-There
will
be
keep-warm
of
up
to
60
minutes
after
the
baking
is
complete
until
the
STOP
pad
is
pressed,
for
all
BAKE
options.
The
keep-warm
is
not
available
for
the
DOUGH
option
and
the
BAKE
ONLY
option.
-For
Bake
Raisin
&
Dough
Raisin
options,
there
will
be
a
break
of
3
minutes
during
the
kneading
process
to
add
dried
fruits
and
nuts.
BAKE
options
Whole
Wheat
:
Bake
Basic
Bake
:
F
Basic
Basic
Whole
Wheat
|
Whole
Wheat
|
Whole
Wheat
Basic
Bake
|
Bake
Rapid
|
Bake
Raisin
|Bake
Sandwich|
Bake
Rapid
Bake
Raisin
|
French
Bake
|
Bake
Only
Sandwich
Multigrain
Bake
}
30
~
60
ee
30
~
60
60
~
90
:
60
~
90
40
min
~
=
Rest
min
min
min
15
min
min
|
1
hr
55
min
olKnead
|
15~30
|
15~20
|
15~30
|
15~25
|
15~25
|
15~25
|
10~20
=
‘
min
min
min
min
min
min
min
e|
Rise
thr50min~|
approx.
|
1
hr
50
min
~/2
hr
20
min
~|
approx.
2
hr
20
min
~|
2
hr
55
min
~
a
Ss
2
hr
20
min
1
hour
2hr20min
|2hr50min
|1hr40
min
|2hr50min
|4hr
10min
ary
ae
S|
Bake
50
min
35
min
50
min
50
min
45
min
50
min
55min
|30~90
min
er
Total
4hours
|1hr55min}
4
hours
5
hours
3
hours
5
hours
6
hours
|30~90
min
——
Timer
WwW
Ww
a
DOUGH
options
Whole
Wheat
Dough
Basic
Dough
Wh
ole
Wheat
‘i
Basic
Dough
Dough
Raisin
French
Dough
|
Pizza
Dough
Raisin
Multigrain
Dough
30
~
50
55~75
40
min
~
Rest
min
min
|1
hr
35
min
|
~~
P
15
~30
15~25 10~20
10~15
:
Knead
min
min
min
min
c|
Rise
1hour~
|1hr40min~|1hr45min~)
10~15
‘
1
hr
20
min
|
2
hours
2
hr
40
min
min
=
_
=
Approx.
Knead
10
min
;
aan
=
=
Approx.
nee
10
min
Total
2
hr
20
min|
3
hr
15
min|3hr35
min}
45min
zal
|
Timer
ees
a
Rom
(e(slaliiversincele
Bread
pan
Slide
in
the
pan
to
the
correct
position
in
the
unit.
Twist
slightly
anti-clockwise
to
remove.
To
remove
Kneader
oma
mounting
shaft
Control
panel
=
Accessories
Measuring
spoon
Use
to
measure
sugar,
salt,
etc.
Tablespoon
(approx.
15
m2
)
(1/2
tablespoon
marked)
Teaspoon
(approx.
5
mé£
)
(1/4,
1/2
&
3/4
teaspoon
marked)
Measuring
cup
Use
to
measure
liquids.
(1
cup/8
fl.
0z./240
m2
)
«<=
Kneading
blade
«aes
Handle
Cord
Plug*
*The
shape
of
plug
differs
in
different
countries
of
EU.
Control
panel-display/functions
Be
sure
you
understand
the
function
of
each
pad
before
using
the
read
Rakerye.
NOTE:
The
unit
has
a
protective
film
overlay
on
the
control
panel
to
prevent
scratching
or
marring
during
shipping.
Display
window
All
modes
and
indications
are
shown
here
for
reference.
You
may
peel
this
film
off
and
discard
it.
SELECT
Press
to
select
the
type
of
bread:
basic,
whole
wheat,
multigrain,
french,
pizza
or
bake
only.
(It
is
not
necessary
to
press
this
pad
for
basic.
)
Each
time
the
pad
is
pressed,
the
display
will
change
accordingly.
Panasonic
SD-251
OPTION
Press
to
choose
the
bake
option:
BAKE,
BAKE
RAPID,
BAKE
SANDWICH,
BAKE
RAISIN,
DOUGH
or
DOUGH
RAISIN.
(It
is
not
necessary
to
press
this
pad
for
BAKE
.)
Each
time
the
pad
is
pressed,
the
display
will
change
accordingly.
SIZE
Press
this
pad
to
select
the
size
of
the
loaf
for:
BAKE,
BAKE
RAPID
&
BAKE
RAISIN
options
of
basic
and
wholewheat
loaves.
CRUST
Press
this
pad
to
select
the
colour
of
the
crust
for
BAKE,
BAKE
RAPID
&
BAKE
RAISIN
options
of
basic
loaf.
TIMER
Press
this
pad
to
set
the
timer
and
to
set
the
baking
time
for
the
bake
only
option.
The
time
will
advance
10
minutes
each
time
this
pad
is
pressed.
(1
minute
for
the
bake
only
option.)
The
timer
setting
will
change
rapidly
if
constant
pressure
is
applied
to
the
pad.
Indicating
light
The
red
light
will
be
lit
when
in
operation.
It
will
flash
when
the
bread
baking
or
the
dough
making
is
completed.
It
will
also
flash
in
a
different
frequency
when
operated
in
abnormal
conditions.
START/STOP
Press
this
pad
to
start
operation
or
begin
the
timer.
Press
this
pad
to
stop
operation
or
cancel
the
timer
setting.
To
stop
operation,
the
pad
must
be
pressed
and
held
for
1
second.
ao
ai
ff:
WW RI
wy,
=
.
al
=
U
ay
aa
e
r
ay
om
—_
Steps
Remove
the
bread
pan
from
the
unit.
Twist
slightly
anti-clockwise
and
pull
up,
using
the
handle.
Mount
the
kneading
blade
on
the
shaft.
Make
sure
that
the
kneading
blade
and
the
kneading
shaft
are
free
of
bread
crumbs.
Place
the
yeast
inside
the
bread
pan.
Only
use
the
"Easy
Biend"/"Fast
Action"
yeast
that
comes
in
a
sachet.
Place
flour
and
all
dry
ingredients
inside
the
bread
pan.
RAISIN
options
only
You
may
place
dried
fruits
(e.g.
raisins)
later
when
the
beeper
sounds
to
prevent
them
from
being
crushed
(see
step
10.)
Pour
water
and
other
liquids,
if
any,
into
the
bread
pan.
Place
the
bread
pan
inside
the
body.
Be
sure
the
bread
pan
contacts
the
bottom
of
the
unit.
Fold
the
handle
down.
Close
the
top
lid.
Plug
into
a
230
(230
~
240
for
U.
K.)
volt
outlet.
{:08
appears.
DO
NOT
press
Start
at
this
stage
(The
machine
will
default
to
an
extra
large
basic
loaf
with
medium
crust,
if
Start
is
pressed
now.).
Select
your
program
first.
442
Notes
The
kneading
blade
is
designed
to
fit
loosely
on
the
shaft
with
some
loose
turning.
For
best
results,
place
the
yeast
first,
so
that
it
is
at
the
bottom
of
all
other
ingredients.
Flour,
dry
milk,
salt,
sugar,
butter,
etc.,
first.
Wipe
off
any
moisture
or
foreign
matter
from
the
outside
of
the
bread
pan
before
placing
it
in
the
unit.
If
the
bread
pan
is
not
placed
correctly,
the
dough
will
not
be
kneaded
properly.
during
the
kneading
process.
Position
the
unit
away
from
edge
of
the
table
or
counter-
top.
The
unit
may
vibrate
or
move
during
the
kneading
process.
Place
the
unit
where
it
will
not
fall
off
should
the
unit
move
DARK
*
LIGHT
Press
select
to
choose
the
type
of
bread
indicated
on
the
right
of
display.
Keep
pressing
the
pad
to
move
the
arrow
down
the
list
of
bread
types.
french
pizza
bake
only
For
basic,
it
is
not
necessary
to
press
this
pad.
For
bake
only
program,
refer
to
P.15
—
16
for
instructions.
Press
Option
to
choose
BAKE
RAPID,
BAKE
SANDWICH,
BAKE
RAISIN,
DOUGH
or
DOUGH
RAISIN.
Option)
Caelect
For
BAKE,
it
is
not
necessary
to
press
this
pad.
basic
wholewheat
multigrain
french
pizza
bake
only
RAISIN
BAKE
DOUGH
RAPID
SANDWICH
vey
Select
size.
G
Cust.»
Select
crust
colour.
Press
Start/Stop.
The
red
light
comes
on,
the
program
is
set
and
no
pads
are
now
operable.
“REST
”
begins.
The
resting
settles
the
temperature
of
the
bread
pan
and
ingredients.
DARK
¢
LIGHT
AREST
>)
basic
wholewheat
multigrain
french
pizza
bake
only
After
rest,
the
process
will
proceed
to
knead,
then
to
rise
and
finally,
bake.
The
time
remaining
until
the
bread
is
finished
is
displayed
in
hours
and
minutes.
(3:59,
3:58
---)
Note:
To
cancel,
press
Start/Stop
and
hold
for
1
second.
The
display
will
go
blank,
begin
again
from
step
7.
XL
OL
M
The
above
display
is
for
basic-BAKE,
XL
size,
medium
colour.
In
the
last
part
of
kneading,
there
will
be
two
sessions
of
beep
sound.
RAISIN
on
display
will
blink
and
kneading
will
stop
for
3
minutes.
wholewheat
multigrain
french
pizza
bake
only
Add
the
dried
fruits
(e.g.
raisins)
during
this
period
to
prevent
them
from
being
crushed.
Close
the
lid
and
leave
the
unit.
When
3
minutes
have
passed,
kneading
The
above
display
will
begin
again
and
the
RAISIN
will
is
for
basic-BAKE
stop
blinking.
RAISIN,
XL
size,
light
colour.
—~12-
3
See
“Choice
of
bread
selections
onP
7.
See
“Choice
of
baking
options”
onP.
7.
The
option
you
require
will
flash.
See
availability
of
size
and
colour
selection
on
P.
7.
When
TEMP
blinks,
see
P.18.
There
will
be
no
mixing
action
during
resting.
A
clicking
noise
may
be
heard
during
operation.
This
is
not
a
malfunction.
For
information
of
the
process
of
each
option,
see
P.
8.
The
time
required
for
each
of
the
steps
will
vary
according
to
factors
such
as
voltage
fluctuation
and
room
temperature.
The
raisin
beep
will
sound
:
For
basic:
42~72
minutes
from
Start.
For
whole
wheat:
72~102
minutes
from
Start.
Do
not
put
your
finger
in
the
dough,
or
touch
the
bread
pan
while
adding
the
dried
fruits.
During
operation,
do
not
remove
the
pan,
nor
unplug
the
power
cord.
The
timer
cannot
be
used
for
this
option.
C
bes
;
CE
Steps
The
beeper
will
sound
eight
times
and
the
indicating
light
will
flash
when
the
bread
is
baked,
or
the
dough
is
completed.
Promptly
open
the
lid
and
remove
the
bread
pan
using
oven
gloves.
Press
Start/Stop.
The
unit
keeps
the
bread
warm
for
1
hour
or
until
Start/Stop
is
pressed
to
prevent
condensation
of
the
steam.
For
DOUGH
options,
follow
each
recipe
directions
for
further
steps
instructed
in
the
cook
book.
Turn
the
pan
upside
down.
Shake
the
pan
several
times
to
release
the
bread.
If
the
kneading
blade
comes
out
with
the
bread,
use
a
heat-resistant
plastic
utensil
to
remove
it.
For
DOUGH
options,
when
baking
is
completed,
remove
from
the
oven,
using
oven
gloves.
Place
the
bread
on
a
wire
rack
to
cool
and
allow
the
steam
to
escape.
Unplug
after
use.
—Allow
at
least
1
hour
for
the
unit
to
cool
down
before
the
next
use.
2434
Notes
The
bread
pan
will
be
very
hot.
Do
not
place
it
on
any
plastic
surfaces.
Handle
carefully.
If
the
bread
is
left
in
the
unit,
further
browning
of
crust
colour
may
occur.
The
bread
and
the
kneading
blade
will
be
very
hot.
A
metal
utensil
may
scratch
the
finish
of
the
kneading
blade.
See
“Slicing
and
storing
the
bread”
on
P.
17.
Follow
the
same
steps
as
in
pages
11—12
except
step
9.
For
step
9,
follow
the
instructions
below.
Press
Timer
to
set
the
amount
of
time
|
See
P.
10
for
further
in
which
you
want
the
bread
to
be
explanation
of
the
timer
pads.
ready.
Time
may
be
set
for
any
length
of
time
from
4
hours
to
13
hours
for
basic,
from
5
hours
to
13
hours
for
whole
wheat
and
multigrain,
from
6
hours
to
13
hours
for
french.
eet,
Example:
If
the
present
time
is
9:00
pm,
and
you
want
the
‘
bread
to
be
finished
at
6:30
am
tomorrow
morning,
'
set
the
timer
to
9:30
(9
hours
and
30
minutes),
the
'
time
required
until
the
completion
of
the
bread.
ae
(9
hours
and
30
minutes)
Press
Start/Stop.
There
will
be
no
action
while
the
timer
is
working.
The
time
remaining
before
the
bread
is
finished
is
displayed
in
hours
and
wholewheat
minutes.
multigrain
french
pizza
bake
only
Vv
Xx
LOM
The
above
display
is
for
basic—BAKE,
XL
size,
medium
colour.
“
Follow
the
previous
steps
1-6.
For
step
7,
choose
either
basic
or
wholewheat
(there
is
no
BAKE
RAPID
option
for
the
multigrain
or
french).
For
steps
8
&
9,
follow
the
instructions
below.”
Press
Option
pad
to
choose
DARK
°
LIGHT
The
remaining
BAKE
RAPID.
>)
basic
time
is
displayed
°
wholewheat
jin
hours
and
multigrain
minutes
french
,
pizza
bake
only
Then
select
size
and
crust
colour.
Vv
XL
LOM
The
above
display
is
for
BASIC-BAKE
(RAPID)
option,
XL
size,
medium
colour.
The
timer
cannot
be
used
for
this
option.
Press
Start
pad.
-14—
English
Follow
the
previous
steps
1-7.
Steps
Notes
Press
to
choose
DOUGH
.
Dough
will
flash.
Press
Start
pad.
DOUGH
will
stop
flashing.
“REST”
begins.
After
rest,
the
process
to
make
the
dough
The
resting
settles
the
will
begin.
temperature
of
the
bread
pan
The
remaining
time
is
displayed
in
hours
and
minutes.
and
ingredients.
The
beeper
will
sound
eight
times
and
the
indicating
light
will
flash
when
the
dough
is
completed.
Press
Stop
pad
when
the
beeper
stops.
Remove
the
bread
pan.
Close
the
lid.
Unplug
after
use.
—
»
The
display
will
go
out
when
the
beeper
stops,
but
the
indicating
light
will
flash
until
the
Stop
=~
pad
is
pressed.
oven
as
per
the
recipes
given.
When
baking
is
completed,
remove
from
the
oven,
using
your
The
timer
cannot
be
used
oven
gloves
and
cool
on
a
wire
rack.
for
this
option.
1
0
Shape
and
give
dough
final
rising
before
baking
in
a
conventional
sing
the
bake
only
prc
Prepare
cake
in
a
separate
mixing
Follow
instructions
in
the
bowl.
Cookbook
for
details.
Place
the
mixture
carefully
into
the
Ensure
that
the
bread
pan
is
lined
bread
pan.
lined
with
baking
parchment
(The
kneading
blade
must
be
so
the
cake
mixture
does
not
removed.)
touch
the
sides.
Press
select
to
choose
bake
only.
2845.2
Steps
Notes
Press
Timer
to
set
the
required
time.
Time
indication
starts
from
30
(Between
30
to
90
minutes.)
minutes
and
moves
up
to
The
Timer
cannot
be
used
to
delay
the
1
hour
30
minutes
in
1
minute
start
of
baking.
increment.
English
of
the
baked
product
by
piercing
the
centre
with
a
skewer.
If
the
baking
is
still
insufficient,
you
may
additionally
bake
by
repeating
above
steps
3
&
4,
after
Start/Stop
has
been
pressed.
The
additional
baking
time
may
be
set
as
long
as
the
accumulated
baking
time
does
not
exceed
70
minutes.
6
Note:
Upon
completion
of
baking,
you
may
check
the
consistency
When
checking
with
a
skewer,
take
utmost
care
not
to
burn
yourself
as
the
oven
cavity
will
be
extremely
hot.
How
to
clean
Before
cleaning
the
unit,
unplug
and
allow
the
unit
to
cool.
Body
and
Lid
Body
and
lid
should
be
wiped
clean
with
a
damp
cloth.
Use
only
mild
liquid
detergent.
For
baked-on
materials,
use
anon
scratch
scourer
and
detergent
on
the
interior.
Do
not
use
cleansers,
steel
wool
pads,
or
other
abrasive
materials.
Do
not
use
benzine,
thinner,
alcohol,
etc.
Temperature
SS
sensor
Temperature
sensor
Wipe
gently
and
avoid
deforming
the
temperature
sensor.
Bread
pan
and
kneading
blade
If
the
kneading
blade
cannot
be
easily
removed
from
the
pan
by
twisting
the
mounting
shaft,
pour
lukewarm
water
into
the
cooled
pan and
allow
to
soak
for
5—10
minutes.
Remove
the
blade.
Always
remove
the
blade
and
wash
the
pan
with
mild,
liquid
detergent
after
each
use.
DO
NOT
SUBMERGE
THE
PAN
IN
WATER.
Do
not
use
other
abrasive
materials
or
otherwise,
the
pan
may
Kneader
mounting
shaft
be
scratched.
These
parts
are
not
dishwasher
safe.
Measuring
cup
and
spoon
Rinse
and
wipe
dry.
These
parts
are
not
dishwasher
safe.
1.
Be
sure
that
the
unit
and
the
bread
pan
have
dried
completely
before
storing.
2.
On
the
interior
of
the
body
some
discolouration
may
occur
with
use.
-16-—
Brot-
und
Teigprogramme
Betatigen
(
basic
(Normal):
Fir
Brote
und
Hefeteige
aus
Weizenmehl
Type
550
und/oder
Type
1050.
whole
wheat
(Vollwert):
Fir
Brote
und
Hefeteige
aus
Weizenvollkornmehl
oder
gemischten
Weizenmehlsorten.
multigrain
(Mehrkorn):
Fir
Brote
und
Hefeteige,
denen
Sauerteig,
ganze
und/oder
geschrotete
Getreidekérner
(z.
B.
Roggen,
Dinkel,
Hafer,
Gerste),
Buchweizen,
Hirse,
GrieB,
Kleie,
Misli,
Cornflakes,
gehackte
Niisse,
Samen
oder
Kerne
zugefiigt
werden.
french
(Franzdsisch):
Fur
Brote
mit
einer
sehr
knusprigen
Kruste
und
luftiger
Porung
sowie
landestypischen
Teigrezepturen,
wie
z.B.
Baguette.
pizza
(Pizza):
Fir
die
Zubereitung
von
Hefeteigen
in
einer
sehr
kurzen
Zeit.
Dadurch
ist
das
Teigvolumen
geringer
als
bei
den
weiteren
Teigprogrammen.
Geeignet
ftir
Pizza,
Fladenbrot,
Quiche
etc.
bake
only
(Backen):
Nur
zum
Abbacken
von
Teigrezepten
laut
beiliegendem
Rezeptheft.
Diese
Teige
werden
nicht
im
Brotbackautomat
geknetet
oder
gemixt,
sondern
separat.
Betatigen
(
Oy
BAKE
(Brot):
Zum
Backen
von
Weizen-und
Mischbroten
sowie
von
Vollkorn-
und
Mehrkornbroten.
BAKE
RAPID
(Brot
schnell):
Zum
Backen
von
Broten
in
einer
verktirzten
Zeit
(nur
flir
die
Programme
Normal
und
Vollwert).
BAKE
SANDWICH
(Sandwich):
Fir
Brote
mit
einem
hohen
Butter-
und
Zuckeranteil
und
einer
weichen,
hellen
Kruste.
Besonders
geeignet
zum
anschlieBenden
Toasten.
BAKE
RAISIN
(Rosinen-Brot):
Fir
Brote
mit
trockenen
Friichten
(z.B.
Rosinen,
Aprikosen).
Damit
die
Friichte
nicht
zerschlagen,
werden
sie
zu
einem
spateren
Zeitpunkt
dem
Teig
zugefligt
(Signalton
beachten).
DOUGH
(Teig):
Zur
Herstellung
von
Hefeteigen
fir
die
Programme
Normal,
Vollwert,
Mehrkorn,
Franzdsisch
und
Pizza.
DOUGH
RAISIN
(Rosinen
-Teig):
Zur
Herstellung
von
Hefeteigen
mit
trockenen
Friichten
wie
z.B.
Rosinen
und
Aprikosen,
die
zu
einem
spateren
Zeitounkt
dem
Teig
zugefligt
werden
(Signalton
beachten).
Nur
fur
die
Programme
Normal
und
Vollwert.
Hinweise:
-
Der
Brotbackautomat
laBt
sich
fir
das
Brotbacken
13
Stunden
vorprogrammieren.
Die
Zubereitungs-
und
Backzeit
sind
in
der
Vorwahizeit
enthalten.
-
Ist
das
Brotbacken
bzw.
die
Teigzubereitung
beendet,
ert6nt
ein
Signalton
achtmal.
-
Bei
Rosinen-
Brot/Teig
ert6nt
wahrend
der
Knetphase
ebenfalls
ein
Signalton,
um
die
Trockenfrichte
hinzuzufiigen.
Der
Knetvorgang
wird
dann
flr
eine
Minute
unterbrochen
(siehe
auch
Seite
26).
Ela
Me
(clam
micel(elcelbi-mlare|
des
Braunungsgrads
Fur
folgende
Programme
und
Brottypen
kénnen
Sie
die
Brotgr6Be
und/oder
Braunungsstufe
wahlen:
Programm
BrotgréBe
Braunungsgrad
basic
BAKE
(Normal
Brot)
basic
BAKE
RAPID
(Normal
Brot
schnell)
basic
BAKE
RAISIN
(Normal
Rosinen-Brot)
whole
wheat
BAKE
(Vollwert
Brot)
ja
whole
wheat
BAKE
RAPID
(Vollwert
Brot
schnell)
ja
whole
wheat
BAKE
RAISIN
(Vollwert
Rosinen-Brot)
ja
¢
Die
Einstellung
der
BrotgréBe
ist
abhangig
von
der
Gesamtmehlmenge,
beachten
Sie
hierfiir
die
Angaben
im
beiliegenden
Rezeptbuch.
*
Die
Brotgr6Be
XL
und
der
Braunungsgrad
mittel
sind
bereits
vorprogrammiert.
¢
GréBe
und
Braunung
des
Brotes
werden
gof.
zusatzlich
durch
Raumtemperatur,
Qualitat
der
Lebensmittel
sowie
durch
unterschieldliche
Zutaten
beeinfluBt.
aof=

Other manuals for Bread Bakery SD-251

2

Other Panasonic Bread Maker manuals

Panasonic SD-RD250 Technical specifications

Panasonic

Panasonic SD-RD250 Technical specifications

Panasonic SD-YR2550 Quick guide

Panasonic

Panasonic SD-YR2550 Quick guide

Panasonic Bread Bakery SD-253 Quick guide

Panasonic

Panasonic Bread Bakery SD-253 Quick guide

Panasonic SD-207 User manual

Panasonic

Panasonic SD-207 User manual

Panasonic SD-ZB2502BXC User manual

Panasonic

Panasonic SD-ZB2502BXC User manual

Panasonic SD-255 Quick guide

Panasonic

Panasonic SD-255 Quick guide

Panasonic SD-BT10P Quick guide

Panasonic

Panasonic SD-BT10P Quick guide

Panasonic SD-ZB2512 Quick guide

Panasonic

Panasonic SD-ZB2512 Quick guide

Panasonic SD-P104 User manual

Panasonic

Panasonic SD-P104 User manual

Panasonic SD-P2000 User manual

Panasonic

Panasonic SD-P2000 User manual

Panasonic Bread Bakery SD-BT51P User manual

Panasonic

Panasonic Bread Bakery SD-BT51P User manual

Panasonic SD-BT65P Quick guide

Panasonic

Panasonic SD-BT65P Quick guide

Panasonic Bread Bakery SD-250 Quick guide

Panasonic

Panasonic Bread Bakery SD-250 Quick guide

Panasonic Bread Bakery SD-250 Quick guide

Panasonic

Panasonic Bread Bakery SD-250 Quick guide

Panasonic SD-YR2540 User manual

Panasonic

Panasonic SD-YR2540 User manual

Panasonic SD-2500WXE Quick guide

Panasonic

Panasonic SD-2500WXE Quick guide

Panasonic SD-PT1001 User manual

Panasonic

Panasonic SD-PT1001 User manual

Panasonic SD-YR2550 User manual

Panasonic

Panasonic SD-YR2550 User manual

Panasonic SD-2501 Quick guide

Panasonic

Panasonic SD-2501 Quick guide

Panasonic SD-ZP2000 User manual

Panasonic

Panasonic SD-ZP2000 User manual

Panasonic SD-ZB2502 Quick guide

Panasonic

Panasonic SD-ZB2502 Quick guide

Panasonic Bread Bakery SD-253 User manual

Panasonic

Panasonic Bread Bakery SD-253 User manual

Panasonic Bread Bakery SD-253 Quick guide

Panasonic

Panasonic Bread Bakery SD-253 Quick guide

Panasonic SD-257WST User manual

Panasonic

Panasonic SD-257WST User manual

Popular Bread Maker manuals by other brands

SEVERIN Bread maker Instructions for use

SEVERIN

SEVERIN Bread maker Instructions for use

Regal K6762 Guide & cookbook

Regal

Regal K6762 Guide & cookbook

Philips HD9046 Recipe book

Philips

Philips HD9046 Recipe book

Oster 4811 user guide

Oster

Oster 4811 user guide

Noxxa BM325SC instruction manual

Noxxa

Noxxa BM325SC instruction manual

Gorenje BM 900 ND instruction manual

Gorenje

Gorenje BM 900 ND instruction manual

Morphy Richards Premium Plus manual

Morphy Richards

Morphy Richards Premium Plus manual

inventum BM121 instruction manual

inventum

inventum BM121 instruction manual

Strata 21597 user manual

Strata

Strata 21597 user manual

MAXXMEE BM8301 manual

MAXXMEE

MAXXMEE BM8301 manual

Team BBA 8 user manual

Team

Team BBA 8 user manual

Sunbeam 4810 user guide

Sunbeam

Sunbeam 4810 user guide

Cuizimate RBSBREADMAKER instruction manual

Cuizimate

Cuizimate RBSBREADMAKER instruction manual

Rachel Allen RA-BMI Instructions and guarantee

Rachel Allen

Rachel Allen RA-BMI Instructions and guarantee

Mirta BM 155 operating instructions

Mirta

Mirta BM 155 operating instructions

Breadman TR440 instruction manual

Breadman

Breadman TR440 instruction manual

Binatone BM-2169 instruction manual

Binatone

Binatone BM-2169 instruction manual

Rosewill RHBM-15001 user manual

Rosewill

Rosewill RHBM-15001 user manual

manuals.online logo
manuals.online logoBrands
  • About & Mission
  • Contact us
  • Privacy Policy
  • Terms and Conditions

Copyright 2025 Manuals.Online. All Rights Reserved.