manuals.online logo
Brands
  1. Home
  2. •
  3. Brands
  4. •
  5. Panasonic
  6. •
  7. Camcorder
  8. •
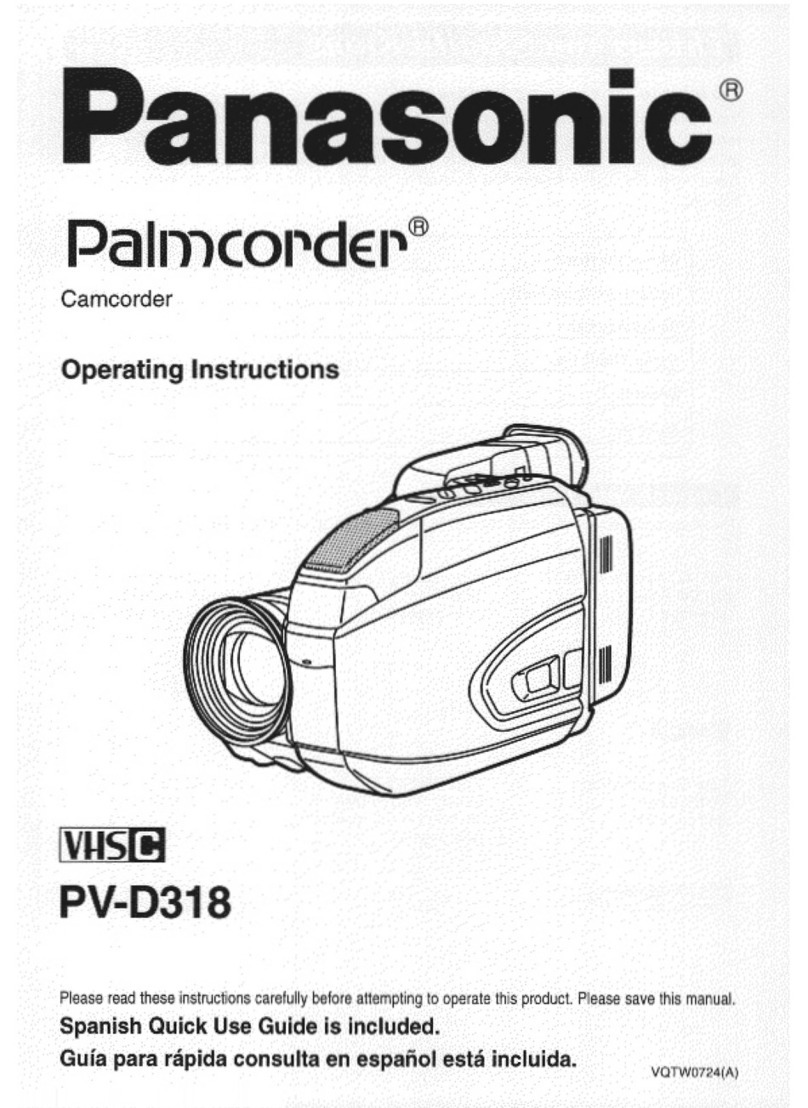
  9. Panasonic PV-L452 User manual

Panasonic PV-L452 User manual

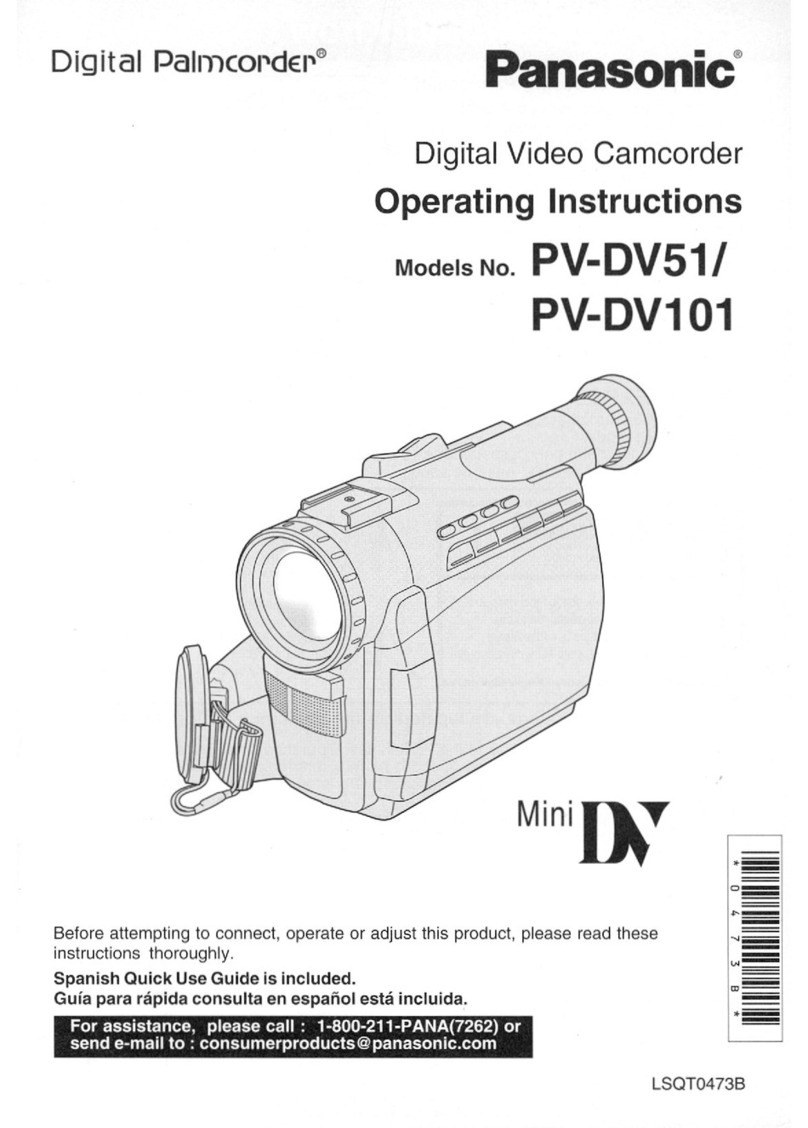
Palrncol'dc r" Panasonic _
WlultiCam• Camcol, dcP Camcorder
Operating Instructions
Models No. PV-L452
PV-L652
(PV-L652 shown)
MultiMediaCard _" =_'_
Please read these instructions carefully before attempting to operate this product.
Please save this manual.
Guia para rbpida consulta en espahol estb incluida.
LSQT0529C
Thank you for choosing Panasonict
You have purchased one of the most
sophisticated and reliable products on the
market today. Used properly, it will bring
you years of enjoyment. Please take time
to fill in the information to the right.
The serial number is on the tag located on
the rear side of your Camcorder. Be sure
to retain this manual as your convenient
Camcorder information source.
Date of Purchase
Dealer Purchased From
Dealer Address
Dealer Phone No.
Model No.
Serial No.
[ll il i!_.I_] "tVle]l II,l_.l iil_I=] I[! [_1i
These accessories are provided in order to set up or use your Camcorder.
1pc. AC Adaptor
(PV-A19/PV-A20) with DC
Power Cable (page 10)
1 pc. Audio/Video Cable 1 pc. Battery Pack
(LSJA0390) (pages 21, 22) (PV-BP18) (pages 9, 10)
1 pc. Shoulder Strap
(LSFC0012) (page 12)
1 pc. Lens Cap (LSYK0817)
with Lens Cap Strap
(LSGQO049) (page 12)
1 pc. CR2025 Clock
Battery (VSBW0004)
(installed in Camcorder)
(page 50)
1 pc. VHS PlayPak
(PV-PllVYMW0009) and
one "AA" battery (page 21)
1 pc. Digital PhotoShot Disk 1 pc. Memory Card [8 MB]
for Windows 95/98/Me/2000 (LSFT0262) (page 34)
(LSFT0490) (page 41)
SD is a trademark of the SD Card Association.
1 pc. PC Connection Cable
RS232C-2.5P)
LSJA0276) (page 41)
MultiMediaCard is a registered trademark of the MultiMediaCard Association.
Microsoft and Windows are registered trademarks of Microsoft in the United States and
other countries.
All product/brand names are trademarks or registered trademarks of the respective holders.
This operating instruction book is designed for use with models PV-L452 and PV-L652.
Illustrations in this manual show the PV-L652 Features may vary, so please read carefully.
Differences between models
LCD Monitor
63.5mm (2.5 inch)
Liquid Crystal Display
76.2 rnm (3.0 inch)
Liquid Crystal Display
2
Digital Zoom
maximum
750x
800x
Viewfinder ISecurity I
I Taa I
mm (0.4 inch)1O.2
Electronic Viewfinder
14 mm (0.55 inch) Liquid Crystal NO [
Co or E ectron c V ewfinder
WARNING: TO PREVENT FIRE OR SHOCK HAZARD, DO NOT
EXPOSE THIS EQUIPMENT TO RAIN OR MOISTURE.
Your Compact VHS Camcorder is designed to record and play back in Standard Play (SP)
and Super Long Play (SLP) modes. You can also play a Compact VHS Camcorder
recording on your VHS VCR using the supplied VHS PlayPak,
This Camcorder is equipped with the HQ System to provide excellent video pictures, and
is compatible with standard VHS equipment.
It is recommended that onl_ssette tapes that have been tested and inspected for use in
VCR machines with the _ and/or _ mark be used.
DO NOT REMOVE _(OR BACK_
NO UGER.GERVICEABLE pARrS INSIDE
_.EFER 8F.RVICING TO I
This symbol warns the user that
uninsulated voltage within the unit may
have sufficient magnitude to cause
electric shock. Therefore, it is dangerous
to make any kind of contact with any
inside part of this unit.
This symbol alerts the user that important
literature concerning the operation and
maintenance of this unit has been included
Therefore, it should be read carefully in
order to avoid any problems.
The above markings are located on the appliance's bottom cover,
Declaration of Conformity
Model Number : PV-L452/PV-L652
Trade Name : Panasonic
Responsibility Party : Matsushita Electric Corporation of America
Address : One Panasonic Way Secaucus New Jersey 07094
Telephone Number : 1-800-211-PANA(7262)
This device complies with Part 15 of the FCC Rules. Operation is subject to the
following two conditions: (1) This device may not cause harmful interference, and
(2) this device must accept any interference received, including interference that
may cause undesired operation.
FCC Warning : To assure continued FCC compliance, the user must use only provided
shielded interfacing cable with ferrite cores when connecting to
computer. Also, any unauthorized changes or modifications to this
equipment would void the users authority to operate.
Note: This equipment has been tested and found to comply with Part 15 and part 18 of the FCC
Rules. These limits are designed to provide reasonable protection against harmful interference when
operated in a residential environment.
If this equipment does cause interference to radio or television reception, which can be determined by
turning the equipment off and on, use the equipment in another location and/or utilize an electrical
outlet different from that used by the receiver.
If necessary, consult the dealer or an experienced radio/TV technician for help. You may find the
booklet, 'Something About Interference' available from FCC local regional offices helpful.
This product may cause interference to radio equipment and should not be installed near maritime
safety communications equipment or other critical navigation or communication equipment operating
between 0.45-30 MHz.
1. ReadInstructions- All the safety and
operating instructions should be read before
the unit is operated.
2. Retain Instructions - The safety and
operating instructions should be retained for
future reference.
3. Heed Warnings - All warnings on the unit
and in the operating instructions should be
adhered to.
4. Follow Instructions- All operating and
maintenance instructions should be followed.
5. Cleaning - Unplug this video unit from the
wall outlet before cleaning. Do not use liquid
or aerosol cleaners. Use a dry cloth for
cleaning.
6. Attachments- Do not use attachments not
recommended by the video product
manufacturer as they may be hazardous.
7. Water and Moisture - Do not use this video
unit near water - for example near a bath tub,
wash bowl, kitchen sink, or laundry tub, in a
wet basement, or near a swimming pool, and
the like.
8. Accessories - Do not place this video unit
on an unstable cart, stand, tripod, bracket, or
table. The video unit may fall, causing sedous
injury to a child or adult, and sedous damage
to the unit. Use only with a cart, stand, tripod,
bracket, or table recommended by the
manufacturer, or sold with the video unit. Any
mounting of the unit should follow the
manufacturer's instructions and should use a
mounting accessory recommended by the
manufacturer. An appliance and cart
combination should be moved
with care. Quick stops,
excessive force, and uneven
surfaces may cause the
appliance and cart combination
to overturn.
9. Ventilation -Slots and openings in the
cabinet are provided for ventilation and to
ensure reIiable operation of the video unit
and to protect it from overheating. These
openings must not be blocked or covered.
Never place the video unit on a bed, sofa,
rug>or other simiIar surface, or near or over a
radiator or heat register. This video unit
should not be placed in a built-in installation
such as a bookcase or rack unless proper
ventilation is provided or the manufacturer's
instructions have been adhered to.
10. Power Sources - This video unit should be
operated only from the type of power source
indicated on the marking label. If you ate not
sure of the type of power supply to your
home, consult your appliance dealer or IocaI
power company. For video units intended to
be operated from battery power, or other
sources, refer to the operating instructions.
4
11. Grounding or Polarization - This video unit
may be equipped with either a polarized
2-wire AC (Alternating Current) line plug (a
plug having one blade wider than the other)
or 3-wire grounding type plug, a plug having a
third (grounding) pin.
The 2-wire polarized plug will fit into the
power outlet only one way. This is a safety
feature. If you are unable to insert the plug
fully into the outlet, try reversing the plug. If
the plug still fails to fit, contact your electrician
to replace your obsolete outIet.
Do not defeat the safety purpose of the
poladzed plug.
The 3-wire grounding type plug will fit into a
grounding type power outlet. This is a safety
feature. If you are unable to insert the plug
into the outlet, contact your electrician to
replace your obsolete outlet. Do not defeat
the safety purpose of the grounding type plug.
12. Power-Cord Protection - Power-supply
cords should be routed so that they are not
likely to be walked on or pinched by items
placed upon or against them. Paying
particular attention to cords of plugs,
convenience receptacles> and the point where
they exit from the unit.
13. Outdoor Antenna Grounding i If an outside
antenna or cable system is connected to the
video unit, be sure the antenna or cable
system is grounded so as to provide some
protection against voltage surges and built-up
static charges. Part 1 of the Canadian
Electrical Code, in USA Section 810 of the
National Electrical Code, provides information
with respect to proper grounding of the mast
and supporting structure, grounding of the
lead-in wire to an antenna discharge unit, size
of grounding conductors, location of antenna
discharge unit, connection to grounding
electrodes, and requirements for the
grounding electrode.
iANT1ENNA
LEAD IN
WIRE
f
DISCtIAI_3E IJNIT
(NECsE-CnON81c_z0)
SERVICE
ROUNDING GONDUCTOR5
(NEC 8ECRION 810_1)
QROUND CLAMp8
FOWER SERVICE GROMNDIidG
ELECTROOE SYSTEM
N B= -NAIIONAL E_'_RIC_- C_OE _EC ART 250, pi_T H)
14. Lightning -For added protection of this
video unit receiver during a lightning storm, or
when it is left unattended and unused for long
periods of time, unplug it from the wall outlet
and disconnect the antenna or cable system.
This will prevent damage to the video unit due
to lightning and power-line surges.
15.PowerLines- Anoutsideantennasystem
shouldnotbelocatedinthevicinityofoverhead
powerlinesorotherelectriclightorpower
circuits,orwhereitcanfallintosuchpower
iinesorcircuits.Wheninstallinganoutside
antennasystem,extremecareshouldbetaken
tokeepfromtouchingsuchpowerlinesor
circuitsascontactwiththemmightbefatal.
16.Overloading- Donotoverloadwalloutlets
andextensioncordsasthiscanresultina
riskoffireorelectricshock.
17.ObjectsandLiquids- Neverpushobjects
ofanykindintothisvideounitthrough
openingsastheymaytouchdangerous
voltagepointsorshortoutpartsthatcould
resultinafireorelectricshock.Neverspill
iiquidofanykindontothevideounit.
18.Servicing- Donotattempttoservicethis
videounityourseifasopeningorremoving
coversmayexposeyoutodangerousvoitage
orotherhazards.Referallservicingto
qualifiedservicepersonnel.
19.DamageRequiringService- Unplugthis
videounitfromthewalloutletandrefer
servicingtoqualifiedservicepersonnelunder
thefollowingconditions:
a.Whenthepower-supplycordorpiugis
damaged.
20.
21.
b.Ifanyliquidhasbeenspilledinto,or
objectshavefallenonto,thevideounit.
c.Ifthevideounithasbeenexposedtorain
orwater.
d.Ifthevideounitdoesnotoperatenormally
byfollowingtheoperatinginstructions.
Adjustonlythosecontrolsthatarecovered
bytheoperatinginstructions,asanimproper
adjustmentofothercontrolsmayresultin
damageandwilloftenrequireextensive
workbyaqualifiedtechniciantorestorethe
videounittoitsnormaloperation.
e.Ifthevideounithasbeendroppedorthe
cabinethasbeendamaged.
f.Whenthevideounitexhibitsadistinct
changeinperformance-thisindicatesa
needforservice.
Replacement Parts - When replacement
parts are required, be sure the service
technician has used replacement parts
specified by the manufacturer or have the
same characteristics as the original part.
Unauthodzed substitutions may result in fire,
electric shock or other hazards.
Safety Check- Upon completion of any
service or repairs to this video unit, ask the
service technician to perform safety checks
to determine that the video unit is in safe
operating order.
USE & LOCATION
•TO AVOID SHOCK HAZARD ,., Your Camcorder and power supply should not be exposed to rain or moisture.
Do not connect the power supply or operate your Camcorder if it gets wet. Your Camcorder has been designed for
outdoor use, however {t is not designed to sustain direct exposure to water, rain, sleet, snow, sand, dust, or a direct
splashing from apool or even a cup of coffee. This action could permanently damage the internal parts of your
Camcorder. Do not attempt to disassemble this unit. There are no user serviceable parts inside. Unplug your
Camcorder from the power supply before cleaning.
•DO NOT AIM YOUR CAMCORDER AT THE SUN OR OTHER BRIGHT OBJECTS,
• DO NOT LEAVE THE CAMCORDER WITH THE EVF AIMED DIRECTLY AT THE SUN AS THIS MAY CAUSE
DAMAGE TO THE INTERNAL PARTS OF THE EVF.
• DO NOT EXPOSE YOUR CAMCORDER TO EXTENDED HIGH TEMPERATURE ,.. Such as, in direct sunlighL
inside a closed car, next to a heater, etc... This action coutd permanently damage the internal parts of your
Camcorder.
•AVOID SUDDEN CHANGES IN TEMPERATURE ,., If the unit is suddenly moved from a cold place to a warm
place, moisture may form on the tape and inside the unit.
• DO NOT LEAVE YOUR CAMCORDER OR THE POWER SUPPLY TURNED ON WHEN NOT IN USE.
•STORAGE OF YOUR CAMCORDER ,.. Store and handle your Camcorder in a manner that will not subject it to
unnecessary movement (avoid shaking and striking). Your Camcorder contains a sensitive pick-up device which
coutd be damaged by improper handling or storage.
CARE
•TO CLEAN YOUR CAMCORDER .,. Do not use strong or abrasive detergents when cleaning your Camcorder
body.
• TO PROTECT THE LENS ,., Do not touch the surface of the lens with your hand. Use a commercial camcorder
lens solution and lens paper when cleaning the lens. Improper cleaning can scratch the lens coating.
• TO PROTECT THE FINISH OF YOUR CAMCORDER .,. Before handling your Camcorder, make sure your hands
and face are free from any chemical products, such as suntan lotion, as it may damage the finish.
Things You Should Know ............................................................................. 2-3
Important Safeguards ................................................................................... 4-5
Precautions ........................................................................................................ 5
Self Demo Mode ................................................................................................ 7
Quick Operation Guide ..................................................................................... 8
Supplying Power (Battery Charge/Use/Refresh/Care, AC Adaptor, Car Battery Cord) ..,, 9+1 O
Cassette Information ...................................................................................... 11
Before Using (Remove the Sensor tag, Using the Shoulder and Hand Straps, Lens Cap) ..,, 12
Using MENU Mode .......................................................................................... 13
Setting the Clock (TimeZone,Auto DaylightSavingTime)................................... 14+15
Built-in Auto Light (Using the Light, Rplacing the Bulb) ............................................. 16
Camera Recording (Basic, Stand-by, Programmed Recording) ............................. 17-19
Playing Back Recordings
(Basic Playback, Visual Search, Still Picture, Tracking, TV/VCR Playback) ................. 20-21
Copying your Tapes (dubbing) ...................................................................... 22
IFour-Speed Power Zoom ............. 23
Backlight ....................................... 23
MagicPix TmImages ....................... 24
FOCUS (Auto/Manual Focus) ................. 25
High Speed Shutter (Auto/ManualShutter)26
Auto Fade ...................................... 27
Color Digital Fade ........................ 28
Color Digital Filter ........................ 29
Digital Zoom ................................. 30
Digital Electronic Image
Stabilization (E.I.S.) .................... 31
Still/StrobeNVide ........................... 32
MotionSensor ............................... 33
Digital Still Camera .................. 34~40
Memory Card Insertion/Removal. 34
Recording ..................................... 35
Using the Light ............................. 36
Playback ........................................ 36
Displayed Directry/Image Number ... 37
Delete Specific Images ................ 38
Picture in Picture Wipe Title ........ 39
Digital Wipe Mode ........................ 40
PC Connection ......................... 41~44
Using a SD PCMCIAAdaptor
(optional) ........................................ 45
Viewfinder/LCD Monitor Indications ....................................................... 46-48
Operation Notes (CleaningEVF)........................................................................... 49
Notice ............................................................................................................... 49
Replacing Clock Battery ................................................................................. 50
Palmcorder Accessory System ............................................................... 51~52
Palmcorder Accessory Order Form .............................................................. 53
Specifications .................................................................................................. 54
Before Requesting Service (Video Head Cleaning, Self Diagnostic System) ......... 55-56
Request for Service Notice ............................................................................ 56
Limited Warranty ............................................................................................. 57
Servicenter List ............................................................................................... 58
Spanish Quick Use Guide/Guia Para Use R_pido ........................................ 59
Index ................................................................................................................. 60
L_JL_IJJI _LIJ _W_l IJLLILWJLW_L_J
Self Demo mode is on when the screen
below appears. To turn it off, follow
steps 1-4 below.
EVF or LCD Monitor
Ilmmllonic
ITS "i_pEs CAN pLAy
IN "K_UR VCR
yES, IT'S VH81
20x LENS I800x DZOOM
DIGITAL STABI LIZATIC_N
FULL-SIZE HEADSYS'n_M
DIGITAL PHOT_HOT
2,3,4
Before you begin...
•Connect Camcorder to power source.
Set POWER to CAMERA.
Press MENU for
MENU mode.
Press UP or DOWN
to select •pAGE 2/1
_ ; OFF
DIQIT,_ WIPE ;OFF
_ICPIX = OFF
_lE_r : PUSH UDt I_IN K_'
_r : pUSH DI_ _
_ID : pU_I MENIJ _
Press DISPLAY to select OFF.
Press MENU to exit.
Note:
• Self Demo stops automatically if battery
is attached (page 9) and cassette tape is
inserted (page 11).
• Inserting a tape alone (or attaching a
partially charged battery) only temporarily
stops Self Deme.
• Self Demo stops for 30 seconds when the
Light is pressed.
To turn Self Demo back on:
• Set to SELF DEMO : ON in MENU screen.
Charge Battery Pack fully before
operation (page 9).
Plug in AC
Adaptor.
Insert Battery_, CHARGE Lamp
flashes, then stays lit when
charging is complete.
_/1 Attach dfu;Ytt
_/_ charge _atterv
f __/_ (page 9).
2S,,deTAPE
I F__ t/144 I EJECTtoopen
lJJ, _1 door.
_ I_Zll _1 3insertcassette
(page,,)
•,_,Press here to
Protection Film close door.
Note:
• Remove the Protection Film before use.
When the LCD monitor is open, the EVF automatically turns OFF (Color EVF model only)
(page 17).
Press LCD-OPEN to unlock the LCD monitor.
Swing it fully open and adjust the angle,
Set POWER to CAMERA.
Press RECORDIPAUSE
to start recording,
Press RECORDIPAUSE
again to..g_pauserecording.
When the LCD monitor is open, the EVF automatically turns OFF (Color EVF model only)
(page 20).
Press LCD-OPEN to unlock the LCD monitor.
Swing it fully open and adjust the angle (see above).
2Set POWER
to VCR, Press REWIND/SEARCH
to rewind tape.
Press PLAY to start
playback.
Press STOP to stop
playback.
8
Charge Battery Pack fully before use.
3
2
POWER
Lamp\ 1
CHARGE
Lamp
(Top View)
Plug in AC Ada.gtor,
POWER Lamp lights.
Insert Batter_.
Align left side of Battery with left edge of
AC Adaptor,
O Press Battery down and slide in direction
of arrow.
The CHARGE Lamp flashes, then stays lit
when charging is complete.
Remove Batter_.
Slide Battery to the left and lift off.
Note:
• Charging takes about I and 1/2 hours.
• While the DC Power Cable (supplied) is connected
to the AC Adaptor, the Battery cannot be charged.
• After charging 5 times, use Battery Refresh feature
as explained below.
• Battery life gradually decreases after repeated use
and recharging. If operation time becomes very
short even after a sufficient charge, discard Battery
properly (page 10).
LIl-t Ii[,_I I_'1"_1:r'_ |(=]/vii t,_"ftl:,
A fully charged Battery provides a maximum of about 2 hours of continuous use (LCD
monitor off) or about 1.5 hours (LCD monitor on). Actual time may vary due to operating
conditions. Using the Built-in Light decreases operating time.
B
A Attach Batter_..
Insert top of Battery into top of mounting
surface.
Press and snap into place.
B Remove Battery.
Slide BATTERY RELEASE and remove
Battery.
This feature completely discharges
Battery before recharging begins.
Use after every 5 charges for optimum
Battery performance.
REFRESH_
Lamp _
BATTERY v
REFRESH
To use battery refresh, insert Battery on AC
Adaptor (see steps 1-2 above), then press
BATTERY REFRESH.
The REFRESH Lamp lights, then goes out whe
discharge is complete. Battery charging will then
start automatically.
If BATTERY REFRESH is pressed by mistake,
remove Battery from AC Adaptor and reinsert it
for normal charging.
Note:
• Charging takes about 7 and 1/2 hours when
Battery Refresh is used.
• Battery will not operate in extremely high
temperatures.
,w w w w v
Caution:
• Charge only with specified charger.
• Battery can be charged within a temperature range of
10 °C (50 °F) and 35 °C (95 °F).
• Battery is normally warm after charging or just after use.
• Do not use an insufficiently charged or worn-out Battery.
Safety precautions:
• Do not get Battery near, or dispose of in, fire.
• Do not directly connect (shoOtcircuit) the positive (÷)
and negative (-) terminals.
• Never attempt to disassemble or reassemble Battery.
To avoid Battery damage:
• Do not drop or jar Battery.
• Use Battery with specified units only.
• If Battery is used in extremely high
temperatures, a safety device will
automatically prevent operation.
To prolong Battery life:
• While not in use, remove Battery from
the Camcorder and AC Adaptor, and
store in a cool, dark, dry place.
• Keep Battery terminals clean.
DC Power Cable
Connect AC Adaotor DC OUT to
Camcorder DC IN with supplied DC
Power Cable.
Plug in AC Adaptor.
POWER Lamp lights.
DC OUT
Connector
DC |N
Connector
Note:
•While the DC Power Cable (supplied) is
connected to the AC Adaptor, the Battery
cannot be charged.
• When not in use, unplug AC Adaptor from
AC outlet. (Adaptor uses 1.2 W of electricity
while plugged in.)
CAUTION: j
This unit will operate on 110/120/220/240 V AC 50/60 Hz. An AC plug adaptor may be required
for voltages other than 120 V AC. Please contact either a local or foreign electrical parts
distributor for assistance in selecting an alternate AC plug. We recommend using the accessory
power plug adaptor (VJSS0070) in an area which has special AC outlets.
[o,_"_ :_'1|(:]a,jLe,r;_, I[[oj-_i [o]ie=ti]
Cigarette
Lighter
Socket (12 V)
/
Car Battery Cord Cigarette
(optional) Lighter Plug
Connect PV-C16 Car Battery Cord
(optional) to Camcorder DC IN,
2_ Start engine first.
Plug Car Battery Cord into
Cigarette lighter socket.
• If Car Battery cord fuse needs replacing,
use exact current rating (in amps).
Note:
• This cord only works in vehicles equipped
with DC 12 V (negative ground) battery.
Check with your car/truck dealer. Use only
specified car battery cord.
• To avoid blowing the car battery cord fuse,
do step 2 in the proper order.
• Running vehicles must be well ventilated.
• When not in use, disconnect cigarette
lighter plug.
• For personal safety the driver of the vehicle
should not attempt to operate the
camcorder while driving.
3 2
Turn T_.a..#eWheel in direction of arrow
until there is no slack.
Attach Batter_. (page 9).
Slide T_.APEEJECT to open door.
Insert £assette as shown.
Press here to close door.
• To remove the cassette, slide the TAPE
EJECT switch.
Use tapes with the _ mark in this unit.
Tape Speed
Selector Position
SP 20 minutes
(Standard Play)
SLP
(Super Long Play)
Cassette type
TC_20 TC_30 TC40
30 minutes 40 minutes
1hour
1 hour 2 hours
30 minutes
•SLP playback may contain more picture noise.
Protects tapes from being accidentally
erased.
Slide tab type
To prevent accidental erasing,
break off tab with screwdriver.
(Or, slide tab open.)
To record again,
cover hgle with adhesive tape.
(Or, slide tab closed.)
11
•: r°v," (on_:4il T°vl:i !iT:_l._ i _-'_°]a _.t, L i3v_ _ !.?_,Td _ I
HandStra_ O
Sensortag
Open the Hand Strap as illustrated
at left.
Remove the Sensor tag.
Then, replace the Hand Strap.
|:I il_T'_='tii[,, i_ =[,,]L!tf; r_ri,.'_q_.ij i
Remove Battery Pack before doing steps.
Undo strap ends _-
from buckles.
Thread strap ends through Strap
Rings on Camcorder,
t
Pull a loop of strap from buckle, then pull
strap tight to shorten or lengthen.
Re-insert the strap
ends into buckles, /.-#
min. 25.4 mm (1 inch) Adjust Hand Strap length to fit your hand as
shown.
Attaching the Lens Cap
Strap:
Thread the Strap through
the Lens Cap attachment
ring as illustrated at left.
Attaching the Lens Cap Cord to the Hand Strap:
Remove the Hand Strap from the front clasp and thread
the Strap through the loop in the Lens Cap Cord.
Reattach the Hand Strap.
1,2,3,4
Before you begin...
•Connect Camcorder to power source.
•Set POWER to CAMERA or VCR.
Press MENU for MENU mode.
The CAMERA or VCR MENU screen (see below
left) appears when Menu mode is entered.
Press UP or DOWN to highlight the
desired menu item.
Press DISPLAY to set selection.
Press MENU to exit.
Note:
•The Menu mode is canceled if UP/DOWN,
DISPLAY, or MENU are not pressed within 5
minutes when Self Demo mode is off.
• The Menu mode is canceled if UP/DOWN,
DISPLAY, or MENU are net pressed within 30
seconds when Self Demo mode is on.
(MENU
3
4 j
5f
6/
8
9 j
11Z
Mode (CAMERA) Screen_) 1
--- MENU --- PAGE 112
_OGRAMMED REC 2
DISPLAY ; ON
SHUTn_R ; AUTO
STAND-BY RELEASE ; OFF
CLOCK SET
LIGHT MODE ; OR=ION 3
SELECT: PUSH UP/DOWN K_Y
SET : PUSH DISPLAY
END : pUSH MENU _ _ _ 4
•PAGE 2/2
IELF DEMO OR=
DIQ ITAL WIPE OR= T*J
MAGICPIX OR=
MOTIONSENSOR OR=
VIDEO EFFECTS FADE O
BLACK
SELECT: PUSH UP/DOWN
SET : PUSH DISPLAY I<L=Y
END : PUSH MENU
(MENU Mode (VCR) Screen_)
5dcLM:ENu---
2_DISPLAY ; ON
PROGRAMMED REC (page lg).
Camcorder starts and stops recording at a
preset time.
DISPLAY (page 46).
ON : On-screen Display (OSD) screens are
displayed.
SHUTTER (page 26).
Select desired shutter speed.
STAND-BY RELEASE (page 18).
ON :Enables quick resumption of recording
from Stand-by mode.
CLOCK SET (pages 14, 15).
Select to set clock.
LIGHT MODE (page 16).
ON/OFF : Light can be set ON or OFF.
ON/OFF/AUTO: Light can be set ON, OFF,or AUTO.
7SELF DEMO (page 7).
ON : SELF DEMO screen is displayed.
8 DIGITAL WIPE (pages 39, 40).
ON :Digital wipe mode can be used.
9MAGICPIX (page 24).
ON : Picture sensitivity is increased.
10 MOTIONSENSOR (page 33).
ON : Enables MetionSensor recording.
11 VIDEO EFFECTS (pages 27-29).
AUTO FADE : BLACK or WHITE
DIGITAL FADE :TYPE "-_ 7 types
COLOR "-_ 8 colors
DIGITAL FILTER : COLOR "-_ 5 colors
Setthefollowingitemsinorder:Time Before you begin...
Zone, Daylight Saving Time, Date, • Connect Camcotder to power source.
and Time. • Set POWER to CAMERA er VCR.
Press MENUfor MENU mode.
Press UP or DOWN to selectS.
STAND-BY F_E ; OFF
E : OFFION
/8_ELEOT: FtJSH UP/_OV.'_ _J _LFCT: PtJ_ tlPl00_d _ =Y
ND :ptJ_4 MENLt b_L_f D : I=t_lt M2t#J _-Y
[CAMERA MODEl [VCR MODEl
Press DISPLAY for _.S.,, _Ks_ ...
CLOCK SET menu. _; _"_"
D.&T, ;AUTO
Press U._P.Por DOWN to _IOATE/TIME;12:00:00/_1
select TIME ZONE, DST, _a_= _ up_oow_
1 2 3 4 or DATE/TIME. _-r :_J=_e,,p._y,_
Press DISPLAY for menu of item selected in
step 2.
To change the setting:
_-) Go to step 3a on page 15.
-) Go to step 3b on page 15.
_-_ Go to step 3c on page 15.
Press MENU twice to exit.
11_1tI!_1_ _. " . 111 ".' L,1[lJ_,[#,ll'_'il_'_r_.' •,I il'll ,1 _.11_..l..ff•lt_l'_u,1"*l.'."
_a ilb,,,,l_J| i iit! iii-T,_llIriiP-.14tl ill
The Camcorder is preset to Eastern time.
Time Zone chart ]
7
Press UP or DOWN to
select local time zone.
Press DISPLAY_ to
confirm entry.
-.. 8BJ_&'T TIME _ -..
_A_ IC "_I_P_IFIG
_ HAWAII
• When traveling, repeat this operation an_
select one of the 8 listed time zones to
set the clock to local time.
Note :
• Clock may lose or gain up to 2 minutes
per month.
•When traveling outside the listed time
zones, set clock to local time manually.
• To adiast or set clock, see "Setting Date
and Time" bottom of page.
Clock will auto-adjust to daylight saving time (DST).
, DST: AUTO
Spring (First Sunday in April) :
ahead one hour.I:00AM 2:00AM
INormal33me
DaylightSaving
Time 3:00AM 4:00AM
Autumn (Last Sunday in October) :
back one hour.
DaylightSaving_AM
Tree I -
{Normal'i3me II:0OAM 2:00AM
The Camcorder is preset to DST:_
If DST is not observed in your area, set
to.by doing the following,
Press UP or DOWN to
select OFF or AUTO.
Press DISPLAY to
confirm entry.
Note:
•Auto DST does not function if time zone
is set to Hawaii or Samoa (see "Setting
the Time Zone" above).
Press or hold down U._EPor
DOWN to select hour, then
press DISPLAY to fix.
Repeat for minute, month, day
and year.
Clock starts when year is
entered and DISPLAY is
pressed. 1.=
For recording in dim lighting.
LIGHT
CAUTION:
ight becomes hot.
ever cover Light while on,
Note:
•Using Light reduces battery operating time.
• Provide proper ventilation when using
Light extensively in a hot environment.
• Using Light when the Camcerder is
powered by a car battery may shorten
bulb life.
• Set Light to OFF when not in use.
Before you begin...
•Connect Camcorder to power source.
• Set POWER to CAMERA.
Press MENU for
MENU mode. Press
UP or DOWN to
_ect _. --- MB_U --- pJ,GE 11
PROGRAtAME_ I_C
DISpL&Y ; CN
SHUT_J_ : AUTO
ttFAND.By RELE_ ;
CLOCK SET
Press DISPLAY to set OFF/ON or
OFF/ON/AUTO. Press MENU to exit.
Press LIGHT repeatedly for Light ON,
OFF, or AUTO.
• In AUTO, light turns itself on/off
according to lighting conditions.
EVF or LCD Monitor
/117^i = _ A_.D: Light is on,
_D : Light mode is auto.
J_l 1
Before you begin...
•Order Part No. VLLW0015 for replacement
bulb.
• Set POWER to OFF.
I iltI1 llil, il [ltl l!llii
Slightly raise portion Oof lens cover
to unhook, and slide portion _)
forward to remove,
Using Tweezers or needle-nose pliers,
carefully remove bulb.
• Take unit to service center if you need
assistance.
Replace bulb using a clean cloth or
tissue, (Do not touch with fingers.)
Replace lens cover.
Note:
• Handle bulb gently. Excessive force may
cause bulb to crack.
ifDANGER: I
se only replacement bulb (PART NO. VLLW0015) supplied by Panasonic to reduce risk |
fire. I
andle new bulb with cloth or tissue as skin oils will decrease bulb life.
emove lens cover and allow bulb to cool before replacing to avoid possible burn hazard.
ViewrecordingsceneonEVF(Electronic
ViewerFinder)orLCD(LiquidCrystal
Display)monitor.
BRIGHT
ADJUSTMENT ADJUSTMENT
_aRmCAUTION :
otating partially open LCD I
onitormay block cassette door |
nd damage Camcorder body, J
Built-in
Microphone
6
WARNING (PV-L652 only) :
•Do not leave the camcorder with the EVF
aimed directly at the sun. This may cause
damage to the internal parts of the EVF.
Note:
•When Camcorderisaimed at excessivelybright
objects,or bdght lights,avertical bar may
appear inthe picture.This is normalfor the
CCD pick-up.Try toavoid this when possible.
• Using LCD monitor reduces battery operation
time. Return LCD monitorto locked position
when not in use.
Before you begin...
• Connect Camcorder to powersource.
•Insert cassette with recordtab (page 11).
Press LCD-OPEN to unlock the LCD
monitor. Swing LCD monitor fully open
and adjust viewing angle.
• If you want to record using EVF, close
and lock LCD monitor.
Set POWER to
CAMERA.
• Be sure POWER
is fully turned to
CAMERA position.
• EVF or LCD monitor
PAUSEl
EVF or LCD Monitor
turns on/off by the POWER switch.
• EVF shuts off when LCD monitor is
opened and turns back on when LCD i
closed (Color EVF model only).
• Both EVF and LCD monitor turn on
when LCD is at 180 ° (see above left).
This allows both you and the subject to
view the recording.
3LCD:PressBRIGHT /:_:__toADJUSTMENTmonitoradjustLCD,.,®,_u "
brightness level. "_ _
EVF : Look into EVF and adjust
VISION ADJUSTMENT to your
eyesight.
4
5
Hold down TAPE SPEED for about 1
second to change tape speed to SP/SLP
(page 11).
Press RECORD/
PAUSE to start or
pause recording.
Set POWERto
OFF: when finished.
Tape speed
RECORD ssP
EVF orLCD Monitor
(Record mode)
•To remove the cassette, slide the
TAPE EJECT switch (page 11). 17
Before you begin...
• Connect Camcorder to power source.
•Insertcassette with recordtab (page 11).
I
B 2,3,4
adD
If left in RECORD/PAUSE mode for 5
minutes, Camcorder switches to Stand-by
mode to conserve battery. When set to ON,
Stand-by Quick Release lets you resume
recording by pressing RECORD/PAUSE two
times. Stand-by Quick Release is set to OFF
at the factory.
Set POWER to --- MENU--- P_E_
F_OQ_ REC
CAMERA. o,s_y =ON
Press MENU for 8ELl'T:_. uP_ _w
SET : PJSH D I _ot_y
MENU mode. E.D :_.M.u,zv
Press UP or DOWN
to select _.
b, C,
A,C
3Press DISPLAY to select ONIOFF.
ON : From Stand-by mode, press
RECORD/PAUSE two times to
resume recording.
OFF : From Stand-by mode, set
POWER to OFF. then to
CAMERA. Press RECORD/
to record.
Press MENU to exit.
For proper continuity when taping from
Stop mode or after attaching a new
Battery.
A set POWER to VCR.
_) Press REWIND/SEARCH to rewind
a few seconds of tape.
Press PLAY to review recording.
Press STILL where you want to
continue recording.
C set POWER to CAMERA.
D Press RECORD/PAUSE to resume
recording.
For a smooth transition between scenes if
recording is stopped, and then started within
24 hours.
a Press RECORDIPAUSE to stop
recording.
b set POWER to OFF and leave cassette
in Camcorder.
CTo resume recording, set POWER to
CAMERA.
d Press RECORDIPAUSE to resume
recording.
Note:
• Use Manual Easy Edit (left) if more than 24
hours before recording is resumed.
i_ l[OliIIP;+tihl ihT_TiII ;.(=To,Zo]11!IIi [! i
Set a recording start and stop time. Or,
set a 5 or 10 second interval recording
to be done each minute.
Before you begin...
• Connect Camcorder to power source.
Use AC Adaptor for longer recordings.
• Insert cassette with record tab (page 11).
• Set POWER to CAMERA.
1,2,3
-REC TIME :
10MIN._ 20MIN._ 30MIN.
_INTERVAL'2_ INTERVAL"1 TOTAPEj
10SEC/MiN.-- 5SEC/MtN. '_END --
"1 Record 5 seconds each minute.
*2 Record 10 seconds each minute.
1
Press DISPLAy..
(Current time is
displayed.)
Each additional press
of DISPLAY increases
start time by 30 minutes.
Press DOWN to select START ; 10:20PM
_. _ ;18MIN.
Press DISPLA.Y. _mL_r:_J_.up_m_
SET :PJSH D I_=t).y
repeatedly to select one _ =Pus.._ _=_
C_NCB- : PtJ_H MENU
of the options shown at 10=20=00F_I
left
To cancel the setup, press MENU twice
4 Press RECORD/PAUSE /STAND-BY
to place Camcorder in / _Tm_ =;_l_
stand-by mode. _,_1_
Recording will be done as scheduled.
Note:
• Start time may not be set over 24 hours from
current time.
• Camcorder shuts off at tape end, or 12 hours
after Interval Recording starts.
• To cancel, set POWER to OFF.
19
Before you begin...
•Connect Camcorder to power source.
•Insert recorded tape. A
1°| Press LCD-OPEN and swing LCD
monitor fully open,
•If you want to playback on EVF, close
and lock LCD monitor.
Set POWER to VCR.
• If tape has no record tab, auto
playback begins.
,¢._90 -_peaKer • EVF or LCD monitor turns on/off by
the POWER switch,
BRIGHT • EVF shuts off when LCD monitor is
ADJUSTMENT i- opened and turns back on when LCD
31 isdosed(Co,orEVFmode,on,y)
_Playback function buttons,
•/_//'_ _ GREW : Rewind tape.
_)PLAY : Play tape,
(_STOP :Stop tape.
STILL _)BRIGHT : Adjust LCD monitor brightness.
j _IVOLUME: During playback, adjust
_" volume of speaker.
Press "T" :Volume
up (+).
Press "W" :Volume
down (-). ,_.. [-],,,,----[;]
Note:
•Using LCDmonitorreduces bakery operating
time. Return LCDmonitorto Iocked position
when notin use.
2
IAuto Tracking I
Continuously analyzes each recording for
optimum picture quality.
IManual Tracking I
Some recordings require manual
adjustment to reduce noise,
Press UP or DOWN until Playback picture
clears up.
Press DISPLAY to return to Auto Tracking.
[Quick Visual Search ]
Search Speed
•SP (Standard Play) : 3 times normal.
• SLP (Super Long Play) : 9 times normal.
During playback, press:
• F! :fast forward search
•REW :rewind search
Press again or press PLAY for normal play.
[Still Picture ]
Press STILL to freeze picture.
Press again for normal play.
This feature works best in SLP mode (page 11).
Note:
• During search, horizontal noise bars will appear.
Audio is muted.
• To protect video heads and tape, operating
modes will revert as follows after 5 minutes:
Still ._l_Stand-by
Stand-by-I_ Power off (when Battery Pack is
used).
• Tape auto-rewinds if played or fast forwarded to end.

Other manuals for PV-L452

1

This manual suits for next models

1

Other Panasonic Camcorder manuals

Panasonic HC-V270 User manual

Panasonic

Panasonic HC-V270 User manual

Panasonic VDR VDR-D220 Quick start guide

Panasonic

Panasonic VDR VDR-D220 Quick start guide

Panasonic SV-AV10 User manual

Panasonic

Panasonic SV-AV10 User manual

Panasonic NV-MD9000EN User manual

Panasonic

Panasonic NV-MD9000EN User manual

Panasonic SDR-H20EE User manual

Panasonic

Panasonic SDR-H20EE User manual

Panasonic NV-DS29EG User manual

Panasonic

Panasonic NV-DS29EG User manual

Panasonic AJ-SPD850E User manual

Panasonic

Panasonic AJ-SPD850E User manual

Panasonic TM 300 User manual

Panasonic

Panasonic TM 300 User manual

Panasonic AVCCAM AG-AC120EN Installation guide

Panasonic

Panasonic AVCCAM AG-AC120EN Installation guide

Panasonic HDC-DX1PC User manual

Panasonic

Panasonic HDC-DX1PC User manual

Panasonic P2HD AG-HPX250EJ User manual

Panasonic

Panasonic P2HD AG-HPX250EJ User manual

Panasonic AG-AC7P User manual

Panasonic

Panasonic AG-AC7P User manual

Panasonic AJD215 - DVCPRO CAMCORDER User manual

Panasonic

Panasonic AJD215 - DVCPRO CAMCORDER User manual

Panasonic HX-WA10A User manual

Panasonic

Panasonic HX-WA10A User manual

Panasonic NV-G202A User manual

Panasonic

Panasonic NV-G202A User manual

Panasonic AJD200P - DVC PRO User manual

Panasonic

Panasonic AJD200P - DVC PRO User manual

Panasonic PV-DV953 User manual

Panasonic

Panasonic PV-DV953 User manual

Panasonic SDR-S26 User manual

Panasonic

Panasonic SDR-S26 User manual

Panasonic Viera Link HX-WA10 User manual

Panasonic

Panasonic Viera Link HX-WA10 User manual

Panasonic NV-R55A User manual

Panasonic

Panasonic NV-R55A User manual

Panasonic Palmcorder PV-L354-K User manual

Panasonic

Panasonic Palmcorder PV-L354-K User manual

Panasonic AJ-D410A User manual

Panasonic

Panasonic AJ-D410A User manual

Panasonic HC-V785 Technical specifications

Panasonic

Panasonic HC-V785 Technical specifications

Panasonic NV-A1B User manual

Panasonic

Panasonic NV-A1B User manual

Popular Camcorder manuals by other brands

Sony Super HAD CCD SSC-CX13VP operating instructions

Sony

Sony Super HAD CCD SSC-CX13VP operating instructions

Samsung Hi8 SC-L901 manual

Samsung

Samsung Hi8 SC-L901 manual

Hitachi DZ-MV4000E instruction manual

Hitachi

Hitachi DZ-MV4000E instruction manual

Dahua DHI-ITC952-AF3F Web operation manual

Dahua

Dahua DHI-ITC952-AF3F Web operation manual

Noraxon Ninox Series user manual

Noraxon

Noraxon Ninox Series user manual

Medion LIFE instructions

Medion

Medion LIFE instructions

ARRI ARRIFLEX 235 instruction manual

ARRI

ARRI ARRIFLEX 235 instruction manual

JVC GR-AX210 instructions

JVC

JVC GR-AX210 instructions

Sanyo XACTI VPC-GH3EX instruction manual

Sanyo

Sanyo XACTI VPC-GH3EX instruction manual

Gradient Lens Luxxor LXC user guide

Gradient Lens

Gradient Lens Luxxor LXC user guide

Sharp VL AH 50 H Operation manual

Sharp

Sharp VL AH 50 H Operation manual

Samsung VP-D301 Owner's instruction book

Samsung

Samsung VP-D301 Owner's instruction book

JVC GR-SXM267UA Service manual

JVC

JVC GR-SXM267UA Service manual

Sony DCR-DVD201 Service manual

Sony

Sony DCR-DVD201 Service manual

Sony HANDYCAM HVR-M35U operating instructions

Sony

Sony HANDYCAM HVR-M35U operating instructions

JVC GZMG21US - Everio Camcorder - 680 KP Schematic diagrams

JVC

JVC GZMG21US - Everio Camcorder - 680 KP Schematic diagrams

Sony DCR-TRV7   (English and Spanish) operating instructions

Sony

Sony DCR-TRV7 (English and Spanish) operating instructions

Vimar Elvox 46516 212B quick start guide

Vimar

Vimar Elvox 46516 212B quick start guide

manuals.online logo
manuals.online logoBrands
  • About & Mission
  • Contact us
  • Privacy Policy
  • Terms and Conditions

Copyright 2025 Manuals.Online. All Rights Reserved.