1 About Lead Free Solder 3
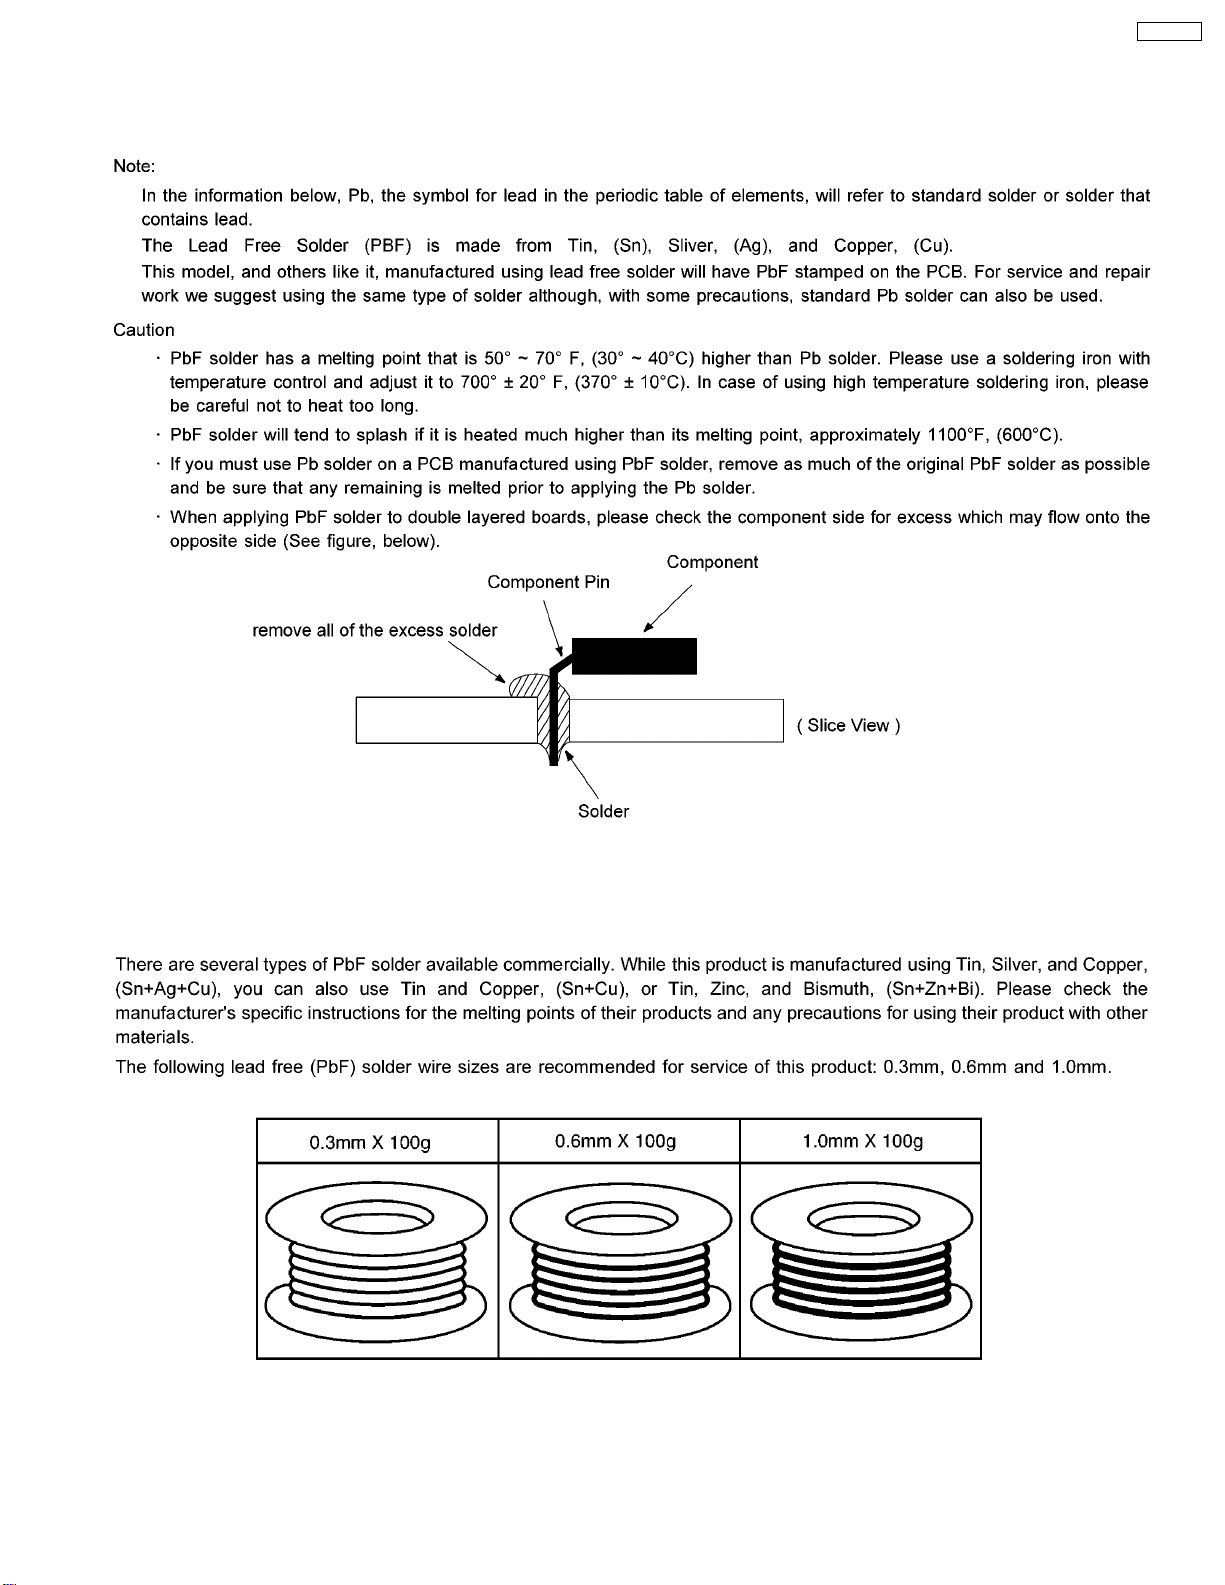
1.1. Suggested PbF Solder 3
1.2. How to recognize that PbF Free solder is used 4
2 Removal and Replacement Procedures 5
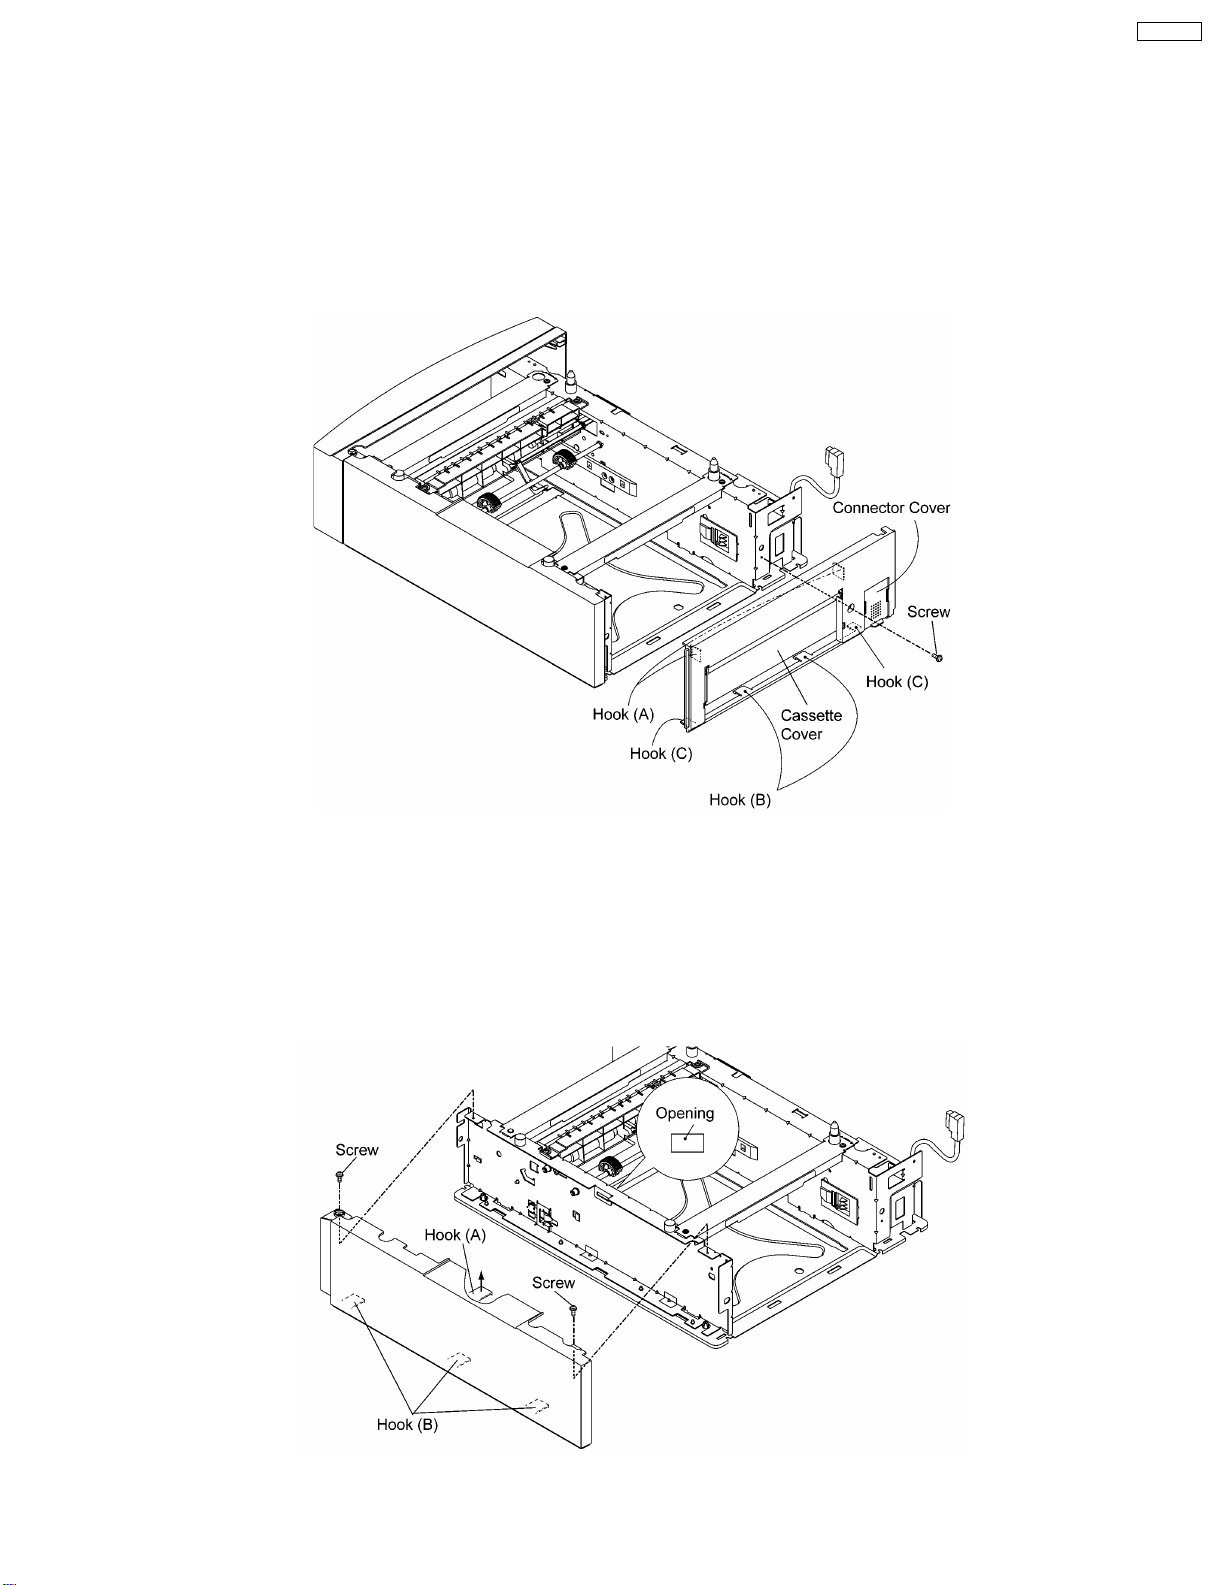
2.1. Front, Right, Left and Rear Covers 5
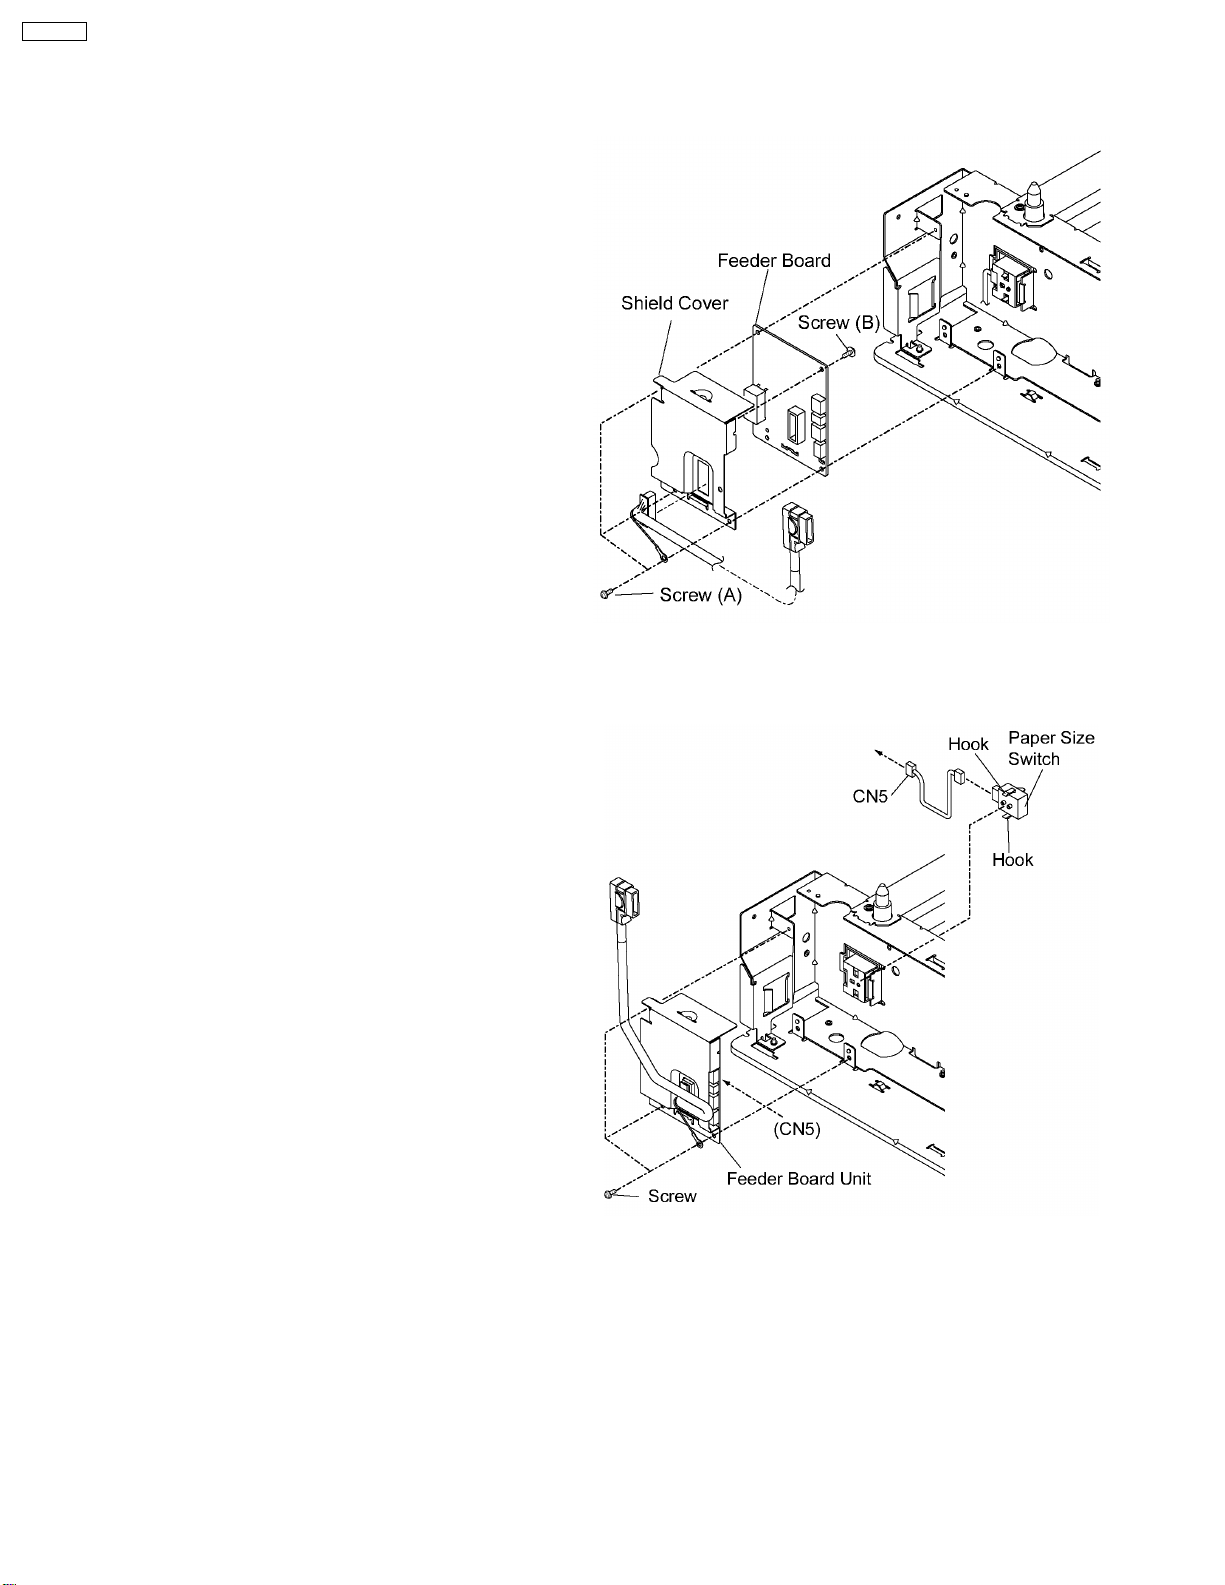
2.2. Feeder Board 8
2.3. Paper Size Switch 8
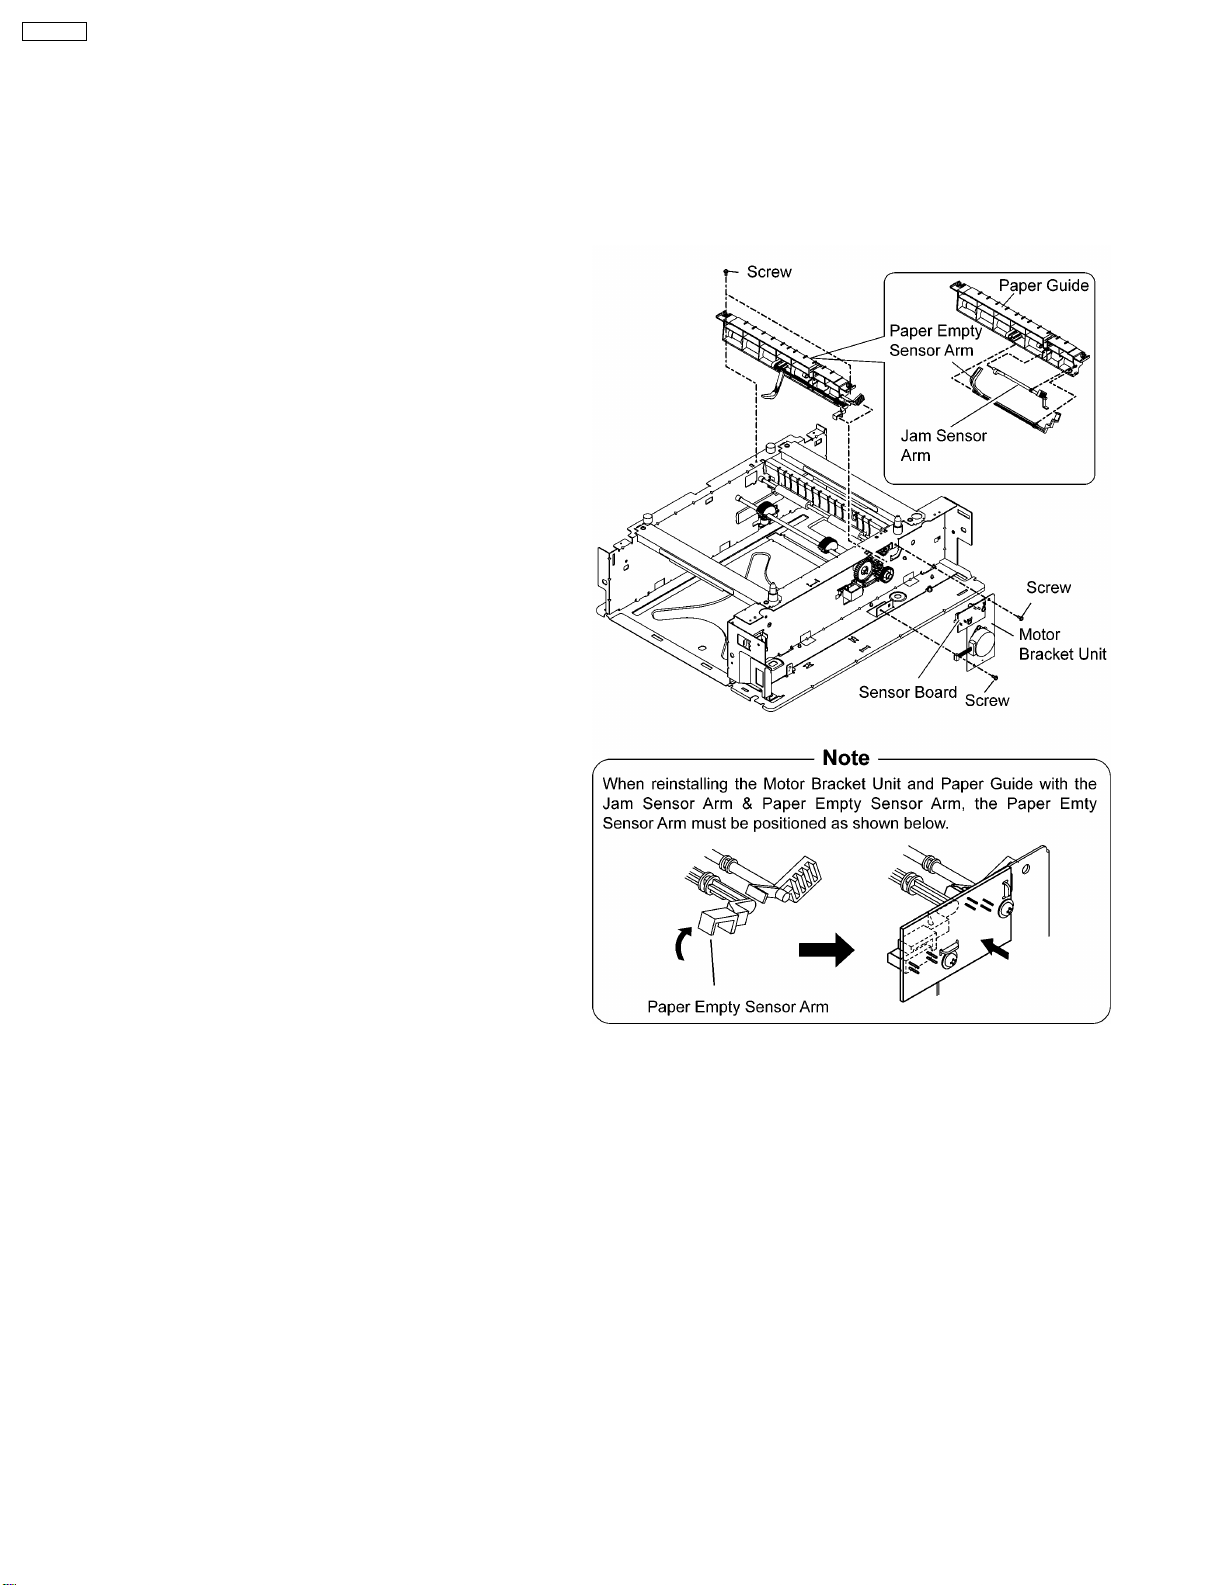
2.4. Sensor Board, Motor and Pickup Solenoid 9
©2003 Panasonic Communications Co., Ltd.
All rights reserved. Unauthorized copying and
distribution is a violation of law.
KX-CLPF1
2.5. Jam Sensor Arm, Paper Empty Sensor Arm, Pickup,
Paper Feed Roller and Pinch Rollers 10
2.6. Paper Cassette 12
3 Electronic Circuit Description and Diagrams 13
3.1. Block Diagram 13
3.2. General Descriptions 14
3.3. Schematic Diagram 17
4 Troubleshooting 19
Optional Paper Feeder
CONTENTS
Page Page
ORDER No.KM60305628C0
G0