manuals.online logo
Brands
  1. Home
  2. •
  3. Brands
  4. •
  5. Panasonic
  6. •
  7. Oven
  8. •
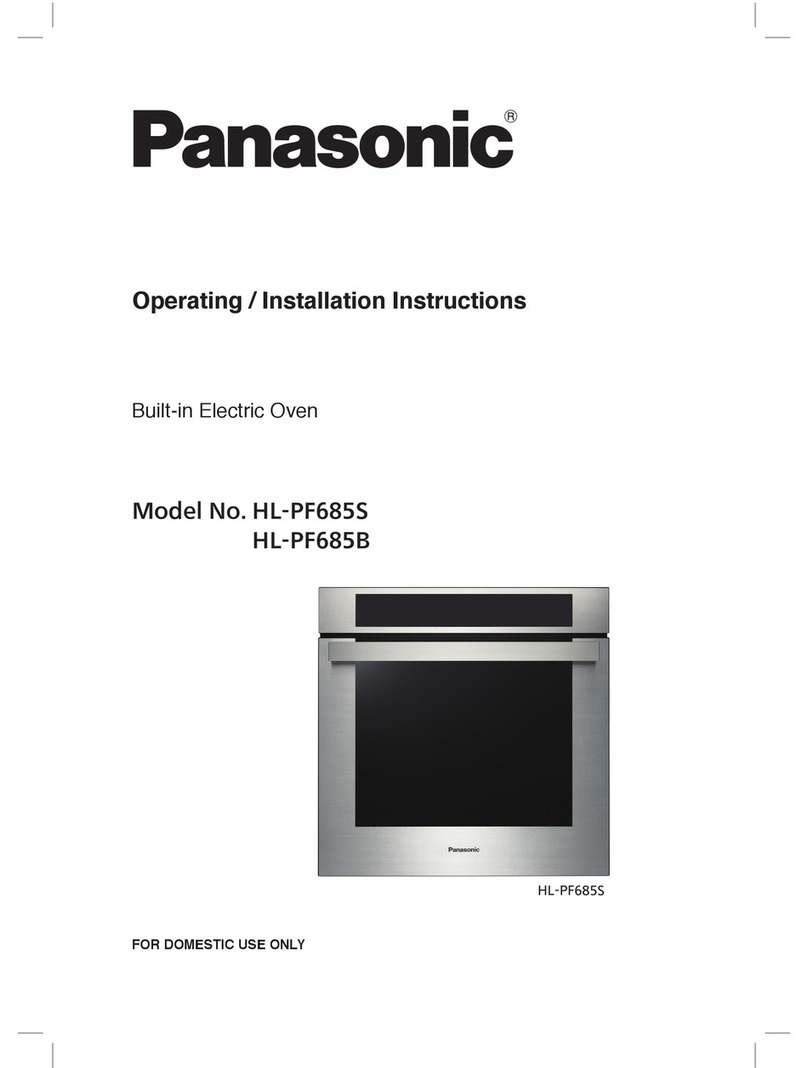
  9. Panasonic NB-HM3810 User manual

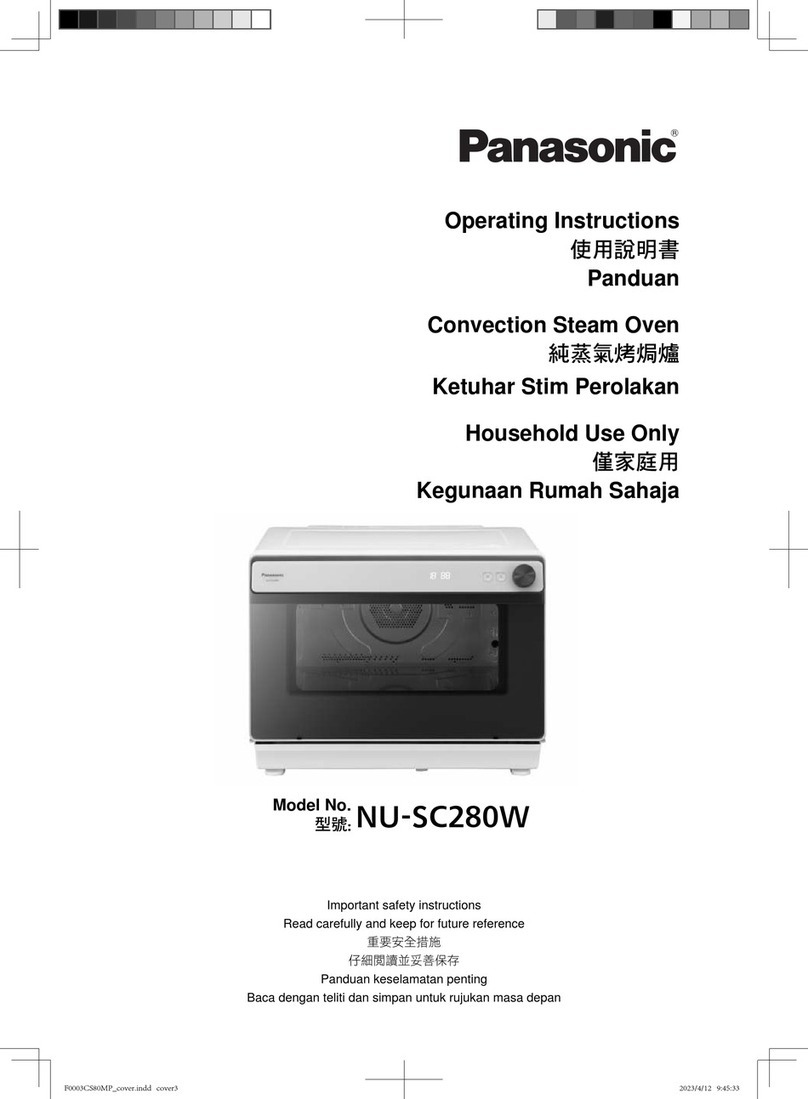
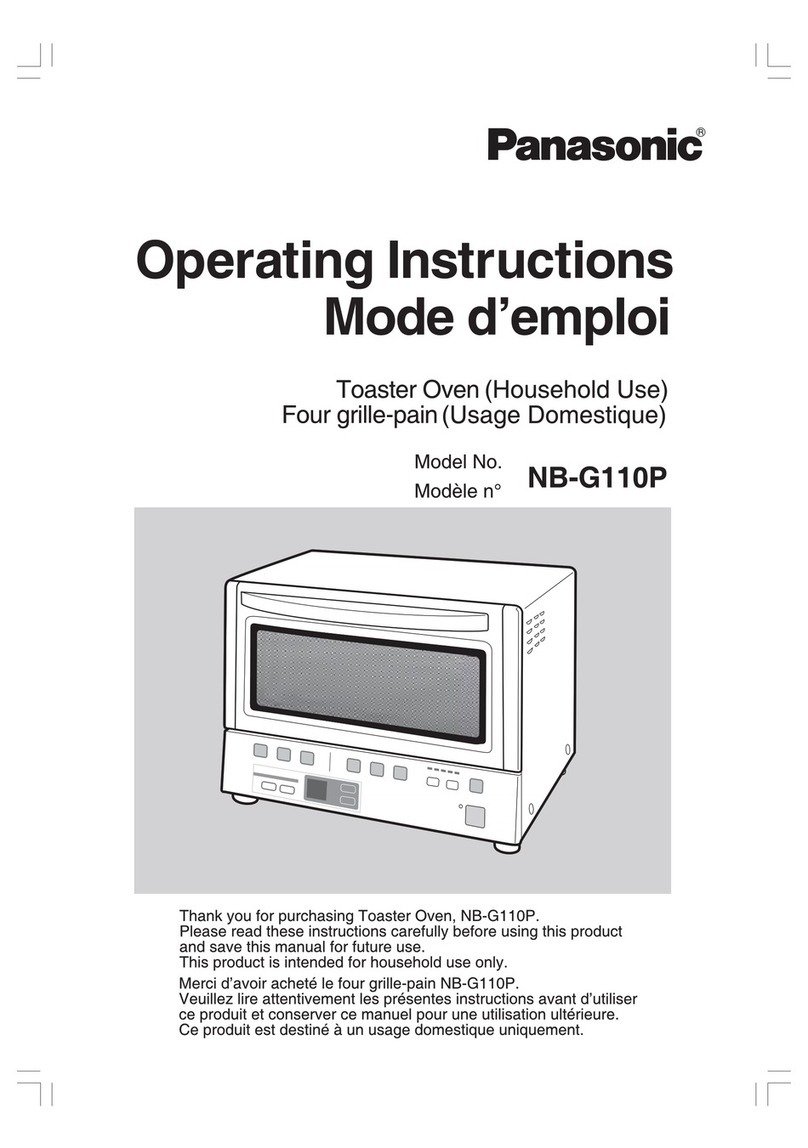
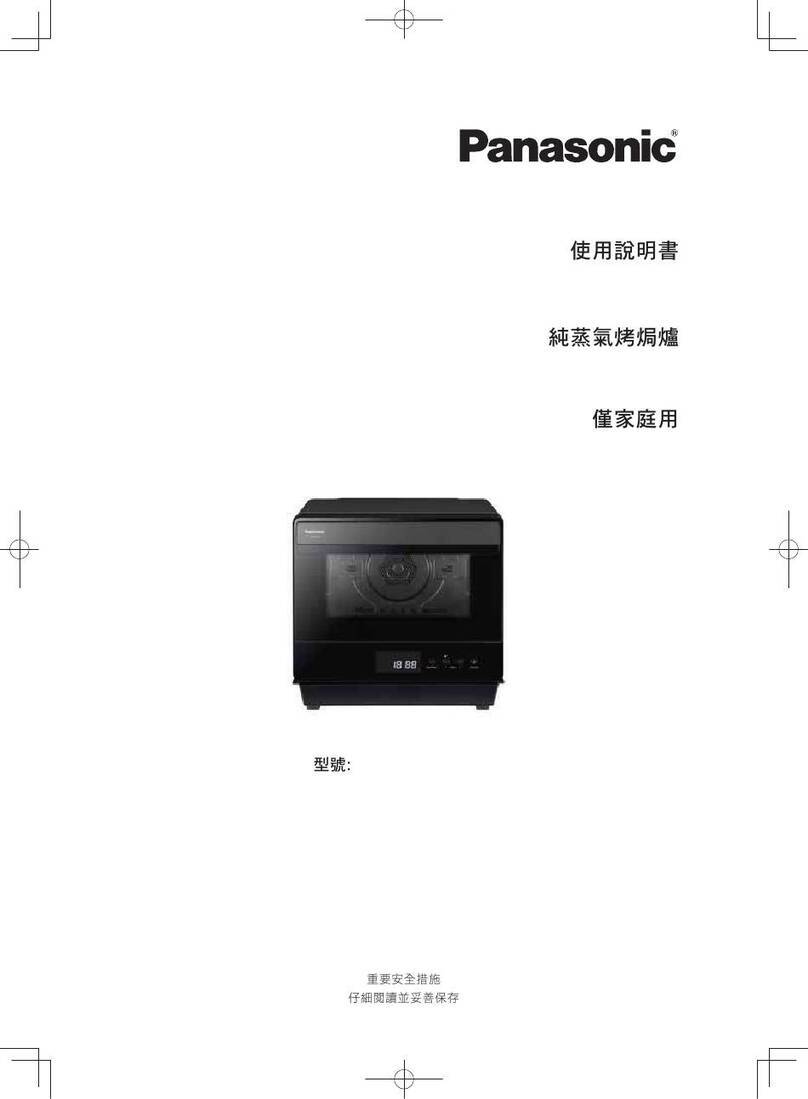
Panasonic NB-HM3810 User manual

Operating Instructions
Oven (Household Use)
使用說明書
電焗爐(家庭用)
Panasonic ofcial website: http://www.panasonic.hk
Panasonic 官方網站網址 : http://www.panasonic.hk
售後服務
Model No.
型號
NB-HM3810
BZ51H188
MD0217E0
Aftersales services
Printed in China
Date of issue: January 2017
Panasonic Taiwan Co., Ltd.
© Panasonic Taiwan Co., Ltd. 2017
Toast (P. EN20)
Roasted Chicken Wings
(P. EN21)
Cookies (P. EN23)
Sponge cake (P. EN24)
Steak (P. EN20)
Salt-roasted Prawns
(P. EN22)
Pizza (P. EN23)
Roasted whole chicken
(P. EN21)
Roasted fish (P. EN22)
Egg Tart (P. EN24)
Roasted whole chicken
(deep baking tray) (P. EN25)
EN2 EN3
English
Contents Page
Safety Precautions EN4
Important Information EN8
Parts Name EN9
How to use EN12
Accessories Instructions EN18
Preset Menu EN20
Key Points for Cooking Food EN26
Cleaning EN27
Troubleshooting EN28
Specications EN29
Chinese and
Western food
Easy to bake
Delicious
Deep baking tray
for party size
dish
Microcomputer controlled temperature cooking for
personalized Chinese and Western dishes
Thank you for purchasing the Panasonic product.
●This product is for household use only.
●Please read these instructions carefully to use the product correctly and safely.
●Before using the product, please give your special attention to the “Safety Precautions” and
“Important Information” (+ P. EN4∼EN8).
●Save this operating instructions for future use.
EN4 EN5
English
Safety Precautions
In order to prevent accidents or injuries to the user, other people, and damage to property,
please follow the instructions below.
■The following charts differentiate and explain the degree of damage caused by
incorrect operation.
WARNING:
Indicates potential hazard that could result in serious injury
or death.
CAUTION:
Indicates potential hazard that could result in injury or
property damage.
■ The symbols are explained and classied as follows.
This symbol indicates prohibition.
This symbol indicates requirement that must be followed.
WARNING
● Do not disassemble, repair or modify this appliance.
ÜConsult the place of purchase or service center for repairs.
●
Do not damage the power cord or power plug.
Following actions are strictly
prohibited.
Modifying or placing near
heating elements, bending,
twisting, pulling along, pulling
over sharp edges, putting
heavy objects on top, bundling
the power cord and carrying
the appliance by the power cord.
●
Do not use the appliance if the power cord or power plug is damaged or the
power plug is loosely connected to the outlet.
ÜIf the power cord is damaged, it must be replaced by the manufacturer, its service
agent or a similarly qualified person in order to avoid hazards.
●
Do not plug or unplug the power plug with wet hands.
●
Do not immerse the appliance, power cord and power plug in water or splash it
with water/any liquid.
●
Do not let the power cord hang over the edge of table or worktop, or touch hot surfaces.
To avoid risk of electric shock, fire, scalding burns or serious injury.
WARNING
To avoid risk of electric shock, fire, scalding burns or serious injury.
● Do not allow infants and children to play with packaging material.
●
Do not use this appliance near any combustible materials or under the
curtains.
●
This appliance is not intended for use by persons (including children) with
reduced physical, sensory or mental capabilities, or lack of experience and
knowledge, unless they have been given supervision or instruction concerning
use of the appliance by a person responsible for their safety.
Children should be supervised to ensure that they do not play with the
appliance.
●
Always keep the infants and children away from the appliance including power
cord.
●
Discontinue using the appliance immediately and unplug in the unlikely event
that this appliance stops working properly.
e.g. for abnormal occurrences or breaking down
●The power plug and the power cord become abnormally hot.
●The power cord is damaged or the appliance power fails.
●The main unit is deformed, has visible damage or is abnormally hot.
● Thereisanotherabnormalityorfailure.
ÜUnplug the appliance immediately and contact to the service center for the check
or the repair.
●
Make sure the voltage indicated on the label of the appliance is the same as
your local supply. Also avoid plugging other devices into the same outlet
to prevent electric overheating. However, if you are connecting a number of
power plugs, make sure the total wattage does not exceed the rated wattage of
the outlet.
●Insert the power plug firmly.
● Dust off the power plug regularly.
ÜUnplug the power plug, and wipe with a dry cloth.
Please make sure to
follow these instructions.
Enamel baking tray
Crumb tray
Glass door
Operating
controls
Power plug
Power cord
CAUTION
To avoid electric shock, fire, smoke, burns, scalding, injury or property loss
EN6 EN7
English
● Never leave the appliance unattended during operation.
●
Do not use the appliance for any purpose other than those described in these
instructions.
 ● Panasonic will not accept any liability if the appliance is subject to improper use,
or failure to comply with these instructions.
●
Do not touch hot surfaces, such as the top of the oven body, the enamel baking
tray, the deep baking tray and the cooking rack while the oven is in use or
just after use. The oven is easy to become hot during use, and the surface
temperature during use is very high. Let it cool down before cleaning after use.
 ● Please pay special attention to heat after use.
●Do not touch the appliance with wet hands.
●
Do not touch, block or cover the steam vent holes during use.
●
Do not put anything on or insert anything underneath the appliance.
●
Do not use the appliance on following places.
 ● On uneven surfaces, on carpet, non-hot-resistant surface or tablecloths etc.
 ● Places where it may be splashed with water or near a heat source.
 ● Near any open water sources such as sinks, or the like.
●
Do not use the appliance near wall, furniture, or in enclosed spaces such as a built-in
cupboard.
(It may cause discoloration or deformation.)
■Leave a space between
the oven and walls or
kitchen cabinets. The
lampblack discharged
during baking may
contaminate the wall and
cabinet, or even cause
reduetooverheating.
Keep a safe distance and prevent the
oven from coming into contact with objects
such as walls. A safe barrier component is
designed on the back of the oven.
Above 20 cm
Oven interior
walls
Above 10 cm
●
Do not use a knife or sharp tool, as these may cause damage to the heating elements.
●Do not use an external timer etc.
 ● Thisapplianceisnotintendedtobeoperatedbymeansofanexternaltimeror
separate remote-control system.
● Do not insert any object in the gaps.
● Do not open the glass door when the food generate smoke or catches fire.
 ● Turn off the power and remove the power plug immediately.
 ● Do not open the glass door before the fire goes out.
 ● Donotextinguishthefirewithwater.
●Do not directly heat cans or glass bottles.
●
Dot not place oil in the enamel baking tray/deep baking tray for heating.
●
Unplug the power plug from the outlet when the appliance is not in use, before
moving, and before cleaning. Make sure to wipe the product before using it
again.
● Let the appliance cool down before moving, cleaning and storing away.
●
Make sure the crumb tray is clean and set correctly when using the appliance.
●
Beware not to be tripped over or get caught in the power cord while in use.
●
Make sure to hold the power plug when unplugging the power plug. Never pull
on the power cord.
●
Make sure to clean the appliance after every use.
●
Place the appliance on a firm, dry, clean flat heatproof worktop.
CAUTION
To avoid electric shock, fire, smoke, burns, scalding, injury or property loss
Safety Precautions
Please make sure to
follow these instructions.
Main unit
* Handle gently when opening
the glass door.
* This product has
heat vents on both
the top and side.
Position for placing
the turnspit
EN8 EN9
English
Important Information Parts Name
●Do not place anything or press by force on the glass door when it is opened.
●Do not move the appliance by holding the door handle.
● Do not place any object on the main unit.
● Do not heat the appliance when unnecessary.
This symbol on the products indicates “hot surface and should not be touched
without caution”.
● Wash the parts before initial use or when leave idle for long time. (+P. E N 27 )
* Do not place the deep
baking tray on Shelf
4 to avoid touching
the heating tubes. It is
recommended to put it
on Shelf 3.
* Heat tube also
available at the top.
Menu tips
Notes:
For the time and temperature of the recipes printed on the glass door, please refer to
each information on “Menu
”
in this instructions.
Heat vents
Position for placing
the cooking rack
Glass door
Position for placing
deep baking tray
Door handle
Tips printed on the glass door
Crumb tray
Heating tube
Please run the oven on idle before initial use
①Place the enamel baking tray and the deep baking tray in the oven. (Do not place the
deep baking tray on Shelf 4)
②In standby mode, press the button, then press the button to select the “ ”,
and set the upper tube temperature and lower tube temperature to “230 °C”.
③Set the time to 10 minutes.
●Whentheovenisusedforthersttime,odormaybeemitted,whichisnormal.Thisiscaused
bytheheatingtubecoatedwithalayerofprotectivelmforprotectingthetubeagainstsalt
corrosion during transportation.
●
Whenrunningtheoveninidle,theovenwillemitsomesmokeandodors.Pleaseopenthedoortodissipate
the smoke. The oven will not emit smoke and odor again under normal operation after released them.
●Ovenmaygeneratenoiseinthefirstidlerun.Thisisnormal.
●Pleasewaittheovencooldownbeforeusingitaftertheidlerun.
Effects
Enamel baking tray
For holding greasy food, such as meat and
sh,forbroiling.
Deep baking tray
For making cake roll, roasting whole
chickens or broiling vegetables.
Effects
Holding rack
For holding the enamel baking
tray and cooking rack.
Effects
Crumb tray
For catching residues and grease
when nongreasy food is baked.
Effects
Cooking rack
For baking bread or broiling other dishes,
and to hold a container.
Effects
Extract bracket
For holding the turnspit.
Effects
Turnspit
For roasting whole chickens or thick meat.
Effects
* Wear heat protective gloves while
pulling out the deep baking tray.
Gloves sold separately.
EN10 EN11
English
Accessories
Control panel
Heating mode display: The icons from left to right
are listed in sequence as “Lower Tube”, “Upper
Tube”, “Upper and Lower Tubes”, “Turnspit”.
Numerals (Lower tube temperature/time)
Numerals (Upper tube temperature/menu)
“Convection” and “Fermentation”
Upper tube temperature display
Lower tube temperature display
Menu working display
Time unit display (Minutes)
Display window
Press the “Menu” button to select a preset menu
Press the “Function” button to select heating mode
Press the “Temperature” button to set the upper or lower tube temperature
Press the “Convection” button to select hot air convection
Press the “Time” button to set the time
Press the “Fermentation” button to select fermentation at low temperature
For adjusting “Menu” / “Temperature” / “Time”
Cancel button
Start / Pause button
Parts Name Parts Name
AC 220 V
2Select functions
In standby mode, press the button, then press the button to select the desired function.
Forexample,selecttheupperandlowertubes( ashes).
3Set Temperature
Press the button, then press the
button
to set the upper tube temperature according to the
food property and personal preference.
After setting the upper tube temperature,
press the button again, then press the
button to set the lower tube temperature.
•Whensettingthetemperature,thetemperatureincreasesordecreasesinincrementsof10°C.
•Thetemperatureforfermentationisfixedandcannotbeadjusted.
•
For heating mode, if you select the upper tube, lower tube or turnspit, the temperature can be set
from 70 °C to 180 °C. If you select upper and lower tubes, the temperature can be set from 70 °C
to 230 °C.
• After setting the temperature, the oven will automatically enter power save mode if it is not
operated for more than 1 minutes.
* If you do not need to preheat the oven, please skip to Step 5 after finishing Step 3.
4Preheating
(No preheating is available for turnspit function and fermentation function.)
It is displayed when the inner temperature of
the oven reaches 100 °C or above
•After setting the temperature, press the button to begin preheating.
• When the temperature reaches the preset degree, the buzzer will sound "beep-
beep-beep" indicating that preheating is completed.
• During or after the selection, before pressing the button, press to restore default
settings.
•TheuppertubetemperaturedisplayshowsthemaximumtemperaturesetattheUpperand
Lower Tube Temperature, which will be used as a reference for preheating.
•Thepreheatingisdonebyupperandlowertubes.Whentheinnertemperatureoftheoven
reaches 100 °C or above, the lower tube temperature display shows the current inner tem-
perature, but it does not show temperature if the inner temperature is below 100 °C.
• After completion of preheating, the oven automatically enters power save mode if it is not
operated for more than 5 minutes.
5Time setting
Afterthecompletionofpreheating,theDisplayWindowdisplaysdefaulttime(60minutes)
automatically. You can press the
button to set the time according to the food nature and
personal preference.
If you do not need preheating, press the
button, then press the
button to set the time
according to the food nature and personal preference.
•Whensettingthetime,thetimerincreasesordecreasesinincrementsof1minute.Pressand
hold the
button for 4 seconds to switch increments to 5 minutes.
• The time can be set from 1 minute to 120 minutes
1Insert the
power plug
Standby mode
•indicates flashing.
EN12 EN13
English
•If the oven is left idle for more than 1 minute, the screen will turn power
save mode automatically and display nothing.
•In power save mode, the button light on, press button and the
screen returns to standby mode.
•In power save mode, only the button can be operated.
How to use
Manual function
6Put in the ingredients
•
Place the food on the enamel baking tray, deep baking tray or the cooking rack.
•
Insert the cooking rack or enamel baking tray/deep baking tray in the proper position according to the food height.
• After putting in the ingredients, the oven will automatically enter power save mode if you leave
it idle for more than 5 minutes.
7Begin broiling
Time to completion
Thetemperaturedisplayshowsthemaximum
temperature set at the Upper and Lower Tube
Temperature
•
Put in the ingredients, close the glass door, and press the button to begin broiling.
• You can adjust the temperature and time according to the food property and
personal preference during baking.
• The buzzer sounds “beep-beep-beep”, indicating broiling is complete.
8Take out the food after baking
• Take out the enamel baking tray or cooking rack with holding rack or heat protective gloves.
Be sure to wear the heat protective gloves to take out the deep baking tray.
Note
• Handle gently when opening or closing the glass door.
(To avoid damaging the glass door or scratching the coating of the door handle.)
•
Whenthetemperatureishighduringorrightafteruse,donotsplashthecoldwatertotheglassdoor.
9Remove the power plug
2Select menu
In standby mode, press the button, then press button to select a desired menu.
(Shows selecting Menu “2”.).
3Set Temperature (Not applicable to Menu “11”)
Press the button, the upper and lower tubes
temperature is 220 °C by default, and the temperature
displayed on the screen is the menu-recommended
temperature. You can also press the button to
set the upper tube temperature according to the food
nature and personal preference.
After setting the upper tube
temperature, press the button
again, then press the button to
set the lower tube temperature.
•Whensettingthetemperature,thetemperatureincreasesordecreasesinincrementsof10°C.
•Different menus have different default temperatures.
•If you select upper and lower tubes, the temperature can be set from 70 °C to 230 °C.
•Menu “3” enables only upper tube heating, which can be set to 180 °C at most.
•After setting the temperature, the oven will automatically enter power save mode if
it is not operated for more than 1 minutes.
1Insert the
power plug
Standby mode
AC 220 V
•indicates flashing.
EN14 EN15
English
Preset Menu
How to use How to use
•If the oven is not operated for more than 1 minute, the screen will
automatically enter power save mode and display nothing.
•In power save mode, the button light on, press button and the
screen returns to standby mode.
•In power save mode, only the button can be operated.
Manual function
4Preheating
(
Preheating is unavailable for Menus 1, 3 and 11.)
•After setting the temperature, press the button to begin preheating.
• When the temperature reaches the preset degree, the buzzer will sound “beep-
beep-beep” indicating that preheating is completed.
• The upper tube temperature display is the menu number, the lower tube temperature
displayisthemaximumtemperaturesetforbothupperandlowertubes,andthemaximum
temperature is used as a reference for preheating.
• After completion of preheating, the oven automatically enters power save mode if it is not
operated for more than 5 minutes.
5Time setting
Afterthecompletionofpreheating,theDisplayWindowdisplaysthedefaulttime(15minutes)
automatically. You can press the button to set the time according to the food property and
personal preference.
•Whensettingthetime,thetimerincreasesordecreasesinincrementsof1minute.Pressand
hold the
button for 4 seconds to switch increments to 5 minutes.
6Put in the ingredients
•
Place the food on the enamel baking tray, deep baking tray or the cooking rack.
•
Insert the cooking rack or enamel baking tray in the proper position according to the food height.
• After putting in the ingredients, the oven will automatically enter power save mode if you leave
it idle for more than 5 minutes.
7Begin broiling
Time to completion
•
Put in the ingredients, close the glass door, and press the button to begin broiling.
• You can adjust the temperature and time according to the food property and
personal preference during baking.
• The buzzer sounds “beep-beep-beep”, indicating broiling is complete.
8Take out the food after baking
• Take out the enamel baking tray or cooking rack with holding rack or heat protective gloves.
Be sure to wear the heat protective gloves to take out the deep baking tray.
Note
• Handle gently when opening or closing the glass door.
(To avoid damaging the glass door or scratching the coating of the door handle.)
•
Whenthetemperatureishighduringorrightafteruse,donotsplashthecoldwatertotheglassdoor.
9Remove the power plug
EN16 EN17
English
Preset Menu
How to use
●
Care should be taken
when handling
“Turnspit”.
Rotate the screw to
xthebakingforkat
the proper position.
Use the baking stick to
penetrate through the
middle of the big piece of
food,andxthefoodwith
the baking fork at one side.
2 3
Rotate the screw to
xthisbakingfork.
5Usetheextract
bracket to place the
penetrated food in
the oven.
6Put the turnspit in place .
Keep the tip end inserted into
the right-side rotation hole.
7
Insert the baking
stick into another
baking fork, and
compress the
food tightly.
4
Insert the baking
stick into a baking
fork.
1
Used for clamping or handling the enamel baking trayUsed for clamping or handling the cooking rack
EN18 EN19
English
Accessories Instructions
How to use the turnspit / extract bracket
●If the cooking rack has any scorched debris stuck to it, soak it in water for a while before cleaning it.
●If you broil with a cooking rack, there may be crumbs or grease drippings. Make sure you put in the
crumb tray for easy cleaning.
How to use the cooking rack
●To facilitate cleaning after use, please install the crumb tray before use.
●Clean the crumb tray after every use. Otherwise, the residue will be over baked, thus generating an
odor.
●Whentakingout,thecrumbtraymayeasilytouchthelowerheatingtube,pleasebesurenottostrikeit
accidentally.
How to use the crumb tray
●To facilitate cleaning after use, put a piece of aluminum foil or baking paper in the enamel baking tray
or deep baking tray before use.
●If the enamel baking tray or deep baking tray has scorched meat grease stuck on it, soak it in water a
while before cleaning. Do not scrape debris with hard metal utensils, like knives or forks.
●Whenrawmeat,shorfriedfoodisdirectlyheated:
The fried food releases grease when being heated. Please place it in the enamel baking tray.
 *Tobakemeatorsh,wrapitwithaluminiumfoil,andthenputitintheenamelbakingtrayforheating.
(+P. EN26)
 *Whenfoodwrappedwithaluminiumfoilisheated,greasemayleak.Pleaseplaceitintheenamel
baking tray.
How to use the enamel baking tray / deep baking tray
●To take out the enamel baking tray or cooking rack, please use the holding rack to avoid scalding.
●Pay attention to the weight distribution of the food when taking out the enamel baking tray or cooking
rack,especiallywhenthereisalargeamountofoatinggreaseintheenamelbakingtray,toavoid
dropping or spills.
How to use the holding rack
●
To place baking ware into the oven, be sure to handle it carefully. The enamel baking
tray, deep baking tray, cooking rack and grill are all metal parts, which may easily
scratch the interior walls of the oven. Any such scratches are superficial and will not
affect oven performance.
●The standard time set in the menu may vary with the temperature, type, quantity (weight) and
container of the food for grilling. Please adjust accordingly.
●The oven has four grilling shelves. Counted from top down, they are Shelf 1, Shelf 2, Shelf 3 and
Shelf 4.
EN20 EN21
English
Preset Menu
Steak
●Select “2”
Upper and lower tubes: 220 °C Time: 15 minutes
①Defrost the steak completely, and then dry the
surface with a paper towel.
②Put one layer of baking paper on the enamel
baking tray, and then apply a layer of olive oil to
the baking paper.
③Apply the black pepper and salt evenly to both
sides of the steak, and place the steak in the
enamel baking tray.
④Select Menu 2. The oven will automatically
preheat to 220 °C.
⑤ Whenitreachesthesettemperature,thebuzzer
will sound “beep-beep-beep”. At this time, put the
enamel baking tray on Shelf 2 of the oven.
⑥Roast the steak with upper and lower tubes at
220 °C for about 15 minutes.
Ingredients
Frozen steak 2 slices
(approx.500
g
)
Black pepper
granules
Appropriate quantity
Salt
Appropriate quantity
Olive oil
Appropriate quantity
(asthickasapprox.2cm)
Roasted Chicken Wings
●Select “4”
Upper and lower tubes: 200 °C Time: 25 minutes
①Rinse the chicken wings, then make two cuts in
each of them for easy seasoning.
②
Put the wings in a bowl, add seasonings and water, then stir.
③After stirring them evenly, refrigerate the bowl of
wings in refrigerator for over 10 hours.
④Place the marinated chicken wings evenly on the
cooking rack.
⑤Select Menu 4. The oven will preheat to 200 °C
automatically.
⑥ Whenitreachesthesettemperature,thebuzzer
will sound “beep-beep-beep”. At this time, put the
enamel baking tray with baking paper on top on
Shelf 4 of the oven, and then place the cooking
rack on Shelf 2 of the oven.
⑦Roast the chicken wings with both upper and
lower tubes at 200 °C for about 25 minutes.
* The enamel baking tray is placed on Shelf 4 of
the oven to prevent meat grease from dripping
onto the heating tube.
Ingredients
Chicken wings
8(approx.350g
Seasonings for Orleans
grilled chicken wings
30 g
W
ater 30 g
Whitesesameseeds
Appropriate
quantity
Toast
●Select “1”
Upper and lower tubes: 230 °C Time: 8 minutes
①Put the slice(s) of bread on the cooking rack.
②Put the cooking rack on Shelf 2, and select Menu 1.
③Bake for about 8 minutes with upper and lower
tubes at 230 °C.
Ingredients
Toast 6 slices
Thinslices(approx.10×10×1.5cm)
Roasted whole chicken
●Select “3”
Upper tube: 180 °C Time: 90 minutes
①Cut the head and feet of the chicken and clean
thebody.Wipeoffanyremainingwaterandapply
salt to the inside and outside of the carcass.
②Stuff the chicken cavity with scallions, ginger
and garlic, sew it with toothpicks, then bind the
chicken carcass with a twine and tie it at the
drumstick.
③ Slidethespitrodthroughthecarcassandxit
with the turnspit.
④Place the enamel baking tray with baking paper
on top on Shelf 4 of the oven, and then put the
rotisserie spit on the spit supports inside the oven.
⑤Select Menu 3, and roast the chicken at 180 °C
for about 90 minutes.
* The enamel baking tray is placed on Shelf 4 of
the oven to prevent meat grease from dripping
onto the heating tube.
Ingredients
Wholechicken
1piece(approx.1000g)
Salt
Appropriate quantity
Ginger slices
Appropriate quantity
Scallions
Appropriate quantity
Garlic
Appropriate quantity
EN22 EN23
English
Roasted sh
●Select “6”
Upper and lower tubes: 220 °C Time: 20 minutes
① Rinsethesh,wipeitdry,maketwocutsatthe
back,stufftheshcavitywithscallions,ginger
andgarlictoremovetheshiness,thensmear
saltandcookingwineonbothsidesofshback,
andrubitsbacktoaddavor.
②Fit one layer of aluminum foil on the enamel
baking tray, smear one thin layer of oil, and place
theshintheenamelbakingtray.
③Select Menu 6. The oven will automatically pre-
heat to 220 °C.
④After preheating, the buzzer will sound “beep-
beep-beep”. At this time, put the enamel baking
tray on Shelf 2 of the oven.
⑤ Roasttheshwithupperandlowertubesat
220 °C for about 20 minutes.
Ingredients
Fish
1pieceofsh(approx.500g)
Salt
Appropriate quantity
Cooking wine
Appropriate quantity
Ginger slices
Appropriate quantity
Scallions
Appropriate quantity
Garlic
Appropriate quantity
Olive oil
Appropriate quantity
Salt-roasted Prawns
●Select “5”
Upper and lower tubes: 180 °C Time: 10 minutes
① Deveinandbutterytheprawn,rinsethemand
wipe them dry.
②Put baking paper in the enamel baking tray, and
lay the prawns evenly on it.
③Put some salt into the egg whites, stir evenly,
then coat the prawn heads and tails with the egg
whites.
④Select Menu 5. The oven will automatically pre-
heat to 180 °C.
⑤After preheating, the buzzer will sound “beep-
beep-beep”. At this time, put the enamel baking
tray on Shelf 2 of the oven.
⑥Roast the prawn with upper and lower tubes at
180 °C for about 10 minutes.
Ingredients
Prawn 8
Salt 70 g
Egg whites 15 g
(Prawnlength:approx.15cm)
Cookie
●Select “7”
Upper and lower tubes: 150 °C Time: 25 minutes
①
Soften the butter at room temperature until it
can be easily penetrated with a scraper.
②Add in salt and granulated sugar, then use the
eggbeater to beat the butter at low speed until the
color becomes lighter.
③ Addineggsand1gramofvanillaextract,and
continue beating at low speed until the eggs are
evenly distributed. You can scrape the edge of the
bowlwiththescraperduringtheprocess.Whenthe
ourpastebecomesthick,removetheeggbeaterand
scrapetheresidualourpastefromthestirringrod.
④ Sievethelow-glutenour,additintothepastein
two portions, and blend and stir with a scraper
until no dry powder remains.
⑤Put the paste into a pastry bag (the diameter of
the pastry tube is 2 cm).
⑥
Put baking paper in the enamel baking tray and
squeeze the pastry bag to make your desired shape.
⑦Select Menu 7. The oven will automatically
preheat to 150 °C. After that, the buzzer will
sound “beep-beep-beep”. Place the cookies on
Shelf 2 of the oven.
⑧Bake with upper and lower tubes at 150 °C for
about 25 minutes, take the cookies out, and let
them cool.
Ingredients
Butter 100 g
Granulated sugar 60 g
Egg 1
Low-glutenour 125 g
Salt 1 g
Vanillaextract 1 g
(approx.25pieces)
Pizza
●Select “8”
Upper and lower tubes: 200 °C Time: 15 minutes
①Take out the frozen pizza from the freezer and
place it on the enamel baking tray.
②Select Menu 8. The oven will preheat to 200 °C
automatically.
③After preheating, the buzzer will sound “beep-
beep-beep”. At this time, put the enamel baking
tray on Shelf 2 of the oven.
④Bake it with upper and lower tubes at 200 °C for
about 15 minutes.
Frozen Pizza
1piece(approx.350g)
Ingredients
(foradiameterofapprox.18cm)
Preset Menu
EN24 EN25
English
Egg Tart
●Select “9”
Upper and lower tubes: 220 °C Time: 15 minutes
①Put pure milk, whipping cream, condensed milk and granulated
sugarintoabowlthatisrestingonhotwater(approx.40°C).
Stir ingredients until the granulated sugar melts.
②Take the bowl out, cool it down, add in the egg yolk and stir
untilevenlymixed.
③Put the egg tart shells into the enamel baking tray, and then
pourtheeggtartliquidintothetartshellstoll70%to80%
of their volume.
④Select Menu 9. The oven will automatically preheat to 220 °C.
⑤After preheating, the buzzer will sound “beep-beep-beep”.
At this time, put the enamel baking tray on Shelf 2 of the
oven, and bake it for about 15 minutes.
⑥
Take out the egg tarts from the oven and enjoy after cooling.
Ingredients
Pure milk 50 g
Whippingcream 100 g
Egg yolk 2
Granulated sugar 16 g
Condensed milk 10 g
Egg tart shells 8 pcs
Sponge cake
●Select “10”
Upper and lower tubes: 180 °C Time: 25 minutes
①Put eggs and granulated sugar into a basin resting on hot
water(approx.40
°C
) in a boiler, use an eggbeater to whip
themrstathighspeedthenatmediumspeeduntilthe
egg liquid becomes light in color, has smaller bubbles, and
gainsathickandsmoothtexture.Theeggbatterwillnotdrip
immediately when the eggbeater is lifted.
②
Meltthebutter,addinmilk,mixevenlyandputtheminabowlresting
on hot water in a boiler to prevent the butter from condensing again.
③
Addthesievedourtothebowlintwoportions,thenturnandstirevenly.
④ Pourthemixtureofmilkandbutterintothebowl,and
continue stirring as softly as you can to avoid generating
foam.Whenitisdone,thepastewillbeglossyandsmooth.
⑤Pour the paste into the mould, shake the mould gently to
remove air from the paste.
⑥
Select Menu 10. The oven will automatically preheat to 180 °C.
After preheating, the buzzer will sound “beep-beep-beep”. At this
time, put the mould on Shelf 3 of the oven, and bake it for about 25
minutes. Stab a toothpick into the middle. If it comes out without
batter on it, the baking is complete.
• If the surface gets colored quickly, you can put a piece of
aluminum foil on the cake to avoid scorching.
•
Take out the cake and let it cool down before removing the mould.
• You can lengthen or shorten the time according to your taste
and the mould you choose.
•
You can coat with the cream and decorate the cake with the fruits.
Eggs
3(approx.150g)
Low-gluten
our 90 g
Granulated
sugar 90 g
Butter 30 g
Milk 30 g
Ingredients (6" round mould)
Defrost
●Select “11”
Upper and lower tubes: 50 °C Time: 60 minutes
①Put the frozen steaks on an enamel baking tray.
②Put the enamel baking tray on Shelf 2 of the oven,
and select Menu 11.
③
Defrost the steaks with upper and lower tubes at
50 °C for about 60 minutes, then take them out.
Ingredients
Frozen steak
2slices(approx.500
g)
(as thick as approx. 2 cm)
Preset Menu
Roasted whole chicken (deep baking tray)
●Select
Upper and lower tubes: 200 °C
Time: 30 minutes for 1st roast (requires preheating)
40 minutes for 2nd roast (does not require preheating)
①Cut the head and feet of the chicken and discard
them, wash the chicken, and wipe it dry. Pat salt
and black pepper on the carcass surface and
inside its cavity.
②Stuff the chicken cavity with rosemary, sage and
lemon, sew the cavity with a toothpick, then put
the prepared chicken aside.
③
Prepare vegetables. Peel garlic and slice ginger. Peel
the potatoes and the carrots, wash them, and cut into
cubes with sides of about 2 cm. Cut onion into
2 cm pieces and tomatoes into 6 pieces of equal size.
④
Put 2 layers of aluminum foil onto the deep baking
tray brush olive oil on the foil, scatter some rosemary
and sage, lay the prepared vegetables (potatoes,
carrots, tomatoes and garlic) around the deep baking
tray with ginger slices in the middle. Finally, put the
seasoned chicken on the ginger in the middle, and
sprinkle salt and black pepper all over.
⑤Preheat the oven with upper and lower tubes to
200°C.Whenthetemperaturereaches,thebuzzer
willsound“beep-beep-beep”.Whenyouhearthe
'beep' sound, put the deep baking tray on Shelf 3
of the oven, roast for about 30 minutes, take it out,
stir the vegetables a little bit, put the deep baking
tray into the oven again, and roast with upper and
lower tubes at 200 °C for about 40 minutes.
Note
Be sure to use the oven gloves when handling
baking accessories.
Chicken 1 (1500 g)
Carrot 1(approx.350g)
Potato
2lager-sized(approx.600g)
Onion 1(approx.200g)
Tomato 2(approx.100g)
Lemon 1
Rosemary
Appropriate quantity
Sage
Appropriate quantity
Florence Fennel
Appropriate quantity
Ginger slices
Appropriate quantity
Garlic
6~10 cloves
Salt
Appropriate quantity
Black pepper granules
Appropriate quantity
Olive oil
Appropriate quantity
Ingredients
Note
To defrost other ingredients, set the defrosting
time accordingly.
Continuous
heating
●
Shorten the set time after cooking for the second time.
 *Whenheatingisinsufcient,adjustthetimeaccordingly.
Grilling thick
and tall food
●
Cover the food with aluminum foil before grilling (to avoid a burnt at the surface
but the core is not ready)
* Keep the aluminium foil from the heating tube.
(The aluminium foil may melt and adhere to the heating tube surface, and cause a failure.)
Grilling meat
and sh
●
Cover the food with aluminum foil before
heating
(to avoid grease and oil splatter)
* Since heated grease may splash,
meatorshshouldbewrappedwith
aluminium foil before being placed
on the enamel baking tray for
heating.
Place meat and
fish on vegetables
Wrapthemwith
aluminium foil and
then pave them
nicely
EN26 EN27
English
Key Points for Cooking Food
●
The standard time set in the menu may vary with the temperature, type, quantity (weight) and container
of the food for grilling. Please adjust it according to the actual grilling needs.
●
To prevent fire caused by the dipping greases, place the food on the enamel baking tray.
●
Do not open the oven door while the grilling is in progress. (Otherwise it may affect the baked food color.)
①Select the function on the oven, and put
the dough inside.
②The fermentation of dough depends on the
recipe,climateanddoughtexture.Adjustthe
time for fermentation of the dough according
to actual conditions.
During the baking process, press the button to
give an even coloring on the surface of the food.
Fermentation function (approx. 40 °C)
Convection function
●It may not be convenient for you to place the enamel baking tray, cooking rack
and crumb tray on the bottom shelf due to the angle of the glass door, please
pay special attention when doing so.
●Shelf1consistsoftwosections,frontandback,withaspacein-between.When
placing the enamel baking tray and cooking rack on Shelf 1, make sure that
they are firmly inserted in the back section to avoid tipping over.
Use a soft sponge soaked with diluted kitchen
detergent to clean them, and dry it well.
* Do not wipe the heating tube.
Use a well-wrung soft cloth soaked with diluted
kitchen detergent to clean the accessories.
Main unit and inner chamber
Enamel baking tray / Deep baking tray /
Cooking rack / Turnspit / Crumb tray
●
Before cleaning, unplug and wait the oven to cool down
completely.
●
Do not use the propellant, paint thinner, grinding powder, steel
brush, or scouring pad. (It may cause surface scratches.)
●
After cleaning the oven, place the crumb tray properly.
●
Use a well-wrung soft cloth soaked with diluted kitchen deter-
gent to clean the oven surface.
●
Be careful to close the glass door. Do not use the oven if the
glass cracks or is damaged.
Cleaning
Notes
Note
EN28 EN29
English
Problems
Bake failure
●The plug is not inserted properly.
ÜInsertthepowerplugrmlyintotheoutlet.
●Afaultexists.
ÜContact our service department.
Odor
●The baking time is too long.
ÜTurn off the oven, and clean up the food with odor.
●The enamel baking tray/deep baking tray releases an odor
or there is some ingredient on the cooking rack.
ÜClean the enamel baking tray/deep baking tray and the
cooking rack.
●Confirm if there are any drippings of grease or crumbs in
the crumb tray.
ÜClean the crumb tray.
H01
H02 Display
●In case of a short circuit or break of the temperature sen-
sor on the upper tube in any mode, the oven will immedi-
ately enter the abnormal mode.
ÜContact our service department.
H03
H04 Display
●In case of a short circuit or break of the temperature sen-
sor on the lower tube in any mode, the oven will immedi-
ately enter the abnormal mode.
ÜContact our service department.
U50 Display
●
For the setting of fermentation, press the Start key, when
the inner temperature of the oven is over 40 °C, the oven
will immediately enter the cavity overheat protection mode.
ÜPress the Cancel button to return to the Fermentation
mode.
ÜOpentheglassdoor.Whenthecavitytemperatureis
below 40 °C, return to the Fermentation Setting mode.
Cause and solution
Quick troubleshooting
Before arranging for service,
check the following points
Troubleshooting
Power supply 220 V 50 Hz
Power Consumption 1800W
Capacity 38 L
Temperature setting of
cavity center
Upper tube, lower tube or turnspit:
70 ~ 180 °C
Upper and lower tubes: 70 ~ 230 °C
(±20 °C from average temperature)
Automatic thermolator Temperature sensor
Ratedpower(approx.)
Upperandlowertubes1800W
Uppertube900W
Lowertube900W
Timer 120 minutes/program control
Net weight(approx.) 11.9 kg
Power cord length(approx.) 1.0 m
Size(approx.)
External dimension Length:53.5cmWidth:42.0cmHeight:35.5cm
Inner chamber Length:39.0cmWidth:32.5cmHeight:29.3cm
Enamel baking tray
(internal dimension) Length:33.0cmWidth:28.5cmHeight:1.7cm
Deep baking tray
(internal dimension) Length:33.5cmWidth:30.0cmHeight:4.2cm
●Afterthepowerplugisinsertedintothesocket,thestandbypoweris0.5W.
Specifications
非常感謝您購買 Panasonic 的產品。
●本產品只限於家庭使用。
●請仔細閱讀本使用說明書, 以確保正確安全使用本產品。
●使用前請確保仔細閱讀「安全注意事項」及「重要資訊」(+ P. TC4 ∼TC8)。
●請妥善保管本使用說明書, 以備將來使用。
多士(P. TC20)
焗雞翼(P. TC21)
曲奇(P. TC23)
海綿蛋糕(P. TC24)
牛扒(P. TC20)
鹽焗大蝦(P. TC22)
薄餅(P. TC23)
焗全雞(P. TC21)
烤魚(P. TC22)
蛋撻(P. TC24)
烤全雞(深烤盤)
(P. TC25)
中文( 繁體 )
TC2 TC3
目錄 頁碼
安全注意事項 TC4
重要資訊 TC8
各部件名稱 TC9
使用方法 TC12
配件使用說明 TC18
預設食譜 TC20
調理的秘訣 TC26
清潔 TC27
故障診斷 TC28
規格 TC29
中西料理
輕鬆烤製
美味可口
配備深烤盤
製作適用於
派對料理
微電腦精準控溫,中西菜餚隨心煮
中文( 繁體 )
TC4 TC5
安全注意事項 請務必遵守
為防患未然避免危害使用者及他人財產,列舉務必遵守事項如下並加以說明。
■因錯誤操作而產生的危害及損失程度,以下列標誌予以區分說明。
警告
:
表示有可能導致重傷或死亡的潛在危險。
注意
:
表示有可能導致輕傷或財產損失的潛在危險。
■希望遵守內容的種類以下面的圖形來區分說明。
表示必須避免的行為。
表示必須遵從的行為。
警告
● 切勿擅自拆解、維修或改裝本產品。
Ü修理時請與購買商鋪或客戶諮詢服務中心聯絡。
●
請勿損壞電源線或電源插頭。
嚴禁執行以下行為:
加工或將其放置在加熱
元件附近;強行彎曲、扭
轉、拉扯、從尖銳邊沿拉
過電源線;在電源線上放
置重物;捆 電源線及使
用電源線提起或拉動本
產品。
●
如電源線或電源插頭受損或插入插座時鬆動,切勿使用本產品。
Ü
如果電源線損壞,為了避免危險,必須由製造商、維修部或類似的
專業人員更換。
●
請勿以潮濕的手插入或拔出電源插頭。
● 請勿將本產品、電源線和電源插頭浸泡在水中或向其噴水 /其他液體。
●
請勿讓電源線懸掛在桌子或工作枱邊緣,或使其接觸到高溫表面。
● 切勿讓嬰兒或兒童將包裝材料視作玩具。
●
請勿在靠近可燃材料的地方或窗簾下方使用本產品。
為了避免出現觸電、火災、燙傷或重傷的危險。
警告
為了避免出現觸電、火災、燙傷或重傷的危險。
●
凡身體、視力或智能缺陷或不足者(包括兒童),以及缺乏使用經驗
和知識者,皆不得使用本產品,除非旁人為其安全承擔責任,且給予
適當監督和指導。
務必從旁監督兒童,避免其任意使用產品。
●
請必須確保嬰兒及兒童遠離本產品及其電源線。
●
萬一本產品不正常運作,請立即中斷使用本產品並拔出電源插頭。
異常或故障事例
 ● 
電源插頭和電源線異常發熱。
 ● 
電源線受損或本產品不通電。
 ● 
爐體變形、有明顯損壞或異常發熱。
 ● 
出現其他異常或故障。
Ü
請立即拔掉產品電源插頭,並聯絡客戶諮詢服務中心予以檢查或維修。
●
確保本產品的標籤上指示的電壓與本地電源的電壓一致。此外還應避
免在同一個電源插座中插入其他設備,以免電氣過熱。但如果連接多
個電源插頭,應確保總功率不超過電源插座的額定功率。
●把電源插頭穩固地插入電源插座內。
● 請定期清除電源插頭上的灰塵。
Ü拔下電源插頭,並用乾布擦拭。
琺瑯質
烤盤
麵包屑盤
玻璃門
控制面板
電源插頭
電源線
注意
為了避免出現觸電、火災、冒煙、燒傷、燙傷、受傷或財產損失的危險
中文( 繁體 )
TC6 TC7
請務必遵守
● 本產品操作過程中切勿離開。
●
切勿將本產品用於說明書所述以外的任何其他用途。
 ● 
如不當操作本產品或未能遵從相關說明,Panasonic 恕不承擔任何
責任。
●
切勿在使用本產品時或剛使用後接觸高溫表面,例如爐體頂部表面、
琺瑯質烤盤、深烤盤、烤網等部位。本產品在使用時容易變熱,使用
期間表面溫度很高,待冷卻後再進行使用後的清潔。
 ● 
請特別注意使用後發出的餘熱。
● 切勿用濕手接觸本產品。
● 使用中請勿接觸、堵塞或覆蓋蒸汽排氣孔。
●
切勿將任何東西放置在本產品上或塞入產品底部。
●
請勿在下列位置使用本產品:
 ● 
不平坦的表面、地氈上面、非耐熱表面或鋪有桌布等表面。
 ● 
可能會被水濺潑的地方或熱源附近。
 ● 
靠近水槽等任何開放式水源附近。
●
切勿在靠近牆壁、家具或封閉空間(例如嵌入式櫥櫃)的位置使用本
產品。
(否則可能導致變色或變形。)
■電焗爐須與牆壁
及櫥櫃保持一定
距 離,因 為 在 烘 焗
過 程 中,排 出 的 油
煙 等 會 污 染 牆 壁、
櫥 櫃,甚 至 會 因 過
熱 而 引 起 火 災。
電焗爐背面有安全阻隔部件,
為防止電焗爐與牆壁等物體
接 觸, 須 保 持 安 全 距 離。
20 cm 以上
牆面
10 cm 以上
●
切勿使用刀具或利器,以免損壞加熱元件。
● 請勿使用外接定時器等。
 ● 
本產品不能在外接定時器或獨立的遙控器控制系統的方式下運行。
安全注意事項
● 請勿在縫隙中插入任何物體。
● 如加熱的食材冒煙或起火,請勿打開玻璃門。
 ● 
馬上關閉電源,拔除電源插頭。
 ● 
火未熄滅時請勿打開玻璃門。
 ● 
不可使用水。
● 罐類與玻璃瓶,請勿直接加熱。
●
請勿將油倒入琺瑯質烤盤 /深烤盤加熱。
●
不使用本產品時,移動和清潔前必須確保已關閉本產品電源,並從電
源插座中拔出電源插頭,再次使用前必須將本產品擦乾。
● 移動、清潔或存放本產品前,請確保本產品處於冷卻狀態。
●
使用本產品時,請確保麵包屑盤已清潔乾淨並正確安裝。
●
使用時小心不要被電源線絆倒或纏繞。
● 拔出電源插頭時,必須握住電源插頭。切勿用力拉扯電源線。
●
每次使用之後,請確保清潔本產品。
●
請將本產品放在穩固、乾燥、清潔、平坦耐熱的桌面上。
注意
為了避免出現觸電、火災、冒煙、燒傷、燙傷、受傷或財產損失的危險
爐體
※ 玻璃門打開時,
請輕力放下。
※ 頂部也設有發
熱管。
※ 本產品頂部和側
面均有散熱孔。
中文( 繁體 )
TC8 TC9
重要資訊
●
玻璃門打開時,請勿用力向下壓玻璃門或在玻璃上放置重物。
● 請勿以握住電焗爐門把手的方式移動本產品。
●請勿在爐體頂部放置任何東西。
● 請勿對本產品進行不必要的加熱。
此符號表示:本產品表面高溫,觸碰時請小心謹慎。
各部件名稱
● 初次使用時或長時間未使用時,請先清洗配件。(
+P. TC 27)
※ 請勿將深烤盤放
到第四層,否則
可能會接觸到加
熱管,建議放在
第三層
。
食譜提示
注意:玻璃門上印刷的各種料理之烘焗時間及溫度設定,請參閱本使用說明
書「食譜」部分的相關資訊。
烤網放置處
玻璃門
深烤盤放置處
門把手
玻璃門印刷
散熱孔
旋轉烤叉放置處
麵包屑盤
發熱管
烘焗時用於放置肉類、魚類等油脂類
食物。 用於製作蛋糕卷、
烤全雞
和焗菜類料理。
取物夾
用於提取琺瑯質烤盤和烤網。
麵包屑盤
用於承接非出油性食物的
殘渣和油脂。
烤網
用於焗製麵包或其他菜餚,以及盛載
容器。
取物支架
用於提取旋轉烤叉。
旋轉烤叉
用於焗製全雞和大塊肉類。
※取出深烤盤時需用隔熱手
套,請顧客自行購買。
琺瑯質烤盤 深烤盤
作用
作用
作用
作用
作用
作用
作用
首次使用之前請空燒
①把琺瑯質烤盤和深烤盤放入電焗爐內。(請勿將深烤盤放到第四層)
②在待機模式時按下 鍵,按 鍵選擇「 」,上管溫度及下管溫度
設定為「230 ℃」。
③將時間設定為 10 分鐘。
●
發熱管塗有防護層,防止運送過程中遭鹽蝕,因此在預熱時可能會有煙霧冒出,
此屬正常現象。
●電焗爐空燒時,會釋放出煙和異味。請將電焗爐門打開,讓煙容易消散。煙和
異味釋放之後,使用時將不會再次出現。
●第一次空燒時,電焗爐會發出聲響,此乃正常現象。
●空燒後,本體冷卻後再使用。
中文( 繁體 )
TC10 TC11
配備說明 控制面板
各部件名稱 各部件名稱
「Menu」(食譜)鍵用於選擇預設食譜
「Function」(功能)鍵用於選擇加熱方式
「Temperature」(溫度)鍵用於設定上管或下管溫度
「Convection」(熱風)鍵用於選擇熱風對流
「Time」(時間)鍵用於設定時間
「Fermentation」(發酵)鍵用於選擇低溫發酵
用於調節「食譜」/「溫度」/「時間」
取消鍵
暫停 / 開始鍵
加熱方式顯示:由左至右的圖示
分 別 為 「 下 管 」、「 上 管 」、「 上 下 管 」、
「旋轉烤叉」
數字(下管溫度 /時間)
數字(上管溫度 /食譜)
「熱 風 」和「發 酵」
上管溫度單位顯示
下管溫度單位顯示
預設食譜運作顯示
時間單位顯示(分鐘)
顯示窗

Other Panasonic Oven manuals

Panasonic NB-G100P User manual

Panasonic

Panasonic NB-G100P User manual

Panasonic NT-H900 User manual

Panasonic

Panasonic NT-H900 User manual

Panasonic HL-FD615SJPQ User manual

Panasonic

Panasonic HL-FD615SJPQ User manual

Panasonic NB-G110PW User manual

Panasonic

Panasonic NB-G110PW User manual

Panasonic NB-G110PLVA User manual

Panasonic

Panasonic NB-G110PLVA User manual

Panasonic HL-PF685B Product guide

Panasonic

Panasonic HL-PF685B Product guide

Panasonic NBG110P User manual

Panasonic

Panasonic NBG110P User manual

Panasonic HL-BD82S User manual

Panasonic

Panasonic HL-BD82S User manual

Panasonic NU-SC280WYUE User manual

Panasonic

Panasonic NU-SC280WYUE User manual

Panasonic NB-H3801 User manual

Panasonic

Panasonic NB-H3801 User manual

Panasonic HL-SF498S User manual

Panasonic

Panasonic HL-SF498S User manual

Panasonic NN-DS596MEPG User manual

Panasonic

Panasonic NN-DS596MEPG User manual

Panasonic NB-W250 User manual

Panasonic

Panasonic NB-W250 User manual

Panasonic NU-HX100S User manual

Panasonic

Panasonic NU-HX100S User manual

Panasonic NU-SC180BYPQ User manual

Panasonic

Panasonic NU-SC180BYPQ User manual

Panasonic NN-CF770 User manual

Panasonic

Panasonic NN-CF770 User manual

Panasonic NU-SC300B User manual

Panasonic

Panasonic NU-SC300B User manual

Panasonic HL-CK614S User manual

Panasonic

Panasonic HL-CK614S User manual

Panasonic NN-DS596M User manual

Panasonic

Panasonic NN-DS596M User manual

Panasonic NN-DS596M User manual

Panasonic

Panasonic NN-DS596M User manual

Panasonic HL-PF685SEPG Product guide

Panasonic

Panasonic HL-PF685SEPG Product guide

Panasonic NU-SC280WYPQ User manual

Panasonic

Panasonic NU-SC280WYPQ User manual

Panasonic NB-H3203 User manual

Panasonic

Panasonic NB-H3203 User manual

Panasonic NB-G100P User manual

Panasonic

Panasonic NB-G100P User manual

Popular Oven manuals by other brands

Whirlpool W9 OM2 4MS2 H manual

Whirlpool

Whirlpool W9 OM2 4MS2 H manual

Electrolux KODFP46TX user manual

Electrolux

Electrolux KODFP46TX user manual

Ninja FOODI SP300 Series owner's guide

Ninja

Ninja FOODI SP300 Series owner's guide

Lincoln Impinger 1600 Series Specification sheet

Lincoln

Lincoln Impinger 1600 Series Specification sheet

OEM SG 69 Operator's manual

OEM

OEM SG 69 Operator's manual

Silverline BO6503X03 user guide

Silverline

Silverline BO6503X03 user guide

Coopers 10571 Instructions for use

Coopers

Coopers 10571 Instructions for use

Jenn-Air JJW2827DS user guide

Jenn-Air

Jenn-Air JJW2827DS user guide

Smeg CS19ID-6 instruction manual

Smeg

Smeg CS19ID-6 instruction manual

TREVIDEA G3 FERRARI ROSTO TITANIUM 47 G10148 user manual

TREVIDEA

TREVIDEA G3 FERRARI ROSTO TITANIUM 47 G10148 user manual

Brandt FC55MUB instruction manual

Brandt

Brandt FC55MUB instruction manual

Electrolux EOD63142 user manual

Electrolux

Electrolux EOD63142 user manual

AEG COMPETENCE B3000-1 operating instructions

AEG

AEG COMPETENCE B3000-1 operating instructions

Blodgett 1048 Specifications

Blodgett

Blodgett 1048 Specifications

Electrolux EOF3H50BX user manual

Electrolux

Electrolux EOF3H50BX user manual

Maytag MEW5527DDB Dimensions

Maytag

Maytag MEW5527DDB Dimensions

Electrolux EW30EW55G - 30 in. Single Wall Oven specification

Electrolux

Electrolux EW30EW55G - 30 in. Single Wall Oven specification

Smeg RFT844 Instructions for use

Smeg

Smeg RFT844 Instructions for use

manuals.online logo
manuals.online logoBrands
  • About & Mission
  • Contact us
  • Privacy Policy
  • Terms and Conditions

Copyright 2025 Manuals.Online. All Rights Reserved.