manuals.online logo
Brands
  1. Home
  2. •
  3. Brands
  4. •
  5. Panasonic
  6. •
  7. Scanner
  8. •
  9. Panasonic KV-S6055W User manual

Panasonic KV-S6055W User manual

ORDERNO. KM70104624C0
G14
High SpeedScanner
KV-S6055W/ KV-S6055WU/ KV-S6050W/ KV-S6050WU
1. GENERALPRECAUTIONS
1.1. SafetyPrecautions
1. Beforeservicing, unplug thepowercordtopreventelectrical
shock hazard.
2. Whenreplacing parts, use onlymanufacturer’srecommended
components forsafety.
3. Check thecondition ofpowercord. Replace ifwearorifdamageis
evident.
4. Afterservicing, besuretorestoretheleaddress, insulation
barriers, insulation papers, shields, etc.
1
5. Beforereturning theservicedequipmenttothecustomer, perform
thefollowing electrical tests topreventashock hazard.
1.2. Electrical Tests
1. Unplug thepowercordand check forcontinuitybetweentheearth
ground connection on theplug and themetal cabinet. There
shouldbezeroohmresistance found.
2. Withtheunitunplugged, shorttheACLive-Neutral oftheplug with
ajumperwire.
3. TurnONthepowerswitch.
4. Measuretheresistance valuewithanohmmeterbetweenthe
jumperedACplug and eachexposedmetal cabinet part, suchas
screwheads, etc.
Note:
Someexposedparts maybeisolatedfromthechassisbydesign.
Theyreadinfinity.
5. Ifthemeasurementisless than1M , apossibilityforelectric
shock mayexit.
Note:
Thishazardouscondition must becorrectedbeforetheunitis
returnedtotheend user.
1.3. ForService Technicians
ICsand LSIsarevulnerabletostaticelectricity.
Whenrepairing, thefollowing precautionswill helptopreventrecurring malfunctions.
1. Covertheplasticparts withaluminumfoil.
2. Ground thesoldering irons.
3. Use aconductivemat on theworktable.
2
4. DonotgraspICorLSI pinswithbarefingers.
2. SPECIFICATIONS
Item Model No.
KV-S6050W
KV-S6050WU
KV-S6055W
KV-S6055WU
Scanner Scanning face Simplex scanning Duplex scanning
Scanning method ADFfrontside/Flatbed:CCD
imagesensor
ADFfrontside/Flatbed:
CCD
imagesensor
ADFback side:CIS
(ContactTypeImage
Sensor)
Readout
speed
Flatbed 1.5sec (1paper, lettersize, 200 dpi)
ADF Simplex scanning :Approx. 55 ppm.
(Letter, fedlengthwise, 200 dpi)
Duplex scanning :Approx. 82 ipm.
(KV-S6055W(U) only)(Letter, fedlengthwise, 200 dpi)
Resolution Flatbed/
ADF
Mainscanning direction :100~600 dpi (1dpi step)
Sub-scanning direction :100~600 dpi (1dpi step)
Optical resolution is400 dpi.
Tonal gradation Binarymode, Grayscalemode(4/8bit), 64-stepgradation, (
dither)
mode, 64-stepgradation (error diffusion)mode
Imagecontrol Imageemphasis, Dynamicthreshold(DIMM required),
Automatic
threshold, Automaticseparation, Monochromereversing,
Automaticback control
Paper Sizefor
Flatbed
~298x432mm (11.7x17 in.)
Sizefor
ADF
Scanning size
70x169mm (2.8x6.7in.), and
106x148mm (4.2x5.8in.)to298x432mm (11.7x17 in.)
Feeding size
70x169mm (2.8x6.7in.), and
106x148mm (4.2x5.8in.)to305x432mm (12x17 in.)
Thickness
for ADF
Singlepaperfeeding :0.05 to0.15mm (2.0to5.9mils)
Continuouspaperfeeding :0.06 to0.15mm (2.4to5.9mils)
Note:1mil=1/1000 in.
Weight
for ADF
Singlepaperfeeding :40 to127g/m2(10.6to34 lbs.)
Continuouspaperfeeding :50 to127g/m2(13 to34 lbs.)
Interface (Transferrate) SCSI3(20MB/sec)
Hoppercapacity 200 sheets[64g/m2 (17 lbs.)un usedpaper]
3
Item Model No.
KV-S6050W
KV-S6050WU
KV-S6055W
KV-S6055WU
Unit External dimensions
(WidthxDepthxHeight)
464x717x296mm (18.3x28.2x11.7in.)
Mass (Weight) 30kg(66 lbs.)
Powerrequirement AC100-120V, 50/60Hz(KV-S6050W/S6055W)
AC220-240V, 50/60Hz(KV-S6050WU/S6055WU)
Power
consumption
Maximum
(Scanning)
1.8A(KV-S6050W/S6055W)/135W
1.0A(KV-S6050WU/S6055WU)/135W
Minimum
(Standby)
0.5A(KV-S6050W/S6055W)/35W
0.3A(KV-S6050WU/S6055WU)/35W
Sleep
mode
0.13A(KV-S6050W/S6055W)/11W
0.07A(KV-S6050WU/S6055WU)/11W
Operating
Environment
Operating temperature
and humidity
15°Cto30°C(59°Fto86°F), 30%to80%RH
Storage
Environment
Storagetemperature
and humidity
0°Cto35°C(32°Fto95°F), 10%to80%RH
Option Rollerexchangekit(KV-SS044), Imprinterunit(KV-SS010), Redlampoption (KV-
SS045),
Rollercleaning paper(KV-SS03), lnkcartridge(KV-SS06), Whiteroller&Cover(KV-
SS049)
“Weightinpounds”ofpaperrepresentstheweightof500 [432x559mm (17x22 inches)] sheets.
“Theredlampoption (KV-SS045)mustbeinstalledbyatrainedservice engineer.
3. COMPONENTIDENTIFICATION
4. INSTALLATION
4.1. MinimumSpace Requirements
Besuretomaintaintherecommendedspace requirementsfor properventilation.
4.2. Removing and keeping Metal Clamp
Inordertoensurethescanner’ssafetywhileitisbeing transported, itsoptical unitissecuredby
ametal clamp. Once thescannerhas beenputintheplace whereitistobeinstalled, changethe
position ofthemetal clampbyfollowing thestepsoutlinedbelow.
(1)Place thescannerissuchaway thatitsleft area protrudes byabout15cm (5.9”)from the
4
edgeofatable.
-Donotturnitupsidedownorstand iton its side.
-Whenplacing thescanneron atable, becareful nottoextend
beyond theedge15cm(5.9”). Otherwise, thescannermayfall.
(2)Remove themetal clampon thebottom ofthescannerfrom position (A)and attachitat
position (B) instead.
4.3. DIMM ModuleExtension
Amaximum of256 MBextendedmemorymay berequireddepending on thecombination ofthe
papersize, resolution and gray scalemode.
(For example, toscanatwo-sidedA4sizedocumentwith600 dpi, gray, etc.)
Todeterminehowmuchextendedmemoryisrequired, refertothesection 4.6.1“Additional
MemorySizeeachscanning mode(MB)”.
*RecommendedDIMM
-JEDEC-standard168pin, dual in-linememorymodule(DIMM)
-Non buffered
-Single+3.3V±0.3Vpowersupply
-Frequency/ CASLatency:100MHz/CL=2, 133MHz/CL=2, 133MHz/CL
5
=3
-64MB, 128MBor256MBmaybeused.
(Reference)DIMM modulewhichhas beenevaluatedusing thisscanner
-Manufacturer:DELKINDEVICES
1. Model No.:DM168-064Y3Q488-10S2P(64MB)
2. Model No.:DM168-064Y3Q446-10S2P(64MB)
3. Model No.:DM168-128Y3Q488-10S4P(128MB)
Note:
Originally, SCSI boardhas 16MBmemoryexceptfortheabove
additional memory.
4.4. Removing SCSI Board
1)Make surethePowerisOFF.
2)Remove SCSIBoard. (See 8.4.2.)
4.5. Installing DIMM Module
InserttheDIMM moduleintotheconnector on the
SCSIinterface board atanangle[Place (1)]. Push
inthemoduleas faras itgoes. Theleversshould
lock automatically. Ifnot, pushtheleverstolock the
modulein[Place (2)].
Note:
-BesurethattheDIMM modulewill beintheproper
position and theproperside.
-Toremove theDIMM module, release thewhite
leversatbothsides oftheconnector.
4.6. Installing theSCSI Board
6
1)InserttheSCSIBoard intotheunitalong the
guides and pushitinfirmly.
2)SecuretheSCSIBoard withthe3screws.
3)Install thescannerdriversoftwareinyour
computeraccording totheenclosedmanuals.
4.6.1. Additional MemorySizeeachscanning mode(MB)
Simplex/4bit, 8bit
Size Resolution (dpi)
100 200 300 400 500 600
A3 0 0 64 64 64 128
A4 0 0 0 0 64 64
A5 0 0 0 0 0 64
A6 0 0 0 0 0 0
B4(JIS) 0 0 0 64 64 64
B5(JIS) 0 0 0 0 64 64
B6(JIS) 0 0 0 0 0 0
DoubleLetter 0 0 64 64 64 128
Legal 0 0 0 64 64 64
Letter 0 0 0 0 64 64
Duplex/4bit, 8bit
7
Size Resolution (dpi)
100 200 300 400 500 600
A3 0 0 64 64 128 256
A4 0 0 64 64 64 128
A5 0 0 0 0 64 64
A6 0 0 0 0 0 64
B4(JIS) 0 0 64 64 128 128
B5(JIS) 0 0 0 64 64 64
B6(JIS) 0 0 0 0 64 64
DoubleLetter 0 0 64 64 128 256
Legal 0 0 64 64 64 128
Letter 0 0 64 64 64 128
Simplex/Binary
Size Resolution (dpi)
100 200 300 400 500 600
A3 0 0 0 0 0 0
A4 0 0 0 0 0 0
A5 0 0 0 0 0 0
A6 0 0 0 0 0 0
B4(JIS) 0 0 0 0 0 0
B5(JIS) 0 0 0 0 0 0
B6(JIS) 0 0 0 0 0 0
DoubleLetter 0 0 0 0 0 0
Legal 0 0 0 0 0 0
Letter 0 0 0 0 0 0
Duplex/Binary
Size Resolution (dpi)
100 200 300 400 500 600
A3 0 0 0 0 0 64
A4 0 0 0 0 0 0
A5 0 0 0 0 0 0
A6 0 0 0 0 0 0
B4(JIS) 0 0 0 0 0 0
B5(JIS) 0 0 0 0 0 0
B6(JIS) 0 0 0 0 0 0
DoubleLetter 0 0 0 0 0 64
Legal 0 0 0 0 0 0
Letter 0 0 0 0 0 0
4.7. Connecting theUnittoaPersonal Computer
8
4.8. SystemConditionsRequirements
Whenusing thescanner, therequiredpersonal computerconditionsareas follows.
CPU Pentium 166MHzor higher(Pentium, Celeron processor or higheris
recommended.
Memory 64 MBor higher(128 MBor higherisrecommended.)
OS Windows95/Windows98/WindowsNT/Windows2000/WindowsMe
SCSIboard Adaptec Brand AHA-1540/2930/2940/19160/29160 Series are
recommended.
*Thescanning speeddiffersdepending on thepersonal computeroperating environmentor
application.
4.9. LCD Settings
Beforescanning thedocument, perform thepreferredsettingson thedisplay. Setting information
and scannerconditionsareshownon thedisplay.
9
4.9.1. Setting thelanguage
1. Turnthepoweron whilepressing theHOMEkey.
Note:
Thelanguagesetting modeisselectedautomaticallywhenthe
scanner’spoweristurnedon forthefirst timeafterthescanner
was purchased.
2. Use the[ ]keyor[ ]keytoselect the“EnglishLetter”,
“EnglishA4”or“DeutschA4”, “ A4”.
3. Press theHOMEkey.
-Thedisplaywill changetotheselect language, thenthe
scannerwill beready.
10
-Thissetting will remainuntil itischangedtoanothersetting.
4.9.2. Setting theSCSIIDand Terminator
1. Press theOTHERSkey.
Enterssetting modes otherthanSCAN, COUNTER, orIMPRINT
and displaystheversion.
2. Press theMODEkey.
Press theMODEkey[ ]todisplaytheSCSI ID, whichisthe
fourthsetting.
3. Press theSELECT[ ]keyor[ ]keytoselect thedesired
setting.
The[ ]keymoves tothenext IDas shownbelow.
The[ ]keymoves tothepreviousID.
4. Press theMODEkey[ ]toswitchtotheterminatorsetting.
To activate theSCSI IDsettings, press theHOMEkeytoreturnto
“READY”, thenturntheunitoff and on.
11
5. Press theSELECT[ ]keyor[ ]keytoselect thedesired
setting.
The[ ]keymoves tothenext contentas shownbelow.
The[ ]keymoves tothepreviouscontent.
Note:
-Ifthescanneristhelast device intheSCSI chain, thenthe
terminatorshouldbeset to“Enable”. But, undertheaboveSCSI
chainand scanner’sturn-off, theterminatorshouldbeattachedto
theSCSI connectoron thescanner.
-Setting theSCSI IDwill beactivatedafterturning thepowerOFF
and turning itONagain.
-Setting theterminatorwill beactivatedafterturning thepowerOFF
and turning itONagain.
5. SECTIONALVIEWS
5.1. Motors(FrontView)
5.2. Optical Units and Imprinter
5.3. Rollers
5.4. DriveBelts
5.5. CircuitBoards
5.6. SensorBoardsand Switches
6. MECHANICALFUNCTION
6.1. PaperFeedMechanism
Fig. 6-1
12
1. Whenthepaperisset on theHopper, and thescanning command
isissuedfromPC, theHopperrises and thepaperwill bebrought
intocontact withPaperFeedRoller.
2. TheConveyorMotoractivates torotate theConveyorRoller1
through 5.
3. ThePaperFeedMotoractivates torotate thePaperFeedand
Separation Rollers. ThePaperFeedRollerpicks up apage. A
spring attaches theRetardRollertotheSeparation Roller. The
supporting axisoftheRetardRollerisconnectedtothefixedgear
through thetorquelimiterand thetiming belt’sgeartrain. Incase
thereisonlyonepagepickedup betweenSeparation Rollerand
RetardRoller, theRetardRollerrotates indirection whichthe
Separation Rollerrotates byallowing theRetardRollertoslipon
thetorguelimiter. Iftherearetwoormorepages between
Separation Rollerand RetardRoller, torquelimiterisset sothat
theloadofthetorquelimiterincreases accordingly, toallow slip
friction foreachpage. Asaresultofthis, onlythetop pagepasses
through theconveyorsection, and theadditional pages are
preventedfrompassing through.
Fig. 6-2
13
4. Whenthetop ofthepaperpasses through on SizeSensorvia
Separation / RetardRollerand ConveyorRoller, Papermotorstops.
5. Whenthetop ofthefirst pagereaches toScanning Position, CCD
sensorand orCISisdriventoscan. And byusing theabove
sensors, scanning process starts.
6. Whentheend ofthepaperpasses through on CIS(Back Side
Scanning Position), ConveyorMotorstops, Scannerwaits fornext
scanning startcommand fromPC. Atthistime, ifno following
papertoscan, thecurrentscanning paperisgoneout.
7. Whentheend ofthefirst pagepasses through on theSizeSensor
on thecontinuousscanning mode, PaperFeedMotorstarts again
afteraninterval ofapprox. 100mm on duplex mode(approx.60mm
on simplex mode) and feedthefollowing paperthrough the
conveyorsection.
8. Repeat theabove(3) to(8).
9. Afterfinishing all scanning process, Hoppergoes downtothe
original position and theseries ofScanning sequence ends.
6.2. Manual FeedMode
1. Formultiplesheet’sscanning, thereispossibilitythat thefirst
pageand thesecond pagewill beseparated, and thepaperwill be
tornifpaperisscannedwhiletheRetardRollerislocked.
14
2. WhenAuto/Manual Select Leverisset to“Auto”, theGearBfixed
withleverisconnectedtotheRetardRoller. Thereby, TheRetard
Rollerislockedthrough torquelimiter.
3. WhenAuto/Manual SelectorLeverisset to“Manual”, theGearB
fixedwithleverisfree fromGearAconnectedtotheRetardRoller.
Inthiscase, theRetardRolleroperates as free rollerforthe
Separation Roller, and does notoperate paperseparation function
because theRetardRollerrotates independently.
6.3. PaperFeedRoller/HopperLift DriveMechanism
1. PaperFeedMotordrives eitherPaperFeedRollermechanismor
HopperLift mechanismbyselecting thedirection ofrotation.
2. Thedrivesystemisshownon Fig. 6-3.
(a) Thegearblock (1) belongstoDrivesystemforPaperFeed
Rollerand Separation Roller.
(b)Thegearblock (2) belongstoDrivesystemforHopperLift.
(c) Thegearblock (3) belongstoDrivesystemforPaperFeed
Roller, Separation Roller, and HopperLift incommon.
Fig. 6-3
15
3. WhenthePaperFeedMotordrives inthedirection ofarrow A,
PaperFeedRollerisactivated, basedon Outputaxis. Ontheother
hand, whenthePaperFeedMotordrives inthedirection ofarrow
B, Hopperlift mechanismisactivated. Gearsmarkedwith“ ”
on EachGearblock haveonewayclutches. Whenthegearsare
activatedtorotate against thedirection ofnormal rotation, theone
wayclutches slippedand theseries ofrotation arenottransmitted
tothemechanical block.
6.4. HopperLift Mechanism
Fig. 6-4
Fig. 6-5
16
Fig. 6-6
1. HopperPlate ismountedon Lift RollerofHopperLift Arm.
2. HopperLift Arm issupportedbyHopperCamthrough Hopper
Spring.
3. HopperCamisaneccentrictypecam, and isconnectedtoHopper
Lift Gearblock mentionedinFig. 6-3.
17
4. WhenHoppercamisincondition as showninFig. 6-5, thepaper
canbeset.
5. WhentheHoppercamrotates inthedirection ofarrow as shown
inFig. 6-6, itpushes up Hopperspring, and enables topaper
feeding byattaching HopperPlate toPaperFeedRoller.
6. And whentheHoppercamstill morerotates inthedirection of
arrow, thecamrotates until theposition as showninFig. 6-5, and
HopperPlate goes down.
6.5. Optical Unit
Thelightreflectedfrom thepapersurface istransmittedviamirrorsA B C D E, and is
transmittedtoCCD surface through thelensatlast.
Fig. 6-7
7. MAINTENANCE
7.1. Maintenance Chart
C:Clean, R: Replace (x1000 Sheets)
18
Description PartNo 50 100 150 200 250 300
PaperFeedRoller PBDRA0081Z C C C C C R
Separation Roller PBDRA0065Z C C C C C R
Retard Roller PBDRA0083Z C C C C C R
Conveyor Roller1 PBDRX03S6055 C C C C C C
Conveyor Roller2 PBDRX04S6055 C C C C C C
Conveyor Roller3 PBDRX09S6055 C C C C C C
Conveyor Roller4 PBDRX10S6055 C C C C C C
Conveyor Roller5 PBDRX11S6055 C C C C C C
ADFGlass PBHEA0093Z-J C C C C C C
Sensor Plate PBUEX0117Y C C C C C C
Free Roller PBDRA0029Z C C C C C C
Sensor Roller(Onlyfor KV-
S6055W/WU)
PBDRA0103Y-J C C C C C C
CIS (Onlyfor KV-S6055W/WU) EQ4R300Q1 C C C C C C
ColdRay FlourescentLamp CFX12AYG/36H Lighting period 1000 hours
Note:
Wheneverblack lineoccurson scanning image, cleanADFGlass,
SensorPlate, and SensorRoller, disregarding theabovevalue.
7.2. RollerCleaning / PaperFeedRoller, Separation Roller, Retard
Roller
1. Turnoff thePower.
2. OpentheADFdoor.
3. Cleanthesurfaces ofPaperFeedRollerand Separation Roller
withcleaning paper. (KV-SS03)
4. Cleanthesurface ofRetardRollerwithCleaning Paper(KV-SS03),
whenRollerCleaning messageisindicatedon theLCD (See
Section 9).
Fig. 7-1
19
Fig. 7-2
Note:
CleananydirtfromtheRetardRolleraccording tothearrowsas
showninFig. 7-2. Otherwise theRetardRollermayberemoved
20

Other manuals for KV-S6055W

1

This manual suits for next models

3

Other Panasonic Scanner manuals

Panasonic KV-S1026C User manual

Panasonic

Panasonic KV-S1026C User manual

Panasonic KV-SS50 User manual

Panasonic

Panasonic KV-SS50 User manual

Panasonic KV-S1025C SERIES User manual

Panasonic

Panasonic KV-S1025C SERIES User manual

Panasonic KV-S2055L User manual

Panasonic

Panasonic KV-S2055L User manual

Panasonic DSC-RX100 User manual

Panasonic

Panasonic DSC-RX100 User manual

Panasonic KV-S5046H User manual

Panasonic

Panasonic KV-S5046H User manual

Panasonic KV-S3085 User manual

Panasonic

Panasonic KV-S3085 User manual

Panasonic KV-S4065CW User manual

Panasonic

Panasonic KV-S4065CW User manual

Panasonic KV-S1065C User manual

Panasonic

Panasonic KV-S1065C User manual

Panasonic KV-SS080 User manual

Panasonic

Panasonic KV-SS080 User manual

Panasonic KV-S2045C User manual

Panasonic

Panasonic KV-S2045C User manual

Panasonic KV-S3085 User manual

Panasonic

Panasonic KV-S3085 User manual

Panasonic KV-S2087 User manual

Panasonic

Panasonic KV-S2087 User manual

Panasonic Workio KV-S7065C User manual

Panasonic

Panasonic Workio KV-S7065C User manual

Panasonic KV-S2025C User manual

Panasonic

Panasonic KV-S2025C User manual

Panasonic KV-S1037X User manual

Panasonic

Panasonic KV-S1037X User manual

Panasonic KV-SS25 User manual

Panasonic

Panasonic KV-SS25 User manual

Panasonic KV-S1065C User manual

Panasonic

Panasonic KV-S1065C User manual

Panasonic KV-S7075C User manual

Panasonic

Panasonic KV-S7075C User manual

Panasonic KV-S1015C User manual

Panasonic

Panasonic KV-S1015C User manual

Panasonic KV-S2065L User manual

Panasonic

Panasonic KV-S2065L User manual

Panasonic KV-S1028Y Installation manual

Panasonic

Panasonic KV-S1028Y Installation manual

Panasonic KV-SS905C User manual

Panasonic

Panasonic KV-SS905C User manual

Panasonic KV-S6040W - Document Scanner User manual
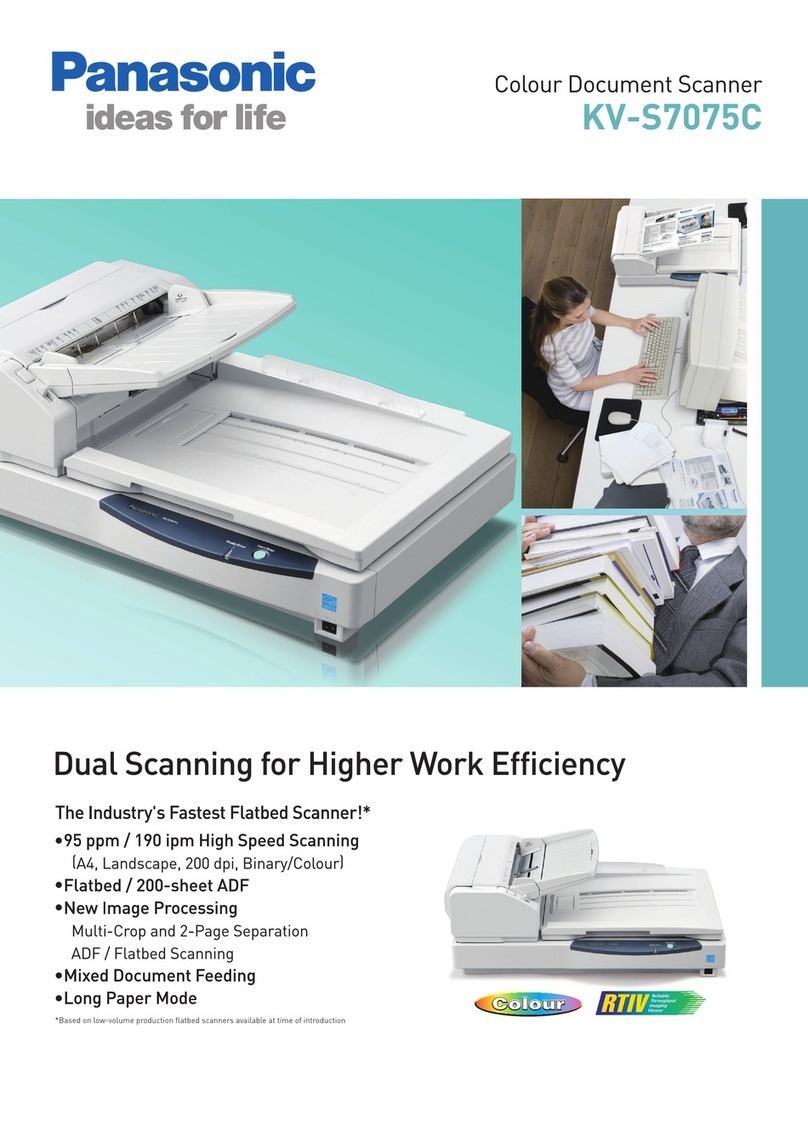
Panasonic

Panasonic KV-S6040W - Document Scanner User manual

Popular Scanner manuals by other brands

UMAX Technologies AV210 Comparison chart

UMAX Technologies

UMAX Technologies AV210 Comparison chart

Nikon Coolscan III LS-30 Reference manual

Nikon

Nikon Coolscan III LS-30 Reference manual

Pepperl+Fuchs PROSCAN/38a manual

Pepperl+Fuchs

Pepperl+Fuchs PROSCAN/38a manual

MEL M2D manual

MEL

MEL M2D manual

Image Access WideTEK 36 Setup instructions

Image Access

Image Access WideTEK 36 Setup instructions

Brother DS700D user guide

Brother

Brother DS700D user guide

Leica RTC360 user manual

Leica

Leica RTC360 user manual

Tokenworks IDVisor Touch quick start guide

Tokenworks

Tokenworks IDVisor Touch quick start guide

BCF Technology OVISCAN 6 Technical manual

BCF Technology

BCF Technology OVISCAN 6 Technical manual

Canon Optura 300 Operation guide

Canon

Canon Optura 300 Operation guide

Datalogic MAGELLAN 1000I Quick reference guide

Datalogic

Datalogic MAGELLAN 1000I Quick reference guide

3D Histech Pannoramic 1000 user guide

3D Histech

3D Histech Pannoramic 1000 user guide

Avision BF-0709S user manual

Avision

Avision BF-0709S user manual

Epson GT-10000 Specifications

Epson

Epson GT-10000 Specifications

Canon imageFORMULA CR-55 Startup manual

Canon

Canon imageFORMULA CR-55 Startup manual

RTscan RTX200A user manual

RTscan

RTscan RTX200A user manual

Technology Solutions Handscanner user guide

Technology Solutions

Technology Solutions Handscanner user guide

Lexmark X4500 Service manual

Lexmark

Lexmark X4500 Service manual

manuals.online logo
manuals.online logoBrands
  • About & Mission
  • Contact us
  • Privacy Policy
  • Terms and Conditions

Copyright 2025 Manuals.Online. All Rights Reserved.