manuals.online logo
Brands
  1. Home
  2. •
  3. Brands
  4. •
  5. Pando
  6. •
  7. Ventilation Hood
  8. •
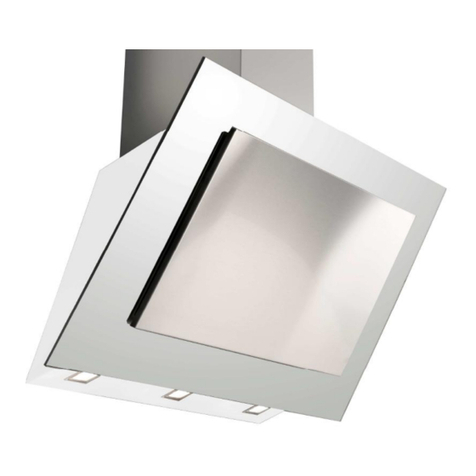
  9. Pando E-220 User manual

Pando E-220 User manual

EXTRACTOR HOOD
E-220
INSTALLATION CUIDE
660066400072
1. – MINIMUM DISTANCE
Befote to install the E-220 in your kitchen , please, make sure, that there is a minimum dis-
tance of 180mm between the CEILING and the FALSE CEILING. Please note that the maximum dis-
tance between the FALSE CEILING and the FLOOR should be no more than 2,40 m.
The threaded rods, included with the extractor hood, allow to adjust the height between 180 and
340mm.
2.– OUTLET AIR EXTRACTION
Please note , that the outlet air extraction in on the lefth of the hood, and it is impossible to
change the position of this outlet air extraction. The unit is supplied with a 100x180mm flexible
ductwork (2 m), it is possible to connect it to rectangular adaptor of 100x180mm and to round
adaptor of Ø150mm.
(Adaptor of Ø150 mm is not included. In case of using the adaptor Ø150mm, please, consult the total
height of the hood, it can be changed)
E-220 INSTALLATION GUIDE
Page 2
3.– DRILLING HOLES INTO THE CEILING
On the solid ceiling, draw the outline of the hole required to house the extractor hood E-220.
This model is supplied with threaded rods which screw into the frame. The adjusting nuts can
be used to set the required height for the extractor hood (beetween 180mm and 340mm)
Drill 4 holes into the ceiling, following the measurements , undicated on the drawing. Insert
the plugs supplied with the extractor hood into the holes and then screw in the rods.
MEASUREMENTS OF HOLE FOR THE HOOD:
1200 —- 1130 X 730
Page 3
E-220 INSTALLATION GUIDE
Page 4
5– CONNECTIONS
All connections should be made befote fitting the extractor hood into the hole.
Fume extractor pipe connections.
Unscrew the adaptor from
the junction of the extractor
hood.
Lift the adaptor to the FALSE CEILING and join it
with the fume extractor pipe of 100x260 mm.
IMPORTANT : Seal the adaptor and the fime ex-
tractor pipe with aluminium foil tape. Make sure, that
there are no air leaks.
4– ACCES IN THE FALSE CEILING
For the correct installation of the extractor hood and realization of all connections, Before the
false ceiling is closed, some form of acces panel must be installed on the side of the extractor hood
where the conduit is connected.
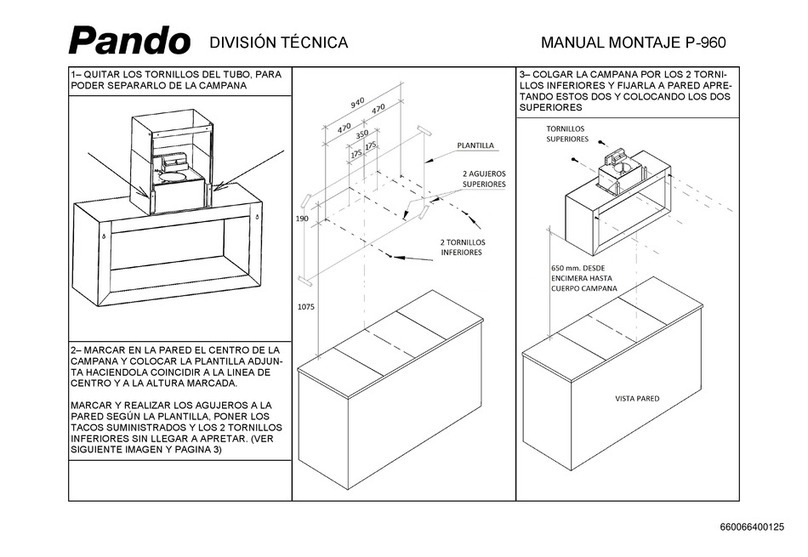
6º– POSITIONING AND SECURING THE EXTRACTOR HOOD
Once the connections are completed, we can lift the extractor hood and insert it in the correct
position inside the hole. Before doing so, we must open the door of the hood and remove the filtres.
Insert the extractor hood into the niche, fitting the threated rods into the corresponding holes;
the outer edge of the extractor hood should line up perfectly with the false ceiling. Place the small
plates, supplied with the extractor hood, and the nuts onto the threaded rods and tighten them correc-
tly.
Page 5
E-220 INSTALLATION GUIDE
Page 6
COMMISSIONING:
Alter opening the door and removing the filtres, we can see the connection box. The ON
switch for the extractor hood is opposite the connection box. If all the coonnections have been com-
pleted, you can swith on the extractor hood.
¡¡IMPORTANT!! After the commissioning of your range hood, please, syncronize the remo-
te control. (Page 7)
7—CONNECTING THE FUME EXTRACTOR PIPE AND POWER CONNECTION:
After the installation of the extractor hood, screw the adaptor of the fume extractor pipe to the
hood.You can realice this operation through the access in the false ceiling.
Realice power connection.
Replace the filtres in their correct position and close the door:
Page 8
E-220 INSTALLATION GUIDE
POINTS TO BE CONSIDERED:
*Extraction conduit pipe connection to the extractor hood.
Before the false ceiling is closed, some form of access panel must be installed on the side of the
extractor hood , where the conduit is connected.
*The ceiling where the extractor hood is to be installed must be completely flat, with no une-
ven ares of any kind.
*For optimal operation of the E-220, ventilation grilles are must be installed at ground level to
ensure a continuous flow of air.
*The maximum distance between the FALSE CEILING and the FLOOR should be no more
than 2,40 m.
*IMPORTANT: For the optimal operation, the extractor hood must be centered over the
cooking area.
Fabricado por INOXPAN S.L.
Pol. Ind. El Cros — Av. El Molí de les Mateves, 11
Apdo. Correos nº21
08310 ARGENTONA (Barcelona - Spain)
Tel. +34 93 757 94 11
Fax. +34 93 757 96 53
www.pando.es
Com.pando@pando.es
Certificación de Producto AENOR
UNE-EN 60335
Certificado de Empresa de Gestión de la
Calidad UNE-EN ISO 9001:2008
The International Certification Network
Quality Management System ISO
9001:2008
Certificación de Producto U.L.
(U.S.A. - Canadá) U.L. 507-2001
E-220 INSTALLATION GUIDE
Página 10

Other manuals for E-220

1

Other Pando Ventilation Hood manuals

Pando E-295 User manual

Pando

Pando E-295 User manual

Pando I-898 User manual

Pando

Pando I-898 User manual

Pando E-290 User manual

Pando

Pando E-290 User manual

Pando E-252 User manual

Pando

Pando E-252 User manual

Pando P-861 User manual

Pando

Pando P-861 User manual

Pando I-861 User manual

Pando

Pando I-861 User manual

Pando TIB-2 User manual

Pando

Pando TIB-2 User manual

Pando I-437 Operating manual

Pando

Pando I-437 Operating manual

Pando E-300 User manual

Pando

Pando E-300 User manual

Pando P-960 User manual

Pando

Pando P-960 User manual

Pando E-220 User manual

Pando

Pando E-220 User manual

Pando UNE EN 60335-1 Operating manual

Pando

Pando UNE EN 60335-1 Operating manual

Pando E-250 User manual

Pando

Pando E-250 User manual

Pando I-825 User manual

Pando

Pando I-825 User manual

Pando integralcooking E-217 User manual

Pando

Pando integralcooking E-217 User manual

Pando E-231 User manual

Pando

Pando E-231 User manual

Pando I-897 User manual

Pando

Pando I-897 User manual

Pando P-842 User manual

Pando

Pando P-842 User manual

Pando TIM-2 User manual

Pando

Pando TIM-2 User manual

Pando P-730 User manual

Pando

Pando P-730 User manual

Pando TIM User manual

Pando

Pando TIM User manual

Pando P-731 User manual

Pando

Pando P-731 User manual

Pando E-219 User manual

Pando

Pando E-219 User manual

Pando E-201 User manual

Pando

Pando E-201 User manual

Popular Ventilation Hood manuals by other brands

Gorenje S3 IHGC963S4X manual

Gorenje

Gorenje S3 IHGC963S4X manual

KOBE ISX2136SQB-1 Installation instructions and operation manual

KOBE

KOBE ISX2136SQB-1 Installation instructions and operation manual

U.S. Products ADVANTAGE-100H Information & operating instructions

U.S. Products

U.S. Products ADVANTAGE-100H Information & operating instructions

Kuppersberg DUDL 4 LX Technical Passport

Kuppersberg

Kuppersberg DUDL 4 LX Technical Passport

Framtid HW280 manual

Framtid

Framtid HW280 manual

Thermador HGEW 36 FS installation manual

Thermador

Thermador HGEW 36 FS installation manual

Electrolux LFT769X user manual

Electrolux

Electrolux LFT769X user manual

AEG X69453MVO UK user manual

AEG

AEG X69453MVO UK user manual

Broan B5836SS manual

Broan

Broan B5836SS manual

Heinner HDCH-6060RGBK quick start guide

Heinner

Heinner HDCH-6060RGBK quick start guide

Baumatic AS35SS instruction manual

Baumatic

Baumatic AS35SS instruction manual

Franke FTF 604 XS V2 Instructions for use and installation

Franke

Franke FTF 604 XS V2 Instructions for use and installation

Best UCB3I30SBW installation instructions

Best

Best UCB3I30SBW installation instructions

Gram EFU 503-90 X instruction manual

Gram

Gram EFU 503-90 X instruction manual

CIARRA CBCS6803 Installation and user manual

CIARRA

CIARRA CBCS6803 Installation and user manual

sauter SHG501 Instructions for installation and use

sauter

sauter SHG501 Instructions for installation and use

Franke 392-17 User instructions

Franke

Franke 392-17 User instructions

FALMEC Polar Black 35 Instruction booklet

FALMEC

FALMEC Polar Black 35 Instruction booklet

manuals.online logo
manuals.online logoBrands
  • About & Mission
  • Contact us
  • Privacy Policy
  • Terms and Conditions

Copyright 2025 Manuals.Online. All Rights Reserved.