manuals.online logo
Brands
  1. Home
  2. •
  3. Brands
  4. •
  5. Parallax
  6. •
  7. Robotics
  8. •
  9. Parallax 28106 User manual

Parallax 28106 User manual

Web Site: www.parallax.com
Forums: forums.parallax.com
Sales: sales@parallax.com
Technical: support@parallax.com
Office: (916) 624-8333
Fax: (916) 624-8003
Sales: (888) 512-1024
Tech Support: (888) 997-8267
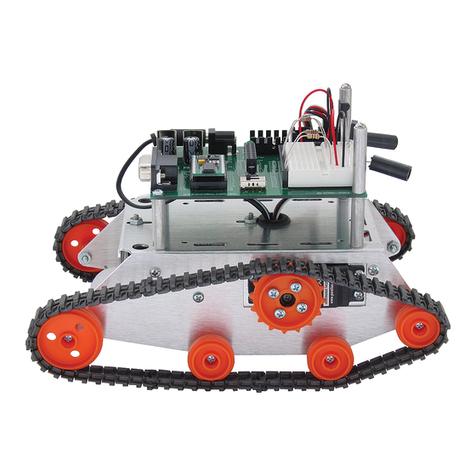
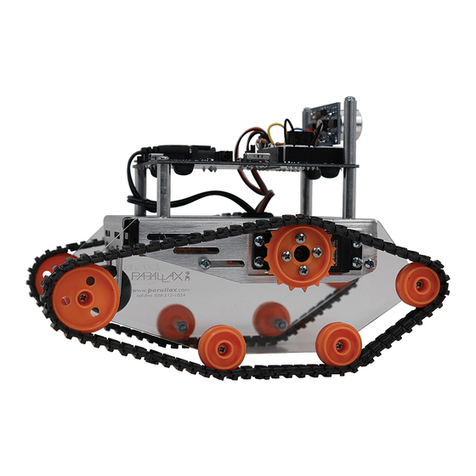
Tank Treads Kit (#28106)
For the Boe-Bot, Shield-Bot, and ActivityBot robot kits
Treads help your robot access varied terrain such
as carpet, small rocks or imperfect surfaces. This
kit involves removing your robot’s wheels (and
encoders* if present), repositioning servos, and
adding the treaded drive train.
*The Tank Treads Kit is not compatible with Boe-
Bot Encoders or ActivityBot Encoders; both of
those rely on spoked wheels that are removed to
mount the treads. See Kit Compatibility on page 4
for tips on using the Tank Treads with other
Parallax Small Robot Kits and Accessories.
Bill of Materials
Part #
Description
Qty
700-00002
4-40 Machine Screw, 3/8”
8
700-00003
4-40 Nut – 700-00003
24
700-00007
4-40 Machine Screw, 7/8”
8
700-00028
4-40 Machine Screw, 1/4”
8
700-00059
#4 Lock Washer
8
710-00008
1.5” Screw
2
713-00003
1.25” Standoff
2
721-32009
Acrylic Side Panels
2
713-00027
Spacer Disks
2
721-28106
Plastic Wheel and Rubber Tread set
1
725-00013
Servo Horns – may be standard X-type or round disk
2
Tools Needed
You will need a #2 Philips screwdriver, wrench, and a 3/32” drill (or hobby knife like an X-acto®knife).
Assembly
Step 1: From the set of wheels, cut out the following and trim off any burrs:
(2) large wheels (with teeth)
(2) large wheels (no teeth)
(6) medium-sized wheels (no teeth)
The remaining wheels are not used for this application. However, the wheels with sprockets can be modified
and used for customization if desired.
Copyright © Parallax Inc. Tank Treads Kit (#28106) v3.0 2/20/2014 Page 1 of 4
Step 2: The servo horn will need four of the holes enlarged for the 4-40 screws. The holes need to be
smaller than the screw so that when the screws are inserted they will make their own threads. You can drill
the holes using a 3/32” drill bit, or use an X-acto knife to enlarge the holes as shown below, depending on
which servo horns were included in your kit. If you are using the knife, be sure not to over-enlarge the holes.
By reaming with the knife a little from both the top and bottom, the hole will be more uniform in size.
3/32”
(2.2 mm)
3/32”
(2.2 mm)
Enlarge the Middle Holes
if using Disc Servo Horns
Enlarge Inner Holes
if using Standard Servo Horns
Step 3: Thread four
¼” length screws
through a large wheel,
and then a spacer disk.
Gently self-tap the
screws into the
enlarged holes in the
servo horn. Repeat for
the other large wheel,
spacer disk, and servo
horn.
Step 4: Attach the 7/8” length screws and nuts to
the remaining wheels (2 large and 6 medium in size)
as shown below, and set aside.
Step 5: Remove the wheels from your robot, and save the servo screw for the next step. Also remove
encoder sensors if present. The servos should be mounted with the head toward the rear ball wheel as in
Figure 5. The servo mounting tabs need to be on the outside of the robot chassis. If your servos are
mounted the opposite way, or are mounted from inside the chassis, remove them and remount as shown.
www.parallax.com
continuous ro tation
www.parallax.com
continuous rotatio n
Servo head is mounted
toward tail wheel
←Wrong Way→
←Right Way→
Servo mounting tabs are
outside of chassis
Copyright © Parallax Inc. Tank Treads Kit (#28106) v3.0 2/20/2014 Page 2 of 4
Step 6: Remove the protective paper cover from the
side panels, if desired.
Attach the side panels to the chassis
, using 3/8”
length screws and nuts as shown. Then attach the
servo horn (with wheel) using the screw that came
with the servo.
IMPORTANT: If your robot has a 5-
cell battery
pack, do not install the screw that goes into the top
rear slot in the chassis. If you are using the Li-Ion
Pack-Charger, see that section of Kit Compatibility on
page 4.
Step 7: Attach the remaining wheels by first
tightening the nut on the wheel then loosening it 1/4
to 1/3 of a turn. Attach the wheel assembly to the
frame with a nut and a lock washer on the inside of
the frame. When the two nuts on each wheel are
tightened, check to see that there is a very small gap
between the wheel and outside nut to allow for easy
rolling, as shown.
Step 8: Mount the remaining wheel assemblies with
lock washers and nuts. When tightening, leave a very
small gap on the wheel side so the wheel can turn
freely, as shown.
Step 9: Separate all the rubber tread pieces and connect together as shown below. Each loop contains 1
long, 2 medium and 2 short treads. Please do not pull the treads to disconnect from one another; please use
scissors or an X-acto®knife. Pulling on the treads will stretch them beyond use. Check each wheel to make
sure it rolls without binding. If any wheels bind, loosen the nut and remount to maintain a very small gap
between the wheel and nut. Carefully stretch the tread over the wheels.
Copyright © Parallax Inc. Tank Treads Kit (#28106) v3.0 2/20/2014 Page 3 of 4
Step 10:The robot’s
breadboard circuit can be
protected by installing the (2)
1.5” screws and (2) 1.25”
spacers on the front
standoffs.
P15
P14
P13
P12
P11
P10
P9
P8
P7
P6
P5
P4
P3
P2
P1
P0
X2
X3 Vdd VssVin
Board of Education
© 2000-2003
Rev C
Vdd
Black
Red
X4 X5
15 14 13 12
To Servos
Troubleshooting the Tread
If the tread is loose and comes off, check to see
that all the wheels can roll easily but their screws
are tightly attached to the side panels. If a wheel’s
screw feels floppy, loosen and then re-tighten the
two nuts so that they are both firm against the
acrylic. If the treads are still loose, move the rear
wheel all the way to the outer end of its slot.
Kit Compatibility & Programming Tips
The Tank Tread Kit is compatible with the Boe-Bot
(28132 & 28832), ActivityBot (32500), and Shield-
Bot (for Arduino, 130-35000). Please read the
Encoders and 5-cell Battery Pack sections below.
Encoders — As noted on page 1, the Tank Tread
Kit is not compatible with the Boe-Bot Encoder Kit
(#28107), or with the stock ActivityBot encoders
(#32501). Those encoders rely on spoked wheels
that must be removed to mount the Tank Tread
gear. Therefore, sensor-based autonomous
roaming where precise straight-line travel is
unimportant will be more successful than lists of
maneuver sequences or dead reckoning. Remote
control applications are also appropriate, where a
gradual arc in straight-line travel can be corrected
by the robot operator.
5-cell Battery Packs – the Propeller ActivityBot
(#32500) and also the Shield-Bot (for Arduino,
#130-35000) include 5-cell battery packs. To use
the Tank Tread Kit with these robots, omit the
mounting screw that would go in the chassis’ top
rear slot when mounting the side panels. This may
cause slightly more flex in the panels.
Boe-Bot Li-Ion Pack-Charger (#28988) — The
Tank Tread Kit may be used with care. Un-mount
the Pack-Charger board first. When moving the
servos to outside-mount position, be sure to re-
mount with the nuts on the outside. When
mounting each side panel, only use the upper rear
slot in the chassis, and install with the nut on the
outside. Omit the screw that would go into the
chassis’ lower rear slot.Re-install the Pack-Charger
last. Note that the extra weight of the Li-Ion
batteries may cause the robot to stand on its back
treads at times; this can be solved by adding a
counterweight on top of the chassis just under the
breadboard area.
Crawler Legs Kit (#30055) — These cannot be
used at the same time as the Tank Treads, since
both kits attach to the robot’s servos.
Line Follower Kits (#28108 & #28034) —
These are compatible not compatible as-is, since
the Tank Treads side panels raise the chassis (and
therefore the line follower sensors) higher off the
surface than required for optimal performance.
PING))) Mounting Bracket Kit (570-28015) —
This kit is compatible (and quite fun) with the Tank
Tread Kit. Note that the extra weight may cause the
robot to stand on its front treads at times; this can
be fixed by adding a small counterweight on top of
the chassis above the tail wheel area.
Speed and Maneuvers — Your robot’s normal
servo control code can be used with the Tank Tread
Kit. However, the treads cause a lower ground
speed than wheels. Therefore, the code routines to
execute maneuvers need to last longer to go the
same distance or to turn to the same angle.
Turning — Care must be taken when making all
but gradual arcs for turns. To turn sharp right or
left, rotate the servos in opposite directions so the
robot pivots around its center. This will help the
treads stay in place. If your program keeps one
motor still while rotating the other one to make a
turn, the sideways pressure on the staying-still
tread may cause the tread to slip off of its wheels,
especially on rough, soft surfaces.
ActivityBot abdrive.h library — To “turn off” the
abdrive library’s expectation encoder feedback with
a calibrated ActivityBot, use drive_feedback(0); at
the beginning of the main routine. Then, your
program may still use the functions drive_speed,
drive_ramp, and drive_rampStep. Do not use
drive_goto. Ramping into and out of high-speed
maneuvers is recommended.
Examples — Check for application examples and
code from www.parallax.com; search “28106.”
Copyright © Parallax Inc. Tank Treads Kit (#28106) v3.0 2/20/2014 Page 4 of 4

Other manuals for 28106

1

This manual suits for next models

1

Other Parallax Robotics manuals

Parallax Boe-Bot User manual

Parallax

Parallax Boe-Bot User manual

Parallax Penguin User manual

Parallax

Parallax Penguin User manual

Parallax SumoBot WX Board User manual

Parallax

Parallax SumoBot WX Board User manual

Parallax S2 User guide

Parallax

Parallax S2 User guide

Parallax Boe-Bot User manual

Parallax

Parallax Boe-Bot User manual

Parallax 28195 User manual

Parallax

Parallax 28195 User manual

Parallax 28106 User manual

Parallax

Parallax 28106 User manual

Parallax Boe-Bot Tank Treads User manual

Parallax

Parallax Boe-Bot Tank Treads User manual

Parallax 28985 User manual

Parallax

Parallax 28985 User manual

Parallax 28990 User manual

Parallax

Parallax 28990 User manual

Parallax Stingray User manual

Parallax

Parallax Stingray User manual

Parallax S2 User guide

Parallax

Parallax S2 User guide

Parallax QuadRover User manual

Parallax

Parallax QuadRover User manual

Parallax 30055 User manual

Parallax

Parallax 30055 User manual

Parallax Boe-Bot Whisker Kit User manual

Parallax

Parallax Boe-Bot Whisker Kit User manual

Popular Robotics manuals by other brands

SeaBotix Generation 2 Service & maintenance procedures manual

SeaBotix

SeaBotix Generation 2 Service & maintenance procedures manual

Toshiba THP700-IP instruction manual

Toshiba

Toshiba THP700-IP instruction manual

Asyril Asycube Series quick start

Asyril

Asyril Asycube Series quick start

Mecademic Meca500 (R3) Programming manual

Mecademic

Mecademic Meca500 (R3) Programming manual

Boston Acoustics SPOT Instructions for use

Boston Acoustics

Boston Acoustics SPOT Instructions for use

Evil Mad Scientist WaterColorBot v 2.0 quick start guide

Evil Mad Scientist

Evil Mad Scientist WaterColorBot v 2.0 quick start guide

ABB CRB 1300 product manual

ABB

ABB CRB 1300 product manual

YASKAWA MOTOMAN-MH600 instructions

YASKAWA

YASKAWA MOTOMAN-MH600 instructions

Sony Aibo ERS-7 brochure

Sony

Sony Aibo ERS-7 brochure

Microbric Spiderbot Assembly instructions

Microbric

Microbric Spiderbot Assembly instructions

Staubli RobiFix-S35-MTB Assembly instructions

Staubli

Staubli RobiFix-S35-MTB Assembly instructions

Manley Kitty operating manual

Manley

Manley Kitty operating manual

sparkfun JetBot AI Kit V2.0 Assembly guide

sparkfun

sparkfun JetBot AI Kit V2.0 Assembly guide

Omron i4H user manual

Omron

Omron i4H user manual

Omron CR-UGD4MINI Series user manual

Omron

Omron CR-UGD4MINI Series user manual

Barrett WAM Wrist Maintenance Guide

Barrett

Barrett WAM Wrist Maintenance Guide

WEISS ROBOTICS GRIPKIT CR EASY manual

WEISS ROBOTICS

WEISS ROBOTICS GRIPKIT CR EASY manual

Flybrix Quad Starter Kit Building and flying instructions

Flybrix

Flybrix Quad Starter Kit Building and flying instructions

manuals.online logo
manuals.online logoBrands
  • About & Mission
  • Contact us
  • Privacy Policy
  • Terms and Conditions

Copyright 2025 Manuals.Online. All Rights Reserved.