manuals.online logo
Brands
  1. Home
  2. •
  3. Brands
  4. •
  5. ROBOTIQ
  6. •
  7. Robotics
  8. •
  9. ROBOTIQ EPick User manual

ROBOTIQ EPick User manual

1.WHAT IS SUPPLIED?
Vacuum generator
I/O coupling kit
- Screws kit
- Micro-USB to USB cable
- 16 Gb USB stick
Suction cups
KIT1-W
KIT2-W
KIT4-W
Required hardware
2.TOOLS YOU NEED
4.MOUNTING
3.GET THE LATEST
THANK YOU FOR
CHOOSING ROBOTIQ
4mm
hex key
1. Have a USB stick that contains the .urcap file (see
section 3, “Get the latest”).
2. Insert the USB stick in the robot teach pendant.
3. Tap Setup Robot > URCaps Setup.
4. Tap .
5. Open UCH-X.X.X.urcap.
6. Tap Restart to activate the URCap.
7. The Wrist Connection toolbar will display shortly after
completing the installation.
This step-by-step guide will allow you to install and use
your EPick vacuum gripper on Universal Robots CB
Series robots fitted with a Robotiq I/O coupling.
Standard upon delivery of
VAC-CB-UR-EPICK-KITX-W
(VAC-GRP-EPICK)
(IO-CPL-UR-CB-KIT)
(1 SUCTION CUP)
BEFORE OPERATING THE EPICK VACUUM GRIPPER, PLEASE
READ YOUR INSTRUCTION MANUAL.
!
(2 SUCTION CUPS)
(4 SUCTION CUPS)
6.INSTALLING SOFTWARE
DOWNLOADING THE INSTRUCTION MANUAL
1. Select brand > Universal Robots > Vacuum
Grippers > Documents > View online or Download
PDF.
For easier mounting, move the robot tool flange
to make it point upwards.
MOUNTING THE I/O COUPLING
1. Insert the provided dowel pin into the tool flange. It
should fit tightly on the flange, and loosely on the
coupling.
2. Mount the I/O Coupling on the tool flange of the
robot. Align with the provided dowel pin.
3. Secure the I/O Coupling on the tool flange with four
M6 screws and toothlock washers, using a 4mm hex key.
MOUNTING THE EPICK ON THE I/O COUPLING
1. Put the EPick on the coupling.
2. Secure the EPick to the coupling with four M5 screws
and toothlock washers, using a 4mm hex key.
3. Plug coupling connector into tool connector.
Visit: support.robotiq.com
DOWNLOADING THE URCAP
1. Select brand > Universal Robots > Vacuum Grippers
> Software > I/O Coupling Software.
2. Select DOWNLOAD ZIP.
3. Save the ZIP file UCH-X.X.X to a USB stick.
5. CONFIGURING
On the teach pendant, select the I/O tab. Tool ouput
must be set to 24 volts (see figure 2).
For more details on configuring coupling
presets, see section 7, “Configuring Presets”.
Figure 2. Set tool output to 24 volts.
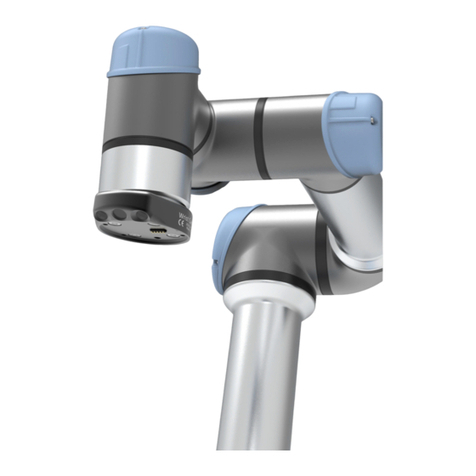
Figure 1. EPick wrist connection kit
exploded view, on robot arm.
Figure 3. The Wrist Connection toolbar.
suction cup
vacuum generator
I/O coupling
dowel pin
coupling
connector
M6 screws
M5 screws
CAREFUL !
FRAGILE PINS
tool connector
8. WRIST CONNECTION
TOOLBAR
[email protected]
T: 1.418.380.2788 ext. 3
July 2019
V1.0
support.robotiq.com
This product is under a 1-year warranty.
Refer to your product instruction manual for details.
9. PROGRAMMING
WITH THE NODE
Wrist Connection Kit
for CB Series
Universal Robots
X-990083-A
Automatic
release mode
Min. vac: 10%
Max. vac: 20%
P
RESET 4PRESET 3
Automatic
grip mode
P
RESET 1 PRESET 2
I/O COUPLING DEFAULT PRESETS
7. CONFIGURING PRESETS
LINKING WITH THE I/O COUPLING
The I/O coupling must be mounted on the tool
flange before proceeding.
1. Connect the micro-USB cable (type B) into the I/O
coupling micro-USB port.
2. Connect the cable to a computer USB port.
3. Configure coupling using the Robotiq User Interface.
CONFIGURING VIA THE ROBOTIQ USER INTERFACE
1. Visit support.robotiq.com.
2. Go to Select brand > Universal Robots > Vacuum
Grippers > Software > Robotiq User Interface.
3. Select Installer > Download ZIP.
4. Run the Robotiq User Interface.
5. Select IO Coupling > Auto Connect.
6. From the dropdown list, select Vacuum Gripper.
7. If required, modify default presets, then click Save
presets configuration to I/O Coupling.
For more details, refer to the EPick instruction manual.
USING THE WRIST CONNECTION NODE
1. From your robot program, go to Structure >
URCaps, and insert a Wrist Connection node.
2. Go to Command, and select the applicable preset.
Vacuum Gripper
1. Using the teach pendant, tap the
Wrist Connection button to expand the
Wrist Connection toolbar.
2. Tap any preset button to test its behavior.
https://robotiq.com/support
QUICK START GUIDE
Continuous
grip mode
EPICK
Figure 4. The Wrist Connection toolbar contains four presets.
https://robotiq.com/support

Other manuals for EPick

6

Other ROBOTIQ Robotics manuals

ROBOTIQ 2-Finger Adaptive Robot Gripper - 200 User manual

ROBOTIQ

ROBOTIQ 2-Finger Adaptive Robot Gripper - 200 User manual

ROBOTIQ AirPick Operation and maintenance manual

ROBOTIQ

ROBOTIQ AirPick Operation and maintenance manual

ROBOTIQ AX10 User manual

ROBOTIQ

ROBOTIQ AX10 User manual

ROBOTIQ HAND-E User manual

ROBOTIQ

ROBOTIQ HAND-E User manual

ROBOTIQ Gripper User manual

ROBOTIQ

ROBOTIQ Gripper User manual

ROBOTIQ EPick Operation and maintenance manual

ROBOTIQ

ROBOTIQ EPick Operation and maintenance manual

ROBOTIQ HAND-E User manual

ROBOTIQ

ROBOTIQ HAND-E User manual

ROBOTIQ 2F-85 Operation and maintenance manual

ROBOTIQ

ROBOTIQ 2F-85 Operation and maintenance manual

ROBOTIQ HAND-E User manual

ROBOTIQ

ROBOTIQ HAND-E User manual

ROBOTIQ Wrist Camera User manual

ROBOTIQ

ROBOTIQ Wrist Camera User manual

ROBOTIQ AirPick Vacuum Gripper User manual

ROBOTIQ

ROBOTIQ AirPick Vacuum Gripper User manual

ROBOTIQ UR3 User manual

ROBOTIQ

ROBOTIQ UR3 User manual

ROBOTIQ 2F-85 User manual

ROBOTIQ

ROBOTIQ 2F-85 User manual

ROBOTIQ S Model User manual

ROBOTIQ

ROBOTIQ S Model User manual

ROBOTIQ PE Series Operation and maintenance manual

ROBOTIQ

ROBOTIQ PE Series Operation and maintenance manual

ROBOTIQ PE Series User manual

ROBOTIQ

ROBOTIQ PE Series User manual

ROBOTIQ AIR PICK User manual

ROBOTIQ

ROBOTIQ AIR PICK User manual

ROBOTIQ HAND-E User manual

ROBOTIQ

ROBOTIQ HAND-E User manual

ROBOTIQ 2-Finger 85 User manual

ROBOTIQ

ROBOTIQ 2-Finger 85 User manual

ROBOTIQ HAND-E User manual

ROBOTIQ

ROBOTIQ HAND-E User manual

ROBOTIQ AX Series User manual

ROBOTIQ

ROBOTIQ AX Series User manual

ROBOTIQ HAND-E User manual

ROBOTIQ

ROBOTIQ HAND-E User manual

ROBOTIQ AX Series User manual

ROBOTIQ

ROBOTIQ AX Series User manual

ROBOTIQ PE20 User manual

ROBOTIQ

ROBOTIQ PE20 User manual

Popular Robotics manuals by other brands

UBTECH Jimu Robot Series user manual

UBTECH

UBTECH Jimu Robot Series user manual

4M KidzRobotix BUBBLE ROBOT instruction manual

4M

4M KidzRobotix BUBBLE ROBOT instruction manual

Cebekit C-9875 manual

Cebekit

Cebekit C-9875 manual

Robokits TrackBot RKI-1247 Assembly guide and user manual

Robokits

Robokits TrackBot RKI-1247 Assembly guide and user manual

ABB IRC5 with T10 operating manual

ABB

ABB IRC5 with T10 operating manual

Pudu SwiftBot SWFD01 Operation guide

Pudu

Pudu SwiftBot SWFD01 Operation guide

Motoman DA20C MANIPULATOR MANUAL

Motoman

Motoman DA20C MANIPULATOR MANUAL

Mitsubishi Electric 4F-FS001-W200 instruction manual

Mitsubishi Electric

Mitsubishi Electric 4F-FS001-W200 instruction manual

Newgy Ball Catch Net II ASSEMBLY & USE

Newgy

Newgy Ball Catch Net II ASSEMBLY & USE

SunFounder PiArm manual

SunFounder

SunFounder PiArm manual

Waveshare Alphabot2 user manual

Waveshare

Waveshare Alphabot2 user manual

MIR 500 user guide

MIR

MIR 500 user guide

Universal Robots UR10 user manual

Universal Robots

Universal Robots UR10 user manual

CAMDUSTER V2203 installation manual

CAMDUSTER

CAMDUSTER V2203 installation manual

Artec Robo 2.0 Fire Fighter manual

Artec

Artec Robo 2.0 Fire Fighter manual

YASKAWA Motoman XRC Function manual

YASKAWA

YASKAWA Motoman XRC Function manual

Tecnospiro ROSCAMAT-500 Series Operator's manual

Tecnospiro

Tecnospiro ROSCAMAT-500 Series Operator's manual

Xtrem Bots SOPHIE instruction manual

Xtrem Bots

Xtrem Bots SOPHIE instruction manual

manuals.online logo
manuals.online logoBrands
  • About & Mission
  • Contact us
  • Privacy Policy
  • Terms and Conditions

Copyright 2025 Manuals.Online. All Rights Reserved.