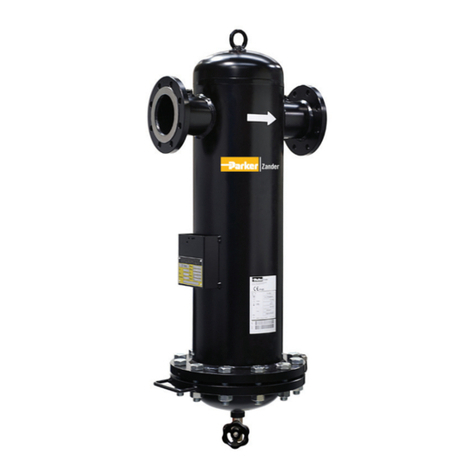
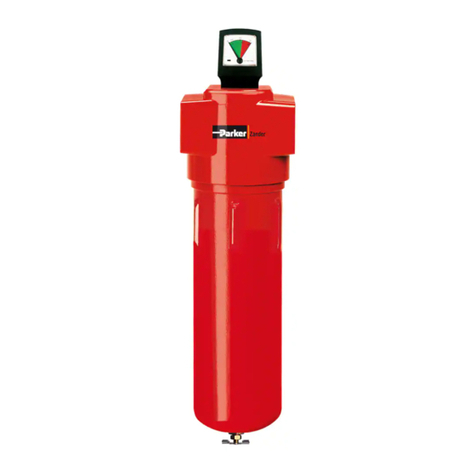
Parker Zander PURGAS TGA1 Series User manual

Microfilter for
Technical Gases
TGA 104–118, 16–50 bar
TGH 104–118, 100–450 bar
TGS 214–232, 16–100 bar
TGE 308–326, 16–100 bar
Operating Instructions
Revision 01—2016/ EN
398H271902

2 TG-Filter_EN_01—2016
Type Label
Attach type label here
Heed the data on the type label and keep it readable at all times.
Note:
The operator is responsible if an acceptance of the overall system as
per ATEX should be required.

TG-Filter_EN_01—2016 3
Table of contents
General information.............................................................................................4
For your own safety.............................................................................................6
Assembly Drawings ............................................................................................9
Storing filters and filter elements ....................................................................13
Filter installation................................................................................................14
Maintenance intervals and work......................................................................16
Correcting faults................................................................................................22
Technical information .......................................................................................23
Spare parts and options ...................................................................................25
Declaration of Conformity ................................................................................26
Manufacturer´s Declaration..............................................................................27

4 TG-Filter_EN_01—2016
General information
Warranty notes
In the following cases, the warranty shall be void:
If corrosion and malfunctions occur due to aggressive substances in the gas
and in the environment.
If the filter is not used in accordance with its intended use.
If the filter is not serviced as specified in these operating instructions.
If spare parts not matching the quality of genuine parts are used.
If the filter is operated with other media than those indicated on the type
label.
If modifications not approved by the manufacturer are made to the filter.
When an ATEX-compliant filter was not properly integrated in the local
equipotential bonding system.
Notes on these operating instructions
The present operating instructions contain important information on the safe and
economic operation of filter series TGA1, TGH1, TGS2 and TGE3 for technical
gases.
Layout conventions
►Work steps that you have to carry out in the sequence stated are marked by
black triangles.
Lists are marked by a small box.
This symbol accompanies information relevant to explosion protection as per
ATEX (94/9/EEC).
Warning!
These safety notes warn against damage to machines or equipment and
help you to avoid such damage.
Danger!
These danger notes with a grey background warn against personal injury
and/or danger to life and limb; danger notes help you to avoid dangerous
or life-threatening situations for yourself and/or third parties.
Target group of these operating instructions
The present operating instructions address all persons who work with and on the
filter. We assume that these persons are specialized staff, e.g. fitters or
electricians or appropriately instructed staff.
We assume the following:
There are appropriate operating instructions for the application intended by
the operator.

TG-Filter_EN_01—2016 5
The staff has been instructed how to handle the used gas and is aware of the
involved risks and the general danger prevention measures.
The staff have basic experience in handling pneumatic devices.
Notes on handling operating instructions
These operating instructions must be continuously available at the site where the
filter is used. We recommend to prepare a copy and to keep the same in a safe
and freely accessible place next to the filter. Keep the original document in a safe
place.

6 TG-Filter_EN_01—2016
For your own safety
Note:
When carrying out any work on the filters comply with all applicable
national accident prevention regulations!
Intended use
A filter of the series described here must be exclusively used for filtering the gas
noted on the filter’s type label. The technical data specified on the type plate
must be observed and complied with. Any operation at conditions other than
those indicated on the type label is regarded as not intended. Please contact the
manufacturer if you plan to use the filter for gases other than those indicated on
the type label.
ATEX-compliant filters as per CE Ex II 2G marking must be operated in zone 1
and zone 2 only.
ATEX-compliant filters are conductive. The operator must make sure
conductivity is maintained under all circumstances. He must also make sure
that the conductivity is not impaired by any attachment parts. The conductivity
must be tested and approved after each service assignment.
To ensure proper preliminary filtration, a strainer filter must be installed upstream
of any C, CF or CSF filter element. Operation of C, CF or CSF filter elements is
regarded as not intended if these conditions are not met.
Obvious improper use
Danger when explosive gases are filtered!
Filters not marked with an ATEX code on the type label must not be used
to filter explosive gases or for operation in an explosive environment.
Impermissible maloperation
The filters described here must not be used for:
filtering instable gases (e.g. acetylene).
filtering liquids
conveying solid, dustlike goods.

TG-Filter_EN_01—2016 7
Hazard areas on the filter
Hazard area
Symbol in
operating
instructions
Warning against overpressure
The entire filter is pressurised during operation. Relieve all pressure before
starting any work on the filter.
Warning against explosive atmosphere/explosive gas
Only filters with the appropriate ATEX code must be used in a potentially
explosive environment and for filtering explosive gases. The filters must be
connected to the customer's equipotential bonding system (local equipotential
bonding).
Beware of critical gases
The filtered gas could be hazardous. Keep appropriate notes on hazardous
substances at hand and heed them when working with critical gases.
Beware of hot surfaces
The filtered gas can be very hot and thus heat up the filter's surfaces. Do not
touch hot surfaces. Wait until the surfaces have cooled down before starting
work on the filter.
Safety notes on specific operating phases
Notes on critical gases
All explosive, flammable and poisonous gases of fluid groups 1+2 as per
pressure equipment directive 97/23/EC are referred to as critical gases.
The release of a critical gas can pose a considerable risk to man and
environment and must therefore be prevented by all means:
—The operator must implement appropriate safety precautions.
—Flush the respective pipe section and the filter with an inert gas prior to
all work that could result in critical gas being released. Then depressurise
the filter and carry out the work.
—Verify the absence of an explosive atmosphere (in line with the
operator’s Directives); if necessary, cancel the EX zone first. Start work
only then..
Make sure to heed the notes on hazardous substances for the used gas
when filtering a critical gas!

8 TG-Filter_EN_01—2016
Notes on transportation and storage
The transportation — in particular of larger build type filters — may be carried
out by specialist personnel only.
Filters damaged during transportation must not be installed.
Store filters, filter elements and cartridges in the unopened original packing in
a clean, dry place until they are used.
Notes on filter operation
Do not perform any unapproved conversions and modifications on the filters.
Non-approved modifications will endanger the operational safety and may
cause damage or personal injury.
For ATEX-compliant filters:
—Filters for explosive gases as per ATEX must be earthed. Establish an
appropriate local equipotential bonding. Test and document the
conductivity.
—For installation under explosion group IIC:
Make sure when attaching decals or other markings that the area they
cover does not exceed a total contiguous area of 20 cm2!
—Make sure when painting that the permissible coat thickness does not
exceed the limits stipulated for the area of application.
—The control of electronic accessories for ATEX-compliant filters must be
intrinsically safe.
Avoid sudden pressure fluctuations on pressure build-up and de-
pressurization. If the pressure builds up or drops, too quickly, this may cause
damage to the filter.
When using accessories with an external power supply, there is a hazard
from electrical voltage. Heed the notes given in the operating instructions for
the accessories. Work on electrical components only when they are
deenergised.
Notes on maintenance
Always maintain the prescribed service intervals. If these are not complied
with, the filter may not function correctly and the manufacturer does not
accept any liability whatever for any possible consequences.
Repairs and maintenance should be carried out by specialist personnel only.
Use only suitable tools when working in an explosive environment.
Notes on disassembly and disposal
Flush the entire system, including the filter, with inert gas before
disassembling filters used for filtering critical gases. Depressurise and
disassemble the filter only then.
The filter housing and elements might be contaminated by substances held
back in the filter. Filters used for the filtering of critical gases might contain
explosive, flammable or poisonous substances. Therefore always read the
material safety data sheet of the respective gas. Dispose of all components
of the filter according to the applicable statutory regulations.

TG-Filter_EN_01—2016 9
Assembly Drawings
TGA 104–118, 16 bar and 25–50 bar
Item Description
Exploded view
1 Locking screw
2 Upper housing
3 Filter element O-ring
4 Housing O-ring
5 Threaded rod
6 Filter element
7 Lower housing
8 16 bar Manual drain HV01-TG
— 25–50 bar: Manual drain EV05-TG
— 16 bar ATEX:
Manual drain EV05-TG
Optional
A Differential pressure gauge
HZD80/50RTGG with adapter block
B Earthing lugs
(for ATEX compliant filters)
— Condensate drain 11LD
(16–25 bar)
Total view

10 TG-Filter_EN_01—2016
TGH 104–118, 100—450 bar
Item Description
Exploded view
1 Locking screw
2 O-ring
3 Upper housing
4 Threaded rod
5 Filter element O-ring
6 Filter element
7 Housing O-ring
8 Lower housing
9 Double nipple
10 Manual drain EV05-TG
Optional
ADifferential pressure gauge
HZD80/350RTGG
BEarthing lugs
(for ATEX compliant filters)
Total view

TG-Filter_EN_01—2016 11
TGS 214–232, 16 bar
Item Description
Exploded view
1 Upper housing
2 Flat seal, housing
3 Filter element
4 Manual drain
EV05-TG through EV08-TG
5 Lower housing
Optional
A Differential pressure gauge
HZD80/50RTGF with
connection pipes
B Earthing lug and connection
bore (only for ATEX-
compliant filters)
— Condensate drain 11LD
(up to TGS 218, 16–25 bar)
Total view

12 TG-Filter_EN_01—2016
TGE 308–326, 16–100 bar
Item Description
Explosionsdarstellung
1 Locking screw
2 Upper housing
3 Filter element
4 Housing O-ring
5 Lower housing
6 Lock ring
7 Double nipple
8 Manual drain EV05-TG
Optional
A Differential pressure gauge
HZD80/50RTGS with connection
pipes
B Earthing lug (only for ATEX-
compliant filters)
— Condensate drain 11LD
(16–25 bar)
Total view

TG-Filter_EN_01—2016 13
Storing filters and filter elements
The storage space must meet the following conditions when the filter is to be
stored for a longer period:
The filter must not be stored out of doors.
The storage space must be dry.
The storage space must be free of dust, or the filter must be packed
dustproof.
The storage space must feature an ambient temperature of at least +1 °C.
Caution:
When you want to store the filter for a longer period (e.g. several months),
you must check the threads for well running from time to time to prevent
corrosion (see page 21).
Storing filter elements and cartridges
►Store filters and cartridges in the unopened original packing until they are
used.
For storage space requirements, see the previous section.

14 TG-Filter_EN_01—2016
Filter installation
The filters are supplied in a ready to operate condition and can be installed
directly into the pipe system. To prevent transport damage, any ordered options
come separately packed. These accessories must be fitted to the filter before
commissioning and in accordance with the respective instructions supplied.
Also heed the information provided in the ancillary documents coming with the
accessories when installing ATEX-compliant accessories!
The control of electronic accessories for ATEX-compliant filters must be
intrinsically safe.
Requirements and preparatory activities
As a rule, the filters should always be used in the pipe system at the point
with the lowest temperature.
Ensure that the pipeline system is free of any contamination and clean it
before installing the filter, if necessary.
To ensure larger particles are safely trapped, a suitable strainer filter must be
installed upstream of any C, CF or CSF filter element.
A safety device for maintaining the maximum working pressure and the
permissible gas temperature must be available. This safety device must
prevent that limit values are exceeded.
A suitable pressure relief device and a condensate drain must be installed for
the filter. This safety device must prevent critical gas from escaping into the
atmosphere.
Danger due to release of a critical gas!
The release of a critical (explosive, flammable, poisonous) gas from the
network can constitute a considerable risk for man and environment.
Therefore heed the following before working on filters for critical gases
— flush the pipe section in question with inert gas
— have the notes on hazardous substances for the used gas ready
— take appropriate protection measures
— verify the absence of an explosive atmosphere
Installation
►Before installing the filter:
—flush the pipe section in question with inert gas if necessary
—and depressurise the system.
►Check filter for possible transport damage. Do not fit a damaged filter.
►If necessary, fit a bracket or pipe support. Construct the support device such
that it can bear the weight of a filter completely filled with liquid.
►Heed the flow direction when installing the filter in the pipeline! The gas must
flow through the filter in the direction of the arrow on the upper housing only.

TG-Filter_EN_01—2016 15
►The filter must always be fitted vertically.
►Ensure that there is sufficient space below the filter so it can be easily
disassembled (see dimension D in the Technical Data).
►For ATEX-compliant filters:
—Filters for explosive gases as per ATEX must be earthed. For this
purpose, the filters are fitted with earthing lugs ex factory (see also the
overview drawings). Establish an appropriate local equipotential
bonding. Test and document the conductivity.
—Make sure when attaching decals or other markings that the area they
cover does not exceed a total contiguous area of 20 cm2!
—Make sure when painting that the permissible coat thickness does not
exceed the limits stipulated for the area of application.
►When installing differential pressure gauge HZDE80/...:
Establish electrical connection.
►Re-pressurize pipe section and check for leaks.
When installing a filter with TKM or TKA cartridge
Beware of damage due to wrong flow direction!
Heed the flow direction when installing the filter in the pipeline! The gas
must flow through the filter in the direction of the arrow on the upper
housing only. The intended flow direction for a cartridge is from bottom to
top.
A reversed air flow through the cartridge can damage the cartridge.
►Also heed the general information on filter installation in the previous
“Installation” section.
►Install a filter with cartridge so that the gas flow is from bottom to top.
Wear debris can exit from the cartridge, contaminate the downstream gas
network or degrade the gas quality.
►Prevent any contamination of the downstream gas network by installing a
suitable particle filter.

16 TG-Filter_EN_01—2016
Maintenance intervals and work
Hazard due to a sudden release of pressure!
Never remove any parts of the filter, or manipulate the same in any way,
for as long as the filter is still pressurised! A sudden escape of pressure
may cause serious injuries.
Depressurise the filter before carrying out any work on the filter.
Danger due to release of a critical gas!
The release of a critical (explosive, flammable, poisonous) gas from the
network can constitute a considerable risk for man and environment.
Therefore heed the following before working on filters for critical gases
— flush the pipe section in question with inert gas
— have the notes on hazardous substances for the used gas ready
— take appropriate protection measures
— verify the absence of an explosive atmosphere
Maintenance intervals
Maintenance interval
Component/series Action 1 2 3 4 5
Manual drain valve Drain condensate x
Entire filter Clean x
Earthing lugs Retighten x
TGA1, TGH1, TGE3 series:
Housing
Check well running of
threads x
S, P, C, CF, CSF, HTNX, HTCR, PL Replace the filter element x
Housing Replace O-ring or flat seal x
TGA1, TGH1 series:
TKA, TKM, CS, OX, SG cartridge Renew cartridge x
1 = Daily
2 = Weekly
3 = Every 6 months
4 = Every year (regardless of operating hours), at the latest with a
differential pressure of 0.35 bar (0.6–0.8 bar for a high pressure filter)
5 = Depending on the load or to be determined by measuring

TG-Filter_EN_01—2016 17
Maintenance tasks
Preparations
Make the following preparations before performing maintenance on filters.
►When critical gases are fed:
Flush the pipe section in question and the filter with inert gas.
►Verify the absence of an explosive atmosphere (in line with the operator’s
Directives); if necessary, cancel the EX zone first. Start work only then.
►All gases:
—Block gas supply to the filter.
—Depressurise the filter housing. Make sure the pressure has been
positively relieved.
—Allow filter to cool down.
Start work only then.
Drain condensate
Draining may be necessary several times a day, depending on the amount of
condensate produced.
►Take appropriate measures to prevent the gas from escaping into the
atmosphere.
►Drain the collected condensate at regular intervals and properly dispose of it.
Clean filter
ATEX-compliant filters
Dust that has collected on the filter can pose a potential risk. It is therefore vital
to regularly clean the filter. The cleaning interval depends on the dust
concentration in the ambient air. The higher the dust concentration, the more
frequently must the filter be cleaned.
Beware of static charges!
Never use dry cloths to clean ATEX-compliant filters! A static charge
could build up due to the friction. This could represent an ignition source.
Therefore: Make sure to clean the filter with a moist cloth only!
►Clean the filter with a moist cloth at regular intervals to prevent the
formation of hazardous dust agglomerations.
►Moisten the cloth with water only, wring out thoroughly, do not use any
detergents!
Filters not intended for an ATEX environment
►Clean the filter with a moist cloth once a week.
►Moisten the cloth with water only, wring out thoroughly, do not use any
detergents!

18 TG-Filter_EN_01—2016
Retighten the earthing lugs onATEX-compliant filters
The earthing lugs on ATEX-compliant filters can loosen over the time. The
conductivity may then be impaired.
►Tighten the earthing lugs every 6 months.
Replacing filter element and housing O-ring
Replace the filter element every year, but at the latest with a differential pressure
of 0.35 bar (0.6–0.8 bar for a high pressure filter). Also replace the housing O-
ring.
Beware of damage due to inexpert handling!
Never use unsuitable tools to open and close the filter housings. Never
apply the tool to the thread area. The exerted force could crush the
thread; it would then be impossible to open the filter again.
Use a suitable open-ended spanner to open and close the filter if possible.
Apply the open-ended spanner to the square at the housing bottom. Use a
similarly suitable tool, e.g. a strap wrench if an open-ended spanner
cannot be used. Apply the tool clearly below the thread.
TGA and TGH filters
►Make the same preparations as described in section “Preparations” on
page 17.
►Unscrew the lower housing and remove it.
►Unscrew the filter element with the O-ring and discard it.
►Discard the housing O-ring.
►Insert a new filter element with O-ring and hand-
tighten the filter element.
►Insert a new housing O-ring.
►Apply a thin coat of grease on the housing threads
before assembly if necessary. Use only TG 1 thread
grease unless any other grease has been agreed
upon in the order!
►Make sure during assembly that
—the O-rings are properly seated
—the grease does not come into contact with O-
rings and sealing surfaces.
Both housing parts have marking arrows.
►Connect both housing parts again and hand-tighten them until the marking
arrows match.
►Close the manual drain valve again.

TG-Filter_EN_01—2016 19
►For ATEX-compliant filters:
Ensure conductivity, test and document it.
►Check the housing for tightness.
TGS filters
Depending on its size, a filter housing can accommodate up to 10 filter elements.
The following description applies to a single filter element per housing, but
equally to several ones as well.
►Make the same preparations as described in
section “Preparations” on page 17.
►Unscrew and remove the nuts on the lower
housing.
►Remove the lower housing or swing it aside.
►Remove flat seal.
►Unscrew and remove the filter element.
►Insert a new filter element with O-ring and hand-
tighten the filter element.
►Insert new flat seal.
►Make sure the O-ring and the flat seal are properly
seated.
►Assemble upper and lower housing and tighten
the screws again.
►Close the manual drain valve again.
►For ATEX-compliant filters:
Ensure conductivity, test and document it.
►Check the housing for tightness.

20 TG-Filter_EN_01—2016
TGE filters
►Make the same preparations as described in
section “Preparations” on page 17.
►Open the lock ring with a hook wrench and take
the lower housing out of the cap.
►Turn the filter element so that it is in release
position, using the click-lock device, and remove
the filter element.
►Remove the housing O-ring and replace it with a
new one.
►Insert new filter element and lock it in place.
►Apply a thin coat of grease on the housing threads
before assembly if necessary. Use only TG 1fn
thread grease unless any other grease has been
agreed upon in the order!
►Make sure during assembly that
—
the O-rings are properly seated
—
the grease does not come into contact with
O-rings and sealing surfaces.
►Insert the lower housing into the cap again and fasten it with the lock ring.
►For ATEX-compliant filters:
Ensure conductivity, test and document it.
►Check the housing for tightness.
Replacing the cartridge of TGAand TGH filters
Note on intervals:
The operating conditions of cartridges with their respective fillings are
very specific and differ with regard to application. It is therefore
impossible to recommend any fixed intervals.
It is safest to determine the necessary exchange by measuring.
Please contact an authorised laboratory or the manufacturer for this
purpose.
Unscrew the lower housing and remove it.
►Make the same preparations as described in section “Preparations” on
page 17.
►Unscrew the cartridge with the O-ring and discard it.
►Discard the housing O-ring.
►Insert a new cartridge with O-ring and hand-tighten the cartridge.
►Make sure the gas flows through the cartridge in the right direction (also see
the note on page 15).
►Insert a new housing O-ring.
►Apply a thin coat of grease on the housing threads before assembly if
necessary. Use only TG 1 thread grease unless any other grease has been
agreed upon in the order!
This manual suits for next models
7
Table of contents
Other Parker Zander Water Filtration System manuals
Popular Water Filtration System manuals by other brands

Omniaire
Omniaire 1000V Operation and maintenance manual

Waterwise
Waterwise Aclare Countertop installation instructions

VWR
VWR Puranity PU 15 System Quick reference guide

Sterling
Sterling QCRO-50-PUMP installation manual

Festo
Festo VABD B Series Assembly instructions

Crystal Quest
Crystal Quest Mega 1000 Installation and operation guide