Parker Smog-Hog PCN User manual

Smog-Hog®
Portable Electrostatic
Precipitator Owner’s Manual
Model PCN

SMOG-HOG Electrostatic Precipitator PCN Series
i
KNOW YOUR EQUIPMENT
READ THIS MANUAL FIRST.
Your Smog-Hog®PCN should provide many years of trouble-free service. This manual
will help you understand the operation of your PCN unit. It will also help you understand
how to maintain it in order to achieve top performance. For quick future reference, fill in
the system and filter information in the spaces below. Should you need assistance, call the
Parker customer service number shown below. To expedite your service, have the following
information available when contacting Parker.
Unit Order #: __________________________________________________________________
Unit Model #: __________________________________________________________________
Unit Serial #:___________________________________________________________________
System Accessories:
______________________________________________________________________________
______________________________________________________________________________
______________________________________________________________________________
Installation Date: _______________________________________________________________
Parker Hannifin Customer Service
1-800-343-4048

SMOG-HOG Electrostatic Precipitator PCN Series
ii
Table of Contents
Safety Precautions ................................................................................................... iii
1. Introduction ......................................................................................................... 1
1.1 Description and Operation ............................................................................ 1
1.2 Electrical Characteristics ............................................................................... 1
1.3 Specifications ................................................................................................ 1
2. Installation ............................................................................................................ 2
2.1. Packaging ..................................................................................................... 2
2.2 Inspection Note ............................................................................................. 2
2.3 Installing the Extraction Arm Assembly ......................................................... 2
3. Operation ............................................................................................................ 3
3.1 Turning the Unit On ....................................................................................... 3
3.2 Operating the Unit ......................................................................................... 3
4. Maintenance and Cleaning ................................................................................. 4
4.1 Cleaning Schedules ....................................................................................... 4
4.2 Component Cleaning ..................................................................................... 4
4.3 Periodic Maintenance .................................................................................... 5
4.4 Other Maintenance ........................................................................................ 5
5. Troubleshooting Guide......................................................................................... 6
5.1 How to Check High Voltage .......................................................................... 7
5.2 Checking for Ionizer High Voltage ................................................................. 7
5.3 Checking for Cell High Voltage ..................................................................... 7
5.4 Determining the Loss of High Voltage .......................................................... 8
5.5 Checking Air Movement (Blower and Drive) ................................................. 9
6. Replacement Parts............................................................................................... 9
6.1 Ordering Parts ............................................................................................... 9
6.2 Returning Parts .............................................................................................. 9
7. Troubleshooting Flowchart ................................................................................. 10
8. PCN Parts List..................................................................................................... 11
9. Wiring Diagram ................................................................................................... 12

SMOG-HOG Electrostatic Precipitator PCN Series
iii
! WARNING
SAFETY PRECAUTIONS
We have provided many important safety messages in this manual and on the PCN Electrostatic Precipitator.
Always read and obey all safety messages.
• Wear protective clothing and safety glasses when
handling collector components or servicing the unit.
• Use proper lifting and rigging equipment to install
your electronic precipitator.
• The electronic precipitator should be properly
grounded prior to servicing.
• Disconnect power before servicing.
• Replace all access panels before operating.
• Do not operate the unit with component doors open.
• Electrical connections should only be made by
qualified personnel and be in accordance with local
and national codes and regulations.
• Do not use in explosive atmospheres.
• Do not collect emissions which are explosive
• Use non flammable cleaners.
• Keep flammable materials and vapors, such as
gasoline, away from unit.
• The unit should be inspected frequently and
contaminants removed to prevent excessive
accumulation which may result in flash-over or fire
damage.
• Operate only in a safe and serviceable condition.
• Operating temperature to the air stream should not
exceed 120° F.
!
!DANGER
!WARNING
!CAUTION
CAUTION
This is the safety alert symbol.
This symbol alerts you to potential hazards that can kill or hurt you and others. All safety messages
will follow the safety alert symbol and the word “DANGER”, “WARNING”, or “CAUTION”.
These words mean:
Indicates a hazardous situation which, if not avoided,
will result in death or serious injury.
Indicates a potentially hazardous situation which, if not avoided,
could result in death or serious injury.
Indicates a potentially hazardous situation which, if not avoided,
may result in minor or moderate injury.
CAUTION used without the safety alert symbol indicates a potentially
hazardous situation which, if not avoided, may result in property damage.
IMPORTANT SAFETY INSTRUCTIONS
To reduce the risk of fire, electric shock, or injury when using your air cleaner, follow these basic precautions:
!

1
SMOG-HOG Electrostatic Precipitator PCN Series
COMBUSTIBLE DUST HAZARDS –
SMOG-HOG®and DUST-HOG®Pollution Control Systems
Pursuant to National Fire Protection Agency (NFPA) Standards, the owner/user is required to test their dust mixtures
to evaluate and understand potential combustion or deflagration hazards that may exist. In addition, NFPA standards
require the owner/user to perform and have record of a Dust Hazard Analysis (DHA) if there is potentially a combustible
material involved within or exposed to the process.
The DHA serves as a systematic review of the process to:
1) Identify where fires and explosions can occur;
2) Identify the potential causes and consequences, and;
3) Determine if existing and proposed safeguards are sufficient.
It is the responsibility of the owner/user to evaluate, interpret and document any associated risk in their process
including adherence and compliance to any and all applicable local, state and federal codes, standards, laws and
regulations.
It is the sole responsibility of the equipment owner/user of record to coordinate and perform sample material collection
and combustion/explosivity testing of any and all dust and material that will be extracted and filtered by the Air Pollution
Control (APC) filtration equipment and to notify Parker of the results prior to any discussion involving equipment
specification and solution recommendation. It is recommended to utilize a Certified Industrial Hygienist (CIH) or certified
safety expert that is properly trained, licensed and approved and to use a licensed and approved dust testing facility
for proper dust and material analysis, testing protocol and reporting procedures. A sample of testing facilities and list of
Industrial Hygiene (CIH) and other occupational and environmental health and safety (OEHS) consultants can be located
through AIHA (American Industrial Hygiene Association) website.
To minimize the risk of fire or explosion, user must ensure proper installation, operation and maintenance of Parker
equipment. Since application, installation, operation and maintenance are beyond the control of Parker, Parker disclaims
any liability or responsibility for damage from fires or explosions regardless of origin. Parker recommends that all APC
dust collection equipment, installation and application conform to any and all applicable local, state and federal
standards, codes, laws and regulations including the addition of appropriate fire or explosion protection systems
including but not limited to venting, mitigation, suppression and isolation when and where required. Installation of
Parker equipment should be by a licensed contractor that is also experienced in potential fire and explosion hazards
and adheres to related local, state and federal codes, standards, laws and regulations. Parker is not an expert nor
certified design consultant in relation to spark, fire or explosion mitigation including but not limited to detection,
mitigation, suppression and isolation pf combustible dusts and materials. Therefore, Parker recommends that any
industrial air filtration system recommendation, design or solution be reviewed, approved, stamped and signed by
an industry expert consultant in air filtration systems, combustible dust/materials or certified safety expert such as a
Certified Industrial Hygienist (CIH) or a Certified Professional Engineer (PE) who is a licensed and certified expert with
industrial filtration system design and application including adherence and compliance to any and all applicable local,
state and federal codes, standards, laws and regulations.
Pursuant to Parker’s Offer of Sale (terms and conditions) and by accepting the purchased equipment, Buyer and owner/
user agree to defend, indemnify, and hold harmless Parker, its successors, assignees, suppliers, shareholders, directors,
officers, employees, agents, and affiliated companies from all losses, costs, damages, demands, claims, liabilities, fines,
penalties or any other expenses (including attorneys’ fees, court costs, and expert fees) (collectively “losses”), caused or
contributed to in any way by Buyer or owner/user’s failure to follow these instructions and/or failure to properly install,
apply, operate, or maintain the equipment purchased from or supplied by Parker, or losses caused or contributed to in
any way by Buyer’s and owner/user’s failure to provide accurate information, specifications or dust explosivity values.

SMOG-HOG Electrostatic Precipitator PCN Series
Page intentionally left blank

3
SMOG-HOG Electrostatic Precipitator PCN Series
1. Introduction
1.1 Description and Operation
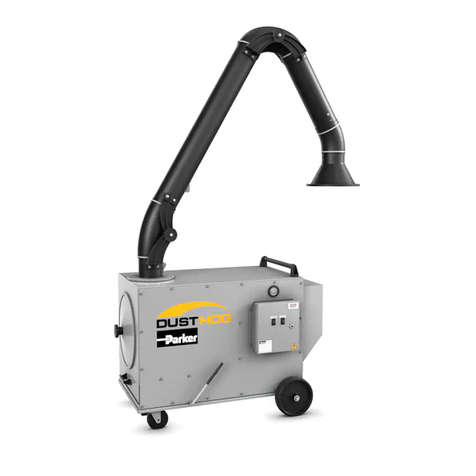
The Smog-Hog PCN is a portable electronic air cleaner designed to eliminate particulate as it is generated.
Contaminant is captured at its source by a unit-mounted hood, then conveyed through a duct network to
the precipitator where it is collected. Clean air is then re-circulated back to the work area.
As air approaches the precipitator, it passes though a reusable, aluminum mesh mechanical pre-filter
which aids air distribution and removes large particles.
Pre-filtered air then passes through an ionizer where particles are charged by corona discharge from
a series of small diameter charged tungsten wires centered between grounded plates. Particles then
pass through a collection cell, consisting of alternately charged and grounded parallel aluminum plates.
Charged plates at the same polarity as the charged particles repel the particles toward the grounded
plates which, in turn, attract the particles. Air next passes through a centrifugal blower where it is
exhausted vertically through an adjustable outlet grille, back to the work space.
An integrally mounted power pack converts 115 volt, single-phase AC power to the high voltage DC
required for ionizer and collection cell operation.
1.2 Electrical Characteristics
The unit is rated for 115 VAC (volts alternating current), single phase, 60 Hz operation, or 3 phase.
It has a 10´ power cord with grounded plug and internal high voltage wiring.
1.3 Specifications
Power Requirements 115V, v 1/2 HP single phase, 60 Hz*, 8.1 amps
115V, 1 HP, 12.7 amps
Precipitator Voltage Ionizer: 11,000 volts DC
Collection Cell: 6,000 volts DC
Motor 1⁄2 HP or 1 HP, totally enclosed
Weight 400 lbs. (181 Kg)
Overall Dimensions
(L”xW”xH”)
42˝x28˝x44˝
(107x71x112 cm)
Cabinet 16 gauge steel
Air Cleaning Capacity 1,000 CFM** (1699M3H)
Capture Distance 18˝ (45.7 cm) max. recommended
Swing Arm Reach 132˝, 360° radius
Duct 8˝ diameter x 7”, 10”, 12”
Hood Size 8˝ diameter
Wheels Two 8˝ (20.3 cm) wheels and two 5˝ (12.7 cm)
swivel locking casters
*50 Hz optional
** Factory set. Nominal airflow rating
208V 230V 460V 575V
1/2 HP 2.2 2.1 1.0 .9
1 HP 3.6 3.4 1.7 1.5
3 Phase

4
SMOG-HOG Electrostatic Precipitator PCN Series
2. Installation
2.1 Packaging
The Smog-Hog PCN is shipped in three containers. One consists of the main cabinet and operating
components. The second is the factory-assembled extraction arm with duct in place. The third is the hood.
2.2 Inspection Note
Upon receipt of your unit, check for any shipping damage. A damaged carton indicates that the
equipment may have received rough handling during shipping that may have caused possible
internal damage. Notify your delivery carrier and enter a claim if any damage is found.
2.3 Installing the Extraction Arm Assembly
The top of the PCN cabinet has eight 3/8-16 threaded inserts in the cabinet, and equally spaced
around the air entry opening. The mating extraction arm mounting flange is ready for installation, and
the mounting hardware (bolts, flat washers, and split ring lock washers) is in a plastic bag inside the
main cabinet. The extraction arm assembly is approximately 50 lbs, but because of its size, may be
best positioned by two people. The extraction arm support spring is in place on the assembly, with a
protective shipping retainer box strapped in place (these must be removed before operating the unit).
All pivot points are tightened slightly to keep arms from moving during handling. This assembly is
shipped for installation so that the arm nearest the cabinet is in the vertical position when the bearing
flange is being bolted down. With this arm extending up from the top of the cabinet, a ceiling height
of about 10´ is required for adequate clearance. Refer to the SA Installation and Owner’s Manual for
instructions on assembling the extraction arm or making field adjustments.
!CAUTION
Sharp pulls on the arm or hood should be avoided since damage to the arm components could result.

5
SMOG-HOG Electrostatic Precipitator PCN Series
3. Operation
Do not use the PCN where high concentrations of flammable materials may be present.
If in doubt, consult Parker.
3.1 Turning the Unit On
The PCN is provided with 10´ of pre-wired type 3-SJ electrical cord with a three-prong male plug.
To operate the unit:
1. Plug the unit into a grounded 115V/1/60 Hz electrical receptacle.
2. For 3-phase units please refer to wiring diagram.
3. Lock wheel casters on unit to secure location.
Do not attempt to move the PCN unit by pulling on the extraction arm or hood.
Use handles on the back of the unit to pull the PCN around the work area.
4. Turn the unit on by flipping the toggle switch to the “on” position. The indicator lamp should glow, and
the unit’s drive fan should rotate. If either of these do not function, refer to the Troubleshooting section
within this manual.
5. The unit is now ready for use.
3.2 Operating the Unit
The PCN moves 1,000 CFM of contaminated air away from the source of generation.
For good contaminant capture, a few simple guidelines apply:
1. Locate the unit, arm and hood in anticipation of the job(s) intended. Know the limitations of the unit
and the job.
2. Minimize the influence of cross drafts from outside air sources.
3. Position the hood slightly higher than the source, with the face of the hood approximately 45° from
horizontal. The hood shape is designed for high velocity pick-up. It should be located no further than
18˝ from the contaminant source.
!CAUTION
!CAUTION

6
SMOG-HOG Electrostatic Precipitator PCN Series
4. Maintenance and Cleaning
4.1 Cleaning Schedules
To maintain maximum efficiency, use the following suggested cleaning schedules:
1. Weld Smoke
• Weekly: Using compressed air, gently blow components with high velocity air.
Be careful not to damage plates.
• Monthly: Soak components using instructions outlined below. Collected contaminant varies greatly
from one application to another, so cleaning frequency should be monitored and adjusted to maintain
unit efficiency.
• The collecting pan should be emptied before dust reaches the top of the pan’s internal baffles.
Failure to do so will cause re-entrainment of previously collected dust into the airstream.
2. Oil Smoke
• Clean as required. When components become dirty, the indicator light will dim, and arcing of
components will become frequent. Smoke may become visible form the PCN exhaust. Soak cleaning
of components (see instructions below) at least every three months is recommended.
• The collecting pan should be emptied as required to prevent overflow.
4.2 Component Cleaning
1. Turn off the PCN and depress both push-to-test buttons to remove residual charge from the components.
2. Open the door and slide components out of the cabinet. If the collected particulate is dry, gently tap
the components to remove loose particles. Components can be cleaned by soaking in a hot solution
of industrial-grade cleaner that is safe for use with the aluminum components in the PCN.
It is extremely important to thoroughly wipe clean all high-voltage insulators whenever the components
are cleaned. Use a non-abrasive cloth to protect glaze on the ceramic insulators.
For inorganic (e.g., iron oxide from welding) residue removal, acidic-type cleaners with a pH from 1 to 1.5 are
most efficient. To clean organic (most petroleum-base oils) materials, alkaline base detergents with pH from
10 to 12 are effective. Consult your supplier for specific recommendations and application instructions.
Any cleaner must contain an aluminum inhibitor or be otherwise made safe for use with aluminum.
Do not use temperatures exceeding 160° F. Do not steam clean, as this may cause the aluminum
plates to warp. If detergent other than Smog-Hog brand is used, care must be taken to ensure that
it contains an inhibitor so that it does not attack the aluminum components.
Let the aluminum components soak for approximately 30 minutes, followed by agitation in the solution to
remove loosened dirt. If agitation is not possible, soak time should be increased to compensate.
3. After removing components from the detergent bath, immediately flush away any residue and rinse
thoroughly with hot water.
4. Shake off excess water and let components stand in vertical position until they are dry to the touch.
5. Re-install components into the PCN cabinet, close the door and turn unit on. If the unit crackles
excessively, or the indicator light fails to come on, open the access door and continue to run the
blower to allow the components to dry thoroughly.
!CAUTION

7
SMOG-HOG Electrostatic Precipitator PCN Series
4.3 Periodic Maintenance
1. At least every three months (or whenever components are removed for soak cleaning), wipe clean the
ionizer and collection cell contact springs and insulators located above the pre-filter. Clean out the
interior cabinet area.
2. With the PCN unplugged, brush clean all wiring connections at the power pack and switches.
3. Check for drive belt tension and wear. One half inch movement (with finger pressure) at the belt
mid-point indicates correct tension. Refer to Figure 1.
4.4 Other Maintenance
Instructions for replacing an ionizer wire:
1. Remove the damaged wire from each spring.
2. Replace spring if damaged.
3. Loop one end of the new wire over the bottom spring, pull down top spring with pliers and loop the
top end of the wire over the spring hook. Refer to Figure 2.
4. Release the spring gently. The wire is now taut and automatically centered.
Note: In the event replacement wire is not immediately available, remove broken wire and springs from
the assembly to allow operation until new parts can be installed.
The following section is for the use of trained service personnel only. The following procedures will
expose hazardous live and moving parts. Disconnect the air cleaner before proceeding.
!CAUTION
Figure 1
Motor/Blower Assembly
Figure 2
Ionizer Wire/Spring Installation

8
SMOG-HOG Electrostatic Precipitator PCN Series
5. Troubleshooting Guide
Tools Required
1. Screwdriver: 8˝ or longer with insulated handle.
2. Volt-Ohmmeter: used to check low voltage input (120 VAC) and continuity (OHMS).
3. High Voltage Probe: used to check high voltage power supply, minimum range from 0-15 KVDC.
*Refer also to the Troubleshooting Flow Chart on page 10.
Normal Operation
1. Turning the toggle switch on allows power supply to the blower and high voltage power pack
(see Wiring Diagram, page 12).
2. The indicator light is on, and its glow is bright and steady, indicating high voltage is present at the power pack.
3. Air draw through the welding hood to the PCN unit is adequate.
4. Unit is clean.
Abnormal Operation
1. The indicator light is off even though the unit blower is running.
Possible Cause:
a. The light bulb is burnt out.
b. The high voltage power pack is defective.
c. A dead short exists in the ionizer and/or collection cell circuit.
d. Components need cleaning.
Corrective Action:
a. Replace the bulb.
b. Replace the high voltage power pack.
c. Troubleshoot and remove the short (see how to troubleshoot ionizer and cell circuit, page 7).
d. Remove components and clean.
2. Indicator light is ickering on/off with audible arcing inside the cabinet.
Possible Cause:
a. An intermittent short exists in the ionizer and/or cell circuit.
b. Components need cleaning.
Corrective Action:
a. Remove the ionizer and cell, inspect for the cause.
b. Remove components and clean.
3. The indicator light is on but the unit does not have adequate air movement.
Possible Cause:
a. The drive belt is loose or off the pulley.
b. The drive motor has malfunctioned.
c. The hood throat screen has plugged.
d. Components need cleaning.
e. The diffuser screen has plugged.
Corrective Action:
a. Tighten or replace the belt.
b. Repair or replace the motor.
c. Remove the blockage from the screen.
d. Remove and clean the components.
e. Clean the diffuser screen.

9
SMOG-HOG Electrostatic Precipitator PCN Series
4. The indicator light and the unit blower are both off.
Possible Cause:
a. The toggle switch is in the “off” position.
b. The unit does not have voltage input.
c. The door safety switch on the inside of the collection component access door is defective
or not activated.
d. The access panel safety switch, located behind the blower access panel, is defective or not activated.
e. Cabinet internal wiring has an open circuit.
Corrective Action:
a. Reset the toggle switch.
b. Determine the cause of input voltage loss.
c. Re-activate the safety switch or replace the defective switch.
d. Activate the safety switch or replace the defective switch.
e. Determine the location of the open circuit and correct.
5.1 How to Check High Voltage
The indicator light on the unit will be on high if high voltage is present at the cell and ionizer terminals
on the power pack. If the light is out, either the voltage applied to the components is below a good
operating level or the light circuit is not functioning.
If push-to-test buttons are not depressed, a residual DC voltage will remain on the high voltage
components for a short period of time after the access door is opened. To ensure safe handling,
components should be grounded to the cabinet by means of an insulated handle screwdriver.
5.2 Checking for Ionizer High Voltage
(See Figure 3)
1. Connect the ground wire on the handle of high voltage probe to the edge of the collection cell or
other convenient cabinet ground.
Figure 3
Ionizer High Voltage Check
!CAUTION
2. Place probe tip on the ionizer wire support rod.
3. Depress the door safety switch to activate the
power supply. The voltage through the ionizer
should read approximately 11.0 KVDC.
5.3 Checking for Cell High Voltage
(see Figure 4)
1. Connect the ground wire on the handle of high
voltage probe to the edge of the collection cell.
2. Place the tip of the probe at the center (metal
support rod end) of the cell insulator.
3. Depress the door safety switch to activate the
power supply.
4. The voltage through the cell should read 5 to 6
KVDC.

10
SMOG-HOG Electrostatic Precipitator PCN Series
1. Remove the cell and depress the door interlock switch.
2. If the indicator light comes on, the problem is in the cell. Check for the following:
a. Excessive build up between cell plates.
b. Something lodged between the cell plates, bowed or bent plates, etc.
c. Cracks in any of the eight cell insulators, carbon tracking or other insulator damage.
3. If the indicator light remains off with the cell out of the unit, remove the ionizer and activate the
power supply.
4. If the indicator light comes on, the problem is in the ionizer. Check for the following:
a. Broken or loose ionizer wires.
b. Excessive build up on insulator(s).
c. Cracked or broken insulator(s).
5. If the light remains out with both the ionizer and cell removed, remove the side access panel and
check out the high voltage power pack. See Figure 5.
a. Remove both high voltage leads from the end of the power pack.
b. Measure high voltage (use probe) at terminal No. 8 (output to ionizer) and terminal No. 7
(output to collector).
c. If no voltage is present or voltage is below minimum, replace the power pack.
Note: Minimum reading with high voltage wires removed: 11KV at terminal No. 8 (ionizer) and
5KV at terminal No. 7 (collector).
6. If voltage is present and within limits, check for:
a. Short in the high voltage lead wires.
b. Cracked or broken cabinet insulators.
5.4 Determining the Loss of High Voltage
As components build up dirt, the indicator light
dims then goes out at a point approximately
3.5KV cell voltage. If satisfactory operating
voltage is present at the ionizer and cell and
the light is out, the problem is either a defective
indicator light or light circuit.
If no voltage is present at the cell, and the
indicator light is out:

11
SMOG-HOG Electrostatic Precipitator PCN Series
Figure 5
Power Pack Terminal Connections
5.5 Checking Air Movement (Blower and Drive)
1. If the unit has deficient airflow:
a. Check for any type of restriction in the pick-up hood, flex hose or main unit.
b. Remove the pre-filter, cell and ionizer components and check for an obstruction at the diffuser plate
directly above them. If none is present, check the components for excessive dirt build up.
c. If components are clean, remove the side access panel and check for:
i. Loose or broken belt
ii. Defective drive motor
iii. Loose pulley
The belt should have approximately 1⁄2” of play when depressed with one finger. Having the belt set
too loose causes slippage and reduces airflow. Having the belt set too tight causes an over current
condition in the motor. The resulting higher temperature shortens motor winding and bearing life.
!CAUTION
6. Replacement Parts
6.1 Ordering Parts
Replacement parts can be ordered from your local representative or from Parker direct.
To order parts from Parker, contact Customer Service at 1-800-348-4048. Please have the following
information available for prompt service:
1. Unit model number (on nameplate, blower access door)
2. Unit serial number (on nameplate, blower access door)
3. Part number of part(s) (see parts list)
6.2 Returning Parts
When returning a defective part under warranty, you need to call Parker Hannifin for a Return Material
Authorization (RMA) number. This control number assures you receive prompt service, so it should
appear prominently on the package being returned.

12
SMOG-HOG Electrostatic Precipitator PCN Series
7. Troubleshooting Flowchart

13
SMOG-HOG Electrostatic Precipitator PCN Series
PCN
Cabinet Assembly Diagram
8. PCN Parts List
Item Part Number Description Quantity
137-0001 Insulator, Cell 1
237-0002 Insulator, Ionizer 2
336-0014 Spring, H.V. Contact 2
420-0467 Lamp (6 Volt) 1
520-0260 Lens Cover 1
620-0288 Power Cord 1
731-0017 Motor Pulley 1
831-0102 Blower Pulley 1
931-0083 Drive Belt 1
10 17-0010 Wheel, 8” 2
11 17-0012 Caster, 5” Swivel 2
12 03-1000 Short-Out Spring Assly 1
13 18-1931 Dust Pan 1
14 20-0326 Toggle Switch 1
15 21-1216 Power Pack 1
16 22-0001 Motor, 1⁄2 HP (Tot. Encl.) 1
17 23-0001 Motor Base 1
18 32-0171 Blower 1
19 32-0172 Blower Support 2
20 33-0001 Pre-filter, Alum. Mesh 1
21 02-0044 Ionizer 1
22 02-2339 Collection Cell 2
23 39-0124 Door Latch (Component) 2
24 36-0016 Ground Spring 2
25 30-0536 Door Latch (Mtr./Blr.) 2

14
SMOG-HOG Electrostatic Precipitator PCN Series
9. Wiring Diagrams

15
SMOG-HOG Electrostatic Precipitator PCN Series

16
SMOG-HOG Electrostatic Precipitator PCN Series
Product Warranty –
SMOG-HOG®and DUST-HOG®Pollution Control Systems
1. Subject to the terms and conditions hereof, Parker-Hannifin Corporation (PARKER) warrants that major structural
components on MCB, PNP, SDC, SFC, and SHM series will be free from defects in materials and workmanship for ten
(10) years from the date of shipment from Parker. Subject to the terms and conditions hereof, warrants to the original
Buyer of any Parker product (PRODUCT) installed and used as recommended by PARKER in normal service, that if the
PRODUCT fails or is materially defective within twenty-four (24) months from date of installation or thirty (30) months
from the date of shipment (whichever is earlier), of such PRODUCT, then PARKER, at PARKER’S sole option, will replace
the PRODUCT with the same or equivalent PRODUCT, repair the PRODUCT or refund the original purchase price for the
PRODUCT. Such replacement, repair of payment by PARKER shall be in complete satisfaction of any and all liability of
PARKER and its agents with respect to such PRODUCT. Excluded from any Parker warranty are hose, electrical motors
or consumable products such as flexible hose, belts, filter cartridges, filter media, ESP cells, electrical components,
gasketing, or any component defined by PARKER as a consumable item.
2. Parker IGFG’s warranty policy covers defects that are due to manufacturing quality. Equipment must be installed,
commissioned and maintained in accordance with Parker IGFG recommendations as documented in the specific user
manual related to your dust or wet collector product. This warranty does not cover defects due to poor environmental
conditions, improper installation, or wear and tear items. This warranty shall be void in case of:
a) Any buyer’s modifications not explicitly approved by Parker IGFG Division,
b) Misuse or failure in maintenance - not in accordance with Parker’s product recommendations,
c) Use of unauthorized or non-genuine Parker replacement parts,
d) Damage caused by corrosion, abrasion, abnormal use or misuse, misapplication, or normal wear and tear,
e) Equipment not properly installed, operated and maintained under normal conditions and recommended applications.
As Buyers exclusive remedy for any defects in the equipment, Parker will exchange or repair any defective parts during
the warranty period, provided such parts are returned, prepaid, to Parker factory. The obligation of Parker is limited to
furnishing replacement parts EXW Parker factory or making repairs at Parker factory of any parts that are determined,
upon inspection by Parker, to be defective. In no event will Parker be responsible for labor or transportation charges
for the removal, reshipment or reinstallation of the parts. Replacement parts will be provided via INCOTERMS EXW
from Parker’s Lancaster NY location. Parker makes no warranty as to goods manufactured or supplied by others.
3. THE FOREGOING IS THE ONLY WARRANTY, GUARANTEE OR REPRESENTATION OF ANY KIND MADE WITH
RESPECT TO THE SUBJECT PARKER PRODUCTS. NO IMPLIED WARRANTY, INCLUDING ANY
IMPLIED WARRANTY OF NONINFRINGEMENT, DESIGN, MERCHANTABILITY OR FITNESS FOR A
PARTICULAR PURPOSE, APPLIES TO THE PRODUCT, AND NO OTHER EXPRESS WARRANTY OR
GUARANTY, EXCEPT AS MENTIONED ABOVE, GIVEN BY ANY PERSON, FIRM OR CORPORATION WITH
RESPECT TO THE PRODUCT SHALL BIND PARKER. PARKER SHALL NOT BE LIABLE FOR LOSS OF
REVENUES OR PROFITS, EXPENSE FOR SUBSTITUTE EQUIPMENT OR SERVICE, STORAGE CHARGES,
OR ANY OTHER SPECIAL, INCIDENTAL OR CONSEQUENTIAL DAMAGES CAUSED BY THE USE, MISUSE
OR INABILITY TO USE THE PRODUCT REGARDLESS OF THE LEGAL THEORY ON WHICH THE CLAIM IS BASED,
AND EVEN IF PARKER HAS BEEN ADVISED OF THE POSSIBILITY OF SUCH DAMAGES. NOR SHALL
RECOVERY OF ANY KIND AGAINST PARKER BE GREATER IN AMOUNT THAN THE PURCHASE PRICE OF THE
PRODUCT SOLD BY PARKER AND CAUSING THE ALLEGED DAMAGE. WITHOUT LIMITING THE
FOREGOING, YOU ASSUME ALL RISK AND LIABILITY FOR LOSS, DAMAGE OR INJURY TO YOU AND YOUR
PROPERTY AND TO OTHERS AND THEIR PROPERTY ARISING OUT OF USE, MISUSE OR INABILITY TO USE
THE PRODUCT NOT CAUSED DIRECTLY BY THE NEGLIGENCE OF PARKER. THIS LIMITED WARRANTY IS GIVEN
ONLY WITH RESPECT TO A PRODUCT PURCHASED FROM PARKER OR AN AUTHORIZED PARKER DISTRIBU-
TOR.
Table of contents
Other Parker Dust Collector manuals
Popular Dust Collector manuals by other brands

Donaldson
Donaldson Torit DCE WSO Flex Installation, operation and maintenance manual

Woodstock
Woodstock SHOP FOX W1687 owner's manual

RSD
RSD SUNCBA-1000AT2-HC-DSA-V1 manual

AirPlus
AirPlus Donaldson Torit Porta-Trunk PT-1000 Installation and operation manual

Amada
Amada ADF4 Installation and operation manual

Tempest
Tempest TEMP142/TEMP142CX(2HP) owner's manual