RS9 CPU Card Replacement
CTC Parker Automation
3
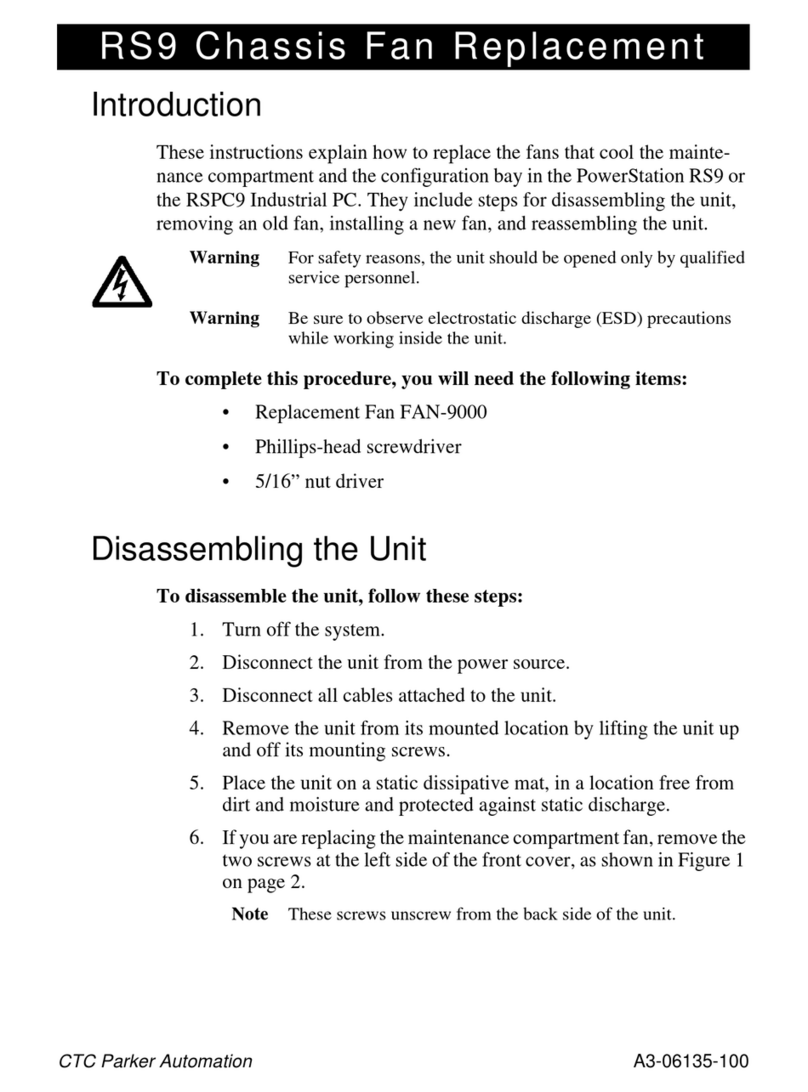
Installing the New CPU Card
To install the new CPU card, follow these steps:
1. Slide the new CPU card into the unit.
• Slide the plastic supports on the back of the card into the metal
brackets on the back wall of the configuration bay.
• Fit the hook on the riser lever underneath the top of the sup-
port on the back of the CPU card.
• Guide the bottom of the CPU card into its socket on the riser
card.
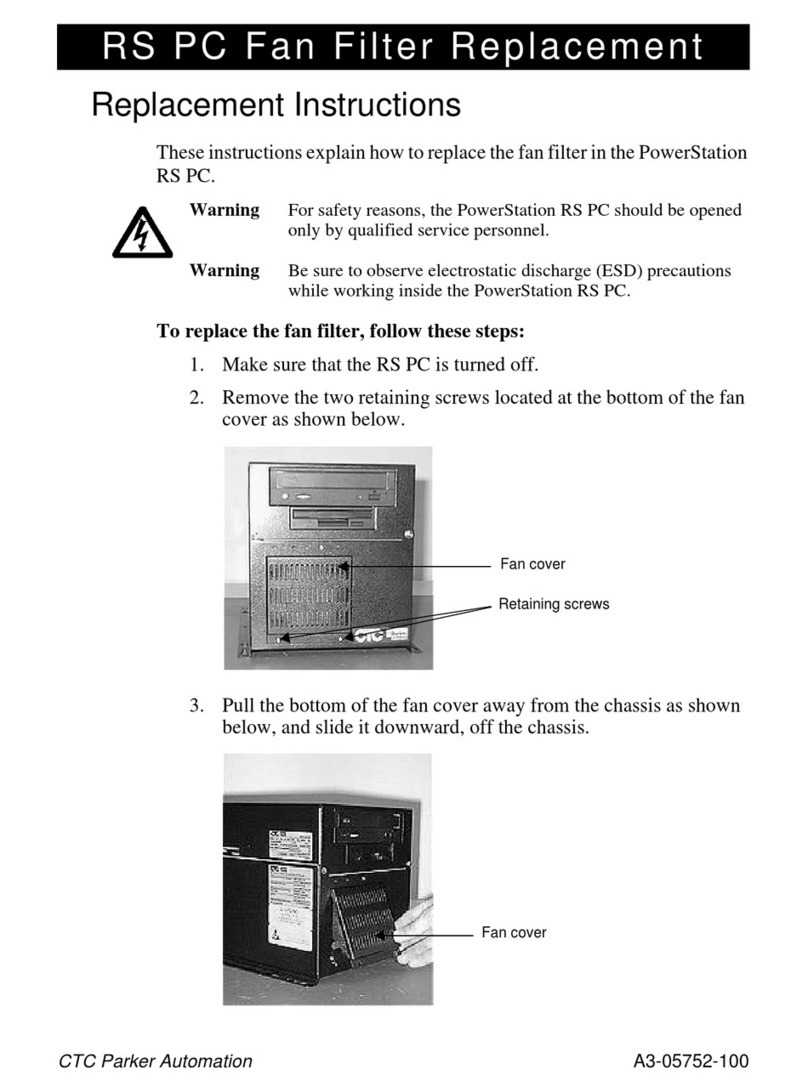
2. When the CPU card is inserted into its socket, push the card down
until it is firmly seated in the socket.
Important Make sure thatthe cardis insertedinto the socket as far as itwill
go.Theriserlevershouldliehorizontalandflushagainstthetop
of the bracket, as shown in the illustration above.
Reassembling the Unit
To reassemble the unit, follow these steps:
1. Fit the two tabs in the top of the back cover into the two slots at the
top of the configuration bay, and slide the back cover onto the unit.
2. Fasten the back cover onto the unit by replacing the four retaining
screws that you removed in step 6 on page 1.
3. Reinstall the unit in its mounted location.
4. Reconnect power and other cables to the unit.
5. Reconnect the unit to the power source.
Your CPU card replacement is complete. You may now restart the system.


