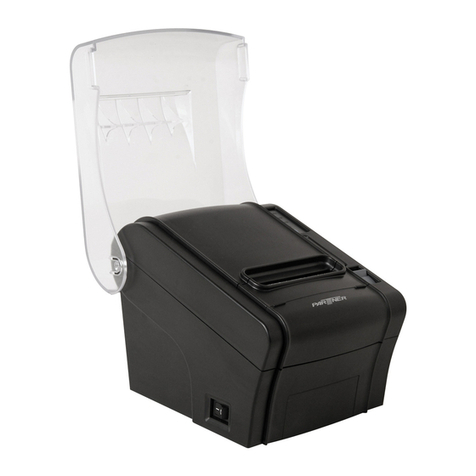
Partner RP-100-300II User manual

1
User’s Manual
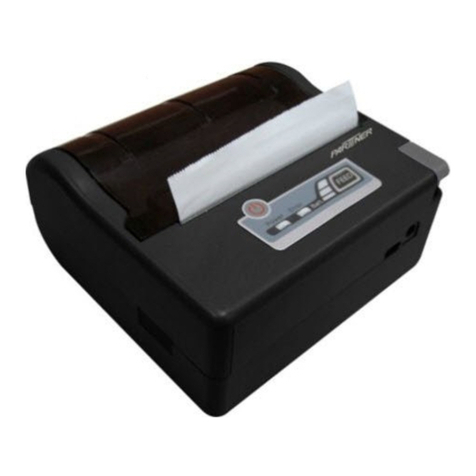
Thermal receipt printer
RP-100-300II
Contents
Contents................................................................................1
Physical dimension.........................................................................................2
Printer features..............................................................................................2
Printer specification.......................................................................................2
Drive installation........................................................................................4
Printer self-test page..................................................................................6
Hexadecimal mode...................................................................................6
Start DHCPfunction.............................................................................6
LAN port connection setting.......................................................................6
Standard TCP/IP port addition.......................................................................9
Baud rate setting........................................................................13
Buttons.....................................................................................................14
Buzzer...................................................................................................15
Interface..................................................................................................13
DIP switch....................................................................................................14
Cutter maintenance....................................................................................15

2 3
1. Printer Physical dimension:
LxWxH:180x139x127mm;
Weight:1.23kg;
2. Features:
300mm/sec high print speed;
Low power consumption:1.44w(Min.);
Multiple interface: Serial, USB, Ethernet port
Automatically resume printing after disconnection;
EPSON ESC/POS & Star command compatible
3. Specification:
Printing
Print method
Direct thermal
Print width
72-50mm
Dot density
576-512dot/line
Print speed
300mm/s
Interface
Serial+Ethernet+Parallel
Paper diameter
83mm
Line space
3.75mm (adjustable by software)
Character Size
ANK Font Font A: 12×24dots Font B: 9×17dots
Simplified/Traditional Chinese Character:
24×24dots
Barcode
Code page
PC437/Katakana/PC850/PC860/PC863/PC86
5/West Europe/
Greek/Hebrew/East
Europe/Iran/WPC1252/PC866/PC852/
PC858/IranII/Latvian/Arabic/PT151,1251/PC73
7/WPC/
1257/Thai
Vietnam/PC864/PC1001/(Latvian)/(PC1001)/
(PT151,1251)/(WPC1257)/(PC864)/(Vietnam)/(
Thai)
Barcode mode
UPC-A/UPC-E/JAN13(EAN13)/JAN8(EAN8)C
ODE39/ITF/
CODABAR/CODE93/CODE128/QRCODE
Fonts
GB18030
Buffer
Data
128K bytes
NV Flash
256K bytes
Power
Cashdrawer
out
DC 24V/1A
Power supply
AC 110V/220V,50 ~ 60Hz,DC 12V/2.5A
Physical
properties
Weight
1.23kg
Dimension
180*139*127mm
Environment
Work
environment
Temperature:5-45℃, Humidity:10 ~ 80%
Storage
environment
Temperature:-10 ~ 50℃,Humidity:10 ~ 90%
Auto Cutter
Reliability
100km

4 5
4. Driver installation
1).Insert the driver CD disk, run the Partner 80Driver to set up
2)Choose the system which you used.
3) Choose the model RP-100-300II
4)Choose the correct port.
5) Completed.

6 7
5. Print self-test page
A. Turn off the printer.
B. Make sure the paper roll is installed correctly and the printer top cover is
closed.
C. Press and hold on the FEED button and turn on the printer. When the red
indicator is OFF, then release the FEED button. printer will print out a page.
6. Hexadecimal mode
A. Turn off the printer.
B. Make sure the paper roll is installed correctly and the printer top cover is
closed.
C. Press and hold on the FEED button and turn on the printer. After 10
seconds, please release the FEED button, then printer will be entered
the Hexadecimal mode.
7. Start the DHCP function
A. Set from web browser.
1) Open the web browser through IP address shown on the self-test page.
2) Click “DHCP Client, set the time of getting the IP (shortest is 14s)
3) Click “save”and then “Reboot”.
4) Print the self-test page with new IP address. If the printer can’t get the new
IP successfully, it will print out the previous IP.
8. LAN port connection setting
A. Connect printer to PC via LAN cable.
Please make sure PC’s IP should be on the same network segment with the
printer’s IP .
For example: Printer default IP address:192.168.123.100. So PC’s IP address
should be set 192.168.123.* network segment, but can not the same as the
printer IP, otherwise printer will not be connected with the PC.
B. Connect with server
Make sure the printer and PC are in the same segment, if not, please revise
the printer’s IP as below method:
8 9
1) With Windows software utility tool.
2) Configure using the web browser.
Open the web browser through IP address showed on the self-test page.
Click “Configure Interface”, put in the new IP address, Subnet mask and
Gateway address. Then save and reboot. When the two red indicators light,
showed the setting is successfully.
9. Standard TCP/IP port addition
Connect the printer with PC through Ethernet port. Install the printer.
1) Right click the printer, and choose the printer properties.

10 11
2) Create a new port

12 13
3) Choose the new port.
10. Baud rate setting
Using serial port to print, printer serial baud rate must be same as the PC
serial port baud rate, otherwise the printer won’t work. The setting
method is as follows:
A. Printer Baud rate :Set the DIP switch on the bottom of the printer
(SW7 , SW8Combination).
DIP SWITCH
Baudrate table
B. PC serial baud rate:
Please install the printer driver first, then goto “Printer properties”to adjust
the baud rate on the PC.
SW7
ON
OFF
ON
OFF
SW8
ON
ON
OFF
OFF
Baud rate
38400
115200
9600
19200

14 15
11. Buttons
1) Feed Button:A. Paper feed B. Print self-test page C. enter
Hexadecimal mode
2) Power indicator (Blue): When the power indicator is ON, Printer is
powered on.
3) Error indicator (Red): A. flashing slowly 2 time: Cutter error B.
Flash fast: Printer overhead protection is activated C. Error
indicator is ON: Paper shortage;
4) Paper shortage indicator (Red): Paper shortage indicator lights: Paper
sensor error or close cover sensor error or Paper shortage
12. Buzzer
1) When cutter error occurred, buzzer will sound short beep 2 times,
and then follow by a long beep 1 time.
2) When paper shortage or cover is not closed, buzzer will sound
continuously short beep sound.
3) When printer resumes printing from un-printed data in buffer
memory, buzzer will quickly sound 4 times after receipt printed.
13. Interface
USB 2.0
RS232
Serial
100M Ethernet
Pin2/pin5Ca
sh drawer
port
DC24V power

16 17
14. DIP Switch
15. Auto Cutter Maintenance
Improper usage and/or bad quality thermal paper may cause the cutter jam
(stuck), thus printer cover is unable to open.
In this case, you may power cycle the power button (turn off and turn back on
after 3 seconds) and check if the auto cutter has recover itself from cutter jam
by trying to open the printer lid.
If print lid still can’t be opened, please follow below manual method to
restore the cutter back into position. 1st: Open the printer front cover, and
then start to turn the gear until the cutter knife has returned fully. Once it has
cutter knife has returned fully, you can open the printer lid.
Caution: Do not open the printer cover by force, doing so will result in
damaging the print head and auto cutter.
1
2
3
4
5
6
7
8
Sele
ct
cutt
er
Select
beeper
SELECT
PRINT
DENSITY
Two-byte
character
code
Character
per line
Cutter
with
cash
drawer
Select
baudrate
ON
OFF
ON
Dark
ON
42-font A
/56-font B
Yes
OFF
ON
OFF
Light
OFF
48-font A
/64-font B
No
Turn the gear to
reset the cutter
Open cover by the
arrow direction
Other manuals for RP-100-300II
1
Table of contents
Other Partner Printer manuals

Partner
Partner LP-9300 User manual

Partner
Partner RP-320 User manual

Partner
Partner RP-300-H User manual

Partner
Partner RP-300 User manual

Partner
Partner MP-300 User manual

Partner
Partner LP-13150 User manual

Partner
Partner RP-300-H User manual

Partner
Partner LP-2120 User manual

Partner
Partner RP-700 User manual

Partner
Partner RP-330 User manual