NL .............................................................................................................................................................. 4 - 6
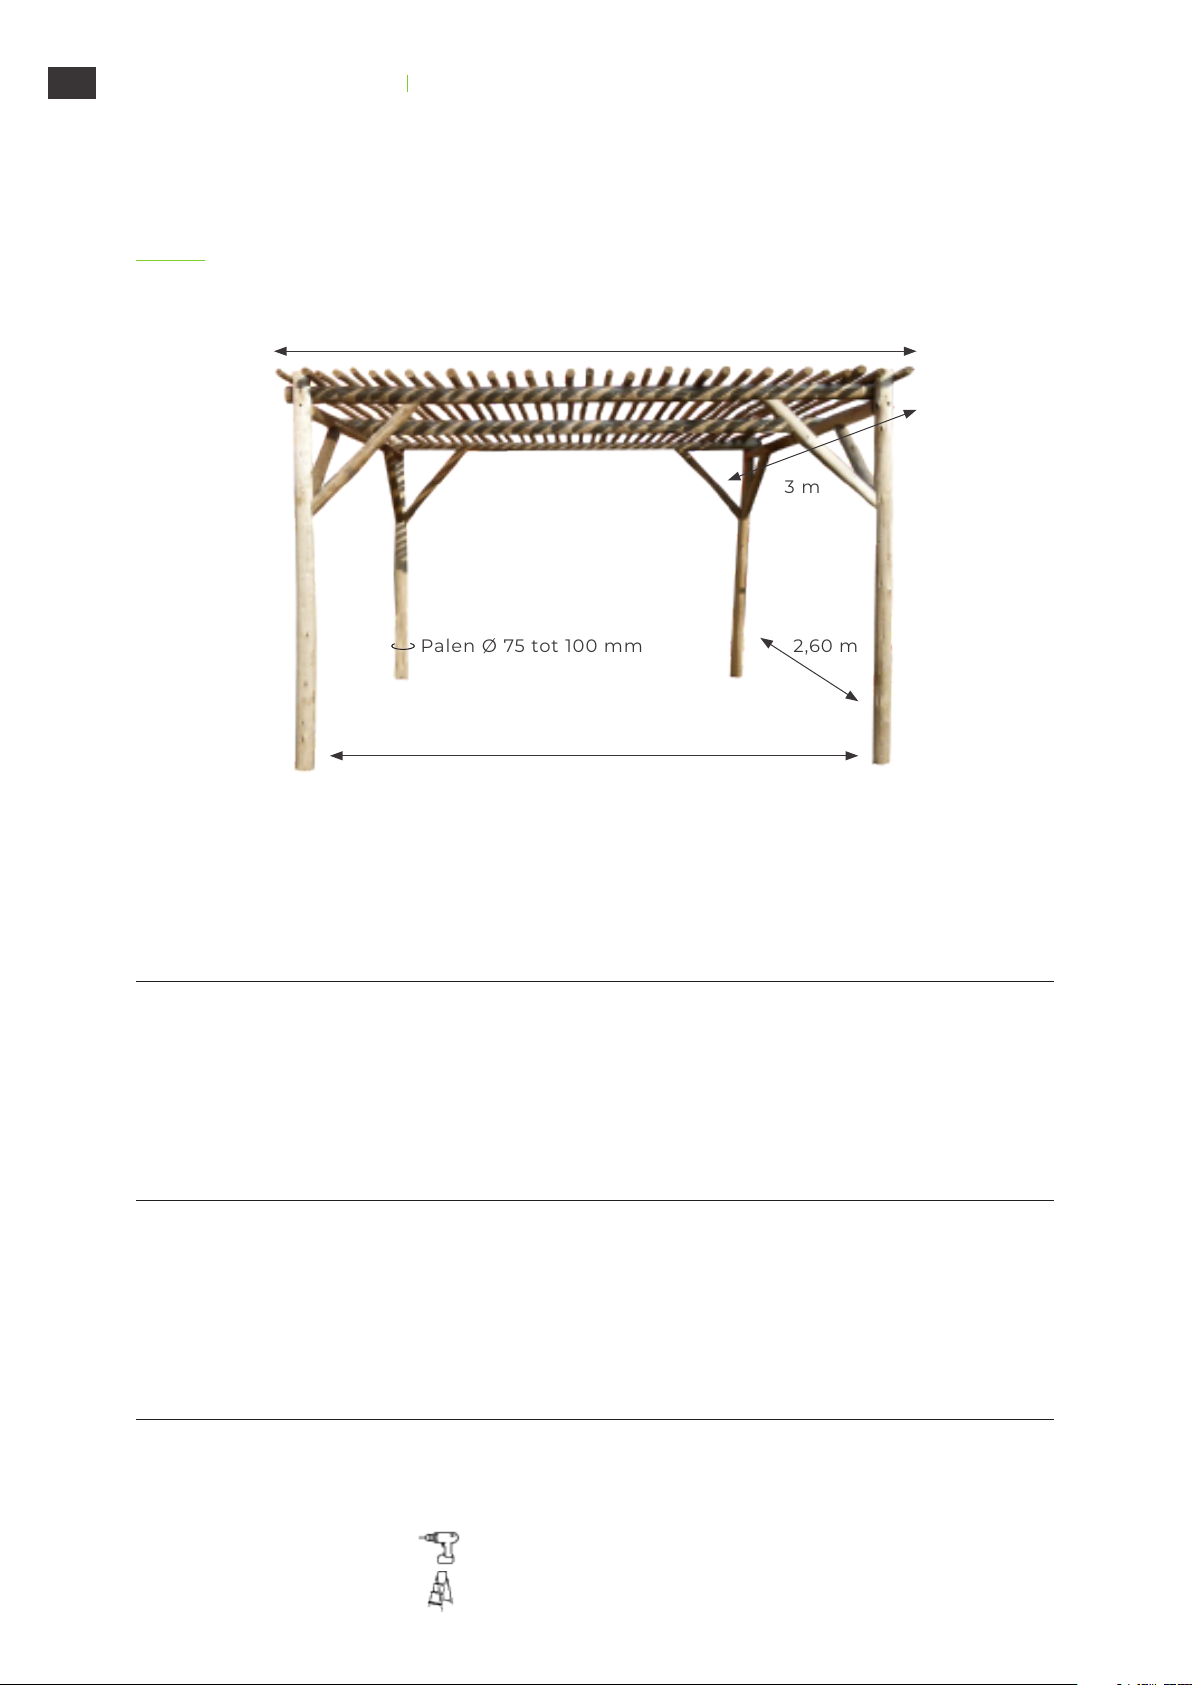
Onderdelen............................................................................................................................................................................................... 4
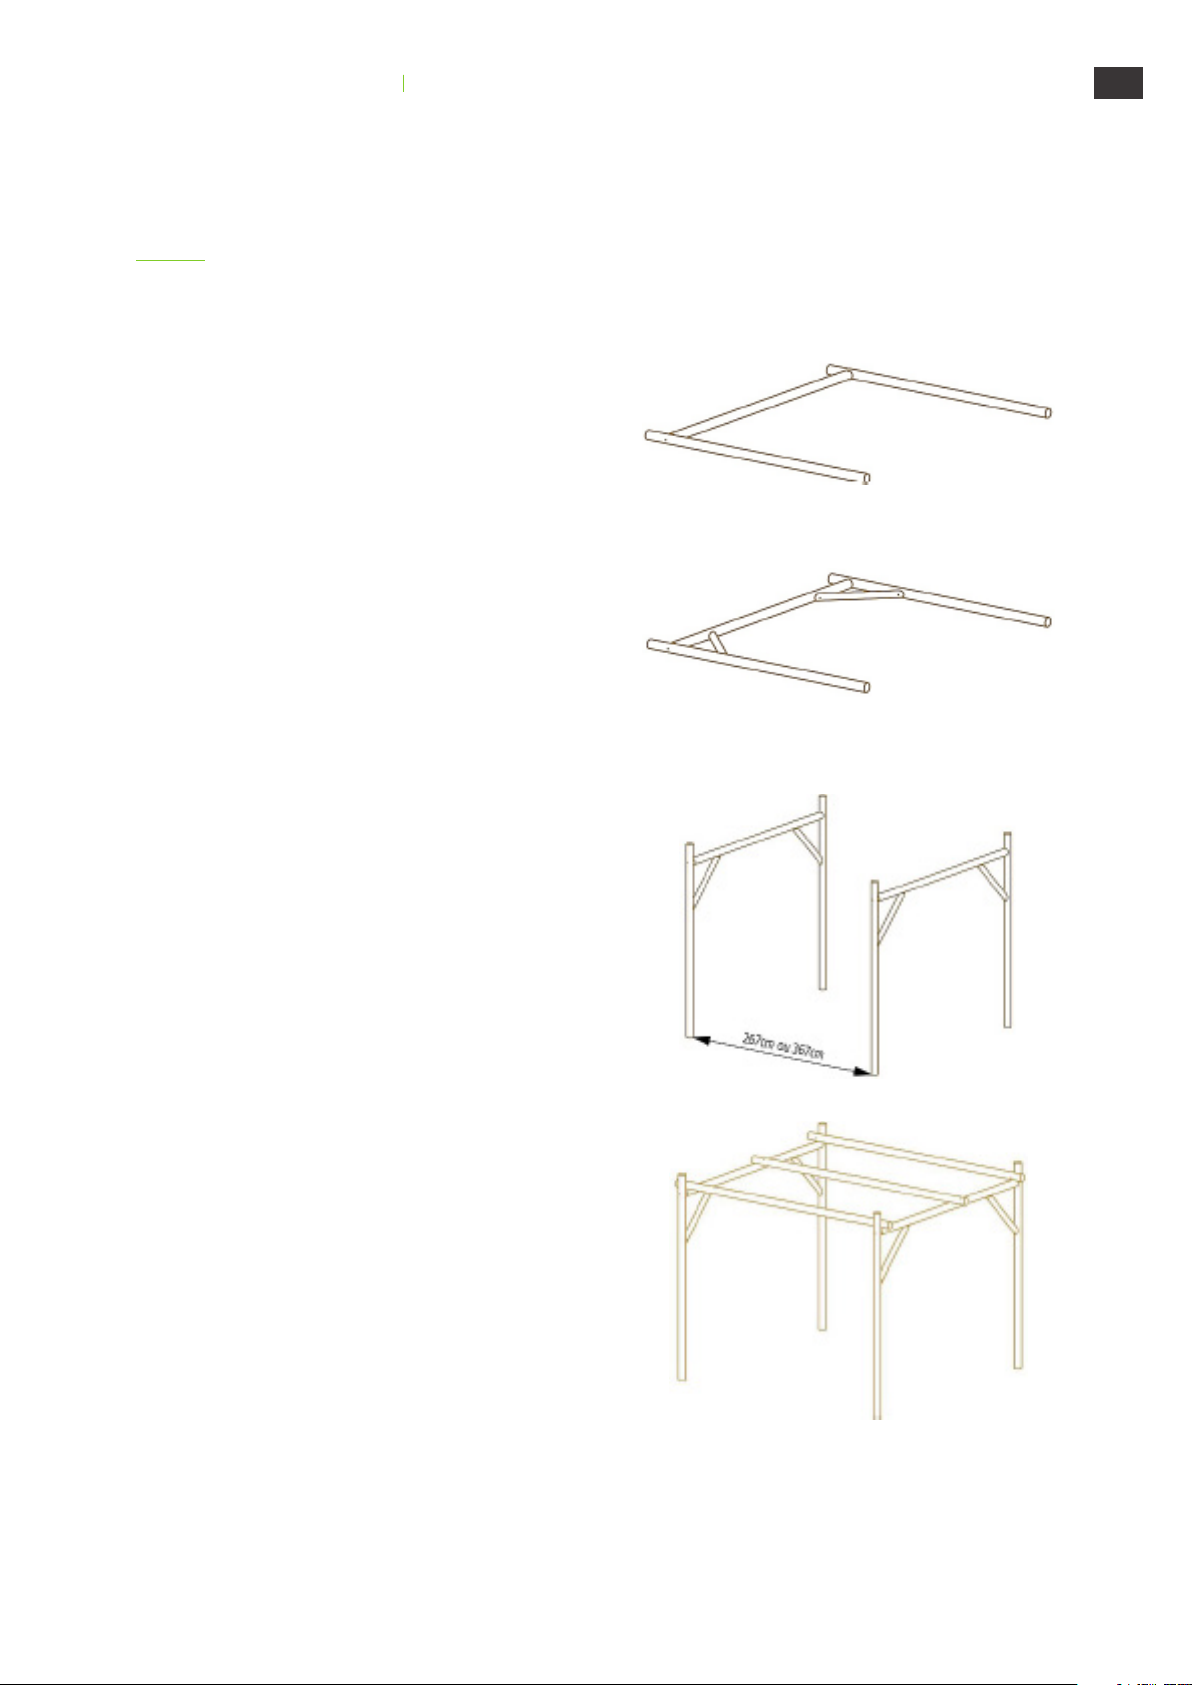
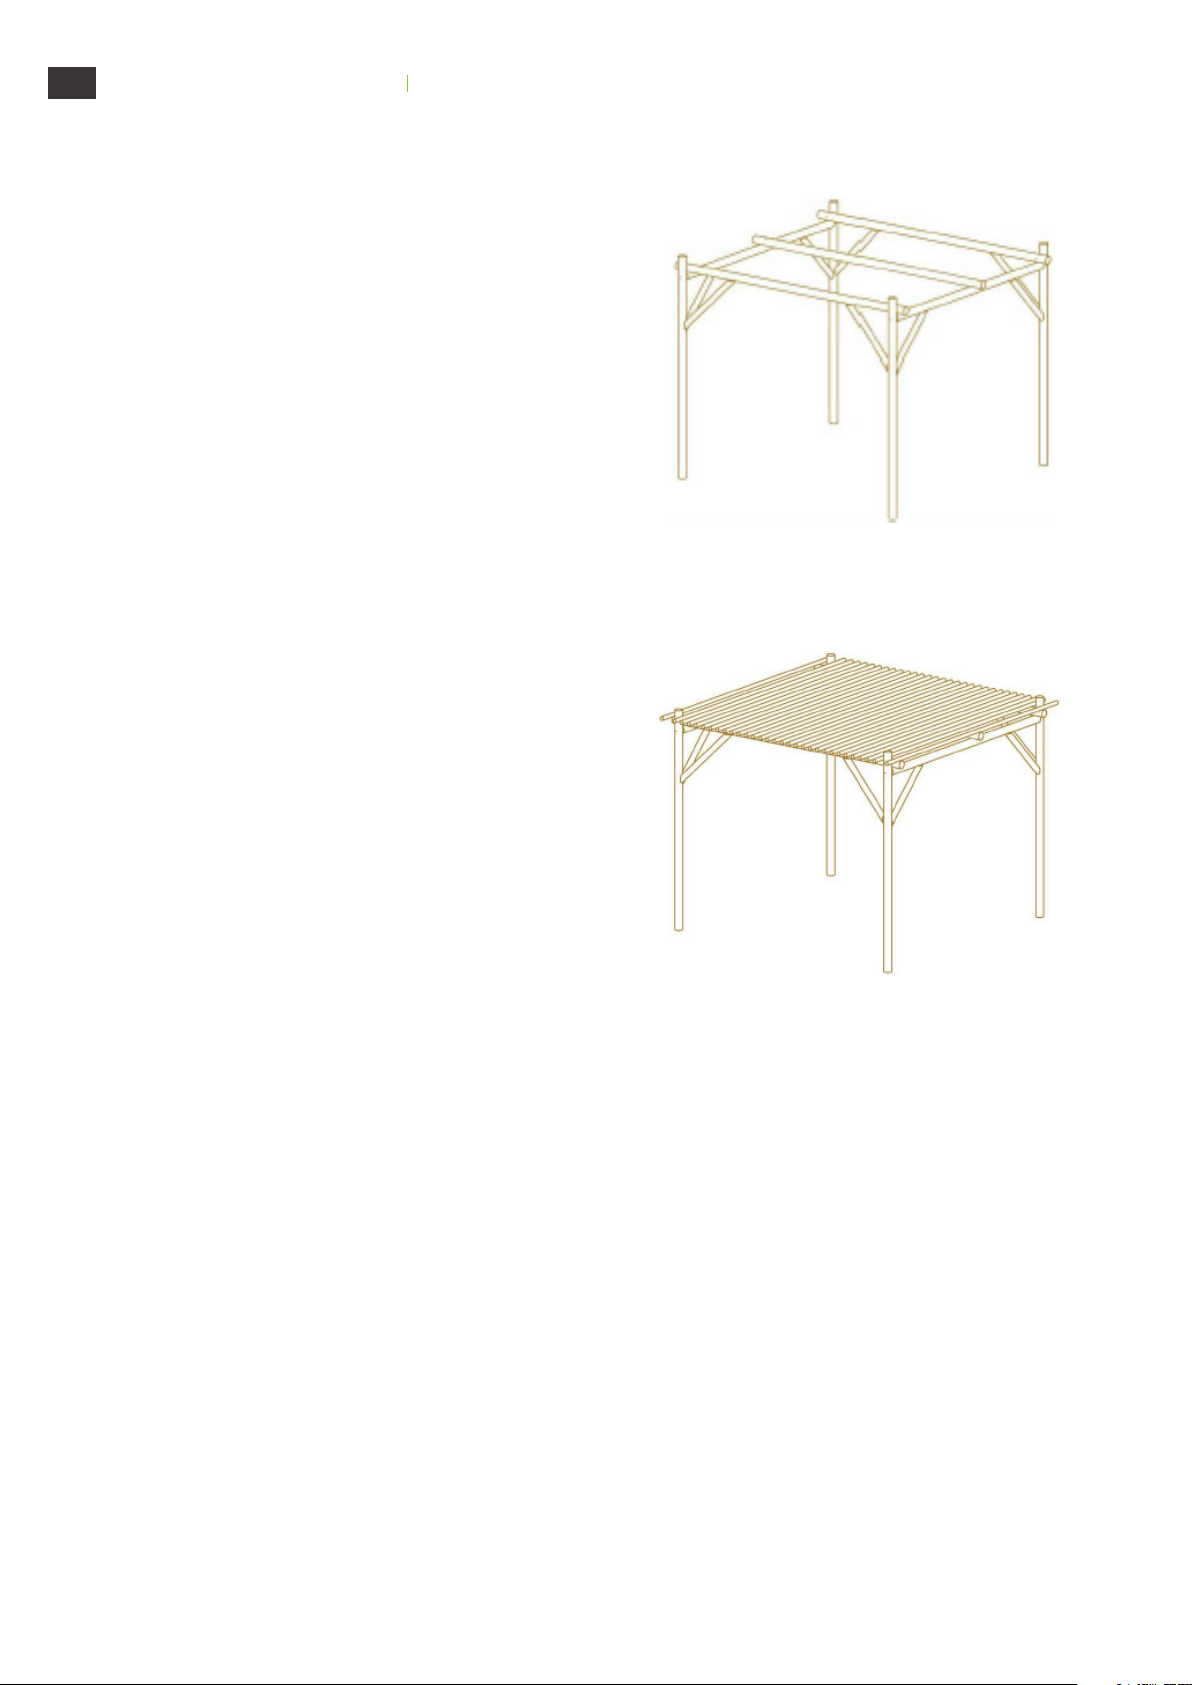
Montage...............................................................................................................................................................................................5 - 6
FR ............................................................................................................................................................. 8 - 10
Liste des pièces....................................................................................................................................................................................... 8
Montage.............................................................................................................................................................................................9 - 10
EN ............................................................................................................................................................12 - 14
Parts............................................................................................................................................................................................................12
Assembly...........................................................................................................................................................................................13 - 14
DE ............................................................................................................................................................16 - 18
Teile.............................................................................................................................................................................................................16
Montage............................................................................................................................................................................................17 - 18