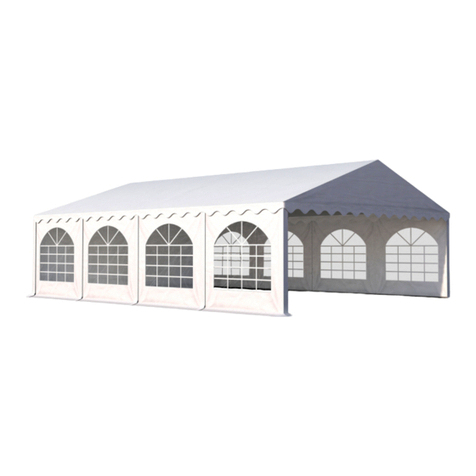
PartySpace bonbo User manual

MANUAL HANDLEIDING
MODE D’EMPLOI ANLEITUNG
PAGODA

EN ......................................................................................................................................... 3 - 18
Important information ................................................................................................................................................ 3
Parts list (Aluminium poles) .............................................................................................................................. 4 - 5
Assembly..................................................................................................................................................................... 6 - 8
Anchoring the tent........................................................................................................................................................9
Parts list (Wooden poles) ..................................................................................................................................12 - 13
Assembly.................................................................................................................................................................. 14 - 16
Anchoring the tent...................................................................................................................................................... 17
NL ....................................................................................................................................... 19 - 34
Belangrijke informatie............................................................................................................................................... 19
Onderdelenlijst (Aluminium palen)............................................................................................................ 20 - 21
Montage..................................................................................................................................................................22 - 24
Veranker de tent...........................................................................................................................................................25
Onderdelenlijst (Houten palen)....................................................................................................................28 - 29
Montage..................................................................................................................................................................30 - 32
Veranker de tent...........................................................................................................................................................33
FR ....................................................................................................................................... 35 - 50
Information importante............................................................................................................................................35
Liste des composants (tubes en aluminium).........................................................................................36 - 37
Montage.................................................................................................................................................................38 - 40
Ancrage de la tente .................................................................................................................................................... 41
Liste des composants (tringles en bois)..................................................................................................44 - 45
Montage.................................................................................................................................................................46 - 48
Ancrage de la tente ................................................................................................................................................... 49
DE ....................................................................................................................................... 51 - 66
Wichtige Informationen ............................................................................................................................................51
Teileliste (Aluminiumpfähle).......................................................................................................................... 52 - 53
Montage..................................................................................................................................................................54 - 56
Zelt verankern ...............................................................................................................................................................57
Teileliste (Holzpfähle)........................................................................................................................................ 60 - 61
Montage................................................................................................................................................................. 62 - 64
Zelt verankern ...............................................................................................................................................................65

3PAGODA MANUAL ALUMINIUM POLES EN
IMPORTANT INFORMATION
Read the assembly manual thoroughly before use and keep it in a safe place, so you can
consult it later if necessary.
• Tents are intended as temporary shelter.
• The person who erects the tent is responsible for its correct anchoring and therefore for its
safety. Check the anchoring of the tent to the ground regularly to ensure the safety of the
tent, to prevent damage to the tent and to protect other users.
• In the event of severe weather conditions, keep an eye on the weather forecasts and
provide temporary extra anchoring for the tent or dismantle the tent. In the event of stormy
weather you must take down the tent to prevent permanent damage.
• With the use of an appropriate heating appliance, a distance of at least 0,5 m from the tent
canvas must be maintained. Open fires and heating appliances with an open flame may
not be used under any circumstances.
• In the event of snowfall, you must regularly remove the snow from the tent canvas. This
also applies to heavy rainfall and loading of the tent canvas with other materials. If you
cannot free the canvas from snow accumulation you must store the tent dry. In the event
of snowfall, you can also heat the tent to 2 degrees so that the snow melts and flows from
the tent canvas.
• You can use the tent in light frost. The tent canvases must however be kept sufficiently long
at a temperature of at least 10 °C and must be folded at the same or higher temperature.
Otherwise the canvases might split in the places they are folded.
• Only use materials that are supplied with the tent. Make sure that the ground underneath
is suitable for the purpose for which you wish to use the tent.

EN 4PAGODA MANUAL ALUMINIUM POLES
NO. PART ILLUSTRATION QUANTITY
1Horizontal tube *
8
2Vertical tube 4
3Pole 1
4Corner piece 4
5Connecting sleeve * 4
6Base plate 4
7Cross cable 2
8 A Tension strap with S-hook - short
(Roof canvas > base plate) 4
8B Ratchet + D-ring
(Roof canvas > base plate) 4
9 A Tension strap with S-hook - long
(Frame > peg) 4
9B Ratchet + snap hook
(Frame > peg) 4
10 Peg 8
11 Roof canvas 1
12 Side wall 4
13 Flag holder 1
14 Ground tubes 8
PARTS LIST ALUMINIUM POLES
* Pay attention - The horizontal tubes for the pagoda tent of 3 x 3 m are made in one piece.

1
5
2
6
7
3
13
4
11
12
5PAGODA MANUAL ALUMINIUM POLES EN
PARTS LIST ALUMINIUM POLES

3. Fit the connected tubes into the corner pieces. Ensure that the keder groove is facing
down.
4. Connect the corners of the roof frame diagonally with each other using the steel cables.
Tension the cables manually and evenly using the turnbuckles. Ensure that the frame is
not skewed and ensure that the keder groove is facing down.
Figure 1bFigure 1a
Figure 3a Figure 3b
Figure 2a Figure 2b Figure 2c
ASSEMBLY
1. Lay the four corner pieces approximately the correct distance from each other.
2. Lay all the horizontal tubes between the corner pieces and connect them together using
the connector piece. See figure 1b.
TIP: Use a groundsheet to prevent the tent canvas from getting dirty during assembly.
EN 6PAGODA MANUAL ALUMINIUM POLES
Pay attention - The horizontal tubes for the pagoda tent of 3 x 3 m are made in one piece.

5. Lay the roof canvas over the frame. Pull the
nylon loops over the corners as indicated in
figure 4. On one of the corners there is a
drawstring to make it easier to pull the last
loop over the corner.
6. Place the pole so that the roof canvas is
placed under tension. Slide the peak of the
roof over the top of the pole and slide the
pole base over the uppermost cross cable
into the centre. Affix the pole with the
attachment clamp at the bottom.
7. Attach the loops around the roof frame to
the inside of the sloping sides of the roof
canvas. This gives the roof structure extra
support.
8. Place two poles on one side beneath the frame so that the roof frame lies at an angle (see
figure 7a). Ensure that the widening of the keder groove is at the top of the vertical poles
and that the keder grooves are fitted at an angle of 45° in relation to the corners of the
tent (figure 7b).
Figure 4
Figure 5
Figure 6
Figure 7a
Figure 7b
9. Place the two other poles in the same way and fit a base plate beneath each pole. Ensure
that the openings in the base plate correspond to the openings at the bottom of the pole,
so that you can affix the poles in the base plates.
7PAGODA MANUAL ALUMINIUM POLES EN

10. If you are not using the side walls, you can skip this step. Slide the suspension eyes of
one half of a side wall up, one by one, via the keder groove in the roof frame. Now slide the
keder rope on the side of the side wall into the corner pole from top to bottom. Affix all the
side walls half by half using this method.
11. Slide the tubes of the base frame over the horizontal
rod of the base plate. Then place the R-pin as illustrated
in figure 9 to prevent the base frame from sliding off
the rod.
Please note! For a tent with side walls, slide the tube of the
base frame through the groove provided at the bottom of
the side wall.
12. Attach the ratchets with the D-ring at the bottom of the
base plate and the short tension strap with S-hook at
the top of the strings on the corners of the roof.
13. Tighten the loops you fastened earlier (step 7) to ensure
that the roof canvas will remain tight during heavy rain.
Figure 8a Figure 8b
Figure 9
Figure 10
EN 8PAGODA MANUAL ALUMINIUM POLES

Figure 11
Figure 13Figure 12
Soft ground:
1. Place a peg in an opening of each base plate.
2. Attach the S-hook of the tension strap to the loop of the
corner piece (Figure 12).
3. Place a peg in the ground through the snap hook of the
ratchet in the length of each corner approximately two
metres from the pole. You can also use the snap hook
to attach the tension strap to (a concrete block with) an
eye bolt.
4. Connect the ratchet with the tension strap and place
the tent under tension evenly in all four corners.
Tip: To anchor the tent more firmly, you can always use
heavier anchoring.
Hard ground
1. Attach the S-hook of the tension strap to the loop of the corner piece (Figure 12).
2. Attach the snap hook of the ratchet to an anchoring point.
3. Connect the ratchet with the tension strap and place the tent under tension evenly in all
four corners.
ANCHORING THE TENT
9PAGODA MANUAL ALUMINIUM POLES EN

READY FOR ACTION!
EN 10 PAGODA MANUAL ALUMINIUM POLES


NO. PART ILLUSTRATION QUANTITY
1Central horizontal pole
4
2Horizontal pole end pieces 8
3Vertical pole 4
4Pole with flag holder 1
5Corner piece 4
6Tie bar 8
7Base plate 4
8Cross cable 2
9A Tension strap with S-hook - short
(Roof canvas > base plate) 4
9B Ratchet + D-ring
(Roof canvas > base plate) 4
10A Tension strap with S-hook - long
(Frame > peg) 4
10B Tension strap + snap hook
(Frame > peg) 4
11 Peg 8
12 Roof canvas 1
13 Side wall 4
14 Ground tubes 8
PARTS LIST WOODEN POLES
EN 12 PAGODA MANUAL WOODEN POLES
* Pay attention - The horizontal tubes for the pagoda tent of 3 x 3 m are made in one piece.

2
5
3
6
8
4
5
12
13
PARTS LIST WOODEN POLES
13 PAGODA MANUAL WOODEN POLES EN

ASSEMBLY
3. Fit the connected tubes into the corner pieces. Ensure that the keder groove is facing
down.
4. Connect the corners of the roof frame diagonally with each other using the steel cables.
Tension the cables manually and evenly using the turnbuckles. Ensure that the frame is
not skewed and ensure that the keder groove is facing down.
1. Lay the corner pieces approximately the correct distance from each other.
2. Lay all the horizontal tubes between the corner pieces and connect them together using
the connector rods. See figure 1b.
Figure 1bFigure 1a
Figure 3a Figure 3b
Figure 2a
Figure 2b
Figure 2c
TIP: Use a groundsheet to prevent the tent canvas from getting dirty during assembly
of the tent.
EN 14 PAGODA MANUAL WOODEN POLES
Pay attention - The horizontal tubes for the pagoda tent of 3 x 3 m are made in one piece.

5. Lay the roof canvas over the frame. Pull the
nylon loops over the corners as indicated in
figure 4. On one of the corners there is a
drawstring to make it easier to pull the last
loop over the corner.
6. Place the pole so that the roof canvas is
placed under tension. Slide the peak of the
roof over the top of the pole and slide the
pole base over the uppermost cross cable
into the centre. Affix the pole with the
attachment clamp at the bottom.
7. Attach the loops with click connectors
around the roof frame to the inside of the
sloping sides of the roof canvas. This gives
the roof structure extra support.
8. Place two poles on one side beneath the frame so that the roof frame lies at an angle (see
figure 7a). Ensure that you tilt the frame evenly on both sides, so that the frame does not
become skewed. Ensure that the widening of the keder groove is at the top of the vertical
poles and that the keder grooves are fitted at an angle of 45° in relation to the corners of
the tent (figure 7b).
Figure 4
Figure 5
Figure 6
9. Place the two other poles in the same way and fit a base plate beneath each pole.
Figure 7a
Figure 7b
15 PAGODA MANUAL WOODEN POLES EN

10. If you are not using the side walls, you can skip this step. Slide the suspension eyes of
one half of a side wall up, one by one, via the keder groove in the roof frame. Now slide the
keder rope on the side of the side wall into the corner pole from top to bottom. Affix all the
side walls half by half using this method.
11. Slide the tubes of the base frame over the horizontal
rod of the base plate. Then place the R-pin as illustrated
in figure 9 to prevent the base frame from sliding off
the rod.
Please note! For a tent with side walls, slide the tube of the
base frame through the groove provided at the bottom of
the side wall.
12. Attach the ratchets with the D-ring at the bottom of the
base plate and the short tension strap with S-hook at
the top of the strings on the corners of the roof.
13. Tighten the loops you fastened earlier (step 7) to ensure
that the roof canvas will remain tight during heavy rain.
Figure 8a Figure 8b
Figure 9
Figure 10
EN 16 PAGODA MANUAL WOODEN POLES

Figure 11
Figure 13Figure 12
Please note - In extremely high relative humidity, there is a possibility that the ash wood
may expand and become stuck in the aluminium sections. This is taken into account during
manufacture and a tolerance of around 2% is allowed for. If you cannot remove the poles from
the corner pieces when taking the tent down, it should be sufficient to leave the poles indoors
overnight in order to be able to loosen the connectors.
Soft ground:
1. Place a peg in an opening of each base plate.
2. Attach the hook of the tension strap to the loop of the
corner piece (figure 12).
3. Place a peg in the ground through the D-ring of the
ratchet in the length of each corner approximately two
metres from the pole.
4. Connect the ratchet with the tension strap and place
the tent under tension evenly in all four corners.
Hard ground
1. Attach the hook of the tension strap to the loop of the corner piece (figure 12).
2. Attach the snap hook of the ratchet to an anchoring point.
3. Connect the ratchet with the tension strap and place the tent under tension evenly in all
four corners.
ANCHORING THE TENT
17 PAGODA MANUAL WOODEN POLES EN

READY FOR ACTION!
EN 18 PAGODA MANUAL WOODEN POLES

BELANGRIJKE INFORMATIE
Lees de montagehandleiding voor gebruik aandachtig door en bewaar deze goed, zodat
je deze later indien nodig nog eens kunt raadplegen.
• Tenten zijn bedoeld als tijdelijke beschutting.
• De persoon die de tent opzet is verantwoordelijk voor de juiste verankering en daarmee
voor de veiligheid van de tent. Controleer de verankering van de tent op de ondergrond
regelmatig om de veiligheid van de tent te verzekeren, beschadiging aan de tent te
voorkomen en andere gebruikers te beschermen.
• Houd bij hevige weersomstandigen de weersverwachtingen in de gaten en zorg voor tijdige
extra verankering of demontage van de tent. Bij stormweer moet je de tent neerhalen om
permanente schade te voorkomen.
• Bij gebruik van een geschikt verwarmingsapparaat moet een afstand van minstens
0,5 m tot het tentzeil worden aangehouden. Open vuur en verwarmingsapparaten met
open vlam mogen in geen geval worden gebruikt.
• Bij sneeuwval moet je regelmatig de sneeuw van het tentzeil verwijderen. Dit geldt ook
bij hevige regenval en belasting van het tentzeil met andere materialen. Als je het zeil niet
kan vrijwaren van sneeuwophoping, dan moet je de tent droog opbergen. Bij sneeuwval
kan je de tent ook verwarmen tot 2 graden zodat de sneeuw smelt en van het tentzeil
stroomt.
• Je kan de tent gebruiken bij lichte vorst. De tentzeilen moeten daarvoor echter voldoende
lang bij een temperatuur van minimaal 10 °C zijn bewaard en bij diezelfde of een hogere
temperatuur worden uitgevouwen. Anders kunnen de zeilen barsten op de plaats van de
vouwen.
• Gebruik uitsluitend materialen die zijn meegeleverd met de tent. Let erop dat de
ondergrond geschikt is voor het doel waarvoor je de tent wilt gebruiken.
NL
19 HANDLEIDING PAGODE ALUMINIUM PALEN

NL
NR. ONDERDEEL AFBEELDING AANTAL
1Horizontale buis
8
2Verticale buis 4
3Mast 1
4Hoekstuk 4
5Koppelmof 4
6Voetplaat 4
7Kruiskabel 2
8A Spanband met S-haak - kort
(Dakzeil > voetplaat) 4
8B Spanratel + D-ring
(Dakzeil > voetplaat) 4
9A Spanband met S-haak - lang
(Frame > haring) 4
9B Spanratel + musketon
(Frame > haring) 4
10 Haring 8
11 Dakzeil 1
12 Zijwand 4
13 Vlaghouder 1
14 Grondbuizen 8
ONDERDELENLIJST ALUMINIUM PALEN
20 HANDLEIDING PAGODE ALUMINIUM PALEN
* Opgelet - Bij de pagodetent van 3 x 3 m bestaan de horizontale buizen uit één stuk.
Table of contents
Languages:
Other PartySpace Tent manuals

PartySpace
PartySpace AIRSPACE ZODIAC User manual

PartySpace
PartySpace Casa Africa SAVANNA LODGE RONDE... User manual

PartySpace
PartySpace AIRSPACE GLOBE User manual

PartySpace
PartySpace DELUXE PLUS User manual

PartySpace
PartySpace FLEXXUM User manual

PartySpace
PartySpace Casa Africa LAPA CSAFLAPA43CL User manual

PartySpace
PartySpace Casa Africa SAVANNA LODGE CARBET User manual

PartySpace
PartySpace VEGA User manual

PartySpace
PartySpace Bonga User manual

PartySpace
PartySpace ELITE 2.3 User manual