XR937H - Large View Light Reactive Welding and Grinding HelmetXR937H - Large View Light Reactive Welding and Grinding Helmet
4 5
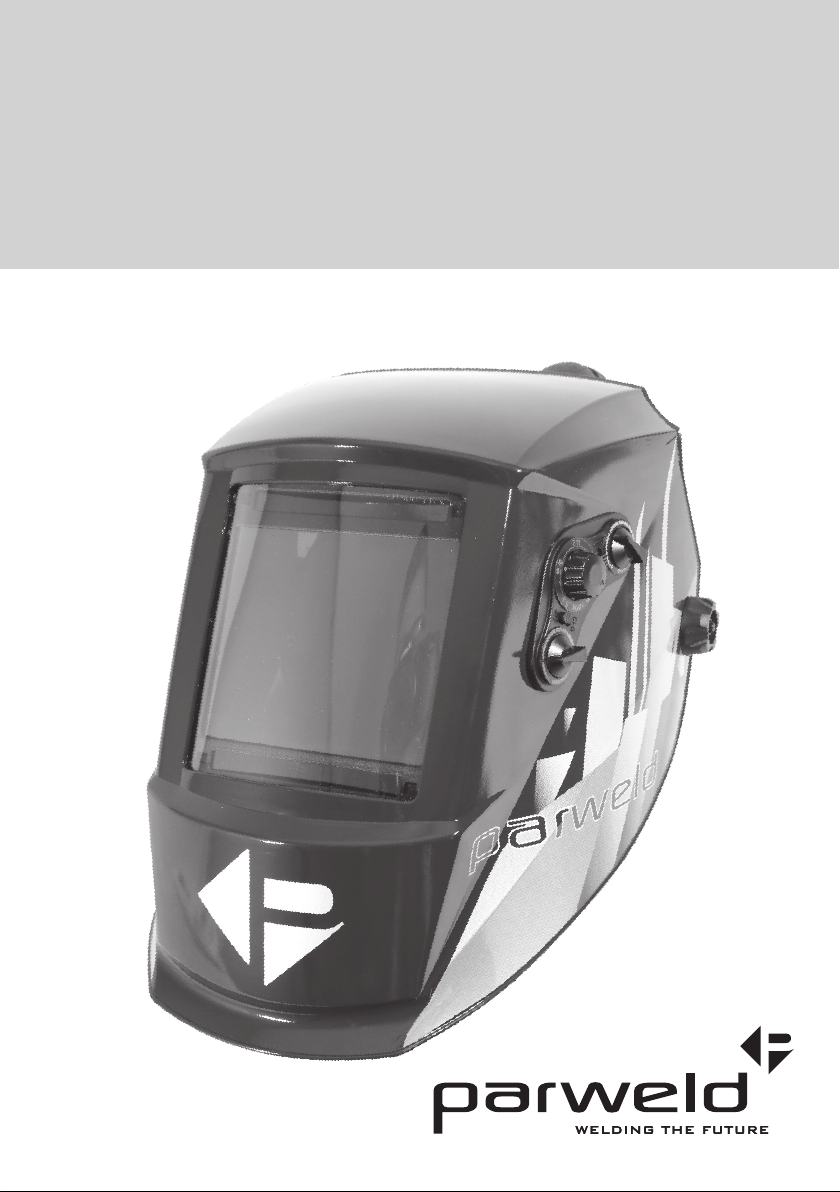
5. Adjustment to Suit Your Head
b. Adjust the Distance Between Face and ADF
MIN
Slacken external adjusting knobs
and then slide forward or back
6. Operating Instructions
• Open the package and take out the
helmet. Check to make sure it is intact and
undamaged including the lithium battery,
installed on the helmet.
• Do not use the Welding Helmet if the lens
is cracked or if the lens is dirty.
• Adjusting the switch sensitivity –the
operator can adjust the amount of
light required for the lens to darken,
depending on working conditions. Reduce
sensitivity to avoid interference from
lighting or other welders nearby. When
working with a low power or TIG welding
high sensitivity is preferred.
• Adjusting dark to clear delay –the time
for the filter to return to clear state can
be adjusted, depending on working
conditions level. When welding is stopped,
the filter screen automatically changes
from dark to clear state according to the
time setting selected. For high amperage
select a long delay or for TIG applications
to prevent flickering at low power.
Short delay is preferred for spot welding
applications.
• Adjusting the Shade Range –the operator
can select (DIN) variable shades from 9 to
13 at the turn of the shade knob. Refer to
Recommended Shade Numbers on page 5
for shade selection.
• This helmet provides protection for arc
welding purposes only. It is not suitable
for laser welding processes. The Welding
Helmet will not protect against severe
impact hazards. The Welding Helmet will
also not protect against explosive devices
or corrosive liquids.
• Use only at temperatures within the
operating range.
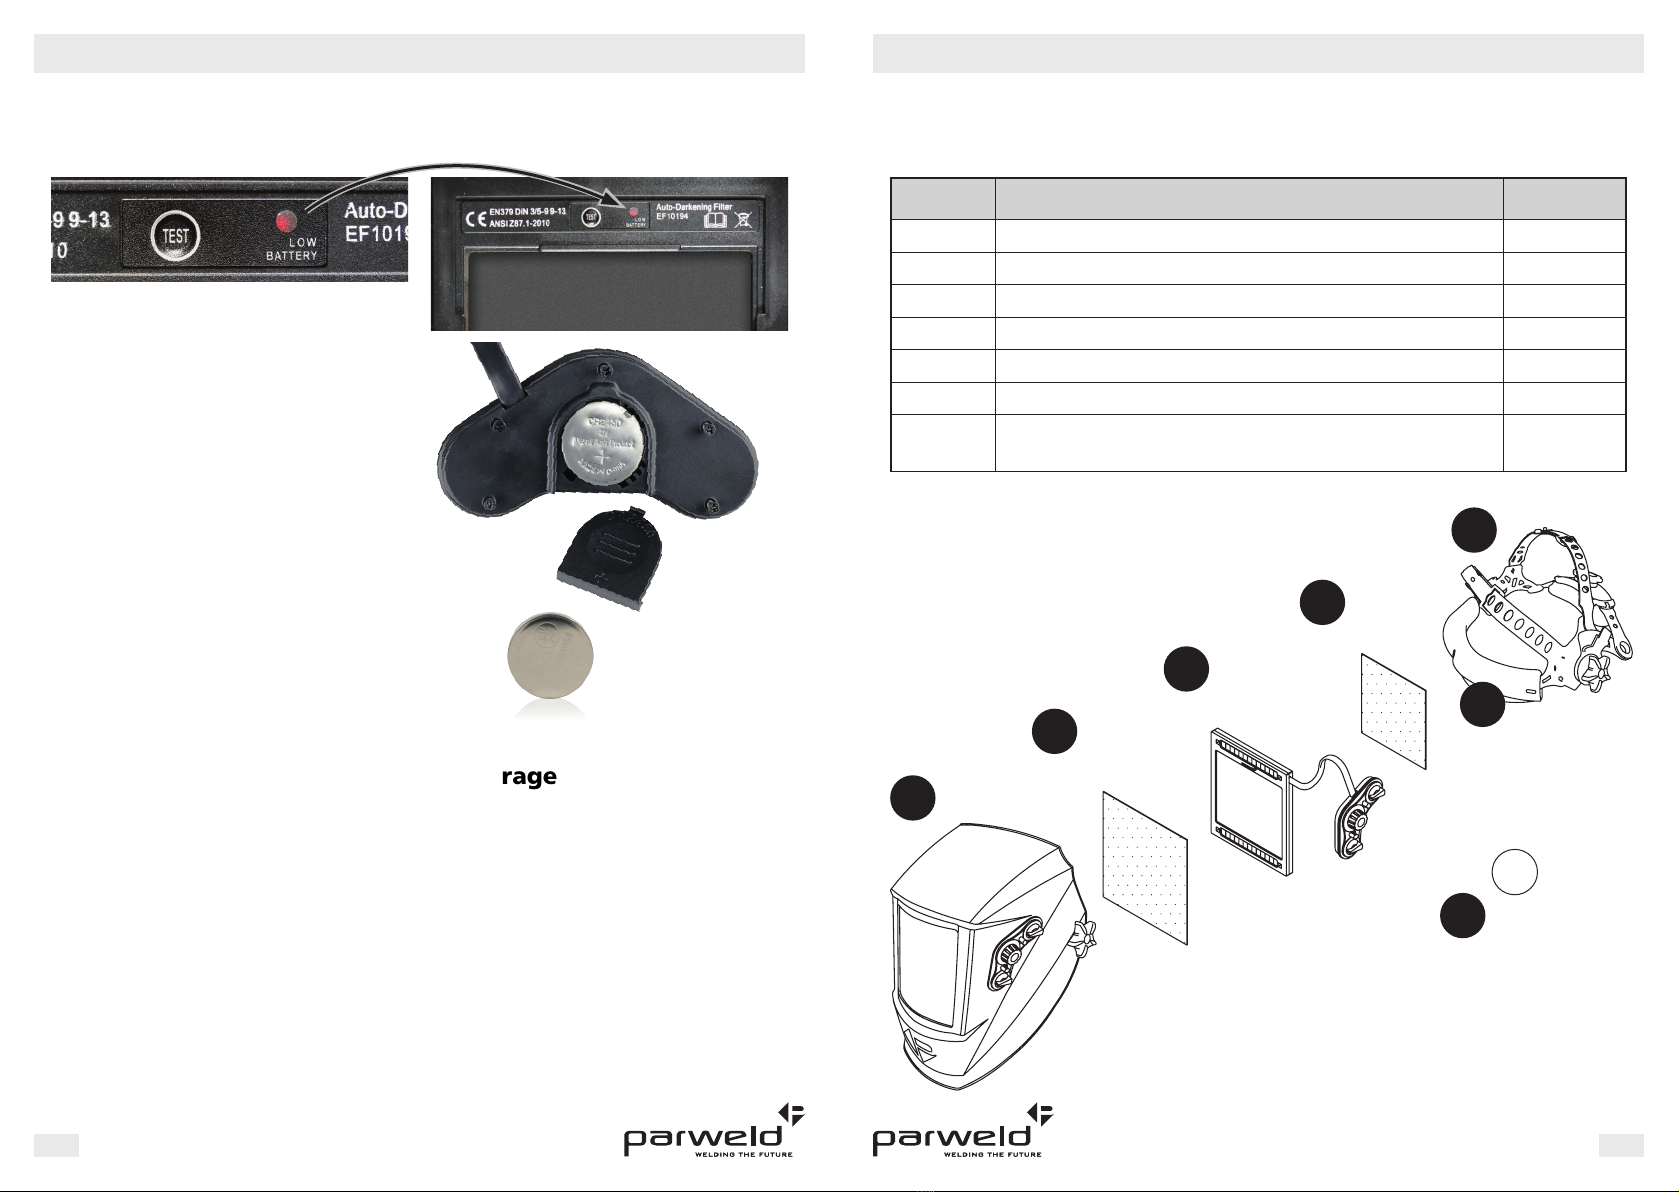
7. Maintenance
To Replace the Cover Lens
• Remove the Front Lens Cover by sliding
the 2 tabs at the base of the filter unit
on the inside of the helmet to the unlock
position.
• Lift up the lower end of the frame and the
ADF unit and slide out the old filter.
• Remove the protection film from both
sides of the new Lens. Place the new Lens
into position.
• Refit the ADF and the locking frame
ensuring the tabs at the top of the frame
are engaged before locking the sliders at
the base.
• Clean the filter lens with a lint-free tissue
or cotton cloth.
• Do not immerse the lens in water or any
other liquid. Do not use abrasives, solvents
or oil based cleaners.
• Do not remove the Auto-Darkening
filter from the Auto-Darkening Welding
Helmet. Do not try to open the filter.
• Clean filter’s surfaces regularly. Protect
filter from contact with any liquid and
dirt. Do not immerse the filter in water.
• Should the Auto-Darkening Welding
Helmet not darken upon striking an arc,
stop welding immediately and check if the
battery needs replacing. If the lens still
does not darken, have the helmet checked
by an authorized service technician.
• Replace the Front Lens Cover if it is
cracked, scratched or damaged in any way.
• The Auto Darkening Filter must never be
placed on a hot surface.
4
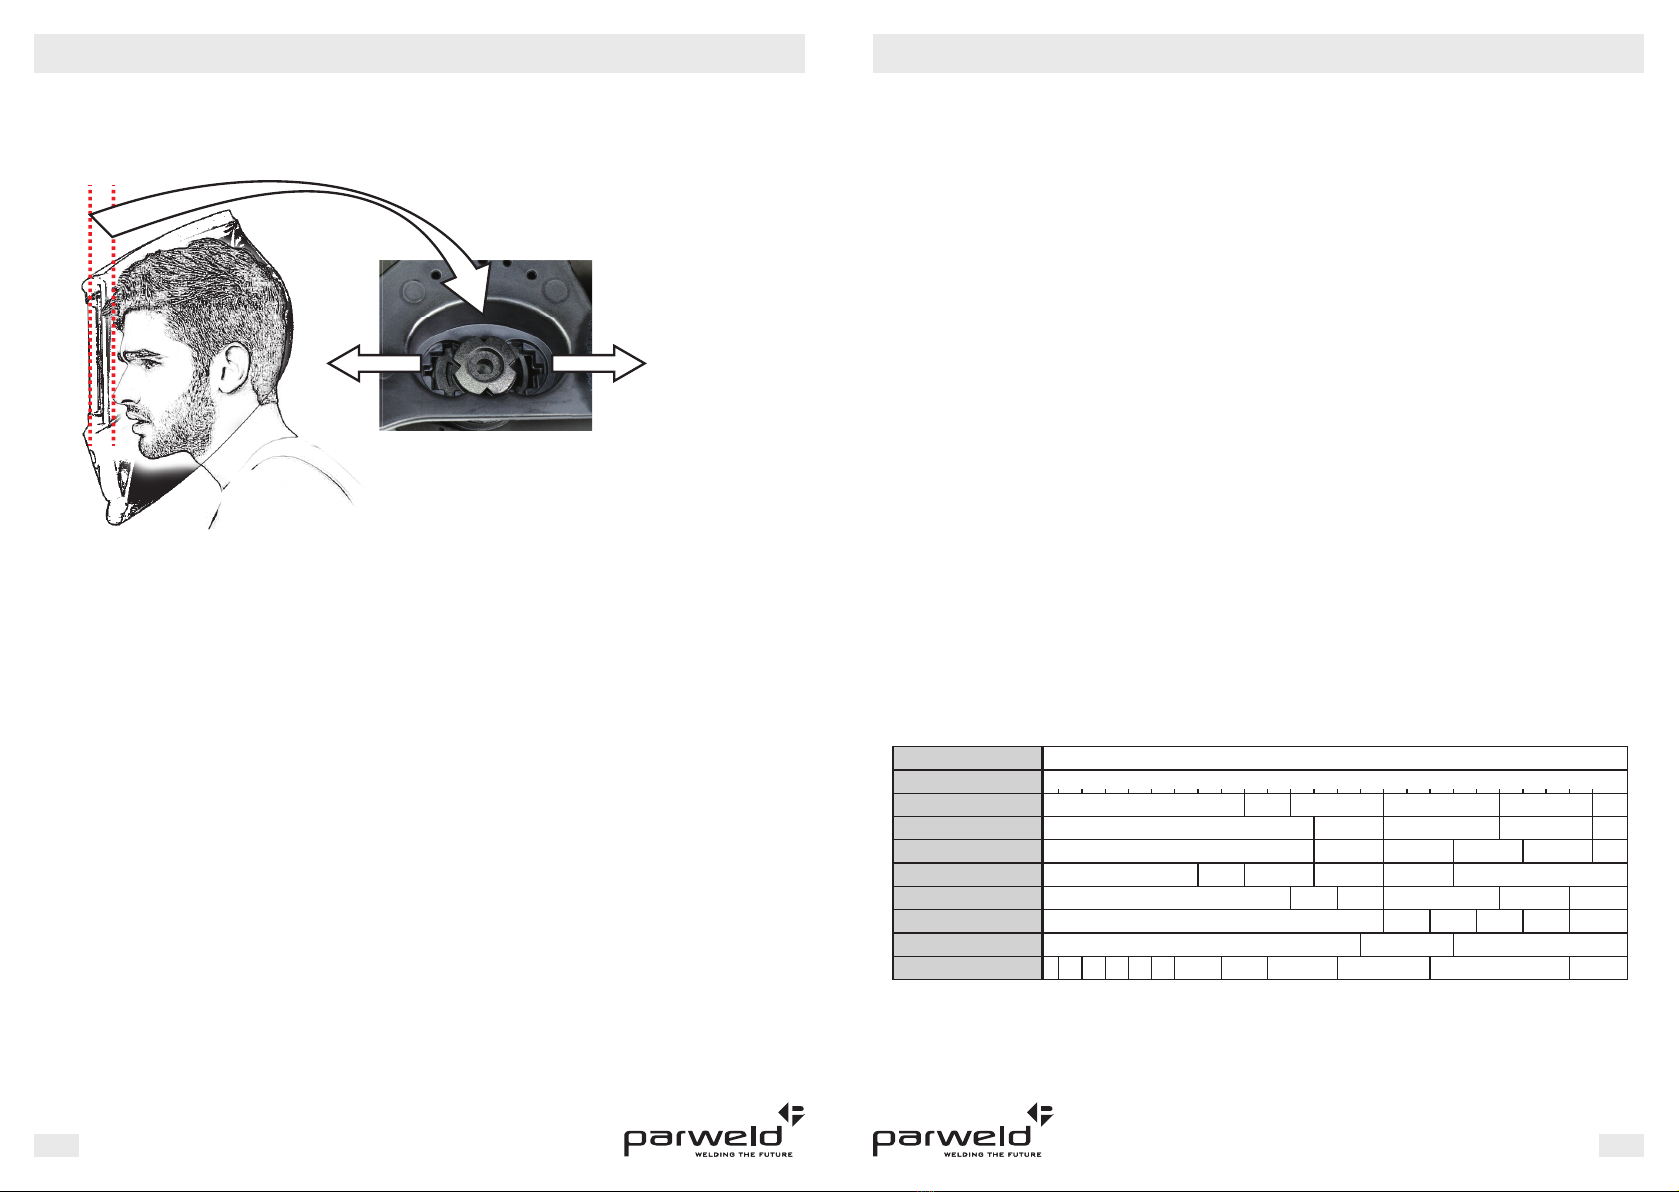
10 15 20 30 00257105152155.215.0 005054001080604 225 250 275 300
CURRENT AMPERES
4111edahS019edahS Shade 13Shade 12
350 400
Shade 11
51edahS01edahS 11 12 13 14
14
Shade 10 Shade 11 Shade 12 Shade 13 Shade 14 15
Shade 13Shade 12Shade 10
Shade 14 Shade 15
Shade 9 10 Shade 11 Shade 12
8 9 10 11
Shade 13 Shade 14
Shade 10 11 12 Shade 13
51edahS21edahS Shade 13 Shade 14
Shade 11 Shade 12 Shade 13
567
WELDING PROCESS
Covered Electrodes
MIG Plate Welding
MIG Sheet Welding
TIG
MAG
Arc Gouging
Plasma Cutting
Plasma Welding
Recommended Shade Numbers