Patlite LPT User manual

Product : 1 unit
製品本体 1台
This manual : 1
本書 1部
GA000147103
補助警告灯 取扱説明書
Warning light Instruction manual
Betriebsanleitung für Warnleuchte
Manuel d’instructions du voyant lumineux
Manuale di istruzioni della luce di avvertimento
Manual de instrucciones de la luz de advertencia
●本製品を安全重視の保安目的でご使用される場合には必ず日常点検を実施してください。万一の故障や誤作動などによる
重大な事故を防止するため、システムとして他の機器と併用してください。●本製品のみで緊急車両に使用しないでくださ
い。緊急車両に使用する場合は必ず警光灯(散光式警光灯)と組み合わせて使用してください。●本製品を振動や衝撃のある場
所で使用すると、製品取付箇所に緩みが生じて、製品の脱落や破損、お客様のけがなどにつながる恐れがあります。年に1〜2回程度、定期的に製品
取付箇所を確認し、指定された締付けトルクで製品取付箇所を締め直してください。●製品や取付箇所に異常が見られる場合は、速やかに不良箇
所を交換してください。●工事を伴う設置は必ず専門業者へ依頼してください。火災や落下などが起こる恐れがあります。●本製品の取付けは十
分強度のある平面におこなってください。また、強い振動や繰り返しの衝撃が起こる場所は製品が落下する恐れがありますので、土台に十分な補
強を施してください。●作動中や消灯後は本製品やその周りをさわらないでください。やけどの原因となります。
●Conduct routine inspections to maintain safe use of this product. Usage with a backup device is recommended
when using this product as a security alarm in hazardous areas. ●If using this product in an environment with
excess vibration, the mounting may loosen over time. Ensure periodic inspections (1-2 times/year) and re-tighten
all screws with the specified torque to avoid product damage. ●Replace as soon as any abnormalities are spotted in the product or
mounting surface. ●To avoid property damage, fire, or injury, any installation requiring construction must be done by qualified
personnel. ●Install on a flat, sturdy surface. Be sure that the mounting is reinforced when used where vibration is present. ●Do not
touch the product and its surroundings while the product is ON. Failure to comply may result in burns.
●Do not look directly at the light source, or use an optical instrument to do so. Failure to comply may result in eye damage.
●This product is not intended for high-pressure wash downs. Doing so may result in water damage.
This equipment has been tested and found to comply with the limits for a Class A digital device, pursuant to Part 15 of the FCC Rules. These
limits are designed to provide reasonableprotection against harmful interference when the equipment is operated in a commercial
environment.The equipment generates, uses, and can radiate radio frequency energy and, if not installed and used in accordance with the
instruction manual, may cause harmful interference to radio communications.Operation of this equipment in a residential area is likely to
cause harmful interference in which case the user will be required to correct the interference at his own expense.
(Responsible party in U.S.A.) PATLITE U.S.A. Corporation, R20130 S. Western Ave.Torrance, CA90501, U.S.A.
This product conforms to EN standards and shows the CE Marking.This product has been tested and found to comply
with the limits for a Class A device, pursuant to EMC DIRECTIVE. These limits are designed to provide reasonable
protection against harmful interference when the equipment is operated in a commercial environment.This product
must not be used in residential areas.
Dieses Produkt entspricht den EN-Normen und trägt die CE-Kennzeichnung.Dieses Produkt wurde geprüft und hält
die Grenzwerte für ein Klasse-A-Gerät gemäß der EMV-RICHTLINIE ein. Diese Grenzwerte sind so ausgelegt, einen
angemessenen Schutz gegen schädliche Störungen zu gewährleisten, wenn das Produkt in einer geschäftlichen
Umgebung verwendet wird. Dieses Produkt darf nicht in Wohngebieten verwendet werden.
Ce produit est conforme aux normes EN et affiche la mention CE.Cet appareil a été testé et jugé conforme aux
limites définies pour les appareils de classe A, conformément à la directive CEM. Ces limites sont conçues pour
fournir une protection raisonnable contre les interférences nuisibles lorsque l’équipement est utilisé dans
unenvironnement commercial. Ce produit ne doit pas être utilisé dans une zone résidentielle.
Questo prodotto è conforme alle norme EN e riporta la marcatura CE. Questo prodotto è stato testato ed è risultato
conforme ai limiti per un apparecchio di Classe A, ai sensi della Direttiva EMC. Questi limiti sono progettati per fornire
una protezione ragionevole contro interferenze dannose quando l’apparecchiatura viene utilizzata in unambiente
commerciale. Questo prodotto non deve essere usato in aree residenziali.
Este producto cumple con las disposiciones EN y muestra el marcado CE. Este producto ha sido sometido a pruebas
y se ha determinado que cumple con los límites para un dispositivo de clase A, de conformidad con la DIRECTIVA
CEM. Estos límites están diseñados para proporcionar una protección razonable contra interferencias perjudiciales
cuando el equipo se opera en unentorno comercial. Este producto no debe ser utilizado en áreas residenciales.
R-R-PAt-LPT1 (Model : LPT-1M1) / R-R-PAt-LPT2 (Model : LPT-2M1)
이기기는업무용(A급)전자파적합기기로서판매자또는사용자는이점을주의하시기바라며,가정외의지역에서
사용하는것을목적으로합니다.
●このたびは、お買い上げいただきまして、まことにありがとうございます。●工事を伴う設置は必ず専門業者へ依頼してください。●ご使用
前に本書をよくお読みのうえ、正しくお使いください。また、本書は大切に保管してください。●ご不明な点は、末尾に記載の技術・修理相談窓
口へお問い合わせください。●本製品を車両走行中に使用する場合、道路運送車両法や道路交通法などで規制されており許可が必要です。許
可申請については、お近くの管内運輸支局、事務所、自動車検査独立行政法人にお問い合わせください。●本製品は道路運送車両の保安基準
「乗用車」の外部突起(協定規則第26号)に適合していますが、設置場所によっては保安基準に不適合となる場合があります。関連する法規制を
確認のうえ、ご使用ください。
■お客様へ
●Thank you very much for purchasing our Patlite products. ●Request the installation and wiring be performed by a professional contractor if
construction work is involved. ●Prior to installation, read this manual thoroughly before using this product to ensure correct use. In addition,
please store this manual for future reference when performing maintenance, repairs or inspections. ●If there are any questions concerning
this product, refer to the contact information at the end of this document and contact your nearest PATLITE Sales Representative.
●Read this manual carefully prior to installation. ●Be sure to return this manual to the customer.
■Notice to Customer
■To the Installation or Construction Contractor
●設置前に本書をよくお読みのうえ、正しく取り付けてください。●本書は必ずお客様にお渡しください。
■設置または施工、取付業者様へ
各部の名称と寸法
4
CE Marking
CE-Kennzeichnung
Marquage CE
Marcatura CE
Marcado CE
「人が障害を負う可能性または物的損害が発生する可能性が想定される内容」を示します。
Indicates, "Failure to follow the instructions may lead to injury or property damage."
注意
Caution
Vorsicht
Attention
Attenzione
Precaución
安全上のご注意1.2. Safety Precautions
内容物
Contents
2
Avvertimento
警告
Warning
Warnung
Avertissement
Advertencia
注意
●光源をのぞき込んだり光学器具を用いて直接見たり、人へ照射したりしないでください。目に障害を及ぼす恐れがあります。
●高圧洗浄機を用いて洗車する場合、本製品に直接噴射しないでください。浸水し故障する恐れがあります。
Caution
Vorsicht
Attention
Attenzione
Precaución
発光色サイズ
Luminous colors
Size
Gasket
パッキン
×2×1 ×2 ×2 ×2
Pan Head Screw M3×25
なべ小ねじM3×25
O-ring
Oリング
Plain Washer
平座金
六角ナットM3※1
Hexagon Nut M3
*1
付属品
86.0 x 28.0 (mm)
赤
黄
緑
青
Red
Amber
Green
Blue
114.4 x 43.4 (mm)
型式
Model
Accessory
LPT-1M1-□
(mm)
A
13.5
13.5
B
28.0
43.4
86.0
114.4
C
500
500
D
LPT-2M1-□
Aレンズ
Lens
ベース
Base
BD
リード線(先端ストリップ加工):AVS0.5mm2×4 本
Lead wires (stripped tips) : AVS 0.5mm2×4
−1−
C
Name and dimensions of each part
機能
5Function
型式構成
3Model configuration
内容物
2Contents
TYPE
LPT
■Hinweis an Kunden ●Herzlichen Glückwunsch zum Kauf dieses Patlite-Produkts. ●Lassen Sie die Installation und Verdrahtung von einem professionellen
Lieferanten ausführen, wenn Montagearbeiten erforderlich sind. ●Lesen Sie vor der Installation diese Anleitung sorgfältig durch, bevor Sie dieses Produkt verwenden,
um eine korrekte Verwendung zu gewährleisten. Bewahren Sie außerdem bitte diese Anleitung zum Nachschlagen für spätere Instandhaltungs-, Reparatur- oder
Inspektionsarbeiten auf.●Wenn Sie Fragen zu diesem Produkt haben, beziehen Sie sich auf die Kontaktinformationen am Ende dieses Dokuments und wenden Sie
sich an Ihren nächsten PATLITE-Vertriebsmitarbeiter.
■Für Karosserien oder Konstruktionen, Installationsunternehmen ●Bitte lesen Sie dieses Handbuch vor der Installation sorgfältig durch und installieren Sie es
ordnungsgemäß. ●Geben Sie dieses Handbuch unbedingt an den Kunden weiter.
■Avis au client ●Nous vous remercions d’avoir acheté un produit Patlite. ●Un entrepreneur professionnel doit effectuer l’installation et le câblage si des travaux de
construction sont requis. ●Avant de procéder à l’installation, lire entièrement ce manuel avant d’utiliser ce produit afin de l’utiliser correctement. Conserver ce manuel
pour référence future lors de l’entretien, de réparations ou d'inspections. ●Pour toute question concernant cet appareil, se référer aux informations de contact
indiquées à la fin de ce document et contacter le vendeur PATLITE le plus proche.
■Pour la carrosserie ou la construction, les installateurs ●Veuillez lire attentivement ce manuel avant l'installation et installez-le correctement. ●Veillez à
remettre ce manuel au client.
■Avviso al Cliente ●Grazie per aver acquistato i nostri prodotti Patlite. ●Richiedere che l'installazione e il cablaggi siano svolti da un contraente professionista in
caso di lavori di costruzione. ●Prima dell'installazione, leggere attentamente questo manuale prima di utilizzare questo prodotto per garantire un uso corretto. Inoltre,
conservare questo manuale per riferimento futuro quando si eseguono interventi di manutenzione, riparazioni o ispezioni. ●In caso di domande relative a questo
prodotto, fare riferimento alle informazioni di contatto alla fine di questo documento e contattare il Rappresentante di Vendita PATLITE più vicino.
■Per carrozzeria o costruzione, appaltatori di installazione ●Leggere attentamente questo manuale prima dell'installazione e installarlo correttamente.
●Accertarsi di consegnare questo manuale al cliente.
■Aviso para el cliente ●Muchas gracias por comprar nuestros productos Patlite. ●Solicite que un contratista profesional lleve a cabo la instalación y el cableado si
implican trabajos de construcción. ●Antes de la instalación, lea por completo este manual antes de utilizar este producto para garantizar un uso correcto. Guarde
este manual para consultarlo en el futuro cuando realice tareas de mantenimiento, reparaciones o inspecciones. ●Si tiene alguna pregunta relativa a este producto,
consulte la información de contacto al final de este documento con su representante de ventas de PATLITE más próximo.
■Para carrocería o construcción, contratistas de instalación ●Lea este manual detenidamente antes de la instalación e instálelo correctamente. ●Asegúrese de
entregar este manual al cliente.
お使いになる人や他の人への危害や財産への損害を未然に防ぐため、必ずお守りいただくことを、次のように説明しています。表示内容を無
視して誤った使い方をした時に生じる危害や損害の程度を、次の表示で区分し説明しております。
In order to prevent any damage to the user and other personnel or to assets, note the following: The degree of harm and damage that will
occur when issues arise by ignoring the contents of the symbols indicated is explained below.
安全に関する表示について
About Safety Symbols
1.1.
「死亡または重症を負う可能性が想定される内容」を示します。
Indicates, "Failure to follow the instructions may lead to death or serious injury.”
警告
Warning
Warnung
Avertissement
Avvertimento
Advertencia
Dies bedeutet: "Nichtbeachtung dieser Anweisungen kann zu Tod oder ernsthaften Verletzungen führen."
Indique, « Le non respect des instructions pourrait entraîner la mort ou des blessures graves ».
Questo simbolo significa che “Il mancato rispetto delle istruzioni potrebbe causare lesioni gravi o mortali”.
Indica que, "El incumplimiento de estas instrucciones puede provocar graves lesiones o incluso la muerte".
Dies bedeutet: "Nichtbeachtung dieser Anweisungen kann zu Verletzungen oder Sachschäden führen."
Indique, « Le non respect des instructions pourrait entraîner des blessures ou des dommages matériels ».
Questo simbolo significa che “Il mancato rispetto di queste istruzioni potrebbe causare lesioni personali o danni alle cose”.
Indica que, "El incumplimiento de estas instrucciones puede provocar lesiones o daños materiales".
●Führen Sie regelmäßige Inspektionen durch, um den sicheren Gebrauch dieses Produkts zu gewährleisten. Zur
Vermeidung von Unfällen durch Produktausfall oder -fehlfunktion ist es zusammen mit anderen Geräten als System zu
verwenden. ●Bei Montage an Stellen, die Vibrationen oder Stößen ausgesetzt sind, kann sich das Produkt lösen und
Verletzungen oder Geräteschäden verursachen. Überprüfen Sie das Produkt ein oder zwei Mal im Jahr in montiertem
Zustand und ziehen Sie alle Schrauben mit dem entsprechendem Anzugsmoment nach. ●Bei etwaigen Unregelmäßigkeiten am Produkt oder
an der Halterung sind fehlerhafte Teile umgehend auszutauschen. ●Lassen Sie sämtliche Installation- und Verkabelungsarbeiten von einem
Fachmann durchführen. Verstöße gegen diese Anweisungen können zu Feuer, Stürzen o.ä. führen. ●Montieren Sie das Produkt auf einer
flachen, ausreichend stabilen Oberfläche. Bei Verwendung an Stellen mit starken Vibrationen oder wiederholten Stößen ist die Unterlage zu
verstärken, um Stürzen des Produkts vorzubeugen. ●Das Produkt und seine Umgebung dürfen in Betrieb und nach Erlöschen der Leuchten
nicht berührt werden. Die Nichtbeachtung dieser Anweisung kann zu Verbrennungen führen.
●Réaliser des inspections quotidiennes pour maintenir une utilisation sécuritaire de ce produit. Pour prévenir les accidents
qui pourraient en résulter d’une défaillance ou d’un dysfonctionnement du produit, utiliser avec d’autres équipements en
tant que système. ●Si ce produit est monté dans un endroit soumis aux vibrations ou aux chocs, il pourrait desserrer et
entraîner des blessures ou des dommages matériels. Une ou deux fois par année, vérifier le produit et son endroit de
montage et serrer toutes les vis au couple spécifié. ●En cas d’anomalie dans le produit ou le montage, remplacer immédiatement les pièces
défectueuses. ●Un entrepreneur professionnel doit effectuer l’installation et le câblage si des travaux de construction sont requis. Le non
respect de ces instructions pourrait entraîner un incendie, des chutes ou autres. ●Installer ce produit sur une surface plane avec suffisamment
de force. De plus, s’il est utilisé dans un endroit où il y a de fortes vibrations ou de chocs répétés, renforcer le base pour empêcher la chute de
l’équipement. ●Pendant que ce produit est en cours de fonctionnement ou après que ses voyants s’éteignent, ne pas toucher le produit ou ses
environs. Le non respect de ces instructions pourrait provoquer des brûlures.
●Condurre ispezioni giornaliere per continuare a usare il prodotto in condizioni di sicurezza. Per prevenire incidenti
derivanti da guasti o disfunzioni del prodotto, utilizzarlo assieme ad altri apparati nell’ambito di un sistema complessivo.
●Se questo prodotto viene installato in un luogo soggetto a vibrazioni e impatti, il fissaggio potrebbe allentarsi e ciò
potrebbe causare lesioni personali o danni all’apparato. Una volta o due l’anno, controllare il prodotto e il luogo in cui è
installato, serrando tutte le viti alla coppia prescritta. ●Se si scoprono anomalie nel prodotto o nella sua installazione, sostituire immediata-
mente le parti difettose. ●L'installazione e il cablaggio devono essere eseguiti da tecnici specializzati, qualora siano necessari lavori di
costruzione. ●Installare questo prodotto su una superficie piatta e sufficientemente robusta. Inoltre, se è soggetto a forti vibrazioni o impatti
ripetuti, rinforzare la base per prevenire la caduta dell'apparato. ●Mentre il prodotto viene utilizzato o dopo che le sue spie si sono spente,
non toccare il prodotto né le zone adiacenti. Il mancato rispetto di tali istruzioni potrebbe causare ustioni.
●Realice inspecciones diarias para asegurar el uso seguro de este producto. Con el fin de prevenir accidentes que
podrían resultar por fallos en el producto o el mal funcionamiento del mismo, utilice este producto junto con otros
equipos como un sistema. ●Si está montado en un lugar expuesto a golpes y vibraciones, podría soltarse y provocar
lesiones o daños al producto. Revise el producto y su ubicación de montaje una o dos veces al año y refuerce todos los
tornillos, aplicando el par de apriete especificado. ●Si descubriera alguna anomalía en el producto o en el montaje, reemplace las piezas
defectuosas de inmediato. ●Solicite que un contratista profesional lleve a cabo la instalación y el cableado si implican trabajos de
construcción. El incumplimiento de estas instrucciones podría provocar un incendio, caídas u otros problemas. ●Instale este producto en
una superficie plana que cuente con la resistencia suficiente. Además, si se utiliza en un lugar expuesto a fuertes vibraciones o golpes
repetidos, refuerce la base para evitar que el equipo se caiga. ●No toque este producto ni su entorno mientras está funcionando o después
de que se apaguen las lámparas. El incumplimiento de esta instrucción podría ocasionar quemaduras.
●Blicken Sie nicht in die Lichtquelle oder auf die optischen Instrumente, und richten Sie das Licht nicht auf andere
Personen. Die Nichtbeachtung dieser Anweisung kann zu Augenverletzungen führen.
●Sprühen Sie beim Autowaschen mit Hochdruckreinigern nicht direkt auf das Produkt ein. Eine Missachtung dieser
Anweisungen kann zu Wasserschäden führen.
●Ne pas regarde directement la source lumineuse ou les instruments optiques et ne diriger pas la lumière vers d’autres
personnes. Le non respect de ces instructions pourrait entraîner de graves blessures aux yeux.
●Lors de lavage d’une voiture à l’aide d’un nettoyeur haute pression, ne pas pulvériser directement ce produit. Le non
respect de ces instructions pourrait occasionner un dégât d’eau.
●Non guardare la fonte di luce, né guardare direttamente gli strumenti ottici, né puntare la luce verso altre persone. Il
mancato rispetto di tali istruzioni potrebbe causare danni oculistici.
●Durante il lavaggio di autoveicoli con getto d’acqua a pressione, evitare di dirigere il getto vero questo prodotto. Il
mancato rispetto di tali istruzioni potrebbe causare danni da contatto con acqua.
●No mire la fuente luminosa, ni mire directamente a los instrumentos ópticos, y no dirija la luz a otras personas. El
incumplimiento de esta instrucción puede provocar una lesión ocular.
●Cuando lave automóviles con lavadores de alta presión, no pulverice directamente sobre este producto. El
incumplimiento de esta instrucción puede provocar daños por agua.
M1
LPT --
1
2
R
Y
G
B
※1「ゆるみ止め機能付き」
はじめにお読みください
Before you begin
1
*1 This nut has a locking function.
■フラッシュ(4パターン) Flash (4 pattern)
Triple flash
トリプ ルフラッシュ
Extreme Warning flash
高警告フラッシュ
Continuous
点灯
Blinking
点滅
■フラッシュグループ Flash group
Group A
Group B
Factory default
工場出荷状態
Exluding Continuous.
点灯を除く
Flash
フラッシュ
T
Flash
フラッシュ
T
Flash
フラッシュ
Flash
フラッシュ
T/2
■減光 Dimming
Normal
通常
Brightness
明るさ Wiring
配線
Dimming
減光
T=1cycle
T=1周期
※
※
※
Factory default
工場出荷状態
※T=1cycle
T=1周期
Gray
灰
❷
Gray
灰❷
T
TT
12-24V
DC
12-24V
DC

機器の設定、設置方法
6Equipment setting and instllation method
注意
●本製品の定格電圧を確認してから使用してください。●ラジオや無線機のアンテナおよび配線からはできる限り遠
ざけて取り付けてください(500mm以上)。近づきすぎるとラジオや無線機に影響が出る場合があります。●本製品の
設置や配線、補修をおこなう際は、必ず非通電状態にしてください(バッテリーの(−)端子を外すなど)。発火や感電、
故障の原因となります。●本製品を取り扱う際は、静電破壊防止のため、体に帯電している静電気を放電させてから作業をおこなってくだ
さい。●本製品を複数台で使用する場合は電流値に合った仕様の電線を使用してください。仕様外の電線を使用すると発煙や発火の危険
があります。●本製品に接続する機器の保護のため、電源の配線には必ず規定容量のヒューズを入れてください。ヒューズを入れないと、
接続する機器の故障や発火の原因となります。●使用しないリード線は他の線や金属部などに接触しないように、1本ごと絶縁テープな
どで絶縁処理をおこなってください。本体の誤作動または他の機器の故障の原因となります。●配線は間違いのないよう十分注意してお
こなってください。故障の恐れがあります。●保護等級はケーブル先端部を除きます。本製品を配線した後に、ケーブル接続部を防水処理
してください。●配線時にリード線を引っ張ったり、本体に押し込めたりしないでください。
●必ずフラッシュ設定をおこなってから、本製品を設置してください。●取付けの際は必ず付属のパッキンとOリングを使用して
ください。●取付面に防水性能が必要な場合は、取付面裏側のねじやナット類、リード線取出し穴に、防水処理を施してください。
●本製品を同期運用する場合の最大台数は20台です。これを超えて同期運用しないでください。●配線に使用するリード線はコイ
ル状に巻き付けて使用しないでください。本製品が正しく作動しないことがあります。●同期運用で複数の製品を使用する場合は、機器間の「同期/設定
線(青)」の長さを3m以内にしてください。●同一の電源線で本製品を複数台配線すると、供給する電圧によっては、電圧降下の影響で入力電圧が満足で
きず正常に作動しない恐れがあります。すべての製品が許容電圧範囲に収まるように、電源系統を複数に分けて配線してください。●同期運用で複数の
製品をボディアースで配線する場合は、本製品が正しく作動しないことがあります。正しく作動しない場合は専用のアース線を配線してください。●本
製品を組み込む機器に絶縁性能が必要な場合は、絶縁タイプの電源をご使用ください。
Caution
●Before use, confirm the rated voltage of the product. ●Install away from radios and radio wave antennas (at least
500mm). If installed too close, this product may interfere with the radio waves. ●During installation, wiring, and
maintenance, make sure that the product is turned off (ex: disconnect the battery’s negative [-] terminal). Failure to
comply may result in fire, electrocution, or product malfunction. ●To prevent electrostatic damage, be sure to ground
your body before performing any work with the product. ●When using multiple units of this product, ensure that the current value of the
cable matches the current value of the product. Failure to comply may result in smoke or fire. ●To avoid over-current and damage to
connected equipment, be sure to use a fuse. Failure to comply may result in fire or property damage. ●Insulate the tips of unused lead
wires with insulation tape to prevent it from touching other wires or metal objects. Failure to comply may result in malfunction of the main
unit or other equipment. ●Be sure that the wiring is done properly. Improper wiring could result in equipment damage. ●The protection
rating of this product excludes the cable ends. After wiring this product, be sure to waterproof the ends of the cable. ●During wiring, do
not pull on the lead wire or force them into the body of the product.
お願い
NOTICE
●Specify the flash settings before installing this product. ●When mounting, be sure to use the gasket and O-ring that
are included with the product. ●If the mounting surface requires waterproofing, be sure to conduct proper
waterproofing on the back side of the product, including the screws and Lead Wire Exit Holes. ●During Multiple-unit
Operation, a maximum of 20 units can be used together. Do not exceed this maximum at any time. ●When used for
wiring, do not wrap lead wires into a coil, the units may not operate properly. ●In Multiple-unit Operation, the length of the
Synchronize/Setting Wire (Blue) should be 3m or less between each unit. ●When multiple units are wired with the same power supply
line, a voltage drop may occur, causing the units to not operate properly. Set up multiple power systems to ensure there is enough
voltage supplied to each unit. ●In Multiple-unit Operation, when units are grounded to its body, the units may not operate properly. If this
occurs, connect a dedicated grounding wire. ●If the equipment used with this product requires power insulation, use an insulated power
supply.
STEP1
設定準備
Preparation for settings
設定
Settings
取付穴の準備
Prepare the mountimg holes
Mounting
設置する
STEP4 作動確認
Conrirm Operation
Change flash pattern
Flash group settings
フラッシュパターン設定
フラッシュグループ設定
STEP2
設置
Mountings
配線図に従って配線する
Refer to the corresponding wiring corresponding wiring diagram
STEP3
配線
Wiring
工場出荷状態のまま使用する場合
When using the factory settings.
工場出荷状態から変更する場合
When changing from factory settings.
STEP3C
When using multiple units
(6 or more,20 or less) in a
synchronous operation
複数台(6〜20台)で
同期運用する
When using multiple units
(2 or more,5 or less) in a
synchronous operation
複数台(2〜5台)で
同期運用する
When using 1unit
1台で使用する
STEP3BSTEP3A
Triple flash
トリプ ルフラッシュ
フラッシュパターン
Flash pattern
フラッシュグループ
Flash group
Group A
STEP1-1
STEP1-2
STEP1-3
STEP2-1
STEP2-2
STEP3-1
Blue
青
Follow the below diagram for wiring instructions. Be careful not to cause short circuits.
設定用配線図を参考に、本製品を配線してください。その際にショートなどが発生しないように十分注意してください。
STEP1
設定
Settings
設定準備
Preparation for settings
Ⅱ
ON(1shot)
Ⅲ
ON(keep)
ⅠⅠ
Ⅱ
Ⅱ
Ⅲ
Ⅲ
DC12-24V
12-24V DC
Black
黒
Gray
灰
Red
赤
■設定用配線図 Wiring diagram for Flash Settings
Ⅲ
ON(keep)
(Change Flash Pattern Mode)
(フラッシュパターン切替状態)
不定期に点滅
flash in irregular
Ⅱ
ON(1shot)
Ⅰ
ON(keep)
The unit will flash with the
set pattern
設定されているフラッシュパターン
で作動
Ⅰ
ON(keep)
(Flash Group Setting Mode)
(フラッシュグループ設定状態)
STEP1-1
Flash group settings
フラッシュグループ設定
STEP1-3
Change flash pattern
フラッシュパターン設定
STEP1-2
L2+L3
()
L2 L3
+
L5
L1
L6
Prepare the mounting surface using the below dimensions.
取付面寸法図に従い、平面を加工してください。
■取付面寸法図 Mounting hole dimensions
Onece mounted, secure the product in place using the nuts and bolts included with product.
下図の取付方法に従い、同梱の部品でねじ止めしてください。
Mounting method
■取付方法
STEP2
設置
Mountings
取付穴の準備
Prepare the mountimg holes
Refer to the corresponding wiring corresponding wiring diagram
配線図に従って配線する
STEP3
配線
Wiring
Refer to the corresponding wiring diagram when wiring the product.The meaning of symbols in the wiring diagrams are
described in the following table.
When running synchronous operation on multiple units, LPT-1M1-□and LPT-2M1-□can be used together.
※Please use if necessary.
それぞれの配線図に従って、本製品を配線してください。配線図のシンボルの内容は次の表にそれぞれ示しています。
※必要に応じて使用してください。
※
※
※
※
複数台で同期運用をおこなう場合、LPT-1M1-□とLPT-2M1-□は併用して使用できます。
Consider the total current consumption of the
equipment in use.
使用する機器の総消費電流を考慮して設定してください。
12V DC input 24V DC inputSymbol
シンボル DC12V入力 DC24V入力
F1
F2
F3
Wiring protection(Normal Blow)
配線保護用(普通溶断型)
Content
内容
Fuse
ヒューズ
Red-1
Black-1
Red-2
Black-2
Red-3
Black-3
Power Supply InputWire +
Ground Wire –
電源入力線+
アース線−
Power Supply InputWire +
Ground Wire –
電源入力線+
アース線−
Dimmer Input Wire
減光入力線
Synchronize Wire
同期線
Gray
Blue
Total length of Dimmer Input Wire
減光入力線の全長
Synchronize Wire between each unit (Includingleadwireofthisproduct.)
製品間の同期線の長さ (本製品のリードワイヤを含む)
Length of wire
(Maximum)
リード線の線長
(最長)
Diameter
of wire
(Minimum)
リード線の線径
(最小)
Power Switch (Alternate type)
電源スイッチ(自己保持タイプ)
Dimmer Switch (Alternate type)
減光スイッチ(自己保持タイプ) DIMMER
SW
POWER
SW 1
POWER
SW 2
RY
C
10m 40m
L2+L3+L4
()
L2 L3 L4
++
0.5mm2
0.75mm20.5mm2
1.25mm21.25mm2
5.5mm23.3mm2
3m
45V DC or more
DC45V以上/35mA×接続台数以上
45V DC or more
/ 3A×number of units connected or more
/ 35mA×number of units connected or more
DC45V以上/3A×接続台数以上
DC45V以上
「使用する各リレーの駆動電流」+「35mA×接続台数」以上
Relay that operates multiple
power systems with a single
power switch
電源スイッチ1箇所で複数の
電源系統を操作するリレー
For surge absorption of relay coil
リレーコイル部のサージ吸収用 Reference Specification:250V 0.5μF
参考仕様:250V0.5μF
Relay contact current capacity
: 3A x number of units connected or more
リレー接点電流容量:「3A×接続台数以上」
Switch
スイッチ
Relay
リレ ー
Capacitor
コンデンサ
LPT-1M1-□:1A
LPT-2M1-□:2A
Item
項目
STEP2-1
設置する
Mounting
STEP2-2
STEP3-1
φ18
リード線取出し穴
Lead Wire Exit Hole
2-φ3.2
A
B
型式
Model
LPT-1M1-□
(mm)
AB
77.3
104.0
29.7
52.0LPT-2M1-□
Oリング
O-ring
なべ小ねじM3X25
Pan Head Screw M3x25
なべ小ねじM3X25
Pan Head Screw M3x25
最大取付板厚:15mm
※取り除いてから使用してください。
Maximum Board Tickness: 15mm
※Useafterremoving.
パッキン
Gasket
パッキン
Gasket
※ ※
※
平座金
Plain Washer
六角ナットM3
Hexagon Nut M3
(締付けトルク:0.6N・m)
(
Tiqhtening torque :
0.6N・m)
六角ナットM3
Hexagon Nut M3
取付面(平面)
Mounting surface (flat)
ALL OFF
Ⅱ ⅢⅠ ALL OFF
Ⅱ ⅢⅠ
ON(1shot)
ON(keep)
ON
ON
OFF
OFF
(ON-time>0.1s)
45V DC or more
「Total drive current of each relay used」
+「35mA×number of unitsconnected」or more
お願い
NOTICE
●Specify the flash settings before wiring the equipment. Also, while in operation, do not change flash patterns or
flash group settings.
●For synchronized operation with multiple units connected, specify all with the same flash pattern.
●あらかじめフラッシュ設定をおこなってから機器の配線をしてください。運用中にフラッシュパターン設定や
フラッシュグループ設定をおこなうことはできません。
●複数台接続で同期作動をおこなう場合、フラッシュパターンはすべて同じ設定にしてください。
ON(1shot)ON(1shot)
Group A
Group B
Change
Ⅱ Ⅱ
ALL OFF
Ⅱ ⅢⅠ
㾎
ポイント
Place a check mark on the Group Setting that you
have set the product to.
設定したグループ名を「㾎(チェック)」します。
TIP
Group Setting
AB
ALL OFF
Ⅱ ⅢⅠ
−2−
Triple flash
トリプ ルフラッシュ
Extreme Warning flash
高警告フラッシュ
点滅
Continuous
点灯
ON(1shot)
Blinking
ON(1shot)
ON(1shot)ON(1shot) Change
ポイント
The flash pattern returns to [TripleFlash].
フラッシュパターンが「トリプ ルフラッシュ」に戻ります。
TIP
Ⅱ
Ⅱ Ⅱ
Ⅱ
ON(1shot)
(1s)
×3 Triple flash
トリプ ルフラッシュ
Ⅱ

F1
F1
F1
F1
F1
Red-1
F1
F1
F1
F1
F1
F1
F1
F1
F1
F1
F1
F1
F1
F1
F1
RY
C
Red-2
POWER
SW 2
DIMMER
SW
DC12-24V
12-24V DC
F3 Red-3
Black-2
Black-3
Black-1
Gray
Blue
DIMMER
SW
Gray
F1
F1
F1
Red-1
F1
F1
POWER
SW 1
Red-2
F2
12-24V DC
Black-1
Black-2
Blue Blue Blue
L6
12-24V DC
DIMMER
SW
POWER
SW 1
Black-1
Gray
Red-1
F1
When using 1unit
When using multiple units (2 or more,5 or less) in a synchronous operation
When using multiple units (6 or more,20 or less) in a synchronous operation
STEP3A
STEP3B
STEP3C
絶縁処理
Insulation
Power Supply Input Wire+ (red)
Dimmer Input/Change Setting Wire (gray)
Synchronize/Setting Wire (blue)
Ground Wire – (black)
Black-1
Black-1
Black-1
Black-1
Red-1
Red-1
Red-1
Red-1
Black-1
Black-1
Black-1
Black-1
Black-1
Black-1
Black-1
Black-1
Black-1
Black-1
Black-1
Black-1
Black-1
Black-1
Black-1
Black-1
Black-1
Black-1
Black-1
Black-2
Black-2
Black-2
Red-1
Red-1
Red-1
Red-1
Red-1
Red-1
Red-1
Red-1
Red-1
Red-1
Red-1
Red-1
Red-1
Red-1
Red-1
Red-1
Red-1
Red-1
Red-1
Red-2
Red-2
Red-2
●
Distribute the power system into multiple system.
You can connect up to 5 units per system. For 20 units, 4systemus are required.
〜
1st Line
〜
2nd Line
〜
3rd Line
〜
4th Line
Power Supply Input Wire+ (red)
Dimmer Input/Change Setting Wire (gray)
Synchronize/Setting Wire (blue)
Ground Wire – (black)
0.5m
※
※
※
※
※
Blue Blue Blue
L1
1
2
5
6
10
11
15
16
20
1
2
3
4
5
15
610
11 15
16 20
L5
L6 L6L6
L5
L2
L2+L3
L3
L2
Power Supply Input Wire+ (red)
Dimmer Input/Change Setting Wire (gray)
Synchronize/Setting Wire (blue)
Ground Wire – (black)
L3
RY
C
RY
C
RY
C
L5
L2+L3+L4
L4
Blue Blue Blue Blue
L6 L6 L6
12-24V
DC
Blue
※
12-24V
DC
Blue
1
DC
Blu
12-24
Blue
※
※
※
※
※
※
※
※
※
お願い
NOTICE
F2
F2
F2
F2
12-24V
DC
Blue
※
12-24V
DC
Blue
1
DC
Blu
12-24
Blue

Are flash patterns of each product the same?
Stimmen die Blinkmuster der einzelnen Produkte überein?
Les modèles de clignotement de chaque modèle sont-ils
identiques ?
¿Son iguales los patrones de intermitencia de cada producto?
Ogni prodotto ha la stessa sequenza di lampeggio?
Are the flash group settings correct?
Sind die Blinkgruppeneinstellungen korrekt.
Les paramètres du groupe de clignotement sont-ils corrects ?
Le impostazioni di lampeggio del gruppo sono corrette?
¿Es correcta la configuración del grupo de intermitencia?
If you are having issues with your product, please refer to the below troubleshooting before requesting repairs.
Etwaige Probleme lassen sich möglicherweise durch folgende Überprüfungen beheben. Vor einer Reparaturanfrage Folgendes überprüfen.
Si un problème se produit, il peut être résolu en vérifiant ce qui suit. Avant de demander des réparations, vérifier ce qui suit.
Se si verificano problemi, è possibile risolverli controllando quanto segue. Prima di chiedere un intervento di riparazione, controllare quanto segue.
To ensure safe use, perform the following inspections.
Um eine sichere Verwendung zu gewährleisten, führen Sie bitte folgende Inspektionen durch.
Pour assurer une utilisation sécuritaire, effectuer les inspections suivantes.
Per assicurare un uso sicuro del prodotto, eseguire le seguenti ispezioni.
Con el fin de garantizar el uso seguro de este producto, realice las siguientes inspecciones.
Luminous colors
Protection Rating
Environmental Conditions
Notes
*1 Flash Pattern (Triple Flash/Blinking) meets
SAE J595 Class 3.
*2The “Dimmer Input/Change Setting Wire (gray)
can be used to dim each Flash Pattern during
a Flash operating.
*3 EMC meets level ECE R10.05.
*4InMultiple-unitOperationwithmultipleunits
connected,specifyallunitswiththesameflash
pattern.Flashwillnotoperateproperlywhen
flashpatternsaredifferent.
・Due to the characteristics of the LED elements,
there may be a slight variation in color tone and
brightness between units.
Synchronized / Alternating
Group A / Group B (Factory default: Group A)
Flash Pattern (4 types)
(Factory default: Triple Flash)
Rated Voltage
Operating Voltage Range
Maximum Current
Consumption (A)
Daisy-
chained
Maximum 3 m
Maximum 20 units
・Triple Flash
*1
・Continuous
・Blinking
*1
・Extreme Warning Flash
E
F
G
Is the correct voltage applied to the Dimmer Input/Change Setting wire?
È stata applicata la tensione di alimentazione corretta alla funzione
Impulso di attenuazione/Modifica configurazione cablaggio?
L’alimentation du gradateur ou du paramètre de changement
est-elle appliquée à la tension correcte ?
Liegt die korrekte Spannung für den Draht der
Dimmereingabe/Änderungseinstellung an?
¿Se está aplicando la fuente de alimentación al cable de Entrada
de atenuador/Cambiar configuración en la tensión correcta?
Is the wiring correct?
Ist die Verkabelung korrekt?
Le câblage est-il correct ?
Il cablaggio è collegato correttamente?
¿Se ha realizado correctamente el cableado?
A
B
C
D
Are the unused lead wires insulated?
Sind die nicht verwendeten Leitungsdrähte isoliert?
Les fils conducteurs inutilisés sont-ils isolés ?
Sono stati isolati i cavi non utilizzati?
¿Están aislados los cables conductores que no están en uso?
Is the fuse blown?
Ist die Sicherung durchgebrannt?
Un fusible est-il grillé ?
Si è bruciato il fusibile?
¿Se ha fundido el fusible?
Refer to “6. (STEP3) ” and redo the wiring.
Siehe „
6. (STEP3)
“ und neu verkabeln.
Voir «
6. (STEP3)
» et effectuer le câblage à nouveau.
Vedere "
6. (STEP3)
” e rifare il cablaggio.
Consulte “
6. (STEP3)
” y realice nuevamente el cableado.
Refer to “6. (STEP3) ” and redo the wiring.
Siehe „
6. (STEP3)
“ und neu verkabeln.
Voir «
6. (STEP3)
» et effectuer le câblage à nouveau.
Vedere "
6. (STEP3)
” e rifare il cablaggio.
Consulte “
6. (STEP3)
” y realice nuevamente el cableado.
Insulate unused lead wires.
Nicht verwendete Leitungsdrähte isolieren.
Isoler les fils conducteurs inutilisés.
Isolare i cavi inutilizzati.
Aísle los cables conductores que no están en uso.
Is the correct voltage applied to the power supply?
Liegt die korrekte Spannung an?
L’alimentation est-elle appliquée à la tension correcte ?
È stata applicata la tensione di alimentazione corretta?
¿Se está aplicando la fuente de alimentación en la tensión correcta?
Use the appropriate voltage.
Geeignete Spannung anlegen.
Utiliser la tension appropriée.
Applicare la tensione di alimentazione corretta.
Utilice la tensión adecuada.
After resolving the cause of the blown fuse, replace the fuse.
Sicherung nach Beheben der Ursache des Durchbrennens ersetzen.
Après avoir résolu le problème, remplacer le fusible.
Dopo aver individuato la causa della bruciatura del fusibile, sostituirlo.
Una vez que haya resuelto la cause del fusible fundido, reemplace el fusible.
Refer to
“ 6.(STEP1) ”
and apply the same settings to the flash pattern for
all units.
Siehe „
6. (STEP1)
“ und für alle Geräte dieselben
Blinkmustereinstellungen vornehmen.
Vedere “
6. (STEP1)
” e applicare la stessa configurazione alla sequenza
di lampeggio dell’intero apparato.
Voir «
6. (STEP1)
» et appliquer les mêmes paramètres au modèle de
clignotement pour tous les équipements.
Consulte “
6. (STEP1)
” y aplique la misma configuración al patrón de
intermitencia para todo el equipo.
Refer to
“ 6.(STEP1) ”
and redo the flash group settings for each unit.
Siehe „
6.(STEP1)
“ und für alle Geräte die Blinkgruppeneinstellugnen erneut
vornehmen.
Voir «
6.(STEP1)
» et reconfigurer les paramètres du groupe de clignotement
de l’équipement.
Vedere “
6.(STEP1)
” e rifare la configurazione della sequenza di lampeggio
dell’intero apparato.
Consulte “
6.(STEP1)
” y configure nuevamente los ajustes del grupo de
intermitencia para el equipo.
All Directions (excluding cable ends)
IP68 (IEC 60529) (IPX8: 1m below water, 1 hour)
NEMA TYPE 4X,13
9.5V - 30V DC
12 - 24V DC
Red Amber Green Blue
What to Confirm
Überprüfungsgegenstand
Vérifier l’élément
Parte da controllare
Ítem a comprobar
ACD
C
E
AG
ACF
B
1
2
3
4
5
6
Solution
Überprüfungsgegenstand
Vérifier l’élément
Parte da controllare
Ítem a comprobar
Issue
Problem
Problème
Problema
Problema
No.
Does not flash
Blinkt nicht
Ne clignote pas
Non lampeggia
No parpadea
The brightness of the light is
not steady
Wird hell, wird dunkel
S’allume, s’éteint
Diventa molto luminosa,
diventa scura
Se ilumina, se vuelve oscuro
Does not dim
Keine Dimmung
Ne s’estompe pas
Non si attenua
No se atenúa
Multiple-unit Operation does
not work
Keine synchrone Aktivität
Ne fonctionne pas de façon
synchronisée
Non funziona in modo
sincronizzato
No funciona de manera
sincrónica
Flash pattern is not accurate
Blinkmuster falsch
Modèle de clignotement
incorrect
La sequenza di lampeggio
non è corretta
El patrón de intermitencia no
es correcto
Appears dark, when not in
dimming mode
Dunkel ohne Dimmereingabe
Sombre même sans
gradateur
Scurisce anche senza
impulso di attenuazione
Está oscuro, incluso sin la
entrada del atenuador
Solution
Lösung
Solution
Soluzione
Solución
What to Inspect
Inspektionsgegenstand
Élément d’inspection
Voce di ispezione
Ítem a inspeccionar
How to Repair
Abhilfe
Solution
Rimedio
Solución
Check for cracks or damages on the outer body
Scheinbar nicht beschädigt
Semble ne pas être endommagé
Il prodotto non sembra danneggiato
No parece estar dañado
If damaged, stop using and replace the product.
Bei Beschädigung Verwendung einstellen und Produkt ersetzen.
S’il est endommagé, arrêter d’utiliser le produit et le remplacer.
Se danneggiato, interromperne l’uso e sostituire il prodotto.
Si está dañado, pare de usarlo y reemplace el producto.
If the product does not flash or light up, refer to “ 8. Troubleshooting ”. Replace the item if it is defective.
Falls kein Blinken oder Leuchten, weiter zu „ 8. Troubleshooting “. Bei Fehler Produkt ersetzen.
S’il ne clignote ou ne s’allume pas, consulter « 8. Troubleshooting ». S’il est défectueux, remplacer le produit.
Se non si accende o lampeggia, vedere “ 8. Troubleshooting ”. Se il prodotto è difettoso, sostituirlo.
Si no se enciende o parpadea, consulte “ 8. Troubleshooting ”. Si está defectuoso, reemplace el producto.
If the units are not synchronized in Multiple-unit Operation, refer to “ 8. Troubleshooting ”. Replace the item
if it is defective.
Falls kein synchrones Blinken, weiter zu „ 8. Troubleshooting “. Bei Fehler Produkt ersetzen.
S’il ne clignote pas de façon synchronisée, consulter « 8. Troubleshooting ». S’il est défectueux, remplacer le produit.
Se il lampeggio non avviene in modo sincronizzato, vedere “ 8. Troubleshooting ”. Se il prodotto è difettoso, sostituirlo.
Si no parpadea de manera sincronizada, consulte “ 8. Troubleshooting ”. Si está defectuoso, reemplace el producto.
Si están flojos, ajústelos según sea necesario. Para mantener la seguridad, compruebe los tornillos de manera
periódica (una o dos veces por año).
Se le viti sono allentate, serrarle come prescritto. Per mantenere la sicurezza, controllare regolarmente una volta
o due l’anno.
Si elles sont desserrées, les resserrer. Pour assurer la sécurité, vérifier une ou deux fois par an.
Lose Schrauben entsprechend anziehen. Zur Aufrechterhaltung der Sicherheit regelmäßig ein- oder zweimal im
Jahr überprüfen.
If loose, tighten as required. To maintain safety, check regularly once or twice a year.
Confirn that the light functions properly
Blinken oder Licht an
Clignotement ou voyant allumé
Luce accesa o lampeggiante
Intermitencia o luz encendida
Schrauben auf festen Sitz überprüfen
Compruebe que no se han aflojado los tornillos
Verificare che non vi siano viti allentate
Vérifier s’il y a des vis desserrées
Check for loose screws
注意
●This product heats up during operation. Be sure to turn the product OFF and wait at least 5 minutes for the unit to
cool before performing any maintenance.
●To clean the product, wipe using a soft cloth dampened with water. Do not use thinners, benzine, gasoline, oil, and
other chemicals, as these may cause discoloration and deterioration of the product.
Caution
Vorsicht
Attention
Attenzione
Precaución
JIS D 0203-1994 S1
LPT-1M1-□/LPT-2M1-□
LPT-
1M1-□
LPT-
2M1-□
12V DC
24V DC
12V DC
24V DC
0.15
0.30
0.15
0.30
0.30
0.60
0.25
0.50
0.55
1.10
0.55
1.10
0.65 0.60
1.201.30
RYGB
Model
Water Resistance (JIS)
Confirm that flashing is synchronized in
Multiple-unit Operation
Blinken synchronisiert
Clignotement synchronisé
Il lampeggio è sincronizzato
La intermitencia está sincronizada
●Während des Betriebs erwärmt sich die Haupteinheit. Schalten Sie bei Reparaturen die Stromversorgung aus, und
warten Sie mindestens 5 Minuten, bevor Sie mit der Arbeit beginnen.
●
Zur Reinigung des Produkts befeuchten Sie ein weiches Tuch mit Wasser, wringen Sie es fest aus und wischen damit
das Produkt ab. Verwenden Sie hierfür keine Verdünner, Benzin, Öl, Chemikalien usw. Die Nichtbeachtung dieser
Anweisungen kann zu Verfärbungen und Materialverschlechterung führen.
●Pendant le fonctionnement, l’unité principale se réchauffe. Lors de la réalisation de réparations, couper
l’alimentation et attendre 5 minutes ou plus avant de procéder au travail.
●Pour nettoyer ce produit, imbiber un chiffon doux avec de l’eau, le bien tordre et essuyer le produit. Ne pas utiliser
des diluants, de la benzine, de l’essence, de l’huile, des produits chimiques, etc. Le non respect de ces instructions
pourrait entraîner une décoloration et une détérioration.
●Durante il funzionamento, l’unità principale si riscalda. Effettuando riparazioni, interrompere l'alimentazione
elettrica e attendere 5 minuti o più prima di iniziare il lavoro.
●Per pulire questo prodotto, inumidire un panno morbido con acqua, strizzarlo bene e poi passarlo sul prodotto. Non
pulire il prodotto con diluenti, benzene, benzina, olio, prodotti chimici ecc. Il mancato rispetto di tali istruzioni
potrebbe causare la scoloritura e il deterioramento dell’apparato.
●Durante su funcionamiento, la unidad principal se calienta. Cuando realice reparaciones, apague el producto y
espere cinco minutos o más antes de iniciar el trabajo.
●Para limpiar este producto, humedezca un paño suave con agua, escúrralo bien y limpie el producto. No utilice
disolventes, bencina, gasolina, aceite, producto químicos, etc. El incumplimiento de estas instrucciones puede
resultar en la decoloración y el deterioro del producto.
EMC Directive (EN61000-6-4, EN61000-6-2) *3
KCKN61000-6-4,KN61000-6-2
RoHS Directive EN 50581
FCC Part15 SubpartB Class A
Compliance Standards
Dimmer Function Yes
*2
保守、点検方法
Maintenance and Inspection Methods
7
困ったときは
Troubleshooting
8
仕様
Specification
9
この保証規定は、お客様がお買い上げ頂いた製品に関して、株式会社パトラ
イト(以下、「弊社」といいます)が保証する内容について明記しています。
第1条(目的)
1.本規定は、弊社の製品(以下、「本製品」といいます)に関する保証責任の取
扱いについて定めるものとします。
2.
お客様が本製品の使用を開始された時点で、お客様は本規定に同意して頂いた
ものとし、お客様と弊社との間で本規定の効力が有効に生ずるものとします。
第2条(保証対象および保証期間)
弊社は、お客様が本製品を購入された日から1年以内(以下、「保証期間」と
いいます)に本製品について以下の各号のいずれかに該当した場合(以下、
「不良」といいます)、次条に定める保証責任を負うものとします。
①本製品の外形または内部に本製品の用途または機能を損なう変質または
変形が発生した場合
②本製品が製品仕様書に定められた性能を発揮しない場合
第3条(保証内容)
1.弊社は、本製品に不良が生じた場合(以下、「不良品」といいます)、自らの裁
量によって無償による修理または代替品の提供のいずれかの措置を講じ
るものとします。
2.弊社が前項の措置を講じた場合、当該措置がなされた本製品の保証期間
は、当初の不良品に関する保証期間と同一とします。
3.弊社が第1項に基づきお客様に対して本製品の代替品の提供を行った場
合、弊社において回収致しました不良品の所有権は、弊社に帰属するもの
とします。
4.弊社は、第1項の代替品の提供に関して、製造中止等の諸事情により同一
製品を提供できない場合には、自らの裁量により本製品と同等以上の性能
を有する製品を提供できるものとします。
5.以下の各号の部材は、保証の対象外とします。
①消耗品(モータ・電球・ロータゴム・パッキン・Oリング・キセノン基板等)
②輸送中における本製品の保護を目的とした梱包材料(製品梱包箱・ビ
ニール袋・緩衝材等)
第4条(免責事項)
1.弊社は、以下の各号のいずれかに該当する場合、不良に関して前条に定め
る保証責任を負わないものとします。
①本製品の輸送・運搬中に発生した衝撃・落下等の外部的要因により不良
が発生した場合
②本製品の製品仕様書・取扱説明書・取り扱い上の注意等に違反すること
により不良が発生した場合
③本製品が設置または接続された装置・機器・車両・船舶・建造物・ソフ
トウェア等による外的要因に起因して不良が発生した場合
④お客様または第三者が事前に弊社の承諾を得ることなく本製品の分解・
改造・補修・付属品取付等を行ったことにより不良が発生した場合
⑤お客様または第三者の故意または過失により不良が発生した場合
⑥お客様が第5条第3項の禁止事項に違反した結果、不良が発生した場合
⑦火災・地震・台風・落雷等の天災地変または公害・塩害・静電気・停電・
異常電圧等の外部的要因に起因して不良が発生した場合
⑧本製品の販売時点における科学または技術に関する知見によっては、弊
社が不良を予測することができない場合
⑨
通常使用に基づく本製品の自然消耗または経年劣化により不良が発生した場合
⑩
本製品が日本以外の国において使用されたことにより不良が発生した場合
⑪保証期間の満了後に不良が発生し、お客様において当該不良が保証期間
内に発生したことを証明することができない場合
⑫弊社に対して本書のご提示がない場合
2.弊社は、第3条第1項の措置の実施の有無を問わず、不良に起因してお客
様に生じた通常損害、特別損害、機会損失、逸失利益、事故補償、当社製品以
外の製品(本製品と通信回線等により接続されているか否かを問いませ
ん)に関する損傷、損失、不具合、データ損失および不良を修補するための
費用(人件費、工事費、交通費、運送費等をいいますが、これらに限られませ
ん)のいずれに関しても、一切の責任を負わないものとします。
3.お客様が使用されるシステム・機械・装置等への本製品の適合性はお客
様自身でご確認いただくものとし、弊社はこれらと本製品との適合性につ
いて一切の責任を負わないものとします。
第5条(ソフトウェアの取扱い)
1.
本製品に弊社が著作権者であるソフトウェア(以下、「本ソフトウェア」とい
います)が内蔵されている場合、弊社は、お客様に対して本ソフトウェアを日
本国内で使用する非独占的で譲渡不能な使用権を許諾するものとします。
2.
弊社は、本ソフトウェアの機能を向上させるべく、自らの裁量により本ソフ
トウェアをバージョンアップすることができるものとします。弊社は、ソフ
トウェアのバージョンアップに起因してお客様に生じた通常損害、特別損
害、機会損失、逸失利益、事故補償、
当社製品以外の製品(本製品と通信回線
等により接続されているか否かを問いません)に関する損傷、損失、不具
合、データ損失および不良を修補するための費用(人件費、工事費、交通費、
運送費等をいいますが、これらに限られません)のいずれに関しても、一切
の責任を負わないものとします。
3.お客様は、事前に弊社の承諾を得ることなく、以下の各号の行為を行って
はならないものとします。
①本ソフトウェアを複製すること
②本ソフトウェアの改変・結合・リバースエンジニアリング・逆コンパイ
ル・逆アセンブル等を行うこと
③
本ソフトウェアを第三者に対して再使用許諾・貸与・レンタル・転売すること
④
本ソフトウェアを第三者に送信可能な状態でネットワーク上に蓄積すること
⑤
本ソフトウェアに付されている著作権表示およびその他の権利表示を除去すること
第6条(その他)
1.本製品に関する製品仕様書・取扱説明書・カタログ等の記載内容は、事前
に予告なしに変更する場合があります。
2.本製品に関する弊社の責任は、本規定をもって全てとし、弊社はこれ以外
に一切の責任を負わないものとします。
3.
本保証書は、日本国内においてのみ有効に効力を生ずるものとします。お客
様または第三者が本製品を海外へ輸出される場合、本規定の適用は除外され
るものとし、本製品に関する全ての責任は、輸出元に帰属するものとします。
4.弊社は、お客様による紛失・損傷等の事由を問わず、お客様に対して本書
の再発行を行わないものとします。
5.本書は、本書に明示した条件に基づき保証をお約束するものです。従って、
本書によって弊社およびそれ以外の事業者に対するお客様の法律上の権
利を制限するものではありません。
第7条(準拠法および管轄裁判所)
本規定は、日本法を準拠法とし、日本法に従って解釈されるものとします。
本規定の履行および解釈に関して紛争が生じたときは、大阪地方裁判所を
第一審の専属的合意管轄裁判所とするものとします。
以上
株式会社パトライト
製品保証規定 [Ver.2.1(2018.07.27)]
Multiple-unit operation
Flash group
Distance between units
Number of units
STEP4
Confirm Operation
Confirm that the product operates properly according to the configured flash pattern and flash group.
Confirm that the product operates properly according to the dimming function.
This manual suits for next models
4
Other Patlite Lighting Equipment manuals
Patlite
Patlite LCE-A User manual

Patlite
Patlite LR4 User manual

Patlite
Patlite WE-402UB-LAN User manual
Patlite
Patlite WH-A Series User manual
Patlite
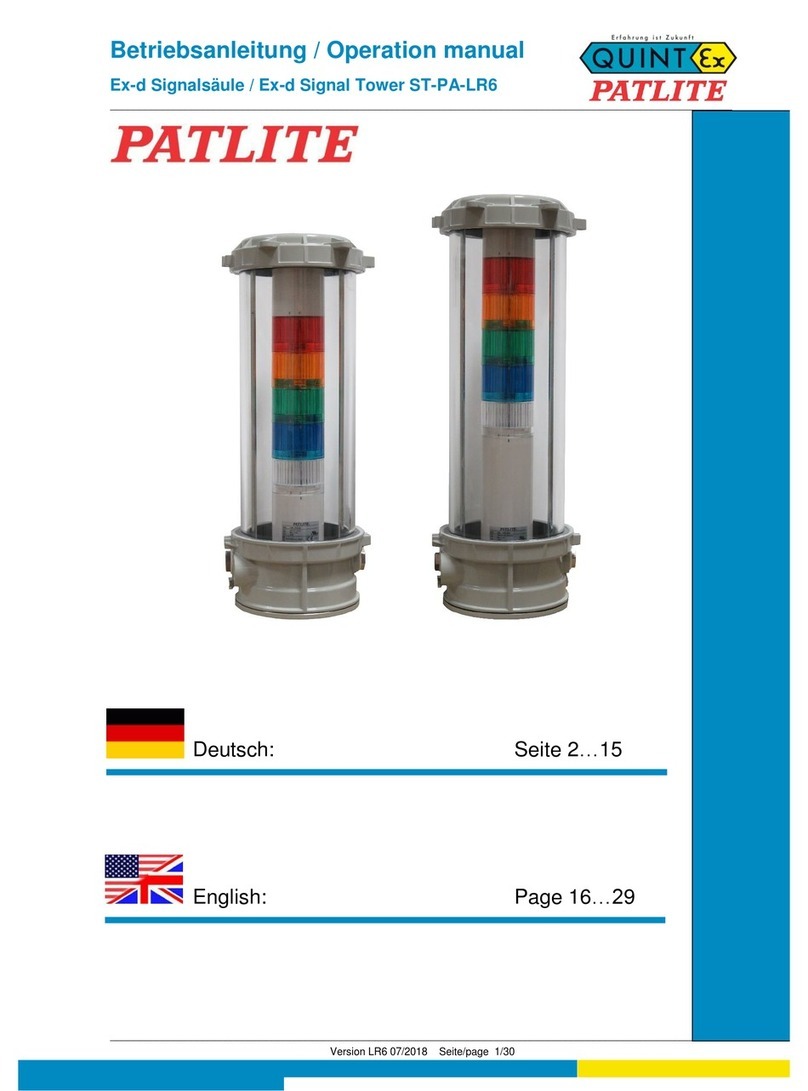
Patlite ST-PA-LR6 series User manual
Patlite
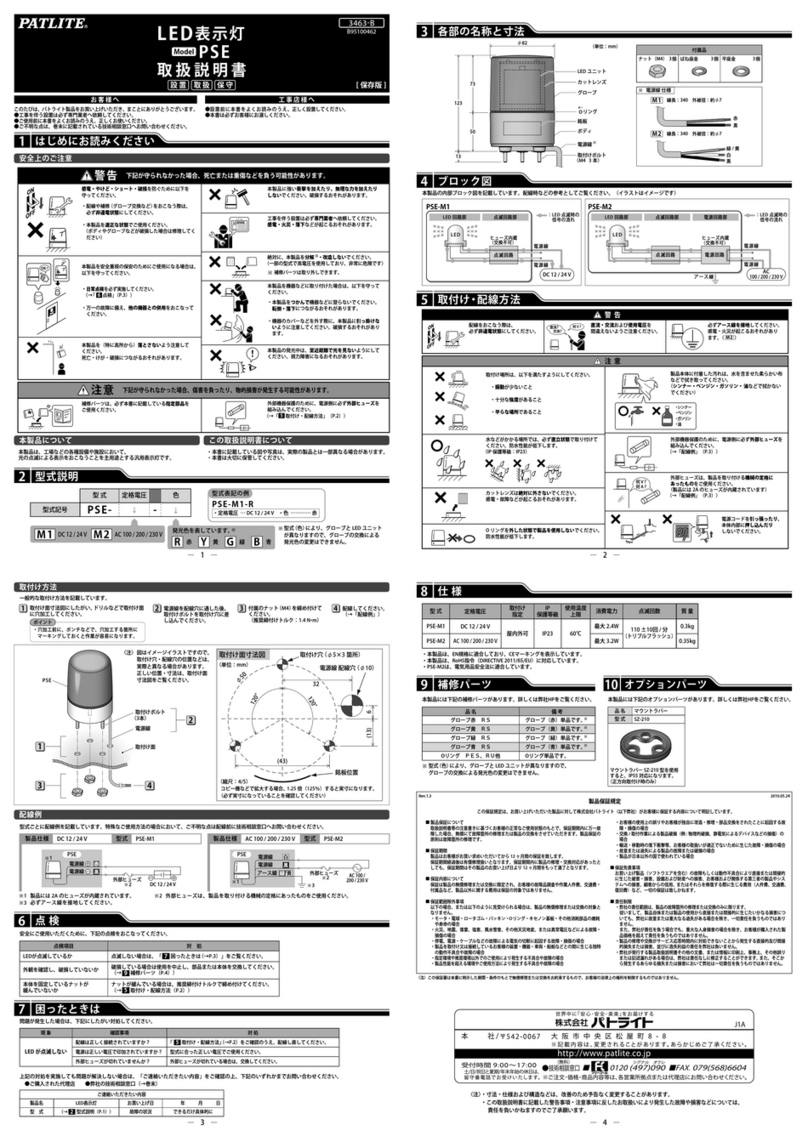
Patlite PSE User manual
Patlite
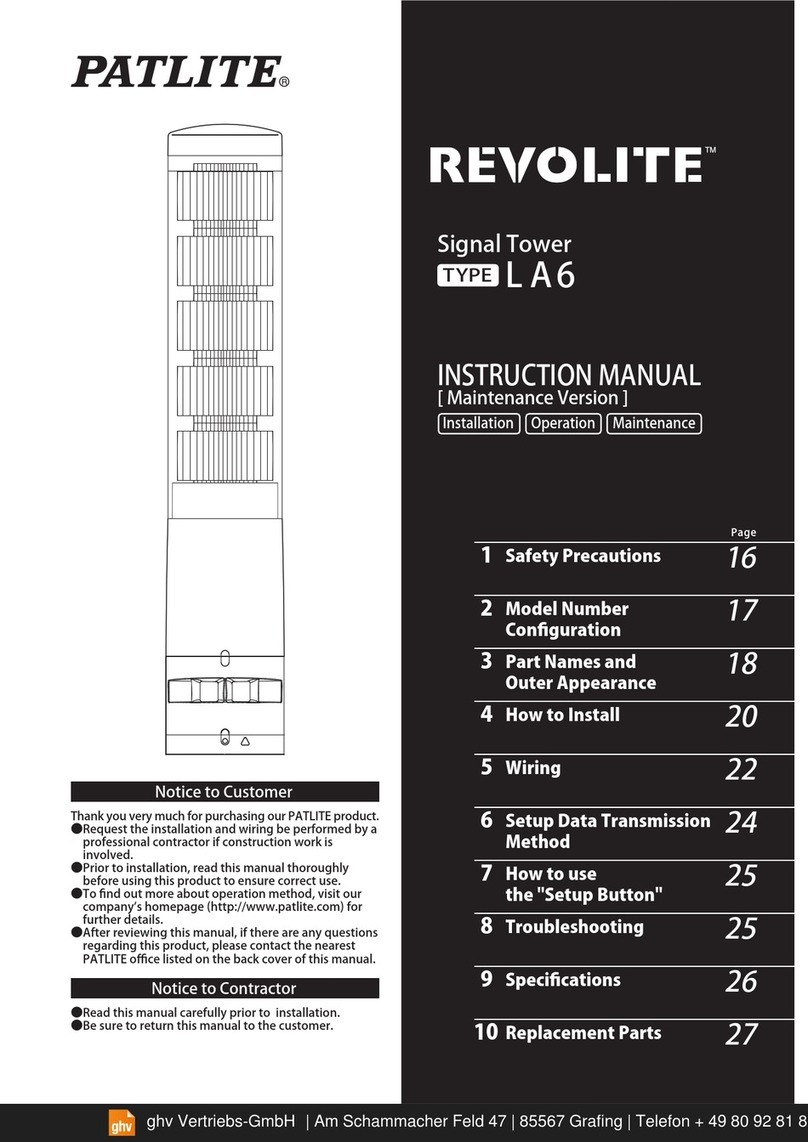
Patlite LA6 series User manual

Patlite
Patlite SUPERSLIM ME-A Series User manual
Patlite
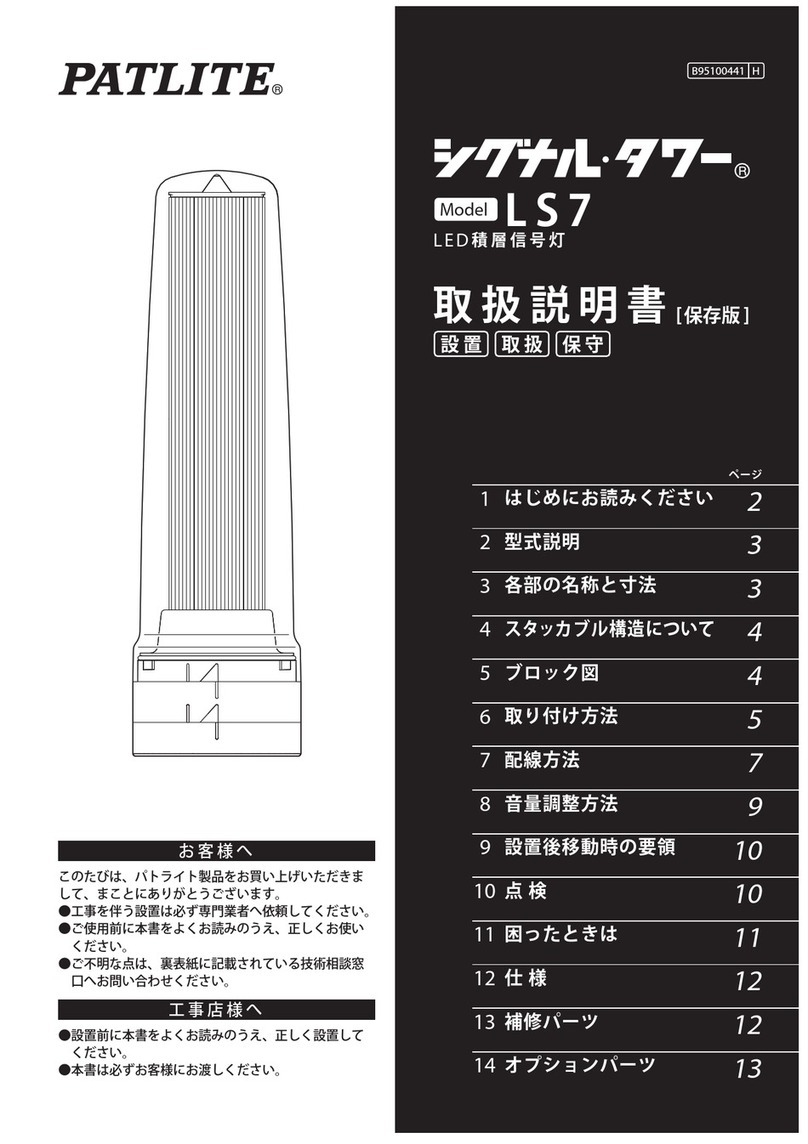
Patlite LS7 User manual
Patlite
Patlite LP8US User manual
Popular Lighting Equipment manuals by other brands
Philips
Philips Vari-Lite TECHNICAL NOTICE
Generac Mobile
Generac Mobile CUBE+ owner's manual
EuroLite
EuroLite LED Pixel Spot 64 DMX user manual
Sagitter
Sagitter SG QUARTZ100 user manual
Vision & Control
Vision & Control LDLF60x240-G525/UDC Instructions for use
Image Engineering
Image Engineering LE7 user manual
