BETRIEBSANLEITUNG
8
4 Vorbereitung
4.1 Stromversorgung
Das Batteriefach befindet sich an der Rückseite des Messgeräts. Wenn die Batteriespannung zu gering
wird, um eine einwandfreie Funktionsweise zu gewährleisten, wird dies durch ein Batteriesymbol im
Display angezeigt und die Batterie im Gerät muss ausgetauscht werden. Dafür müssen die Schrauben,
die das Batteriefach fest halten, gelockert werden. Daraufhin kann die alte Batterie aus dem Gerät
genommen werden und eine neue Batterie eingesetzt werden. Achten Sie dabei auf die korrekte Polung.
Nachdem die neue Batterie eingesetzt wurde, muss das Batteriefach wieder aufgesetzt und mit den
Schrauben gefestigt werden. Achten Sie darauf, dass die Abdeckung wieder fest auf dem Gerät
angeschraubt ist.
5 Betrieb
5.1 Messen
5.1.1 Einschalten
Drücken Sie die Ein/Aus-Taste, um das Gerät ein- und auszuschalten.
5.1.2 Messungen vornehmen
1. Halten Sie die Sensoren in den Bereich, der gemessen werden soll.
2. Warten Sie einige Zeit, bis sich der Messwert stabilisiert hat.
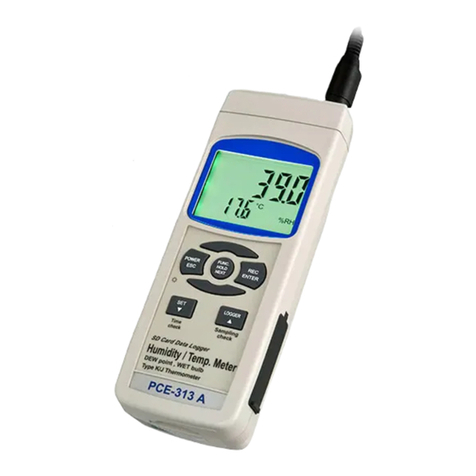
3. Drücken Sie die MODE-Taste mehrfach, um zwischen r. F.%, g/m³ oder gr/ft³ zu wechseln.
4. Die °C / °F –Taste schaltet zwischen den beiden Temperatureinheiten hin und her.
5.1.3 Messung der absoluten Feuchte
1. Wählen Sie mit der MODE-Taste die Funktion zur Messung der absoluten Feuchte (g/m³ oder
gr/ft³), wie beschrieben, aus. Daraufhin erscheint links im Display „abs“.
2. Der angezeigte Messwert beschreibt die absolute Feuchte.
5.1.4 Messung Taupunkt
1. Um die Messung der Taupunkttemperatur durchzuführen, muss die °C / °F –Taste so lange
gedrückt werden, bis „DP“ unten rechts erscheint.
2. Der angezeigte Messwert beschreibt die Taupunkttemperatur.
5.1.5 Messung der Feuchtkugeltemperatur
1. Um die Messung der Feuchtkugeltemperatur auszuwählen, drücken Sie die °C / °F –Taste, bis
„WB“ unten rechts erscheint.
2. Der angezeigte Messwert beschreibt die Feuchtkugeltemperatur.
5.1.6 Temperaturmessung
1. Um eine Temperaturmessung durchzuführen, drücken Sie die °C / °F –Taste, bis unten rechts °C
oder °F erscheint.
2. Der angezeigte Messwert beschreibt die Temperatur, in der ausgewählten Einheit.
5.2 Weitere Messfunktionen
5.2.1 Data-HOLD
Drücken Sie die HOLD-Taste kurz, um den angezeigten Messwert im Display einzufrieren. In der Ecke
unten rechts zeigt das Display HOLD an. Um die HOLD-Funktion zu deaktivieren und zur normalen
Messung zurückzukehren, muss die HOLD-Taste nochmals kurz gedrückt werden.
