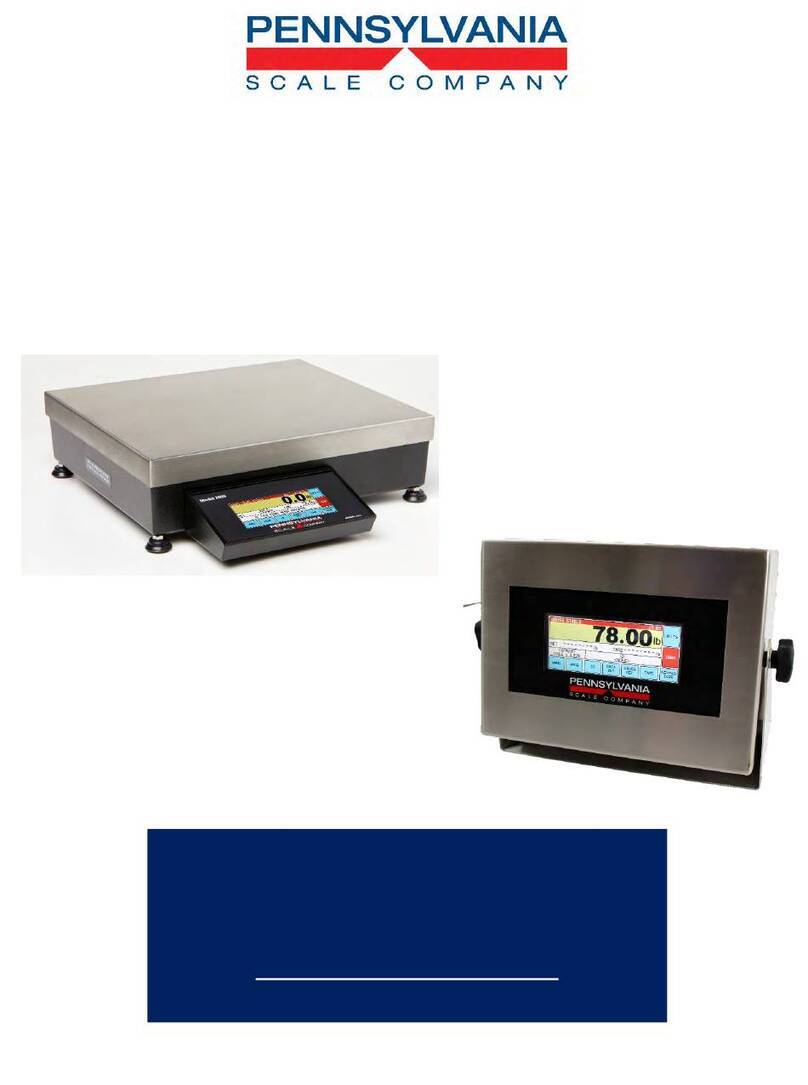
Pennsylvania Scale Company 7800 User manual

7800 Technical Manual
Page 2 of 69
For Tech Support Manuals and How to Videos go to pascale.com or email us at: techsuppo[email protected]
Configuration and Calibration Table of Contents
Unpacking and Setup
3
Specifications
4
Connections
5
Operation Guide
6 - 14
Configuration and Calibration
Weighing Settings
15 – 18
Calibration
19 – 22
Counting Modes
23 – 25
ID Database
26 – 28
Communication Protocols
29 – 35
Data Output
36 – 44
Time and Date
45 – 46
Options
47 – 50
User Settings
52 – 52
Scale External Commands
57 – 58
Wired Ethernet
59 – 62
WiFi
63 – 69

7800 Technical Manual
Page 3 of 69
For Tech Support Manuals and How to Videos go to pascale.com or email us at: techsuppo[email protected]
Unpacking and Startup
Unpack the Scale
• DO NOT LIFT SCALE BY THE TOP
SPIDER OR SUB PLATFORM!
• Remove the molded foam top from
the carton. On 2 lb. and 5 lb. capacity
scales the platform is packaged on
top of this foam. Gently lift and
remove the stainless-steel platform
cover only.
• Remove any options which may be
packed with the scale.
• Carefully remove scale from the
packaging by grasping both sides of
the base.
Scale Setup
• Place the scale on a stable, level
surface for operation.
• Adjust the corner leveling feet until
the level bubble indicates the unit is
level.
• Firmly tighten hex jam nuts on the
leveling feet. (Any time the scale is
relocated, it should be leveled.)
• Remove the protective plastic wrap
from the platform and place the
platform on the spider.
•
Plug the scale into 110/120 VAC

7800 Technical Manual
Page 4 of 69
For Tech Support Manuals and How to Videos go to pascale.com or email us at: techsuppo[email protected]
SPECIFICATIONS
•LOAD CELL A/D CONVERTER
•TYPE: 24-bit delta sigma (1:16,777,216)
•EXCITATION: 5 VDC, 120 mA max.
•SIGNAL INPUT: 16 mv
•SENSITIVITY: 0.1 Uv/grad
•UPDATE RATE: 30 update/second
•DISPLAY: TOUCH SCREEN, high-impact glass, 800x320-dot resolution and 4.6” full-color LCD display with
resistive touch panel
•KEYPAD: Full Alphanumeric plus controls
•POWER INPUT: 117/217 VAC, 50-60 HZ, 20 watts, fuse 0.50 A Slo-Blow.
•SERIAL PORTS: 2 Bi-directional RS232C
•ENCLOSURE: Cast Aluminum Chassis and Load Cell Spider, Stainless Steel Platter.
•OPTIONS:
oSecond base input
oBattery AC operation, built-in re-chargeable
system, 30+ hours of operation
oPrinters for label, barcode label or receipt
printing
oBarcode scanner
oUpgraded Internal Product DB,
o1500 and 3000 entries
o1 alarm buzzer mounted inside scale or
indicator
oBall-top transfer plate
oRoller conveyor
oSetpoint/relays DC or AC
oAlarm stack lights and buzzer
oCommunications Wired
oEthernet, WiFi, USB Virtual
oCom Port, USB HID/Keyboard Emulation and
Bluetooth®
oAnalog output, 4-20ma or 0-10vdc
oCustom label design and setup
oCustom engineering for unique applications

7800 Technical Manual
Page 5 of 69
For Tech Support Manuals and How to Videos go to pascale.com or email us at: techsuppo[email protected]
Connections:
RS‑232 PIN ASSIGNMENTS AND IMPLEMENTED FUNCTIONS
Connection to the Serial Port is made via a DB‑9 female connector found in the access area under
the scale. Internal Instrument connection is on the main Board, TB2 1 through 7
7800 Scale
7800 Indicator
Com 1
PIN#
Com 2
PIN#
Com 1
PIN#
Com 2
PIN#
TXD Transmit
2
TXD Transmit
2
Ground
1
Ground
1
RXD Receive
3
RXD Receive
3
TXD Transmit
2
TXD Transmit
4
Ground
5
Ground
5
RXD Receive
3
RXD Receive
5
+5VDC
6 & 8
+5VDC
6 & 8
+5VDC
7
+5VDC
7
INTERNAL LOAD CELL AND REMOTE BASE CONNECTIONS

7800 Technical Manual
Page 6 of 69
For Tech Support Manuals and How to Videos go to pascale.com or email us at: techsuppo[email protected]
Operation Guide
The 7800 Touchscreen count/weigh scale and indicator uses a windows type operating system allowing
the user to select the operational mode which only has the scale data and function buttons required for
that operation. Use from any of the main operating displays use the MODE button to cycle through the
available modes windows that are enabled. These include Weighing, Counting, Checkweighing and
Setpoint Relay mode windows.
WEIGHING MODE
COUNTING MODE
CHECKWEIGHING MODE
SETPOINT RELAY MODE

7800 Technical Manual
Page 7 of 69
For Tech Support Manuals and How to Videos go to pascale.com or email us at: techsuppo[email protected]
Weighing Mode, ID Function Enabled Weighing Mode, ID Function Disabled
Scale Data Displayed
Function Buttons Available
Operation Performed
Primary Display Field
GROSS WEIGHT Or GROSS/NET
Configurable in Metrological Settings,
parameter 101 Main Weight Display
MENU Access calibration and
configuration menus
Second Display Field
NET WEIGHT
And
TARE WEIGHT
Configurable in Metrological Settings,
parameter 101 Main Weight Display
MODE Cycles through available
operational modes
Third Display Field
TARE WEIGHT
Or
ACTIVE ID
When ID, Description or Custom Defined
Data Fields are enabled in ID Database Active
ID is displayed
ID
When ID, Description or Custom
Defined Data Fields are enabled in ID
Database
Enter an ID number,
enter a new ID number
in database, recall an ID
number from database.
DATA OUT
Sends formatted data
output string to one or
both comports
GROSS NET
Configurable in Metrological Settings,
parameter 101 Main Weight Display
Cycles main display field
between Gross and Net
weight
TARE
Performs a platform tare
KEYPAD TARE
Configurable in Metrological Settings,
parameter 100 Keypad Tare Enable
Enter a known tare
value
ZERO
Zeros the scale
UNITS
Cycles through primary
and secondary units

7800 Technical Manual
Page 8 of 69
For Tech Support Manuals and How to Videos go to pascale.com or email us at: techsuppo[email protected]
Counting Mode, ID Function Enabled Counting Mode, ID Function Disabled
Scale Data Displayed
Function Buttons Available
Operation Performed
Primary Display Field
COUNT
MENU
Access calibration and
configuration menus
APW (Average piece Weight)
ACCURACY/ERROR %
Configured in Counting Modes Menu
Parameter 56 Percent Mode and when ID
function enabled
MODE Cycles through available function
modes
Third Display Field
ACTIVE ID
When ID, Description or Custom Defined
Data Fields are enabled in ID Database
Active ID is displayed
OR
Percent ACCURACY/ERROR
Configured in Counting Modes Menu
Parameter 56 Percent Mode and when ID
function enabled
ID
When ID, Description or Custom Defined
Data Fields are enabled in ID Database
Enter an ID number, enter a new
ID number in database, recall an
ID number from database.
DATA OUT
Sends formatted data output
string to one or both comports
TARE
Performs a platform tare
KEYPAD TARE
Configurable in Metrological Settings,
parameter 100 Keypad Tare Enable
Enter a known tare value
ZERO
Zeros the scale
PIECE WEIGHT
Opens numeric keypad window
for entry of known piece weights
SAMPLE SET
Opens sample set window for
establishing a piece weight
through sampling process

7800 Technical Manual
Page 9 of 69
For Tech Support Manuals and How to Videos go to pascale.com or email us at: techsuppo[email protected]
Checkweigh Mode, ID Function Enabled Checkweigh Mode, ID Function Disabled
Scale Data Displayed
Function Buttons Available
Operation Performed
Primary Display Field
GROSS WEIGHT Or GROSS/NET
Configurable in Metrological Settings,
parameter 101 Main Weight Display
MENU Access calibration and
configuration menus
UNDER/ACCEPT/OVER
Checkweigh Bar graph
Checkweigh by weight or count
Configurable in Setpoint Configuration
Parameter 8 Set Point Enable
MODE Cycles through available function
modes
Third Display Field
ACTIVE ID
When ID, Description or Custom Defined
Data Fields are enabled in ID Database
Active ID is displayed
OR
TARGET WEIGHT/COUNT
Checkweigh by weight or count
Configurable in Setpoint Configuration
Parameter 8 Set Point Enable
ID
When ID, Description or Custom Defined
Data Fields are enabled in ID Database
Enter an ID number, enter a new
ID number in database, recall an
ID number from database.
DATA OUT
Sends formatted data output
string to one or both comports
TARE
Performs a platform tare
KEYPAD TARE
Configurable in Metrological Settings,
parameter 100 Keypad Tare Enable
Enter a known tare value
ZERO
Zeros the scale
UNITS
Change Unit of Measure
SETPOINT
Opens Setpoint Target entry
window for establishing a Target
and Tolerance Values

7800 Technical Manual
Page 10 of 69
For Tech Support Manuals and How to Videos go to pascale.com or email us at: techsuppo[email protected]
Set Point/Relay Mode, ID Function Enabled Set Point/Relay Mode, ID Function Disabled

7800 Technical Manual
Page 11 of 69
For Tech Support Manuals and How to Videos go to pascale.com or email us at: techsuppo[email protected]
To Count an item using SAMPLE SET and ID DATABASE off
1 Step Counting In Counting Modes Set PARM 56 Two-SW APW SAMPLE To NO
If using a container to count parts into place this empty container on the scale
Use the MODE button to cycle through the counting mode window
Select the SAMPLE SET button to enter piece weight calculation Window.
Select from the 4 preset sample size buttons or PIECE SET. If PIECE Set is selected a sample quantity
window appears to enter a unique sample quantity.

7800 Technical Manual
Page 12 of 69
For Tech Support Manuals and How to Videos go to pascale.com or email us at: techsuppo[email protected]
Wait for the system to tare platform then prompt to add sample
Place the entire sample quantity ALL AT ONCE on the scale piece weight is calculated and Counting
Mode Window opens.
Place any additional items to be counted on the scale platform. Repeat above steps for different items
to be counted.

7800 Technical Manual
Page 13 of 69
For Tech Support Manuals and How to Videos go to pascale.com or email us at: techsuppo[email protected]
2 Step Counting
2 Step Counting In Counting Modes Set PARM 56 Two-SW APW SAMPLE To YES
If using a container to count parts into place this empty container on the scale
Use the MODE button to cycle through the counting mode window
Select the SAMPLE SET button to enter piece weight calculation Window.
Select from the 4 preset sample size buttons or PIECE SET. If PIECE Set is selected a sample quantity
window appears to enter a unique sample quantity.

7800 Technical Manual
Page 14 of 69
For Tech Support Manuals and How to Videos go to pascale.com or email us at: techsuppo[email protected]
Wait for the system to tare platform then prompt to add sample
Place the entire sample quantity on the scale. When complete select the ACCEPT COUNT button. Piece
weight is calculated and Counting Mode Window opens.
Place any additional items to be counted on the scale platform. Repeat above steps for different items
to be counted.

7800 Technical Manual
Page 15 of 69
For Tech Support Manuals and How to Videos go to pascale.com or email us at: techsuppo[email protected]
Configuration of Weighing Settings
From any of the main operating screens:
Select the MENU button
In the main menu select the METROLOGICAL SETTINGS button
Enter Password if prompted. Default password is 0000

7800 Technical Manual
Page 16 of 69
For Tech Support Manuals and How to Videos go to pascale.com or email us at: techsuppo[email protected]
To configure or check the weight configuration of the system select CONFIGURE BASE 1 (Or BASE 2 if
option installed)
This will open the weigh configuration menu. Visible on page 1
Use the DOWN arrow keys to scroll down for the settings visible on page 2:
To enter and/or change a setting use the UP/DOWN arrow keys to scroll up or down to setting and
select the Blue EDIT button.
Selecting the Green SAVE & EXIT button will save and exit, Red CANCEL & EXIT will exit without
saving Settings Menu:

7800 Technical Manual
Page 17 of 69
For Tech Support Manuals and How to Videos go to pascale.com or email us at: techsuppo[email protected]
Configuration of Weighing Settings Menu
PARAMETER
(PARM)
NAME
VALUE/SELECTIONS
UNIT
11
SCALE CAPACITY
•Sets the scale capacity.
•Select EDIT and enter Scale Capacity in
Primary Units, 1 – 999,999
41
DISPLAY
UD
RATE/AVG
•
Digital filtering setting the values represent
number of updates per second. The lower the
value the higher the filtering, higher the value
the lower the filtering.
•Available selections updates per second: 1.0,
1.5, 2.0, 2.5, 3.0, 30, 15, 10, 7.5, 6.0, 5.0, 4.0
& 3.0
•Select the EDIT button to cycle through
available selections.
12
AUTO CONFIGURE
•
Configures all metrological setting to
factory default
•Available selections YES, NO
•Select the EDIT button to cycle through
available selections.
13
ZERO ON POWER-
UP
•Automatically Zeros Scale on Startup
•Available selections YES, NO
•Select the EDIT button to cycle through
available selections.
24
PRIMARY UNITS
•
Primary unit of measure
•Available selections: lb., kg, g, ozt, lbt, grn,
dwt, oz, crt, ozf, ml, l, tons, and lb/oz
•Select the EDIT button to cycle through
available selections.
Primary
UOM
25
PRIMARY
RESOLUTION
•Sets the displayed weight graduation for
primary
units Select EDIT and enter primary resolution
0.00001 to 500
Primary
UOM
31
SECONDARY
UNITS
•Secondary unit of measure
•Available selections: lb., kg, g, ozt, lbt, grn,
dwt, oz, crt, ozf, ml, l, tons, and lb/oz
•Select the EDIT button to cycle through
available selections.
Secondary
UOM
32
SECONDARY
RESOLUTION
•Sets the displayed weight graduation
for secondary units
•Select EDIT and enter primary resolution
0.00001 to 500
Secondary
UOM

7800 Technical Manual
Page 18 of 69
For Tech Support Manuals and How to Videos go to pascale.com or email us at: techsuppo[email protected]
PARAMETER
(PARM)
NAME
VALUE/SELECTIONS
UNIT
23
ZERO RANGE
•The amount of weight as a % of capacity that
the scale can zero.
•Select EDIT and enter the % from 1% to 99%
27
ZERO
TRACKING
(AZM)
•Zero tracking value entered as a percent of
display resolution. Entering a 0.25* equals 25%
of one display
•graduation. “0” disables the zero-tracking
feature.
•Select EDIT and enter the % from 0% to 5%
28
STABLE (MOTION)
•Stable/Motion configuration in grads/sec.
Change is displayed weigh in graduations
GREATER than this value will cause the scale
to be in motion.
•Available selections: OFF, 1, 3, 5 & 10
•Select the EDIT button to cycle through
available selections.
100
KEYPAD
TARE
ENABLE
•
Enables or disables keypad entry of tare values
•Available selections YES, NO
•Select the EDIT button to cycle through
available selections
101
MAIN
WEIGHT
DISPLAY
•
Selects the weigh value to display in
primary window
•Available Selections: Gross Only, Net Only,
G/N Select
•Select the EDIT button to cycle through
available selections.

7800 Technical Manual
Page 19 of 69
For Tech Support Manuals and How to Videos go to pascale.com or email us at: techsuppo[email protected]
Calibration Procedure
From any of the main operating screens:
Select the MENU button
In the main menu select the METROLIGICAL SETTINGS button
Enter Password if prompted. Default password in 0000

7800 Technical Manual
Page 20 of 69
For Tech Support Manuals and How to Videos go to pascale.com or email us at: techsuppo[email protected]
To calibrate the system select CALIBRATE BASE 1 (Or BASE 2 if option installed)
Zero Calibration, with no weight or items on the weighbridge select the ZERO button
Place a known calibration weight on the scale to perform span calibration point 1. In this example a
25 lb. weight is used.
Other manuals for 7800
1
Table of contents
Other Pennsylvania Scale Company Scale manuals

Pennsylvania Scale Company
Pennsylvania Scale Company 7600 User manual
Pennsylvania Scale Company
Pennsylvania Scale Company 7500 Series User manual

Pennsylvania Scale Company
Pennsylvania Scale Company 6500 Series User manual

Pennsylvania Scale Company
Pennsylvania Scale Company 7800 User manual

Pennsylvania Scale Company
Pennsylvania Scale Company SS6600 MAX-LT User manual

Pennsylvania Scale Company
Pennsylvania Scale Company 7600 Manual

Pennsylvania Scale Company
Pennsylvania Scale Company MDL64 ABS User manual

Pennsylvania Scale Company
Pennsylvania Scale Company 7600 User manual

Pennsylvania Scale Company
Pennsylvania Scale Company 7700 Use and care manual