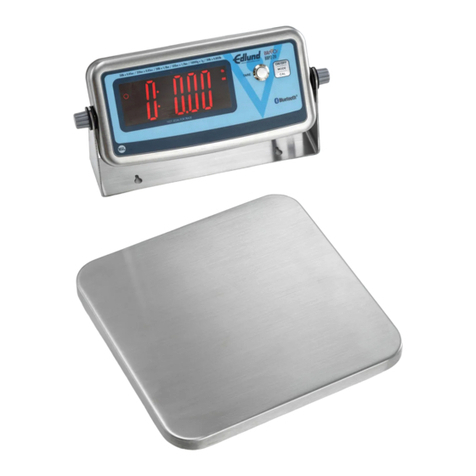
Pennsylvania Scale Company 6500 Series User manual

7400 Technical Manual
For Tech Support Manuals and How To Videos go to: pascale.com/resource-library/ or email us at: sales@pascale.com
Page 2of 28
Table of Contents
Unpacking and Setup
3
Specifications
4
Connections
5
Calibration/Configuration Access, Selecting/Changing Parameters Navigating the
Menus
6
Menu Layout
7
SEL.CFG - Capacity, Resolution, Zero Range and Basic Indicator Configuration
8 - 9
SEL.CL1 - Load Cell/Weighbridge Calibration
10
SEL.OPT1 - Analog Output Configuration
11
SEL.OP3 - Time and Date Configuration
12
Sel.OP5 - 10 Point Span Calibration, Filter Settings
13 –14
SEL.OP6 –Accumulation Configuration
15
SEL.OP8 –Optional Battery Configuration
15
Data Input/Output
16
Wired Ethernet and Wi-Fi Option
17 –26
Status and Error Codes
27
Replacement Parts List
28

7400 Technical Manual
For Tech Support Manuals and How To Videos go to: pascale.com/resource-library/ or email us at: sales@pascale.com
Page 3of 28
Unpacking and Startup
Unpack the Scale
•Remove the molded foam top from
the carton. Gently lift and remove the
indicator from the packaging foam.
•Remove any options which may be
packed with the scale.
•Plug the scale into 110/120 VAC
Scale Setup
•Connect to Scale Base with Quick
Disconnect plug or terminal
connection inside the indicator
enclosure.
Scale Operation
•Press the ZERO button to zero the
scale
•Press the UNITS button to cycle
through units of measure
•Press the PRINT button to send scale
data to a printer or connected
software
•Press GROSS/NET button to cycle
between gross and net weight
•Place item to be tared off on the scale
platform and press the TARE button to
enter the tare weight.

7400 Technical Manual
For Tech Support Manuals and How To Videos go to: pascale.com/resource-library/ or email us at: sales@pascale.com
Page 4of 28
SPECIFICATIONS
•LOAD CELL A/D CONVERTER
•TYPE: 24-bit delta sigma (1:16,777,216)
•EXCITATION: 5 VDC, 120 mA max.
•SIGNAL INPUT: 16 mv
•SENSITIVITY: 0.1 Uv/grad
•UPDATE RATE: 30 update/second
•DISPLAY: Six (6) Digits, 0.6-inch LED
•KEYPAD: 5 Button operation
•POWER INPUT: 117/217 VAC, 50-60 HZ, 20 watts, fuse 0.50 A Slo-Blow.
•SERIAL PORTS: RS232C
•ENCLOSURE: 304 Stainless Steel.
•NTEP: Class III/IIIL, 10,000 divisions CoC 97-009A4
•MEASUREMENT CANADA: AM-5647
•OPTIONS:
oANALOG OUTPUT: 0-10v, 4-20ma (16-bit D/A).
oETHERNET TCP/IP
oAC/DC OPERATION WITH BUILT IN RECHARGEABLE BATTERY

7400 Technical Manual
For Tech Support Manuals and How To Videos go to: pascale.com/resource-library/ or email us at: sales@pascale.com
Page 6of 28
Calibration/Configuration Access, Selecting/Changing Parameters Navigating the Menus
To access instrument configuration, calibration:
Press and Hold the ZERO button for 5 seconds
- 5 seconds
The Audit Trail counters [ P X C X] are
displayed first followed by access code request
[AC ?]. Press the GROSS/NET button 4 TIMES
until 0000 is displayed then press the PRINT
button
4 times
1 time
7400 Keypad access functions:
Scroll through fixed selections or
menus and advance numeric
entries 1 position to left
Enter menus and
Increment Numeric Values
ZERO
PRINT
GROSS
/NET
GROSS
/NET
ZERO
TARE

7400 Technical Manual
For Tech Support Manuals and How To Videos go to: pascale.com/resource-library/ or email us at: sales@pascale.com
Page 7of 28
Menu Layout
Navigating the Menus
EXAMPLE: To go directly to 10-point Span Calibration [SEL.OP5] from [SEL.CFG] press the
6 times until SEL.OP5 is displayed then the to enter.
To exit a sub menu, press the button. To Exit Main menu, press this button again. Scale
will Display SAVE ? and flash nO. Use the button to change nO to YES and press the
to save and exit.
SEL.CFG
Capacity, Resolution, Zero Range and Basic Indicator Configuration
SEL.CL1
Calibration Zero and Span
SEL.OP1
Analog Output Configuration
SEL.OP3
Time and Date Configuration
SEL.OP4
Weigh-IN / Weigh-OUT Truck Mode Configuration
Sel.op5
10 Point Span Calibration, Filter Settings
SEL.OP6
Accumulation Configuration
Sel.op8
Optional Battery Configuration
GROSS
/NET
ZERO
PRINT
TARE
PRINT

7400 Technical Manual
For Tech Support Manuals and How To Videos go to: pascale.com/resource-library/ or email us at: sales@pascale.com
Page 8of 28
Configuration Calibration Menus
Note: Configurations in SEL.CFG must be setup prior to weighbridge calibration
SEL.CFG Capacity, Resolution, Zero Range and Basic Indicator Configuration.
Press the to enter this menu and to advance steps within the menu, press the to
exit. Press the button to change values.
STEP
Description
Parameters
1 CAP
Full capacity of the scale
1 –99,999. Example to change capacity to
10,000: Press the GROSS/NET Button. Display
Shows 000000. Press the GROSS/NET button 4
times, then the TARE button 1 time so 010000 is
displayed. Press the PRINT button to enter.
2
Displayed Resolution
Press the GROSS/NET button to increment
through available values, 0.001 through 500
4
Overrange Configuration
Scale will display “OLOLOL” at 105% of capacity
(4 105P) or at 9% above capacity (4 9d)
5
Digital Filtering
1 –12, 15, 20, 30, 45, 60, 75 & 90. The higher the
filter setting the more stable the weight display,
however the slower the scale response time.
6
Zero Tracking
0.5, 1, 3, 5, 10, Divisions or OFF
7
Zero Range
1.9, 5, 10, or 20, FS (% of capacity). Example:
2,000 capacity, setting of 10, the scale can Zero
up to 200
7.1
Auto Zero on Power Up
OFF or ON
8
Motion Band
Amount of weight change by divisions for the
scale to be in motion. OFF, 1, 3, 5, or 10
(divisions)
9
Units Selection and
Conversion
LB, KG, or CON
9.1
Tare Function
Off, Auto Tare (At), Key Tare (Tr), Both
11.P1.XX
Com Port1 Data Output
Off, Continuous, or Demand (Print button
pressed)
21.P2.XX
Com Port2 Data Output
Off, Continuous, or Demand (Print button
pressed)
ZERO
PRINT
GROSS
/NET

7400 Technical Manual
For Tech Support Manuals and How To Videos go to: pascale.com/resource-library/ or email us at: sales@pascale.com
Page 9of 28
30
DIO Inputs
OFF or ON
40
Remote Serial Display
Option. Allows a second
7400 to be used as a
master or slave display
OFF. Remote Serial Display is Off.
40.rd.En :Set indicator as slave,
40.rd.re :Set indicator as master.
40.Rd.GP: Set indicator as slave for Condec input
Note: When remote slave/master is selected configuration steps 41 –46 become available
and steps 50 and 51 are not available
41.En.XX
Allow remote keypad
operation (Slave)
On or Off
42.2r.XX
Enable/Disable zero key
(Slave)
On or Off
43.tr.XX
Tare Operation
Off, Auto Tare (At), Keyboard Tare (Tr), Both (On)
(Slave).
44.Un.XX
Enable/Disable units key
(Slave)
On or Off
45.Pr.XX
Print function with
MASTER parameter “11”
see below
On or Off
46.Fn.XX
Enable/Disable all other
functions
On or Off
50 nOr
Expanded Test resolution
(X10)
Nor –Normal resolution
10 –Expanded test resolution 10 X
51
Sum two base inputs
No or Yes

7400 Technical Manual
For Tech Support Manuals and How To Videos go to: pascale.com/resource-library/ or email us at: sales@pascale.com
Page 10 of 28
SEL.CL1 Load Cell/Weighbridge Calibration.
Press the button until SEL.CL1 is displayed. Press the to enter this menu and
to advance steps within the menu, press the to exit. Press the button to change
values.
Description
Parameters
Zero/Deadload
This step sets the Zero or deadload setting for
calibration. With no weight on the scale except
the platter or any equipment, brackets or
hardware that would normally be on the scale
and not a part of the displayed weight, press the
button to set. The display should show
“0”. If not press the ZERO button again.
Span Calibration
Place a known calibration weight on the base or
weighbridge. If the weight displayed is different
than the calibration weight key in the calibration
weight. EXAMPLE: to key in 5000 press the
GROSS/NET button until the flashing 0 is in the
thousand position, press the TARE button until
display shows 5000 and press the PRINT button
to accept and perform Span Calibration.
Exit Calibration
Press the PRINT button to return to the main
menu.
ZERO
GROSS
/NET
ZERO
PRINT
GROSS
/NET

7400 Technical Manual
For Tech Support Manuals and How To Videos go to: pascale.com/resource-library/ or email us at: sales@pascale.com
Page 11 of 28
SEL.OP1 Analog Output Configuration.
Press the to enter this menu and to advance steps within the menu, press the to
exit. Press the button to change values.
STEP
Description
Parameters
1.1 xxx
Analog Output Mode
dSP –Uses displayed weight
Gr –Uses gross weight
nEt –Uses net weight
1.5 Zr
Analog Output Start
Point
Flashes current analog output starting point
which is normally set to zero. Adjust by using the
GROSS/NET and TARE buttons. Enter the value by
pressing the PRINT button.
1.6 FS
Analog Full Output
Normally set to full capacity. Adjust by using the
GROSS/NET and TARE buttons. Enter the value by
pressing the PRINT button.
1.7 ZrA
Analog Zero Adjustment
While monitoring the output, use GROSS/NET
button to decrease or TARE button to increase
the analog output value.
1.8 FSA
Analog Full Capacity
Adjustment
While monitoring the output, use GROSS/NET
button to decrease or TARE button to increase
the analog output value.
SEL.OP2 Setpoint Relay / DIO option
Not available on the 7400
ZERO
PRINT
GROSS
/NET

7400 Technical Manual
For Tech Support Manuals and How To Videos go to: pascale.com/resource-library/ or email us at: sales@pascale.com
Page 12 of 28
SEL.OP3 Time and Date
Press the to enter this menu and to advance steps within the menu, press the to
exit. Press the button to change values.
STEP
Description
Parameters
3.1 XX
Clock Type
-- Skip clock type setup
24H –24 Hour clock
12A –12 Hour clock currently AM
12P –12 Hour clock currently PM
3.2 t1
Set Time
Flashes current time setting. Adjust by using the
GROSS/NET and TARE buttons. Enter the value by
pressing the PRINT button.
3.3 dA
Set Date
Flashes current date setting. Adjust by using the
GROSS/NET and TARE buttons. Enter the value by
pressing the PRINT button.
3.4 XXX
Month Data Output
Setup
S.no –Short numerical (mm/ dd/yy)
No –Numbers 01 through 12
Let –Month Spelled Out
3.5 xxx
Month Data When
Printed
OFF –Does not print
Un –Print Under
Ab –Print above
On –Print on same line
SEL.OP4 Truck In/Truck Out Weighing Setup
Not available on the 7400
ZERO
PRINT
GROSS
/NET

7400 Technical Manual
For Tech Support Manuals and How To Videos go to: pascale.com/resource-library/ or email us at: sales@pascale.com
Page 13 of 28
SEL.OP5 10 Point Span Calibration
Press the to enter this menu and to advance steps within the menu, press the to
exit. Press the button to change values.
STEP
Description
Parameters
5.1 XX
Enable/Disable 10 Point
Span Calibration
OFF- Disabled
On –Enabled
5.2 X
Type of Averaging
A –Rolling Average
B –Box Averaging
NOTE: Rolling average is a moving average of conversions, with display update on
conversion. Box average averages a group of conversions, then provides display update.
5.3 X
Multi Range
See Below
Dual and Triple Ranging Setup –Based upon the displayed resolution setting in SEL.CFG
Menu Step 2
5.3
Setting
High Resolution up to % of
capacity
Resolution
Increase
Factor
Medium
Resolution
Resolution
Increase Factor
0
1
50%
2
2
50%
5
3
25%
2
4
25%
5
5
20%
2
6
20%
5
7
20%
10
8
10%
2
9
10%
5
10
10%
10
11
25%
5
50%
2
12
10%
5
50%
2
13
25%
10
50%
2
14
10%
10
50%
2
15
1%
100
10%
10
ZERO
PRINT
GROSS
/NET

7400 Technical Manual
For Tech Support Manuals and How To Videos go to: pascale.com/resource-library/ or email us at: sales@pascale.com
Page 14 of 28
After enabling and configuring the 10-point calibration you will need to save and go to
SEL.CL1. With no weight on the scale base or weighbridge press the button twice.
Scale displays CLr.PtS/nO. Press the button to change the nO to a YES then press the
button to clear stored calibration points.
Place a weight on the scale base, ideally 10% of capacity. Use and to key the
weight in press the button to enter. Scale will display a flashing 1 and the weight on
the scale. Place weight on the scale base, ideally 20% of capacity. Use and to
key the weight in press the button to enter. Scale will display a flashing 2and the
weight on the scale.
Repeat this sequence until 10 point is complete at which point the scale will display a flashing
t and the final calibration weight on scale.
ZERO
TARE
PRINT
GROSS
/NET
TARE
PRINT
GROSS
/NET
TARE
PRINT

7400 Technical Manual
For Tech Support Manuals and How To Videos go to: pascale.com/resource-library/ or email us at: sales@pascale.com
Page 15 of 28
SEL.OP6 Accumulator Configuration
Press the to enter this menu and to advance steps within the menu, press the to
exit. Press the button to change values.
STEP
Description
Parameters
6.1 XX
Enable/Disable
Accumulator
OFF- Disabled
On –Enabled to work with PRINT or BATCH
AU –Auto accumulate of fist stable no zero
weight
6.2 X
Accumulator Reset Band
OFF –Must return to ZERO before next auto
accumulation
1 through 50 –The reset band is used to inhibit a
double add when not in Batch Mode. EXAMPLE
with a setting of 5 the scale return to within 5
divisions of zero for the next auto accumulation
SEL.OP8 Battery Option Configuration
Press the to enter this menu and to advance steps within the menu, press the to
exit. Press the button to change values.
STEP
Description
Parameters
8.1 XX
Enable/Disable Battery
Option
OFF- Disabled
On –Enabled
8.2 xx
Enable/Disable Sleep
Timer
OFF –Always on
5, 15, 30, 90, 120 - Auto sleep in minutes, timer
resets with motion
SEL.OP9 Is only used for testing at the factory
and should not be accessed no settings changed.
ZERO
PRINT
GROSS
/NET
ZERO
PRINT
GROSS
/NET

7400 Technical Manual
For Tech Support Manuals and How To Videos go to: pascale.com/resource-library/ or email us at: sales@pascale.com
Page 16 of 28
Data Input/Output
Remote Commands
<Z><cr> Zero Scale “Gross” mode, no motion, inside zero range.
<N><cr> Switch to Net “Gross” mode with Tare stored.
<G><cr> Switch to Gross “Net” mode.
<T><cr> Auto Tare Switch to Net, no motion, not at “Gross” zero.
<P><cr> Print Valid display, No motion
<U><cr> Units Change units
Data Output Formats
Demand Mode: <stx><pol><DATA><sp><lb/kg><sp><GR/NT><cr/lf>
Continuous Mode: <stx><pol><DATA><L/K><G/N><status><cr/lf>
NOTE: Brackets “<>” are not sent

7400 Technical Manual
For Tech Support Manuals and How To Videos go to: pascale.com/resource-library/ or email us at: sales@pascale.com
Page 17 of 28
Wired Ethernet Option
Configuring the Pennsylvania Scale Wired Ethernet Option
Note: Please consult with IT or Network administrator to determine the network protocols required
for connection on the local area network and/or interface to software programs.
The Default Port number for the Pennsylvania Scale Wired Ethernet Option is 10001
Go to https://www.lantronix.com/products/deviceinstaller/ and download the device installer
application.
Install and run the Device Installer program and connect the scale and PC to the network. Click on the
SEARCH function to discover Pennsylvania Scale Ethernet options that are on the network.

7400 Technical Manual
For Tech Support Manuals and How To Videos go to: pascale.com/resource-library/ or email us at: sales@pascale.com
Page 18 of 28
Any Pennsylvania Scale Ethernet Options that are reachable on the network will be shown on the
Device Installer program.
Note the factory default network protocol is DHCP, IP Address, Subnet and Default Gateway are
assigned by the server. The Default port is 10001
To change from DHCP to a Static IP, Subnet and Default gateway click on the connection to configure,
then click on ASSIGN IP. Select ASSIGN A SPECIFIC IP ADDRESS and NEXT

7400 Technical Manual
For Tech Support Manuals and How To Videos go to: pascale.com/resource-library/ or email us at: sales@pascale.com
Page 20 of 28
Enter the static IP Address, Subnet Mask and Default Gateway, then click NEXT, then ASSIGN.
The Pennsylvania Scale Ethernet Option will be configured with these IP Settings and reboot.
If the IP address is known you can also login into the device and configure through a web browser.
Key in the IP into the web browser address bar. The Lantronix log in window appears, factory default
is no username and password, leave blank and click on SIGN IN
The Lantronix Xport program will open and more advanced settings can be accessed for configuring
the Pennsylvania Scale ethernet option.
This manual suits for next models
3
Table of contents
Other Pennsylvania Scale Company Scale manuals
Pennsylvania Scale Company
Pennsylvania Scale Company 7700 Use and care manual

Pennsylvania Scale Company
Pennsylvania Scale Company 7600 User manual

Pennsylvania Scale Company
Pennsylvania Scale Company SS6600 MAX-LT User manual

Pennsylvania Scale Company
Pennsylvania Scale Company 7600 User manual

Pennsylvania Scale Company
Pennsylvania Scale Company 7800 User manual
Pennsylvania Scale Company
Pennsylvania Scale Company MDL64 ABS User manual

Pennsylvania Scale Company
Pennsylvania Scale Company 7800 User manual
Pennsylvania Scale Company
Pennsylvania Scale Company 7600 Manual

Pennsylvania Scale Company
Pennsylvania Scale Company 7500 Series User manual