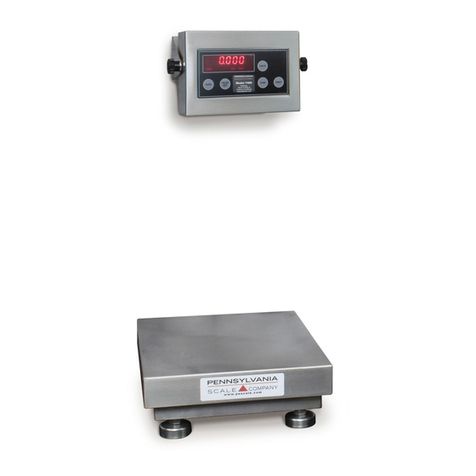
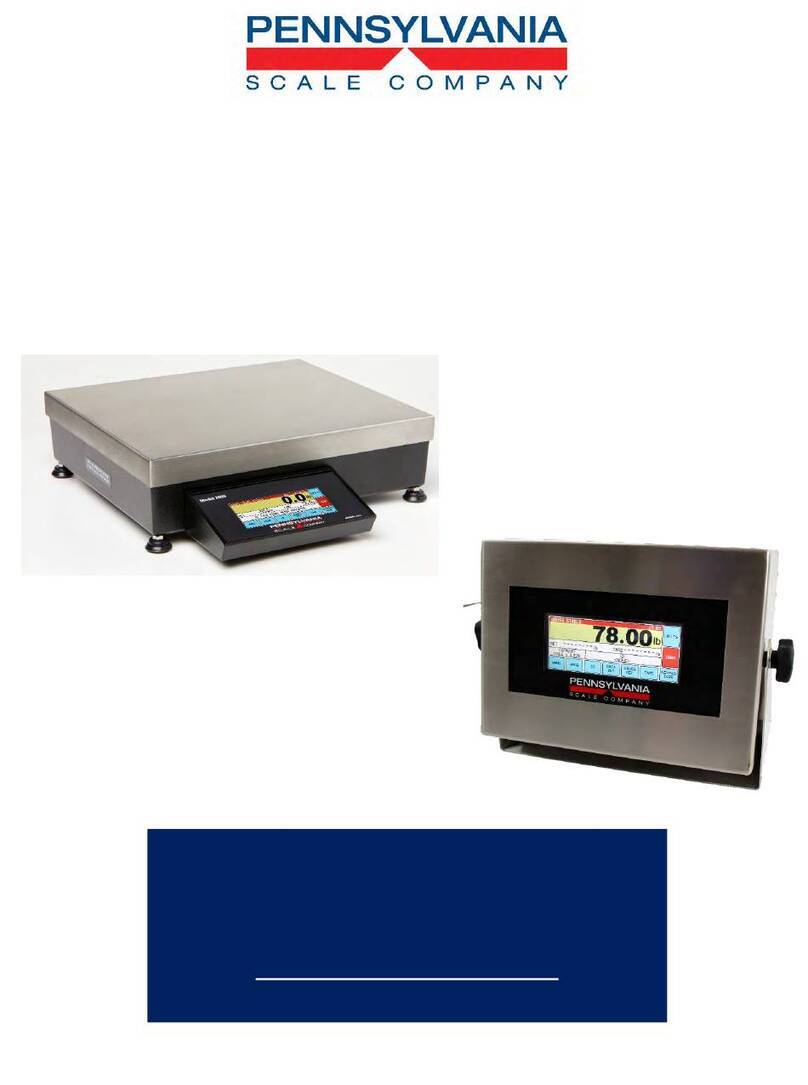
Pennsylvania Scale Company 7500 Series User manual

Pennsylvania Scale Company
Model 7500 Scales
&
7500/4 Indicator
Operation
&
Calibration
Manual
Pennsylvania Scale Company
1042 New Holland Avenue
Lancaster PA 17601
For online interactive tech support or more information on Pennsylvania
Scale products, visit our website at www.pascale.com
Version 4.02
Revised September 3,2002

2
CONTENTS
7500 SERIES –OPERATIONS-SECTION 1
INTRODUCTION -4
INSTALLATION AND SET-UP 5
PLATFORM CONNECTION 5
DIAGNOSTICS 8
OPERATING
OPERATIONAL FEATURES 9
INTERNAL CONNECTORS 9
DISPLAYS AND INDICATORS 10
PUSH BUTTON FUNCTIONS 10
WEIGHING
WEIGHING WITHOUT TARE 11
WEIGHING WITH TARE 11
COUNTING
COUNTING WITHOUT SAMPLE UPDATE 12
COUNTING WITH SAMPLE UPDATE 12
BI-DIRECTIONAL SERIAL ASCII
COMMUNICATIONS CAPABILITIES 14
RS-232 CONNECTOR PIN-OUT 14
RS-232 COMMUNICATIONS PARAMETERS 15
COMMAND FORMATS 15
SCALE COMMANDS 16
SAMPLE COMPUTER PROGRAM 18
ERROR MESSAGE LIST 20

3
CONTENTS (cont’d.)
7500 SERIES -PROGRAMMING/CALIBRATION
SECTION 2
INTRODUCTION 21
CALIBRATION 22
BUILDING A FORMATTED PRINT 30
FORMATTED PRINT CODES 31
COMMAND FORMATS 34
RS-232 SCALE COMMANDS 35
RS-232 CONFIGURATION 36
RS-232 PRINT CODES 37
RS-232 SERIAL INTERFACE 38
CALIBRATION COMMANDS 39
CALIBRATION EXAMPLE 41
“CAL” COMMAND 42
7500 SERIES –ADDENDUM –SECTION 3
INTRODUCTION 44
7500 AC/DC Operating Instructions 45
7500 Basis Weight Scale 47
7500M Money Manager Scale 48

4
SECTION 1
INTRODUCTION
This manual covers the Operations and Programming/Calibration of the Pennsylvania
Model 7500 series scales and indicators.
The 7500 is designed to be simple and easy to operate. But has many features that make it
extremely versatile to use, such as:
ØStandard RS-232 Interface with a selectable output for communications with a
computer or printer
ØAdjustable response time
ØOptional remote displays
ØSingle board electronics for ease of servicing
ØSimple one button counting operation
ØWeight reading may be switched between two weighing units
In addition, the 7500 employs a digital calibration technique that allows calibration with the
keypad or through the RS-232 Interface. The calibration is designed to simplify matching the
scale to the requirements of your application.

5
INSTALLATION and SET-UP INSTRUCTIONS (Scale Version)
The 7500 Series Scale has been packaged for shipment to ensure safe, damage-free arrival.
Please use reasonable care when removing the unit from the shipping carton and retain the origi-
nal packaging materials in case reshipment is required.
NOTE:TO PROTECT THE WARRANTY, FILL OUT AND RETURN THE
WARRANTY CARD AND THE SCALE CONDITION REPORT.
To prepare the 7500 for operation, follow the procedure outlined below:
1. After opening the shipping carton, remove the molded foam top from the carton. (On2# and
5# capacity scales, the platform is packaged on top of this foam. Remove it first and lay it
aside.)
2. Gently lift and remove the stainless steel platform cover only. (On 2# and 5# capacity
scales, the platform is packaged separately and does not need to be removed.)
3. Remove any options which may be packed with the scale.
4. Carefully remove scale from the packaging by grasping both sides of the base.
NOTE: DO NOT LIFT THE SCALE BY THE TOP SPIDER OR THE SUB-
PLATFORM ASSEMBLY.
5. Place the scale on a stable, level surface for operation.
6. Adjust the corner leveling feet until the level bubble indicatestheunitislevel.Firmlytighten
hex jam nuts on the leveling feet. (Any time the scale is relocated, it should be leveled.)
7. Remove the protective plastic wrap from the platform and place the platform on the spider.
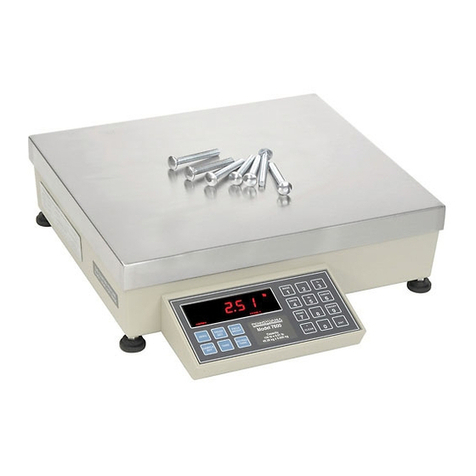
To activate the scale, plug the line cord into any grounded 50/60 hertz 120 volt outlet.
The scale will first display the version number of the software installed followed by its
diagnostic countdown process. During this countdown, the display will show 9.9.9.9.9.9.
through 0.0.0.0.0.0., each number representing a self-diagnostic test which verifies scale
operation. If the scale should fail any of these tests the display will freeze on that number.

6
(The diagnostic failure may be bypassed by pressing the ZERO button.) The serial interface
on all models will also transmit the test numbers.
INSTALLATION AND SET-UP INSTRUCTIONS (7500/4 Indicator)
The 7500/4 Indicator has been packaged for shipment to ensure safe, damage-free arrival.
Please use reasonable care when removing the unit from the shipping carton, and retain the
original packaging materials in case reshipment is required.
NOTE: TO PROTECT THE WARRANTY, FILL OUT AND RETURN THE
WARRANTY CARD AND THE SCALE CONDITION REPORT.
The 7500/4 Indicator is designed to be used with a standard load cell type weighing
platform. This platform may have a 1, 2 or 3 mv/v sensitivity and a bridge resistance of 87 to
2000 ohms.
CONNECTING THE 7500/4 IN NON-WASHDOWN APPLICATIONS
All Pensylvania Scale non-washdownweighingplatformsareshippedwiththepropermating
connector and need only to be plugged into the round CPC style connector on the bottom of
the indicator.
If your 7500/4 indicator is to be attached to a platform of a manufacture other that
Pennsylvania, a mating CPC connector may be ordered and attached top the platform
cable.(This connector is available as a kit form your Pennsylvania distributor, order Part
Number 48445). Or you may follow the connecting instructions for washdown applications,
this will not require the CPC connector. The CPC connector wiring assignments are as
follows:
CONNERTOR PIN # FUNCTION
1 ……………………………. +Signal
2 ……………………………. -Signal
3 ……………………………. Ground
4 ……………………………. Key
5 ……………………………. -Sense
6 ……………………………. -Excitation
7 ……………………………. +Signal
8 ……………………………. +Excitation
NOTE: If a four wire hook up is used, short connector pins 7 and 8 together.

7
CONNECTING THE 7500/4 IN WASHDOWN APPLICATIONS:
Open the 7500/4 enclosure by removing the screws holding on the back plate. Carefully remove
the back plate from the indicator. The main circuit board is mounted to the back plate. On the
main circuit board, locate the load cell terminal block labeled P11. A white dot on the circuit
board denotes the location of pin #1 on the terminal block. Insert the scale platform cable
through the watertight Heyco bushing supplied on the indicator housing and feed it up to the load
cell terminal block. Insert the wires from the load cell cable into the terminal block using a small
screwdriver to tighten the connection for each wire. The following chart shows the proper wiring
for the terminal block.
WIRE COLOR FUNCTION TERMINAL
(Pennsylvania Scale Platforms) LOCATION
GREEN + SIGNAL # 1
WHITE -SIGNAL # 2
SHIELD SHIELD # 3
------- ------- # 4
BLACK -SENSE # 5
BLUE -EXCITATION # 6
RED + SENSE # 7
BROWN (or ORANGE) + EXCITATION # 8
A four wire load cell hook up may be used but is not recommended. If a four wire hook up is
necessary, short the + EXCITATION to the + SENSE on the terminal block.
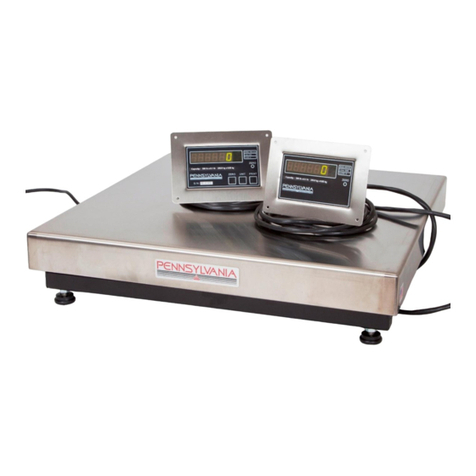
After attaching your 7600/4 Indicator to a platform, it may be activated by plugging the line cord
into any grounded 50/60 hertz 120 volt outlet (220 volts, if this option was ordered). The 7600/4
will begin a diagnostic countdown. During this countdown, the display will first show the
version number of the software, followed by 9.9.9.9.9.9. through 0.0.0.0.0.0. Each number
representing a self -diagnostic test to verify operation of important unit functions. If the indicator
should fail any of these tests, the display will freeze on that number. (A diagnostic failure may be
by-passed by pressing the CHECK button.)
The serial interface will also transmit thetest numbers. The following table lists each test and it
corresponding display.

8
DIAGNOSTICS
DISPLAY DIAGNOSTIC FUNCTION
9.9.9.9.9.9. EPROM Checksum, light all LEDS
8.8.8.8.8.8. RAM check
7.7.7.7.7.7. No Test
6.6.6.6.6.6. Check switches not shorted
5.5.5.5.5.5. No Test
4.4.4.4.4.4. Check load cell excitation voltage
3.3.3.3.3.3. Analog verify (checks output
from analog to digital)
2.2.2.2.2.2. Load CFG EEPROM, test virgin,
checksum, initialize on error
1.1.1.1.1.1. Load CAL EEPROM, test virgin,
checksum, initialize on error
0.0.0.0.0.0. No Test
------Initializing system (may take
several seconds)
After the countdown is completed, the scale performs an initial zeroing of the system. No weight
should be on the platform at this time.
NOTE: Allow at least 20 minutes for initial warm-up and load cell stabilization.
If you have the scale version of the 7600, it will have already been calibrated at the factory. If
your 7600 is an indicator and was matched to its platform at the factory or by your distributor, it
is now ready for operation. If not, please refer to Section II of this manual, the "Calibration &
Programming", for instructions on matching and calibrating the system.

9
OPERATION
OPERATIONAL FEATURES
The following features are available on the 7500 series.
Overload -If the weight exceeds 105% of full capacity, the scale will read out "OLOLOL",
meaning overload.
Underload -If the weight is below -3% of full capacity, the scale will read out "ULULUL",
meaning system underload.
Automatic Zero Tracking -Maintains the system zero to within +/-1/4 of the display
resolution (The resolution being the smallest increment the scale is programmed to read).
AZT increases the overall accuracy of the system by removing errors at zero caused by
accumulation of debris on the base/container or minor drifts in the electronics or load cell.
Four Selectable Sample Sizes -Four different sample sizes may be entered into the scale
memory during programming.
Sample Update -Piece weight accuracy may be improved after the initial sample by adding a
quantity of parts to the platform less then the original sample. When this is done the scale
will recalculate the piece weight, display the message "UPdAtE" for 2 seconds and then
return to the counting mode.
Disable Count -The counting mode may be turned off during programming, allowing the
7500 to be used as a weigh only indicator or scale. (Refer to the Calibration and
Programming Manual in Section 2 of this manual for further information.)
CONNECTORS
The following connectors may be accessed through the opening on the bottom of the scale
version, or internally on the 7500/4.
D-Subminiature Connector (9-pin)-Used with RS-232 Interface. (found on the inside of the
stainless steel models)
Remote Display Connector -Used to connect a remote display option to the indicator.
(found on the inside of the stainless steel models)

10
DISPLAYS AND INDICATORS
Weight Display -Indicates weight when the scale is weighing. Indicates count when scale is in
the counting mode, and displays messages during calibration and sample set operations.
Zero Indicator -Illuminates when the weight is within +/-1/4 of the display resolution of
system zero.
Count Indicator -Illuminates when the scale is in the count mode.
Primary Weighing Unit Indicator -Illuminates when the weight displayed is in the primary
weighing unit.
Secondary Weighing Unit Indicator -Illuminates when the weight displayed is in the
secondary weighing unit.
PUSH-BUTTON FUNCTIONS
ZERO Push-button -Sets scale to zero, functions as a CONTINUE switch during the
self-diagnostic check. (i.e. If the meter stops at a diagnostic, check number. The switch
may be pressed to resume the count down).
SAMPLESET Push-Button -When being used as a counting indicator, this button enters the
scale into the sampling mode.
UNITS Push-button -Pressing this button cycles the scale between the Primary weighing
unit, the secondary weighing unit and the count mode. Pressing and holding this button for
four seconds will cause the current software version to be displayed.
PRINT Push-button -Transmits formatted print to any device connected to the RS-232
port. Holding this push-button for four seconds will access the count and RS-232
configuration modes. (Refer to the Calibration and Programming Manual for further
information.)

11
WEIGHING
WEIGHING WITHOUT TARE
ØRemove any items setting on the weighing platform
ØPress the UNITS button to select either the Primary or secondary weighing unit
(Associated indicator will be lit.)
ØEstablish a base zero by pressing the ZERO button with nothing on the weighing
platform. (This clears any existing weights.)
ØPlace the item(s) to be weighed on the platform and read the weight on the display.
NOTE: If very light items (less then 1/4 of the display resolution) are placed on the
platform individually, the weight may be zeroed off by the AZT feature. Add light
items to the platform simultaneously.
WEIGHING WITH TARE
ØRemove any items from the weighing platform and press ZERO.
ØPress the UNITS button to select either the Primary or the Secondary weighing unit.
(Associated indicator will be lit.)
ØEstablish the tare weight by placing the container or object to be tared-offontheplatform
and press ZERO. The scale will display the net weight.
ØPlace the objects to be weighed in the container and read the net weight on the display.
To clear a tare value, remove all weight from the scale, press ZERO.

12
COUNTING
COUNTING WITHOUT SAMPLE UPDATE
ØRemove all objects from the weighing platform and press ZERO.
ØIf a container will be used to hold the parts being counted, place the empty containeronto
the platform at this time.
ØPress the SAMPLE SET button. (Anything sitting on the scale at this time will be zeroed
off.)
ØScale will display "Add xx" (xx is one of the four samples entered into the scale during
programming. As the scale is shipped from the factory, "Add 10" will be displayed first.)
In this mode, each time the SAMPLE SET button is pressed the next sample size will be
displayed. The larger the sample size, the more accurate the count. This is especially true
for very light parts.
ØCount out the quantity of parts displayed and place them onto the platform all at one
time.
ØScale will display "------" for about 2 seconds and then display the count. The
remainder of the parts to be counted may now be added to the scale at any time.
COUNTING WITH SAMPLE UPDATE
ØRemove all objects from the scale platform and press ZERO.
ØIf a container will be used to hold the parts being counted, place the empty container onto
the platform at this time.
ØPress the SAMPLE SET button. (Anything sitting on the scale at this time will be zeroed
off.)
ØScale will display "Add xx" (xx is one of the four samples entered into the scale during
programming. As the scale is shipped from the factory. "Add 10" will be displayed first.)
In this mode, each time the SAMPLE SET button is pressed the next sample size will be
displayed. The larger the sample size, the more accurate the count. This is especially true
for very light parts.
ØCount out the quantity of parts displayed and place them onto the platform all at one
time.

13
COUNTING WITH SAMPLE UPDATE (cont’d.)
ØScale will display "------" for about 2 seconds and then display the count.
ØThe count accuracy can now be improved by randomly adding quantities of parts that are
greater then one but less then the original sample. The scale will count these parts as they
are placed onto the platform and then display "UPdAtE" for 2 seconds, during which time
the scale will recalculate the piece weight using the new, larger sample. This may
continue indefinitely during the counting process as long as the amount of parts added is
less then the original sample.
The update feature is disabled when a quantity of parts greater then the original sample is added
to the scale all at one time or the original sample is removed from the scale and the scale is
allowed to return to zero. Once the update has been disabled, it will remain so until the
SAMPLE SET button is used to acquire a new sample.
With the update feature, it is not necessary to hand count large quantities of small parts in order
to improve the count accuracy when sampling.

14

15
BI-DIRECTIONAL SERIAL ASCII INTERFACE
INTRODUCTION
The 7500Serial Ascii Interface is an RS-232C, TTL-compatible, asynchronous serial interface
capable of bi-directional transmission of scale data.
This interface features programmable baud rates, word lengths, stop bits, parity, address number
and a formatted print.
COMMUNICATION CAPABILITIES
The interface provides three basic types of communication with the Model 7500:
1. Transmission of a predetermined (at set-up time) array of information for formatted printing.
This may be initiated by pressing the PRINT push-button or by sending "SRP"<CR> ("Send
Requested Print") command to the unit. The scale is shipped from the factory set up to send
the gross weight when the PRINT button is pressed.
2. Transmission and alteration of specific data upon request from an external device.
3. Alteration of the unit's operating mode upon request from an external device.
4. Alteration of scale Calibration and RS-232 communications parameters and print formatting
information. (Refer to the "Programming and Calibration –Section 2" of this manual for
more information.)
RS-232 PIN ASSIGNMENTS AND IMPLEMENTED FUNCTIONS
Connection to the Serial Port is made via a DB-9 female connector found inside the indicator or
on the bottom access on the scale.
PIN EIA CODE FUNCTION DIRECTION
2 BB Transmit Data Output
3 BA Receive Data Input
5 AB Signal Ground -
6 CC Data-Set Ready (DSR) Output
7 CB Clear to Send (CTS) Input
8 CA Request to Send (RTS) Output
NOTE: Allremaining pins arecurrentlyunused and unconnected. Forsimpleterminal
usage where the data rate does not exceed either machine's capacity to process it, only
pins 2, 3 and 5 have to be connected.

16
TYPICAL CABLE WIRING: To connect to an IBM AT or compatible use a cable with one
male and one female DB-9 connector with all nine pins connected straight through.
RS-232 COMMUNICATIONS PARAMETERS
The unit leaves the factory with the following default communication settings :
BAUD 300
WORD LENGTH 7 bits
STOP BITS 1
PARITY ODD
These settings may be changed using the local or remote display keyboard, orRS-232 Interface
commands. If the RS-232 Interface is used, initial communication with the computer or terminal
must be established using the above settings. To return the RS-232 settings to the above default
values:
1. Unplug the unit power cord or otherwise remove power.
2. Depress the internal Calibrate button.
3. Plug in (or energize) the unit and continue to hold the
calibrate button for 5 seconds.
For information on how to reconfigure the RS-232 parameters, refer to the "Calibration and
Programming Manual".
COMMAND FORMATS
The Model 7500 can be controlled from an external device (such as a computer or terminal)
by various commands, each three letters long, which represent related English phrases or
words. For example, to tell the scale to zero, type ZRO followed by a carriage return.
When the scale receives command strings, they are first placed in a 125-character buffer. If
many commands are sent to the scale at high baud rates, it is possible to completely fill this
buffer and data will be lost. Be sure to send commands to the scale at a rate which does not
exceed 125 characters every 500 ms.
The basic command formats are:
1. [<add>]<cmd><cr>
2. <cmd> [<flt>]<cr>
Where <cmd> is a three-letter command, <add> is a scale address number (0-255), <cr>
represents a carriage return, and <flt> is a mixed number, the brackets [ ] are used to indicate
an optional part of the command.

17
The following are some examples of command formats:
Command format 1:
SRP<cr> Send a formatted print
Command format 2:
ITW 13.43<cr> Instructs scale to set tare weight
to 13.43 in the current unit
Command format 3:
5 SGW<cr> Instructs the scale with address #5 to
send the gross weight
MODEL 7500 RS-232 SCALE COMMANDS
General Commands
ATW Acquire Tare Weight
CHK Initiate self-diagnostics CHecK
LCK LoCK out keypad
PON Power ON
POF Power OFf
RES RESet, clears tare weight and piece weight
SCM Select Count Mode
SSS Select Sample Size
SWM Select Weight Mode
UCK UnloCK keypad
UNP UNit Primary
UNS UNit Secondary
ZRO ZeRO scale
Commands Which Enter Information into the Unit
IPW [ FLOATING POINT NUMBER ] Input Piece Weight
ITW [ FLOATING POINT NUMBER ] Input Tare Weight

18
Commands Which Request Information
SAI Send All Information
SAO Send Abbreviated Output (same as SRP)
SCI Send Configuration Information
SCO Send COunt
SDT Send DaTe (with time and date option only)
SGW Send Gross Weight
SMI Send Metrological Information
SNW Send Net Weight
SPC Send Print Codes
SPW Send Piece Weight
SRP Send Requested Print
SSZ Send Sample siZe
STM Send TiMe (with time and date option only)
STW Send Tare Weight
SVN Send Software Version Number
Calibrate and Configure Commands
CAL CALibrate -Same as pressing SW4 button.
CFC ConFigure Communication -To set baud rate etc.
CFP ConFigure Print codes -To enter print codes.
CLE CaLibration End -To save calibration data.
CLP CaLibrate Primary -To set-up primary calibra-
tion data.
CLS CaLibrate Secondary -To set-up secondary cali-
bration data.
CLU CaLibration Unstable -To set-up print
stable/unstable.
CLW CaLibration Weight -To calibrate with weights.
NOTES: All commands and parameters must be separated by spaces.
The entire command string must be terminated with a carriage return.
All calibrate and configure commands are further explained in the
"Calibration and Programming Section of this Manual".

19
SAMPLE COMPUTER PROGRAM
The 7500Series RS-232 Interface may be tested by connecting it to a terminal with an RS-232
port or acomputer with an RS-232 and a terminal program. If a terminal program is not
available, the following program is provided for an IBM PC or compatible using BASICA,
MBASIC or QuickBASIC.
10 ' Terminal Program written for BASIC Programming Language
20 ' provided by Pennsylvania Scale Company
30 '
40 DEFINT A-Z
50 FALSE = 0: TRUE = NOT (FALSE)
60 KEY OFF: CLS : LOCATE 25, 1
70 PRINT SPACE$(20); "Press Alt-X to Exit Terminal Program"
80 LOCATE 1, 1
90 OPEN "Com1:300,o,7,1" FOR RANDOM AS #1 'Handshaking Enabled
100 OPEN "test.dta" FOR OUTPUT AS #2
110 WHILE NOT (QUIT)
120 KEYBOARDINPUT$ = INKEY$
130 IF KEYBOARDINPUT$ = CHR$(0) + CHR$(45) THEN QUIT = TRUE
140 IF KEYBOARDINPUT$ <> " " THEN PRINT #1, KEYBOARDINPUT$;
150 IF LOC(1) > 0 THEN
160 SCALEINPUT$ = INPUT$ (LOC(1), #1)
170 PRINT SCALEINPUT$; 'Writes data from scale to screen
180 LPRINT SCALEINPUT$; 'Writes data from scale to printer
190 PRINT #2, SCALEINPUT$; 'Writes data from scale to file
200 END IF
210 WEND
220 END
See notes on following page.

20
NOTES:
Omit line 180 if data is not to be sent to the printer.
Omit lines 100 and 190 if data is not to be written to a file.
In line 100, the word "OUTPUT" opens the file "test.dta", deleting any data that was in
the file before this program was started. If you want to preserve the contents on the file
"test.dta" from one session to another, replace the word OUTPUT with APPEND on line
100.
Line90 opens theserial communications port,using 300 baud,Odd parity, 7data bits and
1 stop bit. These represent the default settings for the scale, other entries may be used if
the scale settings have been changed. Valid entries for baud rate are 300, 600, 2400, 4800,
9600or 19200. Validentries for parityareN (none), E(even), or O(odd).Valid entries for
data bits are 7 or 8. Valid entries for stop bits are 1 or 2. Com2 may be used if the scale is
attached to serial communications port #2.
To eliminate the need for attaching the handshaking lines in the cable between the scale
and the computer, change line 90 to read:
90 OPEN "Com1:300,o,7,1,RS,DS0" FOR RANDOM AS #1'Handshaking Disabled
Table of contents
Other Pennsylvania Scale Company Scale manuals

Pennsylvania Scale Company
Pennsylvania Scale Company 7800 User manual

Pennsylvania Scale Company
Pennsylvania Scale Company 7700 Use and care manual

Pennsylvania Scale Company
Pennsylvania Scale Company 7800 User manual

Pennsylvania Scale Company
Pennsylvania Scale Company 7600 Manual

Pennsylvania Scale Company
Pennsylvania Scale Company 7600 User manual

Pennsylvania Scale Company
Pennsylvania Scale Company 7600 User manual

Pennsylvania Scale Company
Pennsylvania Scale Company MDL64 ABS User manual

Pennsylvania Scale Company
Pennsylvania Scale Company SS6600 MAX-LT User manual

Pennsylvania Scale Company
Pennsylvania Scale Company 6500 Series User manual