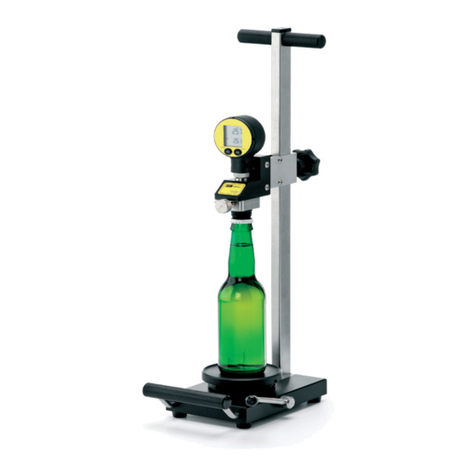
Pentair HAFFMANS GMT User manual

W W W.HAFFMANS.NL
HAFFMANS
W W W.HAFFMANS.NL
HAFFMANS
INSTRUCTION MANUAL
ANALOGUE CO2GEHALTEMETER
TYPE GMT


Serial number: from GMT-7828
Essential reading!
Haffmans BV is not responsible for any damage caused by the owner’s failure to follow the instructions given in this
manual. Haffmans BV is not responsible for print or translation errors in this edition of the manual. The specifications
and design of this product are subject of change without notice. All rights reserved. No part of this publication may be
reproduced or distributed in any form or by any means, or stored in a database or retrieval system, without the prior
written permission of Haffmans BV
Art. nr. : 004.735
Release date : 25 September 2012
Version : 1.0


HAFFMANSGMT
GMT Page 5 of 37
Table of contents
1. Technical specifications................................................................................................ 7
2. Introduction..................................................................................................................... 9
2.1 Intended use ......................................................................................................... 9
2.2 Safety.................................................................................................................... 9
3. General product information....................................................................................... 11
4. Installation..................................................................................................................... 13
4.1 Unpacking........................................................................................................... 13
4.2 Installing the battery............................................................................................ 13
5. Operation.......................................................................................................................15
6. Calibration.....................................................................................................................17
6.1 Determining the accuracy of the pressure gauge ............................................... 17
6.2 Adjusting the handle............................................................................................ 18
7. Maintenance and cleaning........................................................................................... 19
7.1 Daily.................................................................................................................... 19
7.2 Weekly ................................................................................................................ 19
7.3 Monthly................................................................................................................ 20
8. Trouble shooting and repair........................................................................................ 21
8.1 Trouble shooting ................................................................................................. 21
8.2 Repair.................................................................................................................. 22
9. Disposal and the environment .................................................................................... 25
Appendix I: Customer service................................................................................................. 27
Appendix II: Terms of guarantee ............................................................................................ 29
Appendix III: EC Declaration of conformity ........................................................................... 31
Appendix IV: Spare parts......................................................................................................... 33
Appendix V: Drawing............................................................................................................... 37

HAFFMANSGMT
Page 6 of 37 GMT

HAFFMANSGMT
GMT Page 7 of 37
1. TECHNICAL SPECIFICATIONS
Measuring range Thermometer : -2 / +20 ºC
Manometer : 0 / 2,5 bar
CO2: 0,20 / 1,20 gew. %
Pressure range : 5 bar
Accuracy Manometer : 1 %
Thermometer : 0,5 ºC
Dimensions Height : 275 mm
without grip Width : 75 mm
Depth : 190 mm
Weight : 2,4 kg
Battery type : 9V Alkaline
Scale : bar, ºC, weight. %
Protection class : IP 64

HAFFMANSGMT
Page 8 of 37 GMT

HAFFMANSGMT
GMT Page 9 of 37
2. INTRODUCTION
2.1 Intended use
The CO2Gehaltemeter is only intended to be used to determine the gas equilibrium pressure
and the temperature of a liquid when calculating the CO2content.
The instructions in this manual refer to the position numbers given in the diagram in appendix
IV.
2.2 Safety
This section gives the most important instructions for the safe use of the CO2Gehaltemeter.
The meaning of the safety symbols are also explained.
2.2.1 Safety instructions
Read the safety instructions carefully before using the CO2Gehaltemeter. The safety
instructions must be strictly observed during use.
•The maximum permitted pressure in the CO2Gehaltemeter is 5 bar. It is extremely
dangerous to allow the pressure in the CO2Gehaltemeter to increase to more than 5
bar, because the Gehaltemeter may explode.
•Make sure the pressure in the instrument does not exceed the range of the pressure
Gehaltemeter.
2.2.2 Safety symbols
Attention, warning and danger symbols used in this manual have the following significance.
Attention! Information for correct or effective use of the equipment.
Warning Incorrect or careless use can cause serious damage to the
equipment.
Failure to observe this information can result in major
personal injury or loss of life.

HAFFMANSGMT
Page 10 of 37 GMT

HAFFMANSGMT
GMT Page 11 of 37
3. GENERAL PRODUCT INFORMATION
The CO2Gehaltemeter is based on Henry’s law, which applies for an equilibrium state between
a gas and a liquid in a confined space.
This law states that the quantity of gas dissolved in a liquid at a certain temperature is
proportional to the partial pressure of the gas above the liquid.
A stable temperature is reached by allowing the liquid to flow through the CO2Gehaltemeter’s
measuring chamber.
An equilibrium pressure is reached by using electrolysis in the measuring chamber. The CO2
value can be determined using the slide rule provided.

HAFFMANSGMT
Page 12 of 37 GMT

HAFFMANSGMT
GMT Page 13 of 37
4. INSTALLATION
4.1 Unpacking
Before despatch the GMT was checked and tested by Haffmans BV Make sure that the content
of the delivery is complete and undamaged.
If the delivery is incomplete or damaged, please contact Haffmans BV or the representative/agent
designated by Haffmans B.V, immediately (appendix IV). Always include the serial number, order
number or invoice number (given by Haffmans BV) of the GMT in the correspondence.
The contents are as follows:
•CO2Gehaltemeter, type GMT
•Set of hoses.
•Handle.
•Service set (including weight percentage slide rule).
•9 Volt alkaline battery.
•Instruction manual for the CO2Gehaltemeter.
4.2 Installing the battery
The battery must be installed before using the CO2Gehaltemeter.
Attention! There must not be any condensation in the battery housing.
Therefore, first allow the temperature of the instrument to come up
to room temperature.
Method:
1. Unscrew the battery housing’s cover (pos. 76),
2. Insert the battery in the correct position (pay attention to the +ve and -ve terminals),
3. Screw the battery housing’s cover back into place.

HAFFMANSGMT
Page 14 of 37 GMT

HAFFMANSGMT
GMT Page 15 of 37
5. OPERATION
The CO2Gehaltemeter is suitable for measuring pressures up
to 5 bar. It is extremely dangerous to allow the pressure in the
CO2Gehaltemeter to increase to more than 5 bar, because the
Gehaltemeter may explode.
Warning The pressure in the instrument must not exceed the range of the
pressure gauge whilst taking samples (otherwise the pressure
gauge will break).
Attention! No carbon dioxide or foam may be released into the measuring
chamber whilst taking samples. If necessary, adjust the flow of
liquid using the throttle valve.
Avoid sudden jumps in pressure and, therefore, press the handle
slowly and evenly before starting the measurement.
Requirements
•A point to take samples from on the process floor.
•A bucket to collect the sample.
•A sample of approximately 1 litre is necessary for the first measurement. 0.5 litre is
sufficient for any further measurements.
Measurement
Method:
1. Attach the set of hoses to the rear of the CO2Gehaltemeter (the supply hose connects
the inlet hose to the sample taking point, see figure 5.1),
2. Pull the handle (pos. 22) towards you (the sample will flow under pressure into the
measuring chamber and the handle will be in the sample taking position) (see figure
5.2),
3. Set the desirable flow rate using the throttle valve (pos. 99) on the right-hand side of the
CO2Gehaltemeter,
4. Allow the measuring chamber to be filled with the sample without any carbon dioxide or
foam being released (see figure 5.3),
5. Slowly and evenly push the handle back (the handle will now be in the measuring
position, see figure 5.4),
6. Read the pressure gauge reading and the temperature when these values become
stable,
7. Determine the CO2value using the slide rule provided.

HAFFMANSGMT
Page 16 of 37 GMT
Example:
Information: Temperature (T) = + 1.5 0C
Pressure (P) = 0.7 bar
The slide rule gives a CO2value equal to 0.51 percent of the weight (weight %).

HAFFMANSGMT
GMT Page 17 of 37
6. CALIBRATION
6.1 Determining the accuracy of the pressure gauge
The CO2Gehaltemeter’s pressure gauge is accurate to 1% of its total scale. The pressure
gauge can be calibrated using a Haffmans Gauge Calibration Device (GCD).
Method:
Attention! The pressure gauge is calibrated for the most common pressures,
i.e. 1 bar and 2 bar.
1. Unscrew the pressure gauge’s cover (pos. 67),
2. Using a pressure gauge puller (included in the service set), pull the pressure gauge out
of the instrument whilst rotating it,
3. Connect the pressure gauge to the appropriate connection on the GCD (screw; output at
the front),
4. Connect an external gas supply to the GCD,
5. Set the GCD to an exact pressure of 2 bar and compare this to the reading given by the
pressure gauge.
If the pressure gauge does not give the correct reading, the pressure gauge’s needle must be
reset.
Method for 1 bar:
1. Unscrew the screws on the side of the pressure gauge and remove the chrome cap,
2. Remove the plastic sight-glass,
3. Remove the needle using the needle puller (included in the service set),
4. Set the pressure of the GCD to exactly 1 bar,
5. Position the pressure gauge’s needle to 1 bar and push it into place,
6. Check the linearity by setting the pressure of the GCD to half of the calibration pressure
(0.5 bar),
7. Read the pressure given by the pressure gauge (the value must be 0.5 bar +/- 1%),
8. Refit all the components into their original positions.

HAFFMANSGMT
Page 18 of 37 GMT
6.2 Adjusting the handle
The handle is set so that the electrical connection is made before the measurement is started,
just before the handle is fully depressed.
The handle does not normally need to be adjusted, but can be adjusted if necessary.
Method:
Attention! Do not unscrew the adjusting screw too far, because the handle
will not be able to fully close (there will be a leak along the
plunger).
1. Unscrew the locking nut (pos. 93-2),
2. Adjust the adjusting screw (pos. 93-1) (to the left advances the moment and to the right
delays the moment),
3. Tighten the locking nut.

HAFFMANSGMT
GMT Page 19 of 37
7. MAINTENANCE AND CLEANING
7.1 Daily
The CO2Gehaltemeter must be thoroughly rinsed with cold water after all the measurements
have been taken.
Method:
Attention! The temperature in the room must not fall below 0 oC.
1. Connect the supply hose to the water tap,
2. Place the drain hose in a washbasin,
3. Carefully turn the water tap on,
4. Open the throttle valve (pos. 99),
5. Move the throttle valve and thoroughly rinse the instrument with water,
6. Move the handle (pos. 22) up and down a couple of times,
7. Close the handle,
8. Close the throttle valve (the CO2Gehaltemeter is now filled with water),
9. Turn the tap off,
10. Place the CO2Gehaltemeter in a cool room.
7.2 Weekly
Warning! Never use a fluorine based cleaning product.
Attention! Use a diluted solution (maximum of 0.5% chlorine). More
concentrated solutions may attack the stainless steel. Do not leave
the instrument filled with cleaner for longer than 2 hours.
The CO2Gehaltemeter must be cleaned once a week. Thoroughly rinse the instrument with cold
water. If there is still contamination present in the instrument, it may be partially filled with a
cleaning product. For example, use a 1 in 10 parts diluted solution of household chlorine.
Thoroughly clean the instrument with water to completely remove any residue of the cleaning
product. Move the handle up and down a couple of times.

HAFFMANSGMT
Page 20 of 37 GMT
7.3 Monthly
Cleaning the burette and plunger
Burette (pos. 111)
Method:
1. Unscrew the burette’s attachment screws (pos. 73, side of the GMT),
2. Turn the safety plates (pos. 84) upwards,
3. Slide the burette (pos. 111) sideways out of the CO2Gehaltemeter,
4. Clean the burette with cold water and the brush included in the service set.
Plunger (pos. 108)
Clean the plunger once a month, particularly if a grease removing cleaning product is used. Pay
particular attention to the O-rings. If necessary, replace them.
Attention! Only use original O-rings. Avoid using sharp objects or abrasive
materials when cleaning the plunger. Lubricate the O-rings once a
month using the silicon grease included in the service set.
Method:
1. Unscrew the three nuts (pos. 90),
2. Carefully pull the plunger, together with the hinged block (pos. 109), out of the CO2
Gehaltemeter,
3. Unscrew the attachment screws (pos. 73, bottom of the GMT),
4. Remove the closing plate (pos. 72),
5. Remove dirt and any deposits on the plunger (pos. 108) and from the bore using a
clean, non-abrasive tissue,
6. Check the O-rings (pos. 29). If necessary, replace any damaged O-rings (use the O-ring
remover included in the service set),
7. Lubricate the plunger and the O-rings using silicon grease,
8. Carefully insert the plunger into the CO2Gehaltemeter,
9. Fit the closing plate and the hinged block,
10. Tighten the nuts,
11. Check the plunger’s stroke (it must be smooth and even).
Table of contents
Other Pentair Measuring Instrument manuals

Pentair
Pentair HAFFMANS 006.625 User manual

Pentair
Pentair GOYEN MECAIR PEM User manual

Pentair
Pentair HAFFMANS RPU-352 User manual

Pentair
Pentair Point Four Tracker User manual

Pentair
Pentair HAFFMANS c-DGM User manual

Pentair
Pentair EVERPURE EV4339-31 User manual

Pentair
Pentair LINCOLN A Series Owner's manual

Pentair
Pentair INTELLISYNC User manual