manuals.online logo
Brands
  1. Home
  2. •
  3. Brands
  4. •
  5. Pentair
  6. •
  7. Water Pump
  8. •
  9. Pentair LINCOLN POWER-MASTER III Owner's manual

Pentair LINCOLN POWER-MASTER III Owner's manual

LINCOLN
®
APENTAIR COMPANY
Models 84991, 84992, 84993, 84994, 84995
84996, 84997, 84998, 85201, 85202
POWER-MASTER Ill DRUM PUMPS
Bushing &Plunger /Shovel Type Foot Valve
OWNER/OPERATOR MANUAL
HIS the responsibility of the Owner/Operator to properly use and maintain this equipment.
The Instructions and Warnings contained in this manual shall be read and understood by the Owner/Operator prior to
operating this equipment.
It IS the responsibility of the Owner/Operator to maintain the legibility of all Warning and Instruction labels.
The Owner/Operator shall retain this manual for future reference to important Warnings, Operating and Maintenance
Instructions.
WARNING
DO NOT operate these pumps with 10" airmotor.
DO NOT exceed the stated maximum working pressure of the airmotor
or the lowest rated component in your system.
DO NOT alter or modify any part of this equipment.
DO NOT operate this equipment with combustible gas.
DO NOT attempt to repair or disassemble the equipment while the
system is pressurized.
TIGHTEN all fluid connections securely before using this equipment.
ALWAYS read and follow the fluid manufacturer’s recommendations
regarding fluid compatibility, and the use of protective clothing and
equipment.
CHECK ail equipment regularly and repair or replace worn ordamaged
parts immediately.
IMPORTANT: Failure to heed these warnings including misuse,
overpressurizing, modifying parts, using incompatible chemicals and
fluids, or using worn or damaged parts, may result in equipment
damage and/or serious personal injury, fire, explosion, or property
damage.
MODEL CHART
PUMP PUMP AIRMOTOR* RATIO MAXIMUM DELIVERY MAXIMUM AIR DIMENSION "A" DIMENSION "B"
TUBE MODEL PRESSURE PRESSURE in. (cm.) in. (cm.)
2062 84808 84:1 8400 psi (560 bar)
2022 84806 48:1 4800 psi (331 bar) 100 psi (7 bar) 60 (152.4)
84991 2002 84804 24:1 34
4800 psi (331 bar) (86.4)
2042 84803 12:1 2400 psi (166 bar) 200 psi (14 bar) 60-7/8 (154.6)
2063 84806 84:1 8400 psi (580 bar)
2026 84806 48:1 4800 psi (331 bar) 100 psi (7 bar) 53-3/8 (135.6)
84992 2006 84804 24:1 4800 psi (331 bar) 27-3/8 (69.5)
2046 84803 12:1 2400 psi (166 bar) 200 psi (14 bar) 54-114 (137.8)
2023 84806 80:1 8000 PSI (552 bar) 100 psi (7 bar) 60 (152.4)
84993 2003 84804 40:1 6000 psi (552 bar) 34
200 psi (14 bar) 60-7/8 (154.6) (86.4)
2043 84803 20:1 4000 psi (276 bar)
2027 84806 80:1 8000 psi (552 bar) 100 psi (7 bar) 53-3/8 (135.6)
84994 2007 64804 40:1 8000 psi (552 bar) 27-3/8 (69.5)
(14 bar) 54-114 (137.8)
84995
84996
64997
64998
85201
2047
2010
2044
2011
2048
2004
2045
2008
2049
2053
84803 20:1
84804 50:1
84803 24:1
84804 50:1
84803 24:1
84804 75:1
(10bar)
200psi 60-7/8 (154.6) 34 (86.4)
(10bar)
(14bar) 54-1/4 (137.8) 27-3/8 (69.5)
84803 36:1
84804 75:1
84803 36:1
84803 50:1
4000 psi (276 bar)
7500 psi (517 bar)
4800 psi (331 bar)
7500 psi (517 bar)
4800 psi (331 bar)
7500 psi (517 bar)
7200 psi (497 bar)
7500 psi (517 bar)
7200 psi (497 bar)
7500 psi (517 bar)
200psi
150 psi
200 psi
150 psi
200 psi
100psi
200 psi
100 psi
(7 bar)
(14 bar) 60-7/8 (154.6) 34 (86.4)
54-114 (137.8)
200 psi (14 bar) 27-3/8 (69.5)
150 psi (10 bar) 60-7/8 (154.6) 34 (86.4)
85202 2054
*Refer to Airmotor Owner/Operater Manual, Section A50 Page 78.
84803 50:1 7500 psi (517 bar) 150 psi (10 bar) 54-1/4 (137.8) 27-3/8 (69.5)
LINCOLN One Lincoln Way Copyright 1992 Section -A50
St. Louis Missouri 63120-1578 Printed in U.S.A.
®APENTAIR COMPANY (314) 679-4200 Page -82A
JAN-92 FORM 402347
ATTACHING AIRMOTOR
TO PUMPTUBE
1. Tightly attach tie rods to the airmotor
(use short threaded end of the tie
rods).
2. Mount airmotor on top of the pump-
tube outlet and tightly connect
Coupling Nut (Item 2) to airmotor
piston rod.
3. Hand tighten tierods tothe pumptube
with four nuts supplied with airmotor
4. Slowly cycle the pump several times,
using just enough air pressure to
operate the pump without stalling.
5. Stop the pump on an "up” stroke and
tighten the four nuts to securely fasten
the airmotor to the pumptube.
OPERATING PRECAUTIONS
•
•
•
•
•
•
Use Lincoln replacement parts to
assure compatible pressure rating.
HEED ALL WARNINGS.
Be sure material hoses and other
components are able to withstand
fluid pressures developed by this
pump.
Do not operate pump continuously
at speeds in excess of 75 cycles
per minute.
Disconnect air line from pump air-
motor when system sits idle for long
periods of time.
SERVICING. Before servicing or
cleaning pump, or removing fluid
hose orgunfrom aunit that has been
used, be sure to disconnect air lines
and carefully bleed pressure off of
the system.
WARNING
PREVENT STATIC SPARKING.
If static sparking occurs, fire or
explosion could result. Pump,
dispensing valve, and
containers must be grounded
when handling flammable
fluids such as petroleum
products, paints, lacquers, etc.
and wherever discharge of
static electricity is hazard.
•
•
•
Check continuity (a good static wire
connection) with an ohmmeter. Place
one probe on one hose fitting and
the other probe on other hose fitting,
continuity or proper grounding
through hose is good when areading
is obtained on the ohmmeter.
PREVENT FIRES. When pumping,
flushing or recirculating volatile
solvents, the area must be adequately
ventilated.
Keep solvents away from heat, sparks
and open flames. Keep containers
closed when not in use.
CAUTION
DO NOT allow pump to operate
when out of material.
PUMP PRIMING
To begin operation, the pump has to be
primed with the pumped material. The
Power-Master Ill pump isadouble acting
(pumps material on "up’’ &’’down” stroke)
positive displacement reciprocating
pump and as such intakes material only
on the “up” stroke.
To prime pump, open output line
(material valve) and slowly open air
supply valve until pump starts. Allow
pump to cycle very slowly until all air IS
pushed out of lines and material fills up
pump and lines. Close output line
(material shut-off valve) -pump should
stall against pressure.
Note: Pumps are factory tested with
light oil and some of it is left in to
protect pump parts during
storage and transportation. To
prevent contamination of material
to be pumped, flush pump
before using.
DISASSEMBLY
Tools Required
2-1/8" Dia. Strap Wrench
Retaining Ring Pliers (External)
Retaining Ring Pliers (Internal)
19/32” Hex Wrench
5/8” Hex Wrench
11/16“ Hex Wrench
7/8” Hex Wrench
13/16“ Hex Wrench
1-3/8” Hex Wrench
2-1/4” Hex Wrench
Pliers
Procedure
1.Unscrew Adapter Tube (Item 28) from
Pump Tube (Item 18).
2. Pull on Adapter Tube (Item 28) until
connection between Bushing &
Plunger (Item 26) and Bushing &
Plunger (Item 31) is exposed and can
be disconnected.
3. Remove Priming Tube (Item 37) from
Adapter Tube (Item 28).
4. Remove Lower Check Assembly
(Items 29, 30, 31, 33, 34 &35) from
Adapter Tube (Item 28).
5. Remove Cotter Pin (Item 32) from
6. Remove Priming Shovel (Item 36)
from Bushing &Plunger (Item 31).
7. Remove Retaining Ring (Item 29)
and Guide Washer (Item 30) from
Bushing &Plunger (Item 31).
8. Remove O-ring (Item 27) from Pump
Tube (Item 18).
9. Remove Bolt Connector (Item 1)
from Plunger (Item 3).
10. Pull Bushing &Plunger (Item 31) to
remove Plunger (Item 3), Connecting
Rod (Item 21), Adapter (Item 22) and
Bushing &Plunger from Pump Tube
(Item 18).
11. Remove Pump Tube (Item 18) from
Outlet Body (Item 9).
12. Remove O-ring (Item 17) from
Outlet Body (Item 9).
13. Remove Gland Nut (Item 4) from
Outlet Body (Item 9).
14. Remove Priming Plug (Item 10) and
Adapter (Item 11) from Outlet Body
(Item 9).
15. Remove Outlet Body (Item 16) from
Outlet Body (Item 9).
16. Remove Ball (Item 14), Check Seat
(Item 13), and Gaskets (Item 12)
from Outlet Body (Item 9).
17. Remove Retaining Ring (Item 8),
Packing Washer (Item 7) and U-cup
Packing (Item 6) from Gland Nut
(Item 4).
18. Remove Bushing &Plunger (Item 31)
from Adapter (Item 22).
19. Remove Ball (Item 23) from Adapter
(Item 22).
20. Remove Pin (Item 25) and Ball
(Item 24) from Bushing &Plunger
(Item 31). Note: Models 85201 &
85202 do not have Items 24 &25.
21. Remove Cotter Pins (Item 20) from
Connecting Rod (Item 21).
22. Remove Adapter (Item 22) and
Plunger (Item 3) from Connecting
Rod (Item 21). Note: On Models
84997 &84998 there is an Adapter
(Item 19) between the Plunger &
Connecting Rod.
23. To re-assemble pump, reverse
disassembly procedure. (Refer to
illustration for torque specifications.)
Bushing &Plunger (Item 31). TROUBLESHOOTING
Problem Possible Cause Solution
Pump does not operate. Restricted or inadequate air supply. Check air supply pressure and air hose
diameter (see Airmotor manual for
minimum air supply hose diameter).
Obstructed material output. Check output line for restrictions.
Erratic or accelerated operation. Pump is not primed. Prime pump (see “Pump Priming”
instructions).
Insufficient material supply. Refill material supply.
Material is too heavy for priming. Lower output with material valve. Increase
pressure to pressure primer (if in use).
Check for inlet restrictions.
Pump operates on "down” stroke only Worn or damaged Bushing &Plunger Check and replace if needed.
(missing "up” stroke). (Item 26) or Piston Check (Items 23, 24
&26).
Pump operates on "up” stroke only Worn or damaged Inlet Check (Items 34 Check and replace if needed.
(missing "down” stroke). &35).
Insufficient material supply. Pump is not Check inlet for restrictions. Lower output
intaking enough material to dispense on with material valve.
both strokes.
Pump is operating but not dispensing Inlet Check (Items 34&35) is not seating Check and replace if needed.
material. or is damaged.
ACCESSORIES
86218 Gland Protection Sleeve -To increase life of gland seal, for Models 84991 &84992.
86217 Gland Protection Sleeve -To increase life of gland seal, for Models 84993 &84994.
86216 Gland Protection Sleeve -To increase life of gland seal, for Models 84995 &84996.
86215 Gland Protection Sleeve -To increase life of gland seal, for Models 84997 &84998.
86238 Gland Protection Sleeve -To increase life of gland seal, for Models 85201 &85202.
86213 Lube Cup -For solvent, to prevent material from drying on pump rod.
PUMP REPAIR KITS
86231 -Includes soft parts for Models 84991 &84992.
86232- Includes soft parts for Models 84993 &84994.
86233- Includes soft parts for Models 84995 &84996.
86234- Includes soft parts for Models 84997 &84998.
86239- Includes soft parts for Models 85201 &85202.
SPECIFICATIONS
Pump stroke -6in. (152 mm)
Max. recommended speed (continuous) -75 cycles/min.
Output per cycle:
84991 &84992 -6.1 cu. in. (100 cc)
84993 &84994 -3.7 cu. in. (61 cc)
84995 &84996 -3.0 cu. in. (49 cc)
84997 &84998 -2.1 cu. in. (34 cc)
85201 &85202 -1.3 cu. in. (21 cc)
Approx. cycles per gallon (liter):
84991 &84992- 38 (10)
84993 &84994- 63 (16)
84995 &84996- 78 (20)
84997 &84998-111 (29)
85201 &85202-178 (48)
Output at 75 cycles/min.:
84991 &84992 -2.0 gpm (7.5 liter/min.)
84993 &84994 -1.2 gpm (4.5 liter/min.)
84995 &84996 -1.0 gpm (3.7 liter/min.)
84997 &84998 -0.7 gpm (2.6 liter/min.)
85201 &85202 -0.4 gpm (1.5 liter/min.)
Wetted part materials -Steel, Brass, Copper, Polyurethane, Nitrile
PARTS LIST
QPART NUMBER
ITEM
NO. DESCRIPTION TModel Model Model Model Model Model Model Model Model Model
Y. 84991 84992 84993 84994 84995 84996 84997 84998 85201 85202
1Bolt Connector 1 236225 236225 242363 242363 242363 242363 242363 242363 242363 242363
2Coupling Nut 1 237051 237051 237051 237051 237051 237051 237051 237051
3237051 237051
Plunger Rod 1 242929 242929 242930 242930 242931 242931 242932 242932 243247 243247
4Gland Nut 1 242933 242933 242934 242934 242935 242935 242936 242936 243246 243246
5O-ring (polyurethane) 1(Note #1) (Note #1) (Note #2) (Note #2) (Note #3) (Note #3) (Note #4) (Note #4) (Note #5) (Note #5)
6U-cup (polyurethane) 1(Note #1) (Note #1) (Note #2) (Note #2) (Note #3) (Note #3) (Note #4) (Note #4) (Note #5) (Note #5)
7Packing Washer 1(Note #1) (Note #1) (Note #2) (Note #2) (Note #3) (Note #3) (Note #4) (Note #4) (Note #5) (Note #5)
8Retaining Ring 1(Note #l) (Note #l) (Note #2) (Note #2) (Note #3) (Note #3) (Note #4) (Note #4) (Note #5) (Note #5)
9Outlet Body 1 242216 242216 242216 242216 242216 242216 242216 242216 242216 242216
10 Priming Plug 1 16382 16382 16382 16382 16382 16382 16382 16382 16382
11 Adapter 116382
16381 16381 16381 16381 16381 16381 16381 16381 16381 16381
12 Gasket (copper) 2(Note #1) (Note #1) (Note #2) (Note #2) (Note #3) (Note #3) (Note #4) (Note #4) (Note #5) (Note #5)
13 Outlet Check 1 11948 11948 11948 11948 11948 11948 11948 11948 11948 11948
14 Ball 1 66285 66285 66285 66285 66285 66285 66285 66285 66285 66285
15 Ball Stop 1 57036 57036 57036 57036 57036 57036 57036 57036 57036 57036
16 Outlet Body 1 12017 12017 12017 12017 12017 12017 12017 12017 12017 12017
17 O-ring (nitrile) 1(Note #1) (Note #1) (Note #2) (Note #2) (Note #3) (Note #3) (Note #4) (Note #4) (Note #5) (Note #5)
18 Pump Tube 1 242373 242378 242373 242378 242373 242378 242373 242378 242373 242378
19 Adapter 1---- ---- ---- ---- ---- ---- 13242 13242 ---- ----
20 Cotter Pin 2(Note #1) (Note #1) (Note #2) (Note #2) (Note #3) (Note #3) (Note #4) (Note #4) (Note #5) (Note #5)
21 Connecting Rod 1 242372 242377 242372 242377 242372 242377 242372 242377 242372 242377
22 Adapter 1 13230 13230 91917 91917 91917 91917 91916 91916 92181 92181
23 Ball 1 66728 66728 66071 66071 66071 66071 66285 66285 66030
24 Ball 166030
66285 66285 66030 66030 66030 66030 66007 66007 ---- ----
25 Pin 113231 13231 13237 13237 13237 13237 13240 13240 ---- ----
26 Bushing &Plunger 1 242545 242545 242547 242547 242548 242548 242549 242549 243245 243245
27 O-ring (nitrile) 1(Note #1) (Note #1) (Note #2) (Note #2) (Note #3) (Note #3) (Note #4) (Note #4) (Note #5) (Note #5)
28 Adapter Tube 1 242433 242433 242420 242420 242374 242374 242374 242374 242374 242374
29 Retaining Ring 1(Note #1) (Note #1) (Note #2) (Note #2) (Note #3) (Note #3) (Note #4) (Note #4) (Note #5) (Note #5)
30 Guide Washer 1(Note #1) (Note #1) (Note #2) (Note #2) (Note #3) (Note #3) (Note #4) (Note #4) (Note #5) (Note #5)
31 Bushing &Plunger 1 242546 242546 242546 242546 242546 242546 242546 242546 242546 242546
32 Cotter Pin 1(Note #1) (Note #1) (Note #2) (Note #2) (Note #3) (Note #3) (Note #4) (Note #4) (Note #5) (Note #5)
33 Retainer 1 13227 13227 13227 13227 13227 13227 13227 13227 13227 13227
34 Check 1 13229 13229 13229 13229 13229 13229 13229 13229 13229 13229
35 Check Seat 1 13228 13228 13228 13228 13228 13228 13228 13228 13228 13228
36 Priming Shovel 1 13235 13235 13235 13235 13235 13235 13235 13235 13235 13235
37 Priming Tube 1 242375 242375 242375 242375 242375 242375 242375 242375 242375 242375
NOTES: 1. Included in 86231 Pump Repair Kit.
2. Included in 86232 Pump Repair Kit.
3. Included in 86233 Pump Repair Kit.
4. Included in 86234 Pump Repair Kit.
5. Included in 86239 Pump Repair Kit.
RETAIN THIS INFORMATION FOR FUTURE REFERENCE
When ordering replacement parts, list Part Number, Description, Model Number and Series Letter.
LINCOLN provides aDistributor Network that stocks equipment and replacement parts.

This manual suits for next models

10

Other Pentair Water Pump manuals
Pentair BERKELEY B4ZRKS User manual

Pentair

Pentair BERKELEY B4ZRKS User manual
Pentair WCFIX 260V/3 User manual

Pentair

Pentair WCFIX 260V/3 User manual
Pentair Hypro 9200 Series User manual

Pentair

Pentair Hypro 9200 Series User manual

Pentair MYERS 4VC User manual

Pentair

Pentair MYERS 4VC User manual
Pentair STA-RITE User manual

Pentair

Pentair STA-RITE User manual
Pentair Aurora 1060B Series Operating instructions

Pentair

Pentair Aurora 1060B Series Operating instructions

Pentair HYPRO 9305C Series User manual

Pentair

Pentair HYPRO 9305C Series User manual

Pentair MYERS WGL20 Manual

Pentair

Pentair MYERS WGL20 Manual
Pentair IntelliFloXF User manual

Pentair

Pentair IntelliFloXF User manual
Pentair MYERS S33 Manual

Pentair

Pentair MYERS S33 Manual
Pentair WhisperFloXF User manual

Pentair

Pentair WhisperFloXF User manual

Pentair Master Plumber 176958 User manual
Pentair

Pentair Master Plumber 176958 User manual

Pentair Myers WHR Series Manual

Pentair

Pentair Myers WHR Series Manual

Pentair AURORA 3310 Operating instructions
Pentair

Pentair AURORA 3310 Operating instructions

Pentair JUNG PUMPEN K2 plus User manual
Pentair

Pentair JUNG PUMPEN K2 plus User manual

Pentair AURORA 1070 Series Operating instructions

Pentair

Pentair AURORA 1070 Series Operating instructions

Pentair Fairbanks nijhuis 5800 Installation and operating instructions

Pentair

Pentair Fairbanks nijhuis 5800 Installation and operating instructions

Pentair PVM32 User manual

Pentair

Pentair PVM32 User manual

Pentair SuperFlo VS User manual

Pentair

Pentair SuperFlo VS User manual

Pentair JUNG PUMPEN K2 plus User manual

Pentair

Pentair JUNG PUMPEN K2 plus User manual

Pentair HYDROMATIC B-A1 Manual

Pentair

Pentair HYDROMATIC B-A1 Manual

Pentair DELTA ENVIRONMENTAL D1P20-21 Manual

Pentair

Pentair DELTA ENVIRONMENTAL D1P20-21 Manual

Pentair Berkeley 3PL Guide

Pentair

Pentair Berkeley 3PL Guide

Pentair MYERS MCI033 User manual

Pentair

Pentair MYERS MCI033 User manual

Popular Water Pump manuals by other brands
Calpeda GX-40 operating instructions

Calpeda

Calpeda GX-40 operating instructions
Garmin Smartpump installation instructions
Garmin

Garmin Smartpump installation instructions

Blue-White industries ProSeries Chem-Pro C2F Series manual
Blue-White industries

Blue-White industries ProSeries Chem-Pro C2F Series manual

Grundfos CRT Installation and operating instructions

Grundfos

Grundfos CRT Installation and operating instructions

OLIJU CMH Series Installation and operation instructions
OLIJU

OLIJU CMH Series Installation and operation instructions

Maruyama MP2500E2 instruction manual

Maruyama

Maruyama MP2500E2 instruction manual
Ingersoll-Rand PD10E-X-X user manual

Ingersoll-Rand

Ingersoll-Rand PD10E-X-X user manual

Grundfos CRN 95-8 Installation and operating instructions
Grundfos

Grundfos CRN 95-8 Installation and operating instructions

Grundfos AP80 Vortex Installation and operating instructions

Grundfos

Grundfos AP80 Vortex Installation and operating instructions
Pfeiffer Vacuum UNO 6 operating instructions

Pfeiffer Vacuum

Pfeiffer Vacuum UNO 6 operating instructions

Varian SD-91 instruction manual

Varian

Varian SD-91 instruction manual
Grundfos Sololift2 CWC-3 Installation and operating instructions
Grundfos

Grundfos Sololift2 CWC-3 Installation and operating instructions

Edwards RV Series instruction manual

Edwards

Edwards RV Series instruction manual
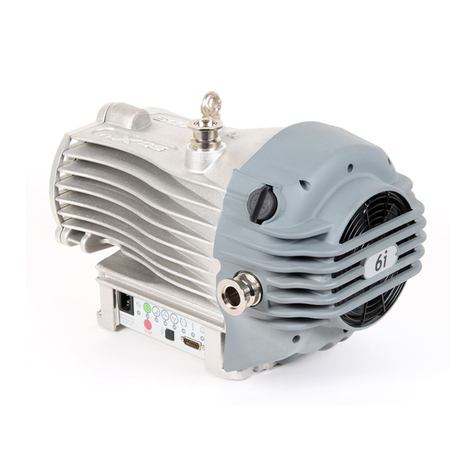
Edwards nXDS6i instruction manual

Edwards

Edwards nXDS6i instruction manual

Gormann-Rupp Pumps AMT 25FP Series Specifications information and repair parts manual

Gormann-Rupp Pumps

Gormann-Rupp Pumps AMT 25FP Series Specifications information and repair parts manual

JEC Pumps AccuLAB Series operating & maintenance manual
JEC Pumps

JEC Pumps AccuLAB Series operating & maintenance manual

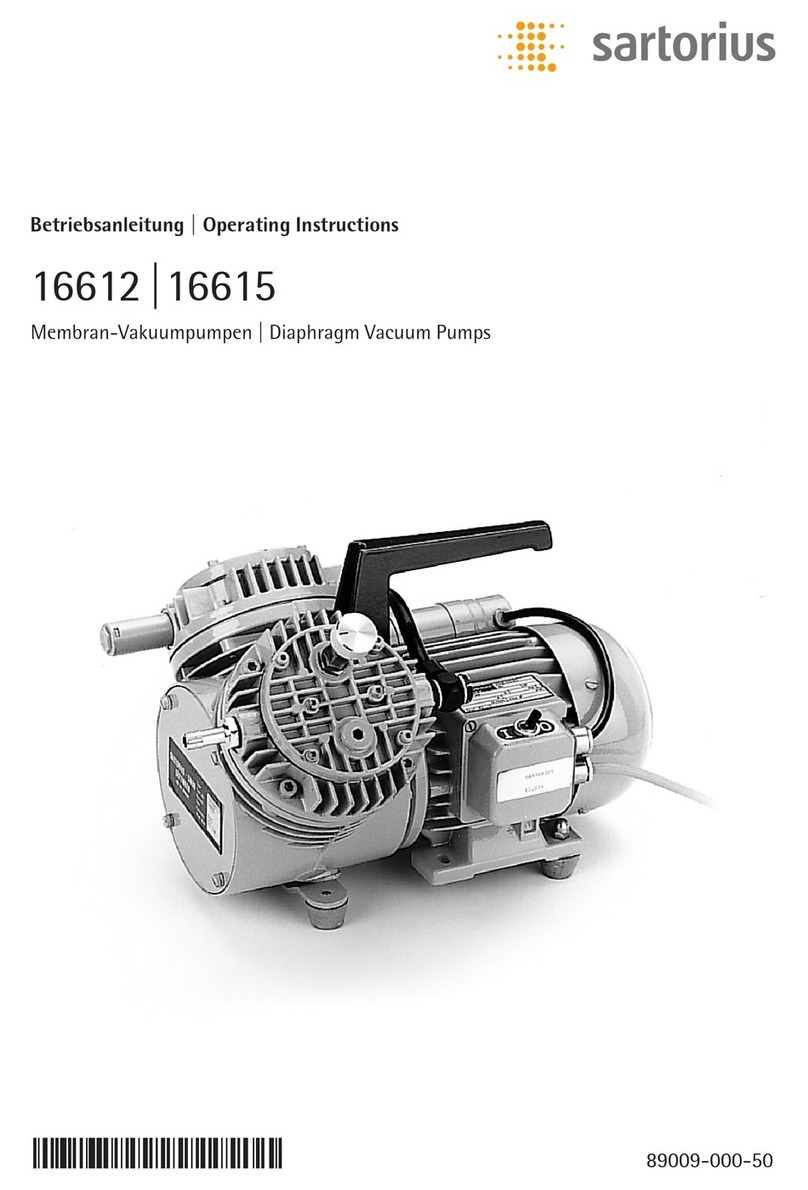
Sartorius 16615 operating instructions
Sartorius

Sartorius 16615 operating instructions

Enerpac of 150 instruction sheet

Enerpac

Enerpac of 150 instruction sheet
manuals.online logo
manuals.online logoBrands
  • About & Mission
  • Contact us
  • Privacy Policy
  • Terms and Conditions

Copyright 2025 Manuals.Online. All Rights Reserved.