I
n
d
e
x
1.
Introduction................................................................................................................................ 3
1.1
Hardware Overview...............................................................................................................3
1.2
Software Overview ................................................................................................................3
1.3
Operating requirements: .......................................................................................................4
1.4
Electric requirements: ...........................................................................................................4
1.5
Size: ...................................................................................................................................... 4
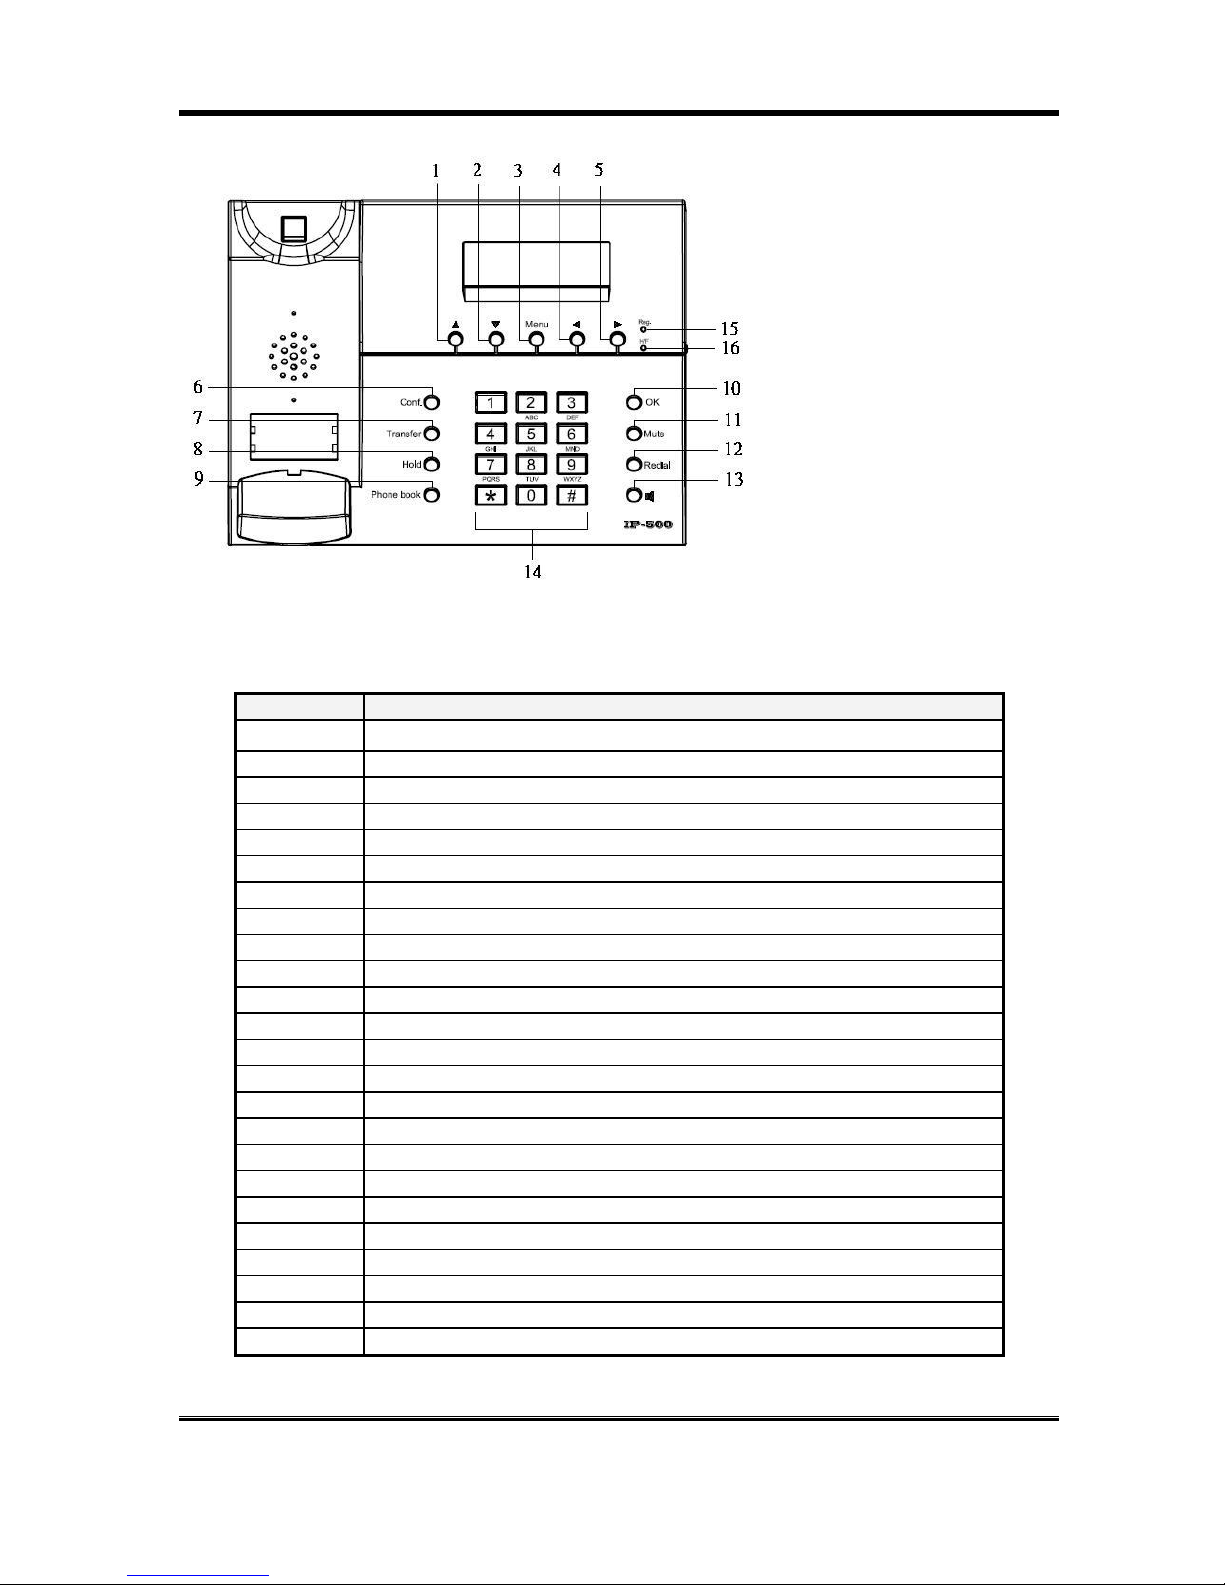
1.6
Phone diagram ...................................................................................................................... 4
1.7
Keypad description................................................................................................................ 5
2.
Installating the IP Phone ........................................................................................................... 5
3.
Setup the VoIP Phone by Keypad............................................................................................. 8
3.1
Keypad Setting List ...............................................................................................................8
4.
Setup the VoIP Phone by Web Browser ................................................................................. 12
4.1
Login.................................................................................................................................... 12
4.2
System Information for the VOIP PHONE ..........................................................................12
4.3
Phone Book......................................................................................................................... 13
4.4
Phone Setting...................................................................................................................... 14
4.5
Network ...............................................................................................................................17
4.6
SIP Settings......................................................................................................................... 20
4.7
NAT Trans. ..........................................................................................................................24
4.8
Others.................................................................................................................................. 24
4.9
System Authority .................................................................................................................25
4.10
Save Change ...................................................................................................................... 26
4.11
Update.................................................................................................................................26
4.12
Reboot.................................................................................................................................27
5.
Setup the VoIP Phone by using Console (Hyper Terminal) .................................................... 28
5.1
Configure the COM port ......................................................................................................28
5.2
Login into the VoIP Phone...................................................................................................29
5.3
Using CLI command to configure the VoIP Phone..............................................................30
6.
Phone function list................................................................................................................... 36