3
SPECIFICATIONS
Specifications are subject to change without notice
IMPORTANT SAFETY INFORMATION
WARNING!
READ, UNDERSTAND AND FOLLOW ALL INSTRUCTIONS AND
WARNINGS BEFORE OPERATING THIS TOOL. FAILURE TO DO
SO MAY RESULT IN PERSONAL INJURY AND/OR PROPERTY
DAMAGE AND WILL VOID WARRANTY.
1.
2.
3.
4.
Use only paper sanding disks with the proper adhesive. Read, under-
stand and follow all adhesive manufacturers’ directions. DO NOT USE
CLOTH BACKED SANDING DISKS WITH THIS TOOL.
Make sure sanding pad RPM rating matches Free Speed rating
of this tool.
Wear a dust mask while operating this tool. Read, follow and un-
derstand manufacturers instructions on paint, primer, paint preps,
glazing, body ller, etc. for additional respirator and ventilating
requirements.
Always use approved eye and ear protection when using air powered
tools. If raising dust/debris, wear a suitable mask. Do not wear loose
clothing or jewelry.
5. Always operate tool a safe distance from yourself and others in the
work area. Keep footing and balance at all times.
6.. Make sure work piece is secure to allow safe operation of the tool wi
both hands. Do not hold the work piece in your hand, lap or against
any part of your body.
7.. Make sure trigger is in the “ f” position before connecting or discon-
necting the tool from air source. Disconnect tool from air source
before changing accessories, performing service and when not in use.
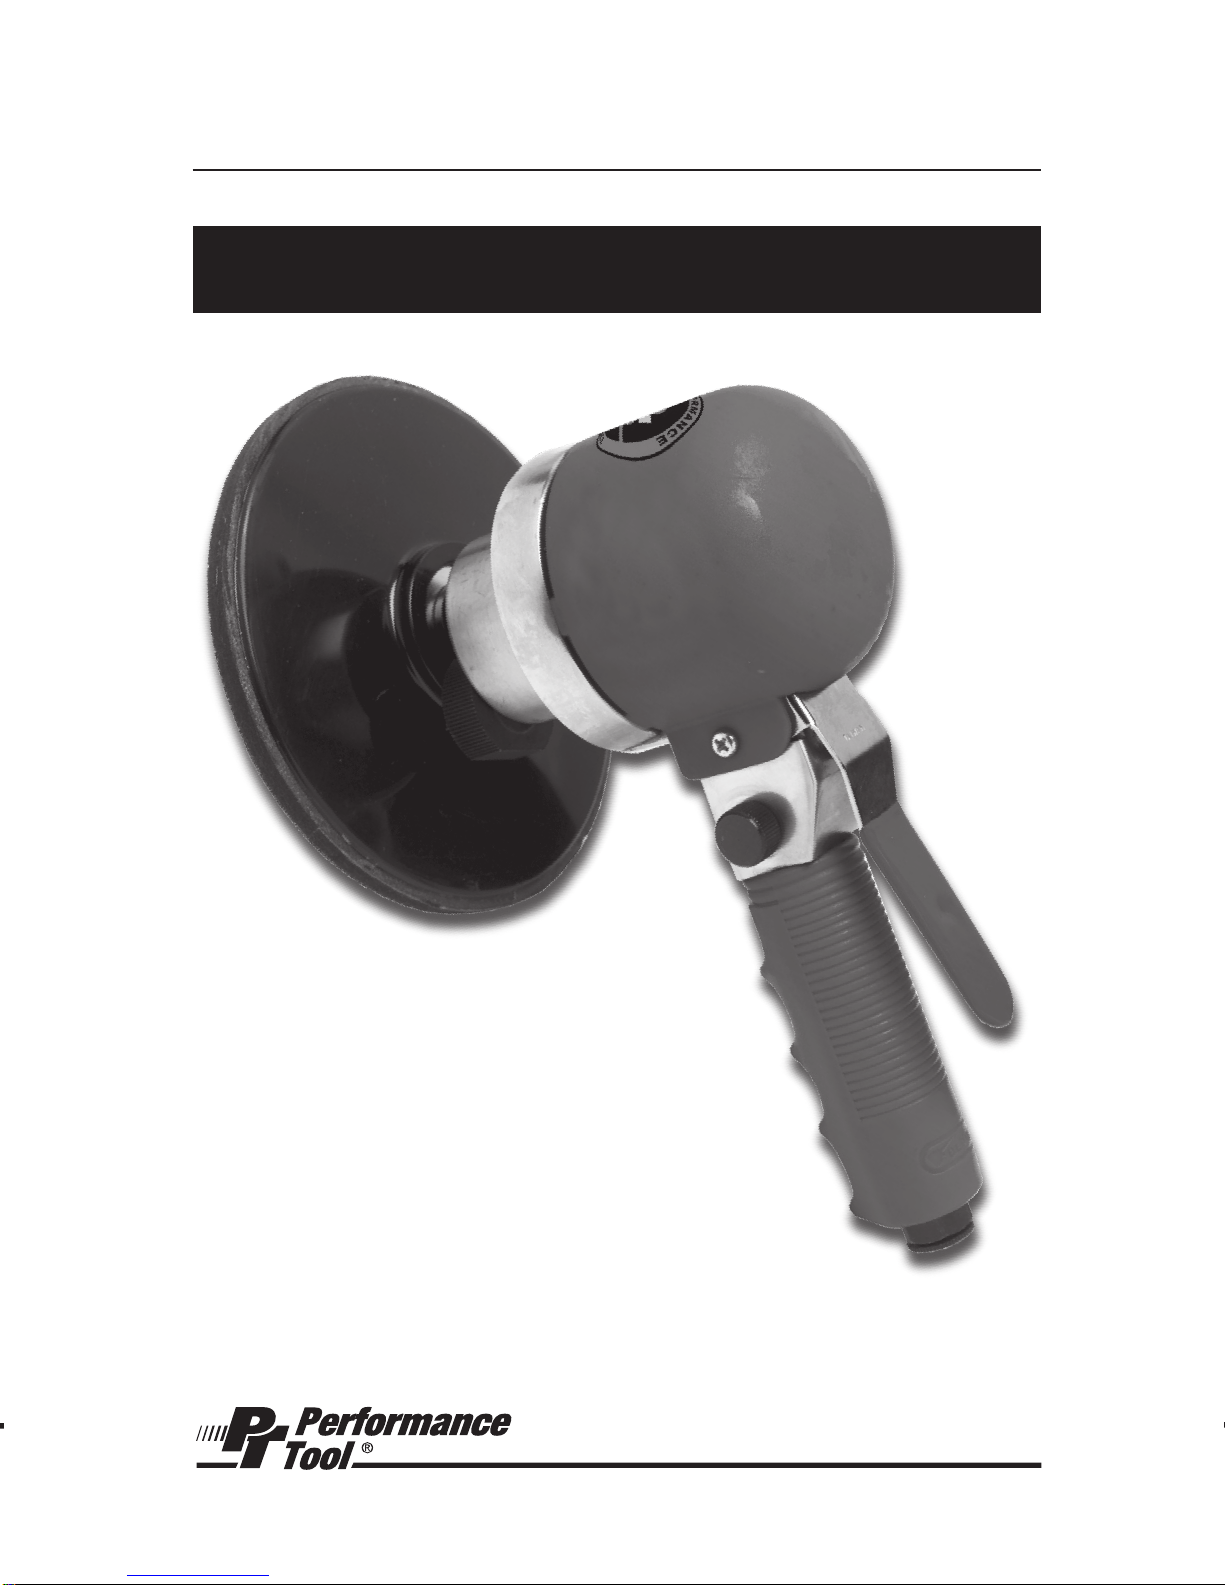
Pad size...............................................................................................6 in.
Sanding surface.....................................................................28-1/4 sq. in.
Spindle/thread size..........................................................5/16 in. / 24 UNF
Orbital stroke .................................................................................5/16 in.
Air pressure .................................................................................. 90 P.S.I.
Average air consumption.............................................................. 5 C.F.M.
Free speed ..........................................................................10,000 R.P.M.
Air inlet....................................................................................1/4 in. N.P.T.
Recommended hose size.......................................................... 3/8 in. I.D.
Length...............................................................................................8.6 in.
Weight ............................................................................................3.3 lbs.
4
IMPORTANT SAFETY INFORMATION
OPERATION
1.
2.
Regulate pad speed with air regulator knob.
Start the sander off the sanding surface. Set the sander on the
surface gently and evenly and start the work. Let the sander do
the work. The weight of the sander will provide efcient sand-
ing. Applying pressure to the sander will only slow the speed of
the pad and reduce sanding efciency. This will also overload
the motor and cause premature wear of the tool and void the
warranty.
3. Work the sander back and forth in a wide, overlapping motion.
Lift the sander off the surface before releasing the trigger.
4. Start with a paper grit coarse enough to remove high spots and
rough areas. Continue using progressively ner grit to attain
desired nish.
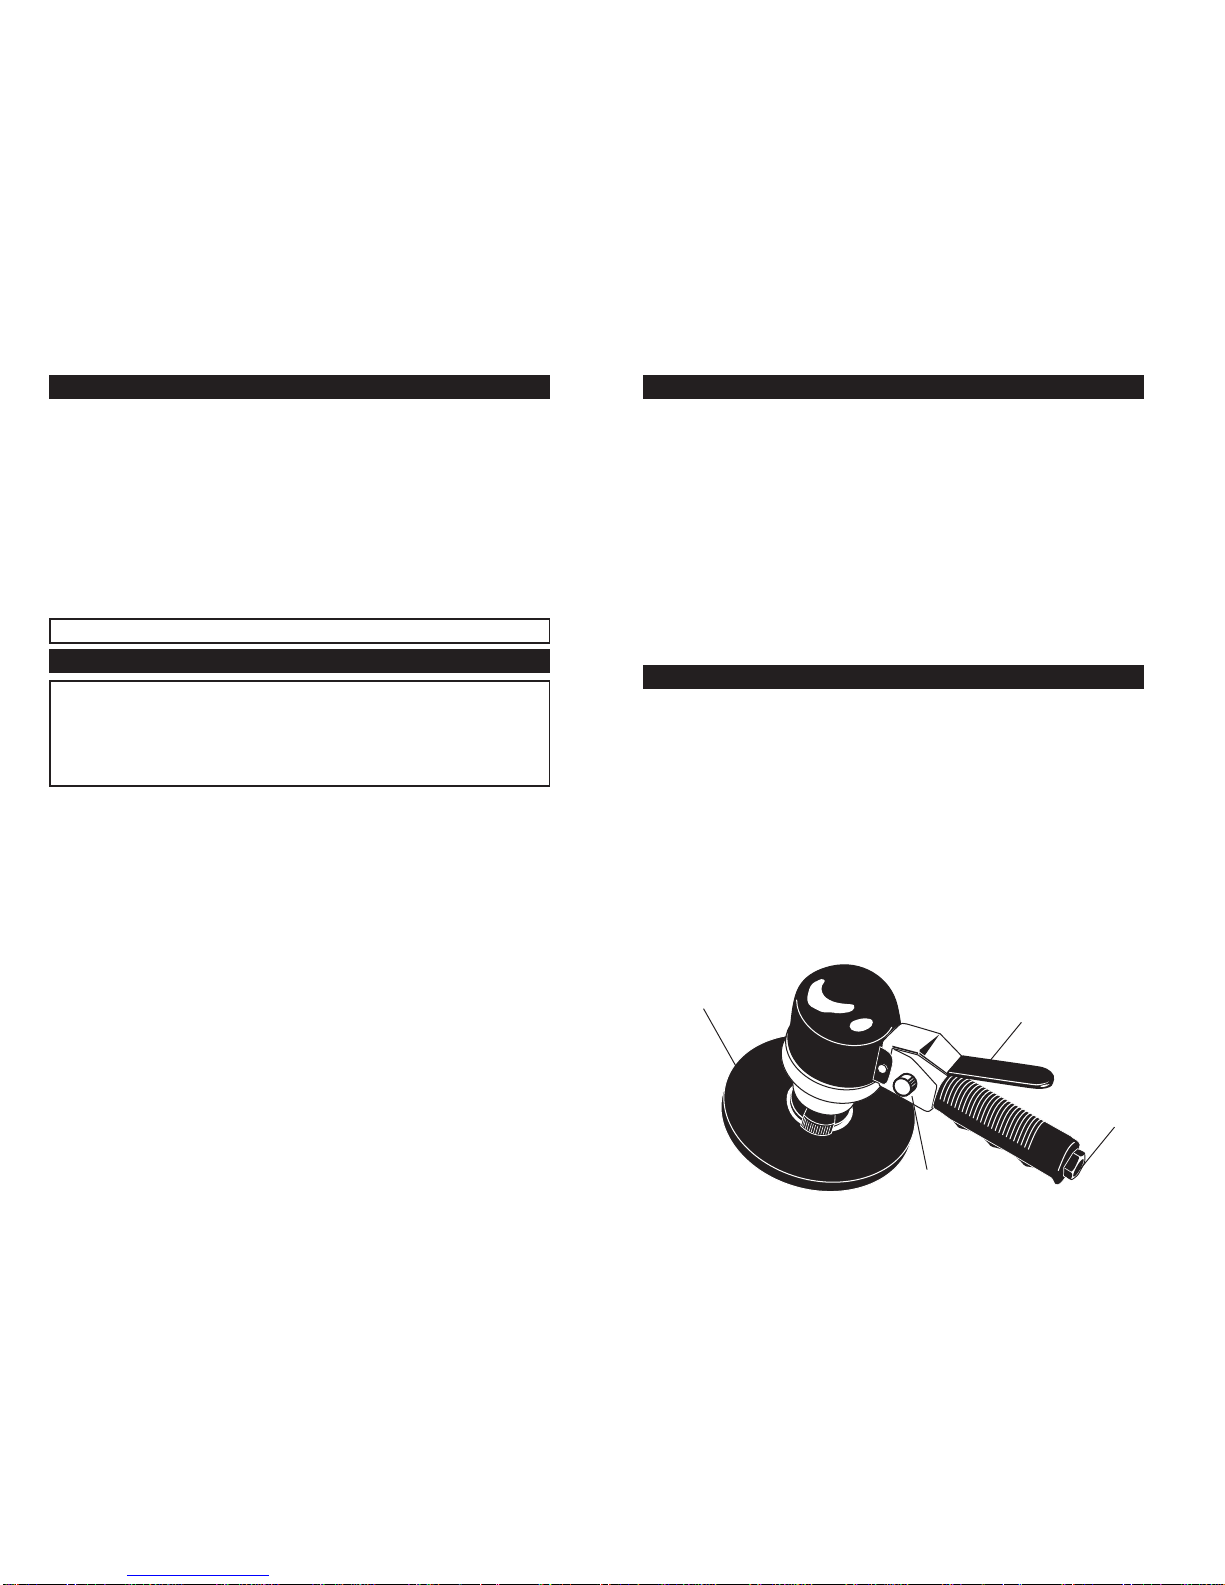
Sanding pad
Air regulator
Air Inlet
Trigger
8. Follow air source manufacturer’s directions for connection of regula-
tors, lters and other accessories to air source. Do not install quick
couplers directly at tool air inlet. This causes inlet failure due to
excess weight and vibration. Use a whip hose between tool and quick
couplers.
9. DO NOT OVERLOAD! Do not force tool. Match tool capacity to work
load requirement. Use tool within its rated capacity and only for its
designated purpose. Overloading air tools will cause premature wear
and/or permanent damage of internal and external drive parts and will
void warranty.
10. Inspect hoses and ttings for wear and damage prior to using tool.
Do not carry or drag tool by the air hose. Keep air hose free from
obstruction, twisting and binding.