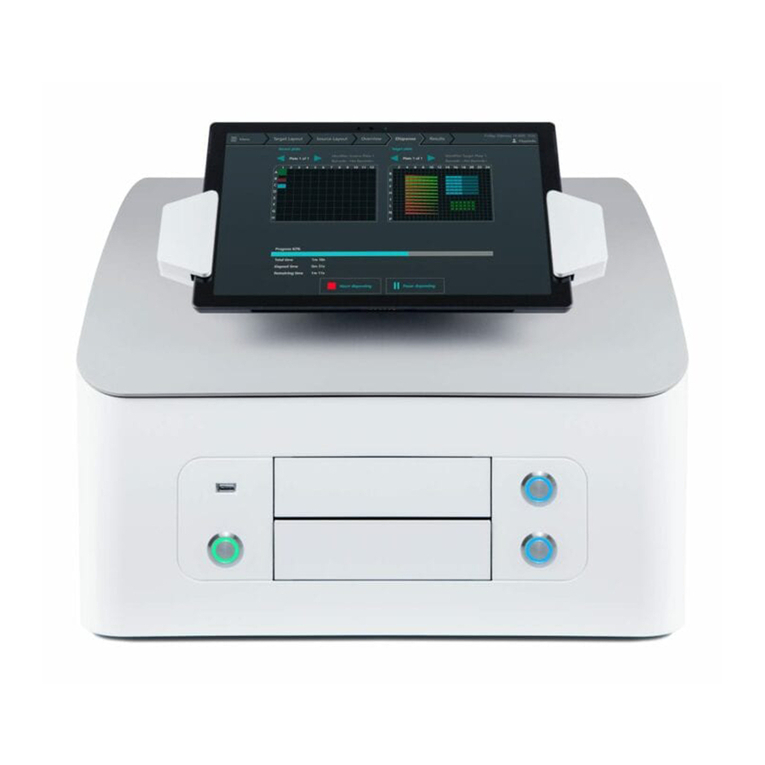
PerkinElmer FlexDrop iQ User manual

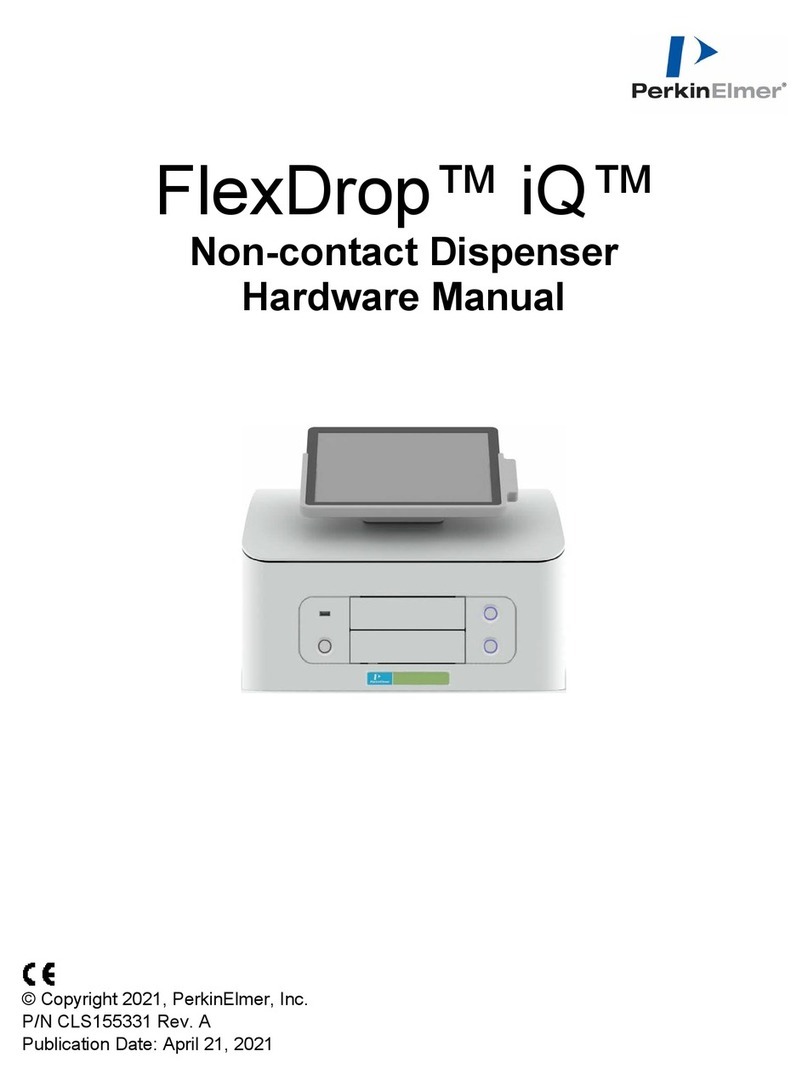
FlexDrop™ iQ™
Non-Contact Dispenser
User Manual
© Copyright 2021, PerkinElmer, Inc.
P/N CLS155330 Rev. A
Publication Date: April 13, 2021

Preface 2
P/N CLS155330 Rev. A FlexDrop iQ User Manual PerkinElmer, Inc.
Preface
Copyright
This manual is published by PerkinElmer, Inc., 68 Elm Street, Hopkinton, MA 01748 USA.
Copyright 2021, PerkinElmer, Inc. All rights reserved, including but not limited to those rights to
reproduce this publication or parts thereof. Reproduction of this publication or parts thereof, or
the products it describes, by any means or in any form is expressly prohibited without the
written permission of PerkinElmer.
Trademarks
PerkinElmer is a registered trademark of PerkinElmer, Inc. All other trademarks are the
property of their respective owners.
Content
Any errors or omission which may have occurred in this publication despite the utmost care
taken in its production will be corrected as soon as possible, but not necessarily immediately
upon detection. PerkinElmer provides this publication “As Is” without warranty of any kind,
either express or implied, including but not limited to the implied warranties of merchantability
or fitness for a particular purpose.
Some states or jurisdictions do not allow disclaimer of express or implied warranties in
certain transactions; therefore, this statement may not apply to you. PerkinElmer reserves
the right to revise this publication and to make changes from time to time in the content
hereof without obligation of PerkinElmer to notify any person of such revision or changes.
Further, PerkinElmer may make modifications to the product described in this manual at any
time without any obligation to notify any person of such modifications.
Proper Equipment Operation
WARNINGS
•
To reduce the risk of electric shock, do not remove the cover. No user
serviceable parts are inside. Refer to qualified service personnel if help is
required.
•
Use this product only in the manner described in this manual. If the equipment is used
in a manner not specified by the manufacturer, the protection provided by the
equipment may be impaired.
AVERTISSEMENTS
•
Pour réduire le risque de choc électrique, ne pas retirer le couvercle. Ce produit ne
contient aucune pièce pouvant être réparée par l’utilisateur. Au besoin, confier l’appareil
à un réparateur qualifié.
•
Ce produit ne doit être utilisé que comme décrit dans ce manuel. Si cet appareil est
utilisé d’une manière autre que celle spécifiée par le fabricant, la protection fournie par
l’appareil peut être entravée.

Preface 3
P/N CLS155330 Rev. A FlexDrop iQ User Manual PerkinElmer, Inc.
Contact Us
If you have a question about a product that is not answered in this manual, or if you need
assistance regarding this product, please contact the PerkinElmer Technical Support Center
from 8:00 A.M. to 8:00 P.M., Eastern Time, Monday through Friday:
Phone: (US Toll Free): 800-762-4000
(Worldwide): +1 203-925-4602
Fax: +1 203-944-4904
Email: DXSupportAmericas@perkinelmer.com
Internet: www.perkinelmer.com
Before you call, have the following information available for the technical representative:
•
Product serial number
•
Software version (found by choosing About from the main Help menu)
•
If applicable, the error number shown in the software or in the log file.
Product Service and Customer Support Plans
PerkinElmer offers a full range of services to ensure your success. From our original factory
warranty through a comprehensive line of customer support plans, PerkinElmer offers you
Field Service Engineers and in-house Specialists who are dedicated to supporting your
hardware, software, and application development needs.
Phone: (US Toll Free): 800-762-4000
(Worldwide): +1 203-925-4602
Fax: +1 203-944-4904
Email: global.techsupport@perkinelmer.com
Our programs can include such useful services as:
•
Preventive maintenance
•
Diagnostic servicing performed on-site by PerkinElmer field service engineers or remotely
via Technical Support
•
Validation performed on-site by PerkinElmer field service engineers
•
Extended use of the PerkinElmer Technical Support Center
•
Software updates
•
Parts, labor, and travel expense coverage
•
Other customized services upon request
Training for Your Product
Contact PerkinElmer for information about the availability of training courses for your product:
Phone: (US Toll Free): 800-762-4000
(Worldwide): +1 203-925-4602
Fax: +1 203-944-4904
FCC
This device complies with part 15 of the FCC (United States Federal Communications
Commission) Rules. Operation is subject to the following two conditions:
•This device may not cause harmful interference, and
•This device must accept any interference received, including interference that may
cause undesired operation.

Preface 4
P/N CLS155330 Rev. A FlexDrop iQ User Manual PerkinElmer, Inc.
CE
This device complies with all applicable CE rules and requirements.
NOTE
Changes or modifications to this equipment not expressly approved by the party responsible
for compliance could void the user’s authority to operate the equipment.
REMARQUE
Tout changement ou modification apporté à cet instrument non expressément approuvé par
l’entité responsable de la conformité peut annuler l’autorisation d’opérer l’appareil accordée à
l’utilisateur.
Table of Symbols
Table 1 contains symbols that identify particularly important information and alert you to the
presence of hazards. These symbols may appear in this manual and/or on the product it
describes.
Table 1. Important Symbols
Symbol
Symbole
Description
Description
WARNING: Caution. Refer to the User’s documentation. (ISO 7000-0434B)
AVERTISSEMENT : Attention. Se reporter à la documentation de l’utilisateur.
NOTE: A cautionary statement; an operating tip or maintenance suggestion; may
result in instrument damage if not followed.
REMARQUE : Énoncé indiquant une précaution à prendre, un conseil de
fonctionnement ou une suggestion d’entretien ; son non-respect peut provoquer
des dommages à l’instrument.
Hazardous voltage; risk of electric shock. (IEC 60417-6042)
Tension dangereuse ; risque de blessure par électrocution.
Biological risks. (ISO 7000-0659)
Risques biologiques.
Risk of injury due to moving parts, shearing force, and crushing areas in operations
area.
Risque de blessure dû aux pièces mobiles, à la force de cisaillement et aux zones
d'écrasement dans la zone d'opérations
Lifting hazard. May result in injury. (ISO 3864)
Levage dangereux. Peut entraîner des blessures.
Keep Dry. (ISO 7000-0626)
Garder au sec.
Fuse. (IEC 60417-5016)
Fusible.

Preface 5
P/N CLS155330 Rev. A FlexDrop iQ User Manual PerkinElmer, Inc.
Symbol
Symbole
Description
Description
Alternating current. (IEC 60417-5032)
Courant alternatif.
On (power). (IEC 60417-5007)
Marche (alimentation).
Off (power). (IEC 60417-5008)
Arrêt (alimentation).
CE compliance mark.
Marque de conformité CE.
WEEE symbol (EN50419:2005). Do not dispose of as unsorted municipal waste.
See the PerkinElmer website (www.perkinelmer.com) for more information.
Consult Instructions for Use. (ISO 7000-1641)
Consulter les Instructions d’emploi.

Preface 6
P/N CLS155330 Rev. A FlexDrop iQ User Manual PerkinElmer, Inc.
Table of Contents
Preface ................................................................................................................................. 2
Introduction.......................................................................................................................... 7
Overview............................................................................................................................ 7
Dispensing Runs.................................................................................................................. 8
Starting the FlexDrop iQ...................................................................................................... 8
Selecting the Protocol Settings............................................................................................ 9
Selecting the Target Layout .............................................................................................. 10
Selecting the Dispensing Options .................................................................................. 12
Selecting the Source Plate ................................................................................................ 19
Viewing the Protocol Overview.......................................................................................... 21
Starting the Dispense Protocol .......................................................................................... 22
Viewing the Results .......................................................................................................... 23
Shutting Down the FlexDrop iQ ......................................................................................... 24
Print Log ............................................................................................................................ 25
Comma-Separated Values (CSV) File ................................................................................ 26
Header Section................................................................................................................. 26
Task Section .................................................................................................................... 27
Advanced User Settings .................................................................................................... 28
About Liquids and the Liquid Library.................................................................................. 28
Liquid Library ................................................................................................................ 28
Liquid Class Library....................................................................................................... 29
Creating a New Liquid Class ............................................................................................. 30
Automated Calibration for New Liquid Classes ............................................................... 31
Manual Calibration of New Liquids................................................................................. 34
About Plate Format Library ............................................................................................... 35
About Advanced Settings.................................................................................................. 36
Dispense Head Settings................................................................................................ 36
Reset Liquid Classes..................................................................................................... 39

Introduction 7
P/N CLS155330 Rev. A FlexDrop iQ User Manual PerkinElmer, Inc.
Introduction
Overview
This FlexDrop iQ User Manual contains information about the safe and
proper handling and operation of the FlexDrop iQ Non-contact Dispenser and
FlexDrop iQ consumables.

Dispensing Runs 8
P/N CLS155330 Rev. A FlexDrop iQ User Manual PerkinElmer, Inc.
Dispensing Runs
This chapter describes how to set up the FlexDrop iQ target and source
plates, prepare the instrument, start a dispensing run, and analyze the
results.
Starting the FlexDrop iQ
To start up the FlexDrop iQ:
1. Switch the instrument power switch on the back of the instrument to the
On (|) position.
2. Press the On/Off switch on the front of the instrument. Wait for the tablet
to start and the instrument to initialize.
3. On the tablet, touch the FlexDrop iQ Studio icon to start the FlexDrip iQ
Studio software. You are prompted to Open a Saved Protocol or Create a
New Protocol as shown in the figure below.
Figure 1. Starting Screen of the FlexDrop iQ Software
4. If the desired protocol has not been saved, touch the Create New
Protocol button and continue with Selecting the Protocol Settings on the
next page.
If the desired protocol already exists, click the Open Saved Protocol
button, open the desired XML file, and then edit or run the protocol.
NOTE: The tabs along the top of the FlexDrop iQ software screen (Figure
1) guide you through each single step of a dispensing run,
highlighting the current step in blue.

Dispensing Runs 9
P/N CLS155330 Rev. A FlexDrop iQ User Manual PerkinElmer, Inc.
Selecting the Protocol Settings
To create a new protocol, click Create New Protocol.The Protocol
Settings screen opens as shown in Figure 2.
Figure 2. Protocol Settings Screen
1. Select the desired options:
•Enable or disable the Deionization function.
•Enable or disable the Dispense to waste function (primes the source
wells to make sure there are no air bubbles directly above the orifice).
oSpecify the volumes for priming each source well.
oSpecify the number of priming cycles for each source well.
•Select the Error handling if no droplets are detected during priming
(Ask, Abort, or Continue).
•Select the Optimization Level (reduces dispensing time by
reordering dispensing steps and using parallel dispensing).
•Select whether to Save liquids in local liquid library (Always, Ask,
or Never).
2. Click OK to define the Target Layout.
NOTE: To change protocol settings, click Menu > Settings > Protocol.

Dispensing Runs 10
P/N CLS155330 Rev. A FlexDrop iQ User Manual PerkinElmer, Inc.
Selecting the Target Layout
Figure 3. Target Plate Settings Screen
1. Select the desired settings in the Add Target Plate window:
•Optional: Enter a Plate Identifier.
•Optional: Enter Plate Barcode ID.
•Select the target Plate Format (96, 384, or 1536).
•Optional: Select a Waste Well position if Dispense to Waste is
enabled.
2. Click Ok to save the settings and display the main window to choose the
Wellgroup.
NOTE: To edit the Target Plate properties, click the Edit button in the
top left corner of the Target Layout window.
NOTE: If a barcode reader is available, barcodes can be scanned. Enable
the barcode reader in the Advanced Device Settings (see page 28)
and click the Scan button to scan.
3. Select the wells which should receive liquids by clicking on the desired
well positions shown in the Target Layout tab. Selected wells are
highlighted in blue and are defined as one Wellgroup (see Figure 4).

Dispensing Runs 11
P/N CLS155330 Rev. A FlexDrop iQ User Manual PerkinElmer, Inc.
Figure 4. Target Layout Screen with Blue Highlighted Wellgroup
NOTE: To add additional target plates, click the Add button in the top
left corner of the Target Layout window. The arrow buttons switch
between different target plate layouts.

Dispensing Runs 12
P/N CLS155330 Rev. A FlexDrop iQ User Manual PerkinElmer, Inc.
Selecting the Dispensing Options
The FlexDrop iQ software offers four different dispensing options, which are
indicated as buttons Mixing, Dilution, Array, and Normalization
on the left below the wellgroup (see Figure 5).
To add a dispense option, click the desired button, and then edit the options
as described in each section below.
Mixing is a simple liquid transfer step to dispense a distinct volume or
concentration of a chosen liquid to the selected wells on the target plate.
Figure 5. Dispensing Option - Mixing
NOTE: When performing dispensing runs by concentration, the FlexDrop iQ
software is able to calculate the required volume, as long as all
parameters (total assay volume, liquid stock concentration and
desired concentration in target well) are given.
Define the Total assay volume for the whole target plate by clicking
the Edit button and adjusting the assay volume.
Total assay volume can also be different for several wellgroups.
When defining the dispensing option by concentration, click
Uncouple to define another total assay volume for the selected
wellgroup, which is different from the total assay volume for the
whole target plate.

Dispensing Runs 13
P/N CLS155330 Rev. A FlexDrop iQ User Manual PerkinElmer, Inc.
Dilution creates direct dilutions within the selected wellgroup.
Choose the liquid and the desired volume or concentration to dispense.
Figure 6. Dispensing Option - Dilution
The following items can be edited:
•Volume or concentration: Set volume/concentration start and end point
for Logarithmic Auto and Linear distribution. Set starting
volume/concentration for Custom distribution.
•Add additional 0step to dilution series.
•Distribution: Choose distribution type of the dilution series. Linear,
logarithmic, and individual dilution factors can be applied.
•Add replicates.
•Change dilution pattern to horizontal or vertical distribution.

Dispensing Runs 14
P/N CLS155330 Rev. A FlexDrop iQ User Manual PerkinElmer, Inc.
Normalization equalizes the filling level of each target well to the same
volume within a dilution series.
Figure 7. Dispensing Option - Normalization
Select one of the normalization options:
•Highest fluid volume: Equalize wells to the same total volume using the
well with the highest volume level of the wellgroup.
•Specific volume: Equalize wells to a user-specified volume.
•Specific % of assay volume: Equalize well volume to the specified
percentage of the total assay volume.

Dispensing Runs 15
P/N CLS155330 Rev. A FlexDrop iQ User Manual PerkinElmer, Inc.
Array creates arrays within one or multiple wells.
Figure 8. Dispensing Option – Array, Specifying Array Size and Position
The following items can be edited:
•ID: Select a pre-defined array or create a new array.
•Size X/Y: Specifies the array size (spot number).
•Pitch X/Y: Specifies the distance between spots.
•Location: Specifies the position of the array within the well.
Choose the wells to be dispensed and the desired dispensing option (see
Figure 9).

Dispensing Runs 16
P/N CLS155330 Rev. A FlexDrop iQ User Manual PerkinElmer, Inc.
Figure 9. Defining Dispensing Options within an Array
The selected array pattern will be applied to all chosen wells of target layout.
Figure 10. Final Array in Target Layout
NOTE: Mixing, Dilution, Normalization and Array will affect all wells of the
selected area in the respective wellgroup.

Dispensing Runs 17
P/N CLS155330 Rev. A FlexDrop iQ User Manual PerkinElmer, Inc.
Edit Wellgroups
To edit a wellgroup, select the wellgroup in the list on the left side of the
screen. Click in the wellgroup on the target plate layout to be edited. Blue
squares display in each corner of the area.
Change the size of an area by hovering on a blue square until the square
turns red, and then click and drag to the desired size.
Change the position of the whole wellgroup by clicking in the middle of the
wellgroup, and then click and drag to the desired position on the target plate.
Remove selected wells by dragging them to the bin icon (see Figure 11) or
pressing the “Del” key on the keyboard.
Figure 11. Editing Wellgroups on the Target Plate

Dispensing Runs 18
P/N CLS155330 Rev. A FlexDrop iQ User Manual PerkinElmer, Inc.
Copy Wellgroups
Whole wellgroups with already defined dispensing option, volume, and liquid
can be copied by clicking the Copy Wellgroup button of the respective
wellgroup. Select the liquid you want to use and the location for the new
wellgroup (see Figure 12).
Figure 12. Copy Wellgroup - Setup Screen

Dispensing Runs 19
P/N CLS155330 Rev. A FlexDrop iQ User Manual PerkinElmer, Inc.
Selecting the Source Plate
After the target layout is defined, click the Source Layout tab to specify the
Source Plate and Source Well Volume.
Figure 13. Add Source Plate Window
The following items can be edited:
•Optional: Enter a Plate Identifier.
•Optional: Add the Plate Barcode ID.
•Select the source Plate Type.
Click Ok to proceed.
NOTE: Edit the Source plate properties by clicking the Edit button in the
Source Layout window.
To add additional source plates, click the Add button on the top
of the Source Layout window.
All liquids and the minimum required volumes for dispensing used in the
protocol are listed on the left side of the screen in the Unassigned liquids
section (see Figure 14).

Dispensing Runs 20
P/N CLS155330 Rev. A FlexDrop iQ User Manual PerkinElmer, Inc.
Figure 14. Source Plate Setup - Unassigned Liquids
Liquids are assigned either by manually dragging them to the desired position
on the source plate or automatically by clicking Auto Assign All. Assigned
liquids move from the left to the right side of the screen into the Assigned
liquids section.
Figure 15. Source Plate Setup - Assigned Liquids
After defining the source plate layout click Overview in the top bar to
proceed.
Other manuals for FlexDrop iQ
2
Table of contents
Other PerkinElmer Dispenser manuals
Popular Dispenser manuals by other brands

Dispens-a-Matic
Dispens-a-Matic U-25 operating instructions

RealCup
RealCup RC400 Service manual

Component Hardware
Component Hardware KS15-2020 user manual

Silvercrest
Silvercrest SSE 6 C3 operating instructions

Avantco
Avantco 177DHC13 user manual

PotteryBarn
PotteryBarn Wall Barrel Dispenser Mounting instruction