Perlick is committed to continuous improvement. Therefore, we reserve the right to change specications without prior notice
6
SINGLE KEG BEER DISPENSER
Operation/Installation Manual
SINGLE KEG BEER DISPENSER
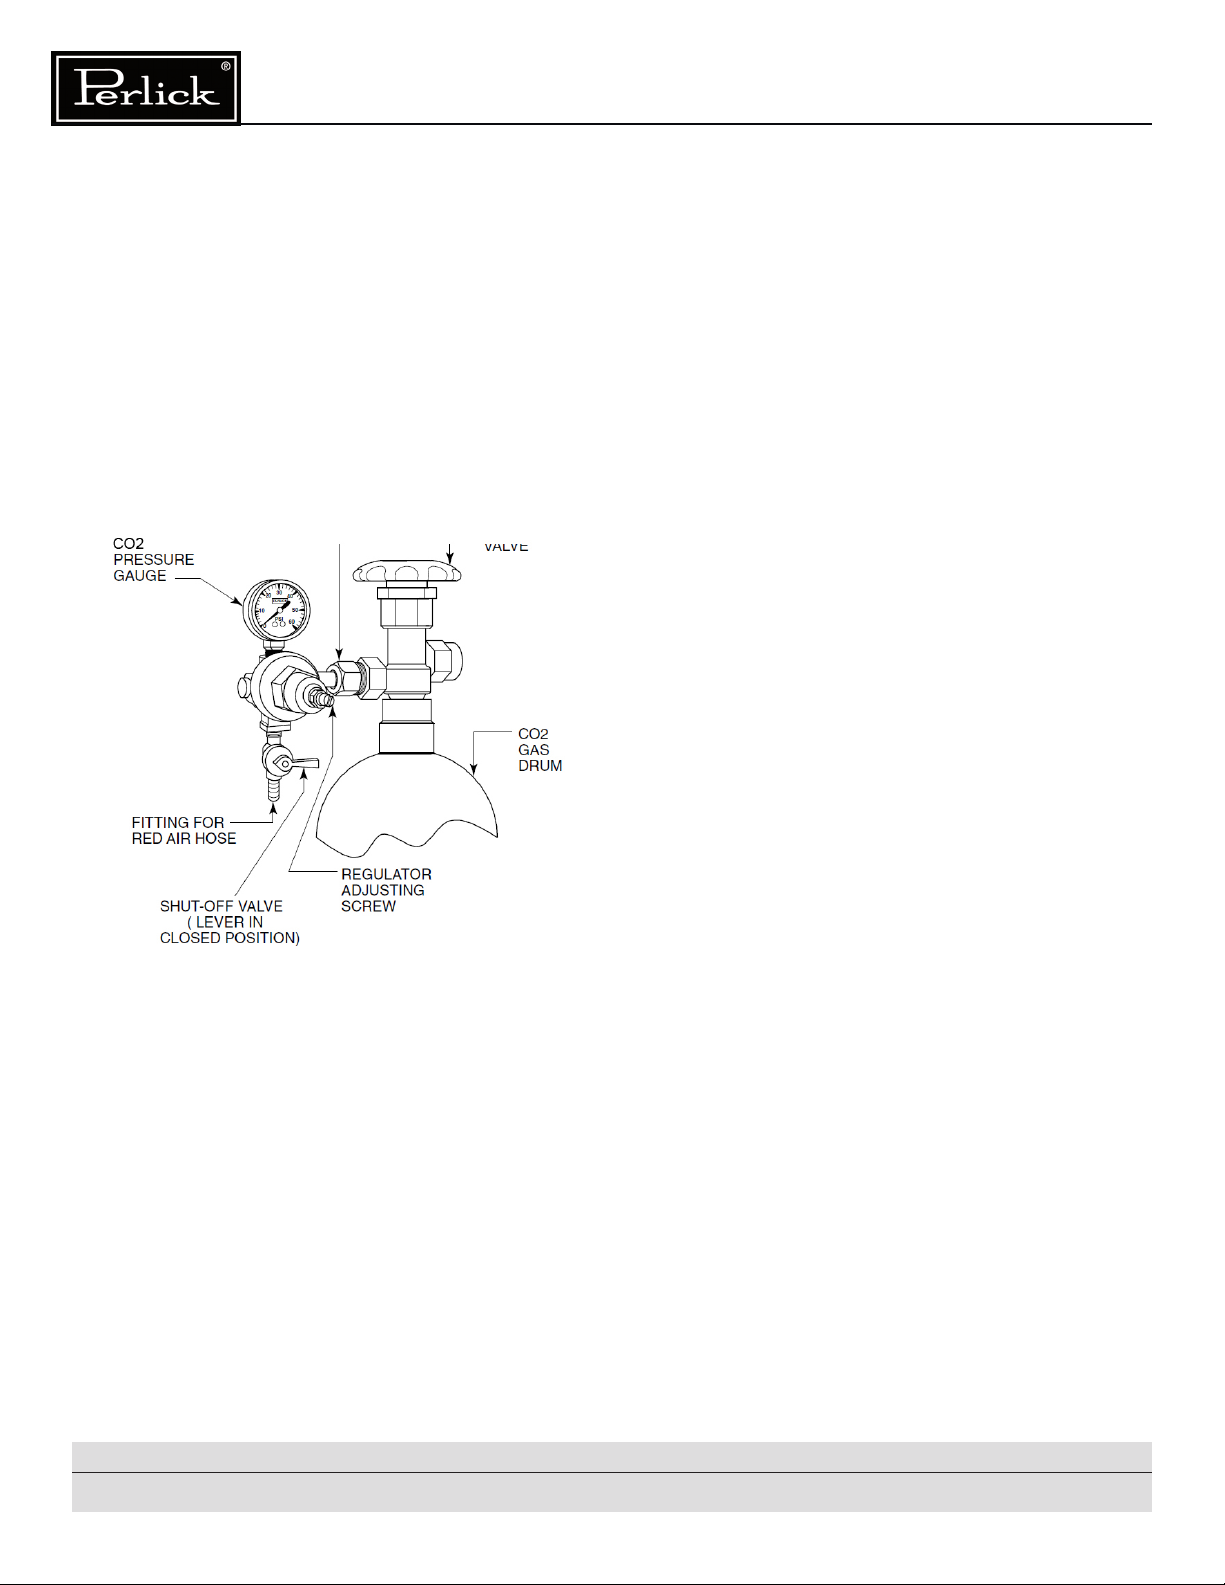
How to Pour the Perfect Beer
NOTE: Cabinet Temperatures lower than
34° will not allow for proper defrosting of the
evaporator coil. If defrosting is necessary,
turn the control knob to the OFF position until
coil is defrosted.
Cleaning the Beer System
The entire beer system, to include the faucet,
exible beer line and tapping devices must be
cleaned at regular intervals. We recommend
ushing the entire system with fresh water
immediately after a keg has been emptied.
Once each month the system should be cleaned
chemically.
It is recommended that you purchase Perlick’s
Pump Type Sterilizer, as shown below. It is
equipped with an adapter that attaches directly to
the faucet shank in lieu of the faucet.
PART NO. DESCRIPTION
63797 Beer Line Cleaning Kit
BLC32 32oz Cleaner
BLC4 4oz Cleaner
Cleaning the draft beer system will help to eliminate
the buildup of the following materials:
■Bacteria:
Beer is an excellent food for bacteria (none of
which is harmful). Proper conditions may begin
the growth of bacteria in draft beer and on the
beer faucet. By regular cleaning, we prevent
this bacterial buildup and maintain the quality
of the draft beer. Greenish or yellowish colored
material on the faucet may indicate bacterial
growth.
■Yeast:
All domestic draft beers contain a small amount
of yeast which remains in the beer from the
fermentation process. When the temperature of
draft beer exceeds 50° a process of secondary
fermentation may take place. The beer faucet
may exhibit a white colored substance (yeast
build up) if not cleaned on a regular basis.
■Beer Stone:
All beer contains calcium which is present from
the grains used in the brewing process. It is an
important natural material in draft systems in that
as it oxidizes it coats the internal parts of the beer
lines and equipment. The beer stone will continue
to build if the system is not cleaned properly or
regularly and can cause drawing problems if it
begins to ake off. Beer stone is present if one
can see a brownish color on the faucet or inner
wall of the beer line, or tobacco- like akes in the
beer.
Cleaning the Cabinet
Use a mild detergent and water to clean the
inside and outside of the cabinet. Dry thoroughly.
Never use a scouring pad or abrasive cleanser.
Note: An industrial strength, commercial
cleaner can be used to clean the outside of
painted cabinets.
Cleaning the Condenser
Use a long handled, stiff brush to clean the dirt
from the front surface of the condenser. Keeping
the condenser free from dust and dirt will ensure
efcient operation.
Caution: Do not bend the ns while brushing
the front of the condenser.
Condenser
The condenser (located behind the back cover)
should be inspected every 30 days and cleaned,
if necessary. Failure to keep the condenser clean
will cause a loss in condensing unit efciency.