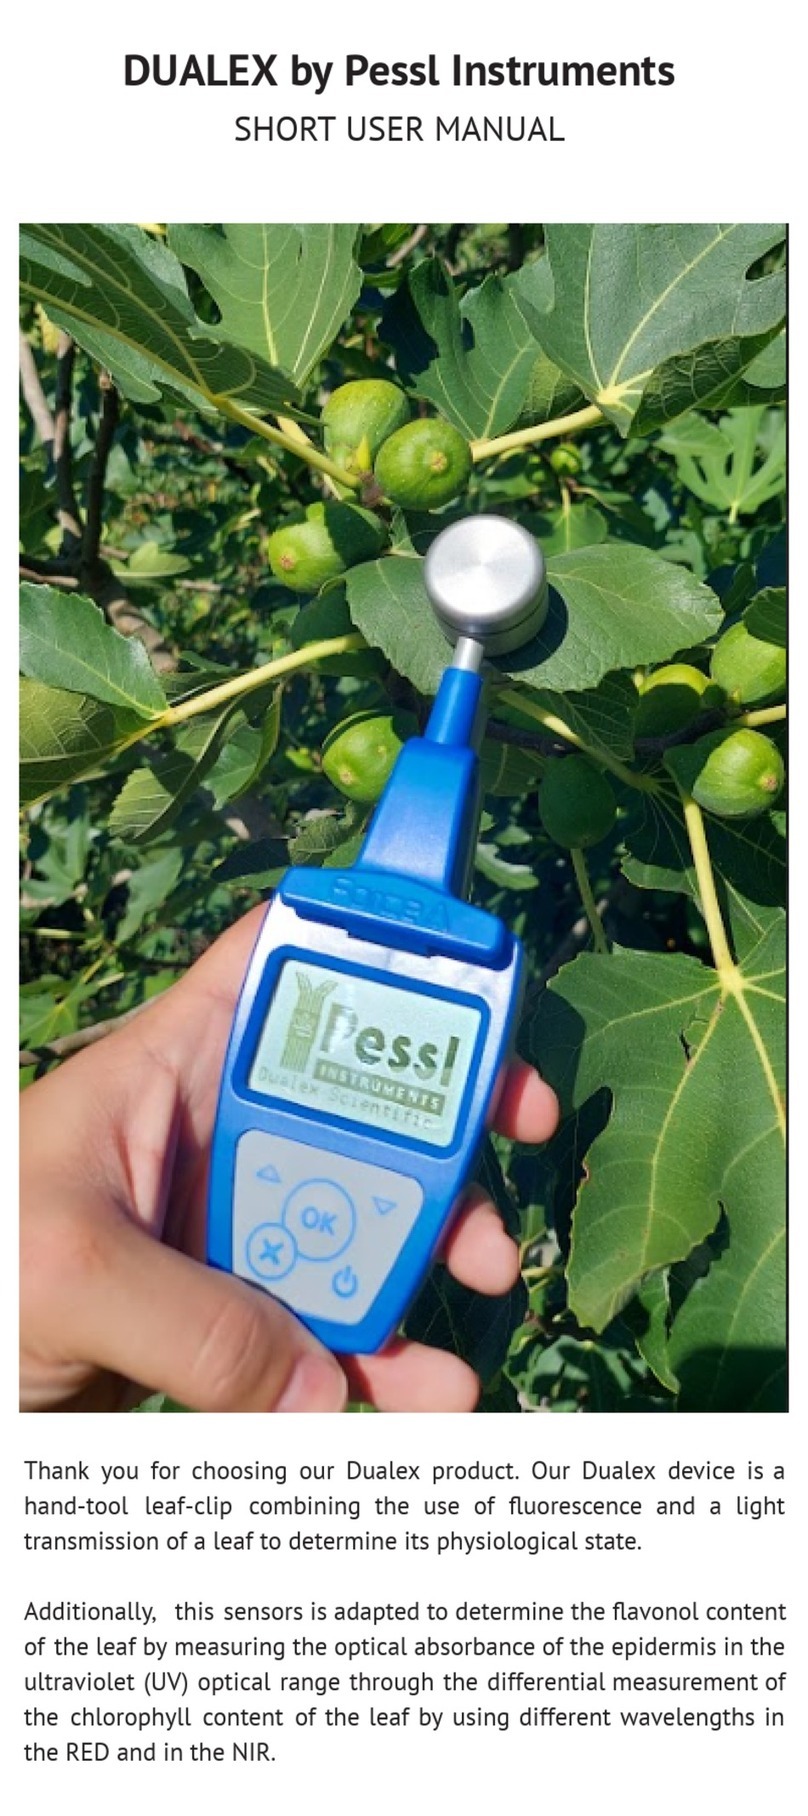
5. Plug the battery cable into the
BAT connector on the PCB (red cir-
cle).
6. Close the cover to its nal position.
Your device is now up and running. The three LEDs on the motherboard
will turn on for an instant indication that the station has reset. After
this, the connection with FieldClimate will start and the LEDs will give
you information about the communication process (for more details
see Blinking code section on metos.at/imetos-eco-series/#blinking-code).
iMETOS ECO D3 is a durable and exible datalogger for all climatic
conditions, but if you want to store it (e.g. during the winter) in a ware-
house, disconnect the battery to avoid discharge.
USE YOUR iMETOS
To start using services we provide, you need to register on the Field-
Climate platform, which gives you the access to the data in graphs or
tables. FieldClimate also provides a powerful decision support system
for growing your crops (plant protection, irrigation, sowing, harvesting,
fertilizing).
REGISTER AS A NEW USER ON ng.FieldClimate.com
ADD YOUR iMETOS DEVICE TO YOUR ACCOUNT
Now you can login to ng.FieldClimate.com. To
add your iMETOS device, click on the icon in
the top right corner User Menu > Add/Remove
station. It will ask you for the Station Serial
number (SN) and the station key. Now the sil-
ver sticker (in the gure) which came with your iMETOS has to be used.
Key 1 gives you full (admin) access and enables you to change all the
settings and set up the iMETOS (e.g. data transfer interval, SMS warning,
etc.). With Key 2 the user is not allowed to change the station parame-
ters, but can access all the data.
tally into the undisturbed soil face. Let the cable go down rst and
then take it up to the top. This prevents water from following the
cable in the ground and wetting the sensor.
• Soak Watermark sensors in water before installation.
• To install soil moisture prole probes, drill a hole with an auger and
insert the probe carefully in the tapered soil opening, until the top of
the probe is levelled with the soil surface. To ensure high quality of
measurements, all soil moisture sensors should have a good contact
with the soil around them.
• If you have Wet and Dry Bulb Temperature sensor, ll the plastic bot-
tle with water and mounts it at 50 cm above the ground or at the
height of the lowest owers/fruits.
• The leaf wetness sensor can be tied to a branch of the plant slightly
inclined with the lter paper looking up. Mount it in a position that
allows the sensor to pick up early rain and to stay wet in the shade.
• If you ordered special version with anemometer or hygroclip, please
follow the instruction reported in the extended manual
metos.at/im-
etos-eco-series/#special-eco-with-wind-sensor
.
Note: 6 sensors can be connected directly to the iMETOS board; there
is also one PI bus chain input and 2 extension connectors on the top
of the motherboard – the system can handle up to 400 sensors. The
central extension can support up to two cable chains, 2 soil moisture
prole probes or the SDI12 interface. The extension on the left side
supports the I2C interface, which can be connected with low cost bar-
ometric pressure with air temperature and relative humidity and light-
ning sensors. For detailed info about the installation of sensors refer to
metos.at/home/imetos-eco-series
.
START-UP THE iMETOS ECO D3
1. Open the housing by unscrewing the 6
screws on the bottom with the 2.5 mm allen
key.
2. Loose the nut from the cable gland.
3. Pull out the case cover, letting the battery
cable loop pass through the gland.
4. In GPRS, UTMS, LTE (i.e. G2, G3, G4) networks a SIM card from a pro-
vider is needed. To insert a SIM card:
Note: Check that the PIN request for the SIM is disabled and that you
have data transfer service enabled.
1. Go to ng.eldclimate.
com/login and click the
button “+”.
2. Insert your
personal data &
e-mail.
3. Check your e-mail and
click on the link to ac-
tivate the user account
you created.
4.3 Lock the holder
by sliding the met-
al lock.
4.1 Slide the met-
al part of the SIM
card holder to un-
lock it.
4.2 Place the SIM card into
the holder so the gold con-
tacts on the SIM face down
on the board.
Unlock Lock
