Wichtige Hinweise
–Gerät nur an Wechselstrom 220 – 240 Volt
anschließen.
–Das Gerät darf niemals in der Badewanne,
der Dusche oder über mit Wasser gefülltem
Waschbecken benutzt werden.
–Das Gerät darf auch beim Reinigen nicht
mit Wasser in Berührung kommen.
–Nach Gebrauch Netzstecker ziehen!
–Kinder erkennen nicht die Gefahren, die beim
Umgang mit Elektrogeräten entstehen
können. Deshalb Kinder niemals unbeauf-
sichtigt mit Elektrogeräten arbeiten lassen.
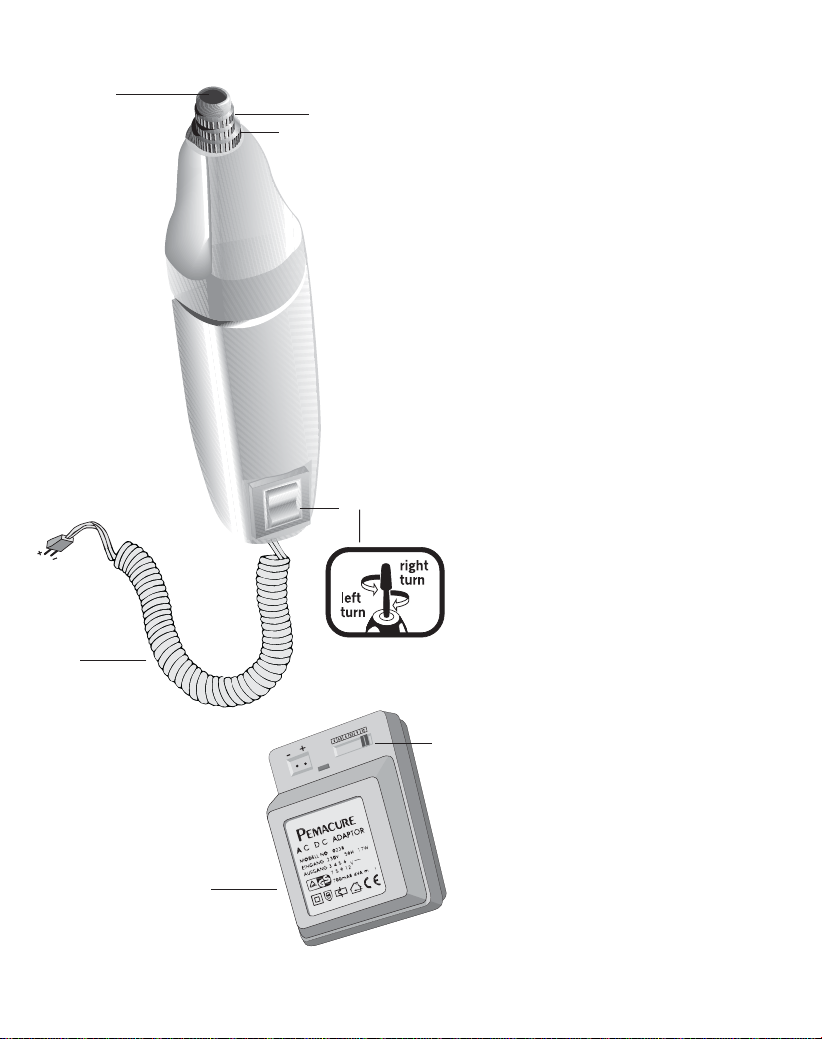
Über die Verwendung des Gerätes
Das elektrisch angetriebene Gerät ermöglicht per-
fekte Manicure-Pedicure.
Important
–Connect the adaptor exclusively to AC mains
of 220 – 240 Volts.
–Never use the appliance in the bath, or near
a water-filled hand-basin.
–Do not let the appliance get wet when
cleaning.
–Disconnect from mains when not in use.
–Do not let children use the equipment
without supervision.
Its function
Electric set permitting to have always hands and
feet in perfect shape.
Très important
–Ne brancher l’appareil que sur du courant
alternatif 220 – 240 Volt.
–Ne jamais utiliser l’appareil dans une
baignoire, sous la douche, ou au-dessus
d’un lavabo rempli d’eau.
–Au cours du nettoyage ne pas mettre
l’appareil en contact avec de l’eau.
–Débrancher l’appareil après utilisation.
–Les enfants ne connaissant pas les dangers
il ne faut jamais laisser un appareil électrique
leur portée.
Sa fonction
L’appareil électrique idéal pour avoir toujours
mains et pieds soignés.
Importante
–Allacciamento: solo a corrente alternata
220 – 240 Volt.
–Non usate mai l’apparecchio nella vasca,
sotto la doccia o sopra il lavandino con
acqua.
–Non pulite l’apparecchio con acqua o altro liquido.
–Dopo l’uso staccate la spina.
–Poiché i bambini non si rendono conto dei
pericoli, non lasciateli mai usare apparecchi
elettrici se non in Vostra presenza e sotto il
Vostro controllo.
A che serve
L’apparecchio elettrico ideale per avere sempre
mani e piedi curati e sani.
Advertencias importantes
–Conectar el aparato sólo con corriente
alterna 220 – 240 voltio.
–El aparato nunca debe ser empleado en
la bañera, en la ducha o encima de un
lavabo lleno de agua.
–Al ser limpiado, el aparato tampoco debe
entrar en contacto con el agua.
– Después de su empleo, debe quitarse el
enchufe!
–Los niños no perciben los peligros que
pueden surgir al manejar aparatos eléctricos.
Por lo tanto, los niños nunca deben trabajar
con aparatos eléctricos sin ser vigilados.
Su funciòn
Aparato eléctrico para tener manos y pies
siempre arreglados y sanos.
Zeer belangrijk
–Sluit het toestel enkel aan op wisselstroom
220 – 240 Volt.
–Gebruik het toestel nooit in bad, onder een
douche of boven een wasbak met water gevuld.
–Tijdens het schoonmaken het toestel niet
in aanraking laten komen met water.
–Schakel het toestel volledig uit na elk gebruik.
–Kinderen kennen het gevaar niet van
electrische toestellen. Laat deze buiten
hun bereik.
Gebruik van het toestel
Het apparaat met electrische motor maakt het
mogelijk op een aangename en veilige wijze de
eeltplekken te verwijderen op alle plaatsen.
!