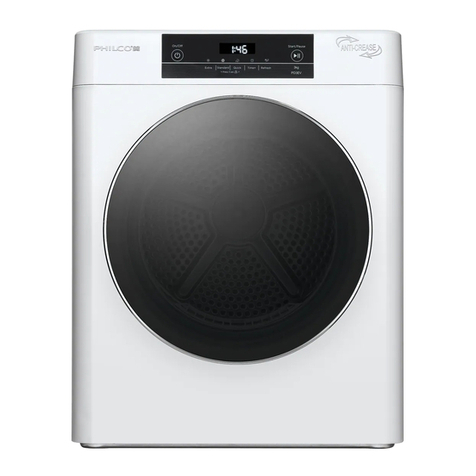
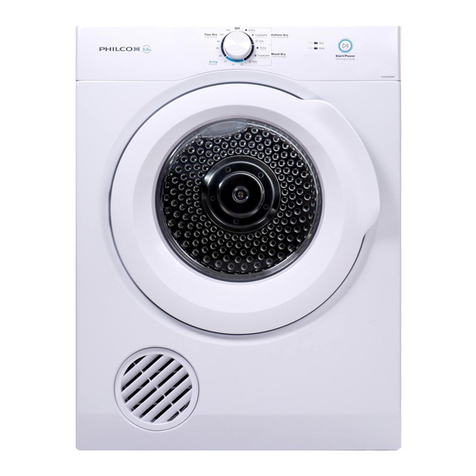
Philco PDC 72 Chiva User manual

TUMBLE DRYER
OWNER’S MANUAL
PDC 72 Chiva

Thank you for choosing this product.
This User Manual contains important safety information and instructions on the operation and maintenance
of your appliance.
Please take the time to read this User Manual before using your appliance and keep this book for future
reference.
Icon Caption Description
WARNING Risk of serious injury or death
RISK OF ELECTRIC SHOCK Dangerous voltage
FIRE Risk of re
ATTENTION Risk of injury or material damage
IMPORTANT/NOTE Information on correct operation of the system
Read the instructions
Hot surface

Copyright © 2018, Fast ČR, a. s. Revision 06/2022
EN - 1
CONTENTS
1. SAFETY INSTRUCTIONS................................................................................................................................9
1.1. Electrical Safety...........................................................................................................................................................................9
1.2. Children‘s Safety .......................................................................................................................................................................10
1.3. Product Safety...........................................................................................................................................................................11
1.4. Correct Use.................................................................................................................................................................................12
1.5. Installing On Top Of a Washing Machine.........................................................................................................................13
2. INSTALLATION.............................................................................................................................................15
2.1. Connection to Water Outlet (with optional drain hose) ............................................................................................15
2.1.1. Connecting the Water Discharge Hose.........................................................................................................................15
2.2. Adjusting the Feet....................................................................................................................................................................16
2.3. Electrical Connection..............................................................................................................................................................16
2.4. Under Counter Installation...................................................................................................................................................16
3. OVERVIEW ...................................................................................................................................................17
4. PREPARING THE LAUNDRY.........................................................................................................................18
4.1. Sorting the Laundry to be Dried.........................................................................................................................................18
4.2. Preparing the Laundry to be Dried....................................................................................................................................19
4.3. Load Capacity............................................................................................................................................................................20
5. USING THE TUMBLE DRYER........................................................................................................................21
5.1. Control Panel .............................................................................................................................................................................21
5.1.1. Programme Selection Knob..............................................................................................................................................21
5.1.2. Electronic Indicator and Additional Functions ..........................................................................................................22
5.2. Programme Selection and Consumption Table............................................................................................................23
5.2.1. Auxiliary Functions...............................................................................................................................................................24
5.2.2. Starting the Programme ....................................................................................................................................................25
5.2.3. Programme Progress...........................................................................................................................................................26
5.3. Drum Light Information.........................................................................................................................................................26
6. CLEANING AND CARE .................................................................................................................................28
6.1. Cleaning the Lint Filters .........................................................................................................................................................28
6.2. Emptying the Water Tank ......................................................................................................................................................29
6.3. Cleaning the Heat Exchanger..............................................................................................................................................30
6.4. Cleaning the Humidity Sensor ............................................................................................................................................31
6.5. Cleaning the Inner Surface of the Loading Door..........................................................................................................31
6.6. Machine sound .........................................................................................................................................................................32
7. TECHNICAL SPECIFICATIONS .....................................................................................................................33
8. TROUBLESHOOTING ...................................................................................................................................34
9. AUTOMATIC FAULT WARNINGS AND WHAT TO DO...................................................................................36
10. ENVIRONMENTAL PROTECTION AND PACKAGING INFORMATION.......................................................37
10.1. Packaging Information........................................................................................................................................................37
11. DESCRIBING THE ENERGY LABEL AND SAVING ENERGY .......................................................................38
11.1. Energy Labelling ....................................................................................................................................................................38
11.2. Energy Eciency....................................................................................................................................................................39

Copyright © 2018, Fast ČR, a. s. Revision 06/2022
EN - 2
This appliance can be used by children aged from 8 years and
above and by persons with reduced physical, sensory or mental
capabilities or lack of experience and knowledge if they have been
given supervision or instructions concerning use of the appliance
in a safe way and if they understand the hazards involved.
Children must not play with the appliance.
Cleaning and user maintenance cannot be performed by children
without supervision.
If the supply cord is damaged, have it replaced by a qualied
service centre in order to avoid dangerous situations. It is
prohibited to use an appliance with a damaged supply cord.
– The maximum weight of dry textiles that can be used in the
appliance is specied in the specications of each dryer later in
the manual.
– The drum dryer must not be used if industrial chemicals were
involved in cleaning.
– Flu receivers must be cleaned regularly after each drying
programme of the dryer has ended.
– Make sure that u does not accumulate around the drum dryer.
– Unwashed pieces of clothing must not be dried in the dryer.
– Pieces of clothing stained with substances such as edible oil,
acetone, alcohol, petrol, paran, stain removers, turpentine,
waxes or wax removers must be washed in hot water with an
extra dose of detergent before they are dried in a drum dryer.

Copyright © 2018, Fast ČR, a. s. Revision 06/2022
EN - 3
– Pieces of clothing such as foam rubber (foam latex), bathing
caps, waterproof textiles, rubber-coated elements and clothing
or pillows lled with foam rubber should not be dried in a drum
dryer.
– Softeners and similar products should be used according to their
instructions for use.
– The nal phase of the drum dryer cycle will be performed without
heating (cooling cycle) to ensure that the clothing pieces achieve
such temperature that will prevent them from getting damaged.
– Before drying clothes in a drum dryer, please remove all items
such as lighters and matches from pockets.
Never turn the drum dryer o before the drying cycle is
completed unless all items are removed and spread out
quickly afterwards so that the heat can dissipate.
– The vents in the bottom of the dryer should not be covered by a
carpet.
– The appliance must not be installed behind lockable door, sliding
door or door with hinges at the opposite side from the drum
dryer if such installation would prevent the drum dryer door from
opening fully.

Copyright © 2018, Fast ČR, a. s. Revision 06/2022
EN - 4
Ventilation openings in the cover of the appliance or in its
construction must be kept free.
The cooling circuit must not be damaged.
CAUTION:
FIRE HAZARD / FLAMMABLE MATERIALS!
CONTAINS COOLING GAS PROPANE
R290
REFRIGERANT
ALTHOUGH THE PROPANE REFRIGERANT R290 THAT IS
CONTAINED IN THE COOLING CIRCUIT OF THE APPLIANCE IS A
NATURAL GAS WITH HIGH ENVIRONMENTAL COMPATIBILITY, IT
IS STILL FLAMMABLE. AVOID DAMAGE TO THE COMPONENTS
OF THE COOLING CIRCUIT DURING TRANSPORTATION AND
INSTALLATION OF THE APPLIANCE.
THE REFRIGERANT R290 IS FLAMMABLE.
●WARNING DRIERS CONTAIN REFRIGERANT GASES IN THEIR
SYSTEM. REFRIGERANT GASES MUST BE DISPOSED OF IN A
PROFESSIONAL MANNER BECAUSE THEY CAN CAUSE EYE INJURY
OR IGNITION.
THE
SYMBOL INDICATES A WARNING THAT THE COOLING
GASES ARE FLAMMABLE.

Copyright © 2018, Fast ČR, a. s. Revision 06/2022
EN - 5
WARNING: FIRE RISK DUE TO FLAMMABLE MATERIALS
IF THE COOLING CIRCUIT GETS DAMAGED:
AVOID OPEN FIRE AND ALL IGNITION SOURCES.
PROVIDE SUFFICIENT VENTILATION IN THE ROOM IN WHICH THE
APPLIANCE IS LOCATED.
IT IS DANGEROUS TO CHANGE OR MODIFY THE APPLIANCE IN
ANY WAY.
ANY DAMAGE TO THE POWER CABLE MAY LEAD TO A SHORT
CIRCUIT, FIRE AND/OR ELECTRIC SHOCK.
●CAUTION: THE COOLING SYSTEM CONTAINS REFRIGERANT
UNDER HIGH PRESSURE. DO NOT TAMPER WITH THE SYSTEM. THE
SYSTEM MAY ONLY BE REPAIRED BY AN AUTHORISED PERSON.
●CAUTION: WHEN PLACING THE APPLIANCE, MAKE SURE THAT
THE POWER SUPPLY DOES NOT GET CAUGHT OR DAMAGED.
●CAUTION: DO NOT PLACE MULTIPLE PORTABLE SOCKETS OR
PORTABLE EXTENSION CABLES TO THE BACK OF THE APPLIANCE.

Copyright © 2018, Fast ČR, a. s. Revision 06/2022
EN - 6
Children under 3 years of age should be prevented from handling
the appliance unless they are permanently under supervision.
The appliance must not be powered from an external
switching device such as timer switch and it must not be
connected to a circuit that is regularly switched on and o.
This appliance is intended only for drying fabrics for which the
manufacturer has recommended such treatment.
Always use programmes according to the fabric type.
The appliance might get damaged when drying shoes.
Do not use to dry carpets.
Use only detergents that are intended for washing or drying
clothes in an automatic drum washing machine and dryer.

Copyright © 2018, Fast ČR, a. s. Revision 06/2022
EN - 7
- If the supply cord gets damaged, it must be replaced by the
manufacturer, its service agent or other similarly qualied person.
- The appliance can be connected to the water drain, it is
recommended to do so only using new hoses, not hoses that
have already been used.
- The appliance should be disconnected from the mains before any
maintenance.
- The power cord plug must be connected to a grounded three-
pole electric outlet.
- Never use a power outlet with a rated voltage that is dierent
from the appliance’s voltage.
- Do not use an extension cord or an AC adapter to connect the
appliance to the power outlet.
- The power cord must not be excessively or dangerously bent or
compressed during installation or operation.
- The controls and the door of the appliance are not intended for
playing.
- The glass door of the appliance can get hot during operation.
- Do not dry unwashed pieces of clothing in the dryer.
- The condensed water is not drinkable. It can cause health issues
when consumed by people or animals.
APPLIANCE INSTALLATION
- This appliance is intended for interior use only.
- Before connecting the dryer, please make sure that the
parameters at the type plate (fuse rating, voltage and frequency)
correspond to the network voltage. In case of doubt please
contact a qualied electrician.

Copyright © 2018, Fast ČR, a. s. Revision 06/2022
EN - 8
- This appliance is not intended to be used as a built-in appliance.
- The electric outlet that the power cord is connected to must be
easily accessible after the appliance has been installed.
- Remove all packaging materials and safety transportation bolts
before using the appliance. Otherwise the appliance or its
surroundings might get seriously damaged.
- The appliance, the power cord or the electric outlet must not lie
in, touch or be submerged in water or any other liquid to avoid
electrical hazards.
- The appliance must not stand on the power cord.
- Do not plug or unplug the plug with wet hands.
- Dispose of packaging in a proper manner.
- Do not lift or handle the appliance when holding its door,
controls, the upper board, hoses or power cord.
- The power cord must not be excessively or dangerously bent or
compressed during installation or operation.
- The appliance must be placed on a rm and level surface.
- After you place the appliance, make sure it is level in all directions
using a spirit level.
- The appliance must not be installed behind lockable door, sliding
door or door with hinges at the opposite side from the drum
dryer if such installation would prevent the drum dryer door from
opening fully.
THESE SAFETY INSTRUCTIONS SHOULD BE READ AND
FOLLOWED CAREFULLY AND KEPT FOR FUTURE REFERENCE.

Copyright © 2018, Fast ČR, a. s. Revision 06/2022
EN - 9
1. SAFETY INSTRUCTIONS
This section contains safety instructions that will help protect you
from risk of personal injury or property damage. Failure to follow
these instructions will void any warranty.
1.1. Electrical Safety
• Theappliancemustnotbesuppliedthroughanexternal
switching device, such as a timer, or connected to a circuit that is
regularly switched on and o by a utility.
• Donottouchthepowerplugwithwethands.Alwayspullthe
plug to unplug the product, otherwise, there will be risk of an
electric shock.
• Connectthedryertoagroundedsocketwithfuseprotection.
The earth connection must be installed by a qualied electrician.
Our company cannot be held responsible for damages/losses
resulting from using the dryer without an earth connection as
required by local regulations.
• Thevoltageandtheallowablefuseprotectionareindicatedon
the type plate. (For the type plate, please see 3. Overview)
• Voltageandfrequencyvaluesindicatedonthetypeplatemust
be equal to the mains voltage and frequency value in your house.
• Unplugthedryerwhenitisnotusedforanextendedperiod,and
before installation, maintenance, cleaning and repair, otherwise,
the dryer may get damaged.
• Theplugsocketmustbefreelyaccessibleatalltimesafter
installation.

Copyright © 2018, Fast ČR, a. s. Revision 06/2022
EN - 10
To avoid the risk or re or electric shock, do not use extension
cords, multi sockets or adapters to connect the dryer to mains
power.
1.2. Children‘s Safety
• Donotleavechildrenunattendednearthemachine.
• Childrenmightlockthemselvesinthemachineresultinginriskof
death.
• Donotallowchildrentotouchtheglassdoorduringoperation.
The surface becomes extremely hot and may cause skin damage.
• Keeppackagingmaterialawayfromchildren.
• Poisoningandirritationmayoccurifdetergentandcleaning
materials are consumed or come into contact with the skin and
eyes.
• KeepcleaningmaterialsoutofthereachofchildrenElectrical
products are dangerous for children.
• Keepchildrenawayfromtheproductwhileitisrunning.
• Topreventchildrenfrominterruptingthedryercycle,youcanuse
the child lock to avoid any changes in the running programme.
• Donotallowchildrentosit/climbonorclimbinsidetheproduct.
• Childrenoflessthan3yearsshouldbekeptawayunless
continuously supervised.

Copyright © 2018, Fast ČR, a. s. Revision 06/2022
EN - 11
1.3. Product Safety
Due to risk of re, the following laundry items and
products should NEVER be dried in the dryer:
• Donotdryunwasheditemsinthetumbledryer.
• Itemsthathavebeensoiledwithsubstancessuchascookingoil,
acetone, alcohol, petrol, kerosene, spot removers, turpentine,
waxes and wax removers should be washed in hot water with
an extra amount of detergent before being dried in the tumble
dryer.
• Cleaningclothsandmatsthathaveresiduesofammable
cleaning agents or acetone, gas, patrol, stain remover, turpentine,
candle, wax, wax remover or chemicals.
• Laundrythathasresiduesofhairsprays,nailpolishremoverand
similar substances.
• Laundryonwhichindustrialchemicalshavebeenusedfor
cleaning (such as chemical cleaning).
• Laundrythathasanykindoffoam,sponge,rubberorrubber-like
parts or accessories. These include latex foam sponge, shower
caps, waterproof fabrics, tted clothes, and foam pillows.
• Itemswithllinganddamaged(partsorjackets).Foam
protruding from these items might catch re during the drying
process.

Copyright © 2018, Fast ČR, a. s. Revision 06/2022
EN - 12
• Operatingthedryerinenvironmentsthatcontainourorcoal
dust may cause explosion.
ATTENTION: Underwear that contains metal reinforcements
should not be put in the dryer. The dryer may be damaged if metal
reinforcements come loose and break o during drying.
Risk of re and damage!
1.4. Correct Use
ATTENTION: Never stop a tumble dryer before the end of the
drying cycle unless all items are quickly removed and spread out so
that the heat is dissipated.
ATTENTION: Make sure that pets do not enter the dryer.
Check the inside of the dryer before using it.
ATTENTION: Superheating of clothes inside the dryer can
occur if you cancel the programme or in the event of a power
failure whilst the dryer is running. This concentration of heat can
cause self-combustion so always activate the Refresh programme
to cool down or quickly remove all laundry from the dryer in order
to hang them up and dissipate the heat.
• Usethedryeronlyforhouseholddryingandtodryfabricswitha
label that indicates they are suitable for drying. All other uses are
out of the scope of intended use and are prohibited.
• Thewarrantywillbevoidincaseofanycommercialuse.
• Thisapplianceisdesignedtobeusedinsidedomesticresidences
only, and should be placed on a straight and stable surface.
• Donotleanagainstorsitonthedoorofthedryer.Thedryermay
tip over.

Copyright © 2018, Fast ČR, a. s. Revision 06/2022
EN - 13
• Tomaintainatemperaturethatwillnotharmthelaundry(e.g.to
prevent the laundry from catching re), a cooling process starts
after the heating process. After this, the programme ends. At the
end of the programme, always remove the laundry promptly.
ATTENTION: Never use the dryer without a lint lter or with a
damaged lint lter.
• Lintltersmustbecleanedafter each use as indicated in 6.1.
Cleaning the Lint Filter.
• Lintltersmustbedriedafterwetcleaning.Wetltersmight
cause malfunction during the drying process.
• Lintaccumulationmustnottobeallowedaroundthetumble
dryer (not applicable for appliances intended to be vented to the
exterior of the building)
• Donotinstallthedryerinroomswherethereisriskoffreezing.
Freezing temperatures negatively aect the dryers performance.
Condensed water that freezes in the pump and hose may cause
damage.
1.5. Installing On Top Of a Washing Machine
ATTENTION: A washing machine cannot be placed on the
dryer. Pay attention to the warnings below when installing the
dryer on a washing machine.

Copyright © 2018, Fast ČR, a. s. Revision 06/2022
EN - 14
ATTENTION: The dryer can only be placed on washing
machines that have a same capacity and above.
• Tousethedryeronthewashingmachine,axingpartmustbe
used between the two products. The xing part must be attached
by an Authorised Service Provider.
• Whenthedryerisplacedonthewashingmachine,thetotal
weight of these products may reach almost 150 kilograms
(when loaded). Place the products on a solid oor that has a load
bearing capacity!
Appropriate InstallationTable for Washing Machine and Tumble Dryer
Tumble Dryer
(Depth)
Washing Machine
37 cm 42 cm 53 cm 56 cm 59 cm 85 cm
56 cm X X
61 cm X X X
(For the depth information, please see 7. Technical Specications)
In order to put the dryer machine onto the washing machine, a
special stacking kit is required as an optional extra. Please contact
customer service to acquire. The assembly instruction will be
served together with the stacking kit.
CE Declaration of conformity
We declare that our products meet the applicable European Directives, Decisions and Regulations and the
requirements listed in the standards referenced.

Copyright © 2018, Fast ČR, a. s. Revision 06/2022
EN - 15
2. INSTALLATION
2.1. Connection to Water Outlet (with optional drain hose)
In products with a heat pump unit, water accumulates in the water tank during the drying process. You must
empty the accumulated water after each drying process. Instead of periodically emptying the water tank,
you can also use the water drain hose provided with the product to directly drain the water outside.
2.1.1. Connecting the Water Discharge Hose
1. Pull and take out the end of the hose at the back of the dryer. Do not use any tools to take out the hose.
2. Fit one end of the water discharge hose, which is provided with the product, to the slot from which you
have removed the hose.
3. Fix the other end of the water discharge hose directly to the water outlet or sink.
ATTENTION: The hose must be connected in a manner that it cannot be displaced. If the hose comes out
during water discharge, there might be ooding in your house.
IMPORTANT: The water discharge house must be installed at a height of 80 cm maximum.
IMPORTANT: The water discharge hose must not be bent between the outlet and the product, folded or
stepped over.

Copyright © 2018, Fast ČR, a. s. Revision 06/2022
EN - 16
2.2. Adjusting the Feet
• Forthedryertoworkwithlessnoiseandvibration,itmustbestableandbalancedonitsfeet.Adjustthe
feed to ensure that the product is balanced.
• Rotatethefeettotherightandtotheleftuntilthedryerisevenandstable.
IMPORTANT: Never remove the adjustable feet.
2.3. Electrical Connection
ATTENTION: There is risk of re and electric shock.
• Yourdryerissetto220-240Vand50Hz.
• Themainscableofthedryerisequippedwithaspecialplug.Thisplugmustbeconnectedtoanearthed
socket protected by a fuse of 16 Amperes as indicated on the type plate. The fuse current rating of the
power line where the outlet is connected must also be 16 amperes. Consult a qualied electrician if you
do not have such an outlet or fuse.
• Ourcompanycannotbeheldresponsiblefordamagesresultingfromusagewithoutearthing.
IMPORTANT: Operating your machine at low voltage values will shorten the service life and decrease the
performance of your machine.
2.4. Under Counter Installation
• Leaveatleast3cmofspacebetweenthesideandrearwallsoftheproductandtheundersideofthe
worktop when installing your product under a counter.
• Assembly/disassemblyunderthecounterifneccessarymustbedonebyauthorizedservice.

Copyright © 2018, Fast ČR, a. s. Revision 06/2022
EN - 17
3. OVERVIEW
1
2
3
4
5
6
7
8
9
10
11
1. Upper tray
2. Control panel
3. Loading door
4. Plinth
5. Plinth opening slot
6. Ventilation grills
7. Adjustable feet
8. Plinth cover
9. Type plate
10. Lint lter
11. Drawer Cover

Copyright © 2018, Fast ČR, a. s. Revision 06/2022
EN - 18
4. PREPARING THE LAUNDRY
4.1. Sorting the Laundry to be Dried
Follow the instructions on the labels of the laundry to be dried. Only dry items that have a statement/symbol
that indicates„they can be dried in a dryer“.
• Donotoperatetheproductwithloadamountsandlaundrytypesotherthanthosegivenin4.3.Load
Capacity.
Suitable for drying in a dryer Does not need ironing Sensitive/Delicate drying
Not suitable for drying in
a dryer
No drying Do not dry-clean At any temperature At high temperatures
At medium temperatures At low temperatures Heatless Hang to dry
Spread to dry Hang wet to dry Spread in shadow to dry Suitable for dry cleaning
Do not dry thin, multi-layer or thick-layer fabrics together as they dry at dierent levels. For this reason, dry
clothes together that have the same structure and fabric type. This way, you can get an even drying result. If
you think that the laundry is still wet, you can select a time programme for additional drying.
Please dry your big (like duvets) and small sizes of laundries seperately in order to not to have a damp
laundries.
IMPORTANT: Delicate fabrics, embroided fabrics, woolen/silk fabrics, clothes made of delicate and
expensive fabrics, airtight clothes and tulle curtains are not suitable for drying in the dryer.
Table of contents
Languages:
Other Philco Dryer manuals

Philco
Philco PDV556HQWA User manual

Philco
Philco PDC 82 R Crown User manual

Philco
Philco PDV556N3WB User manual

Philco
Philco PCD8H User manual

Philco
Philco PD40M User manual

Philco
Philco PDC 82 Crown User manual

Philco
Philco PD3EV User manual

Philco
Philco PD 8 Crown User manual

Philco
Philco PLWDSI 86 KING User manual
Popular Dryer manuals by other brands

Tennant
Tennant 250 Operator and parts manual

Asko
Asko T700 Series Service manual

Starmix
Starmix XT 1000 E Mounting Instructions and Directions for Use

GE
GE GFDS375 Owner's Manual & Installation Instructions

GE
GE Spacemaker DSXH47 Owner's manual and installation instructions

Kenmore
Kenmore 8885 - Rear Control 7.3 cu. Ft. Capacity Electric... Use & installation instructions