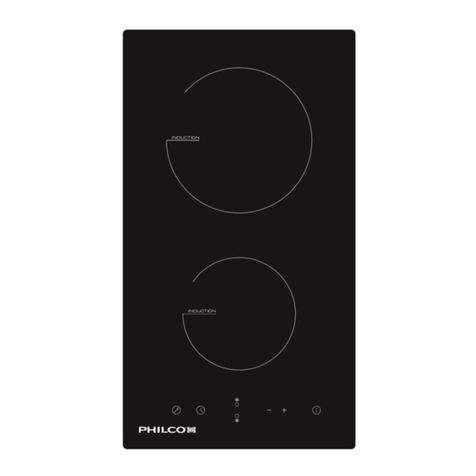
Philco PHS 3292C User manual

GLASS-CERAMIC HOB
OWNER’S MANUAL
PHS 3292C

Dear customer,
Thank you for buying a PHILCO brand product. So that your appliance serves you well, please read all
the instructions in this user’s manual.
Copyright © 2019, Fast ČR, a. s. Revision 08/2019

Copyright © 2019, Fast ČR, a. s. Revision 08/2019
EN - 1
CONTENTS
PART 1: SAFETY INFORMATION......................................................................................................................2
PART 2: DESCRIPTION OF THE APPLIANCE...................................................................................................7
Technical characteristics..................................................................................................................................................................7
Control panel.......................................................................................................................................................................................7
PART 3: USE OF THE APPLIANCE ....................................................................................................................8
Sensitive touch.................................................................................................................................................................................... 8
Display.................................................................................................................................................................................................... 8
Residual heat indication.................................................................................................................................................................. 8
PART 4: STARTINGUP AND APPLIANCE MANAGEMENT ............................................................................9
Before the rst use.............................................................................................................................................................................9
Starting-up ........................................................................................................................................................................................... 9
Automatic cooking............................................................................................................................................................................9
PART 5: COOKING ADVICES ..........................................................................................................................10
Examples of cooking power setting..........................................................................................................................................10
PART 6: MAINTENANCE AND CLEANING.....................................................................................................10
PART 7: WHAT TO DO IN CASE OF A PROBLEM ...........................................................................................11
PART 8: INSTALLATION INSTRUCTIONS ......................................................................................................12
PART 9: ELECTRICAL CONNECTION .............................................................................................................13
Connection of the hob...................................................................................................................................................................13
This appliance has been tested in accordance with the directives in force in the European Union.
This appliance conforms to the relevant safety provisions for electrical appliances in force in the
European Union.
Dear customer,
Thank you for having chosen a hob.
In order to install properly your appliance and to make the best use of it, please read this entire instruction
manual carefully.


Copyright © 2019, Fast ČR, a. s. Revision 08/2019
EN - 2
PART 1: SAFETY INFORMATION
PRECAUTIONS BEFORE USING
UNPACK ALL THE MATERIALS.
THE INSTALLATION AND CONNECTING OF THE APPLIANCE
HAVE TO BE DONE BY APPROVED SPECIALISTS. THE
MANUFACTURER CANNOT BE RESPONSIBLE FOR DAMAGE
CAUSED BY BUILDINGIN OR CONNECTING ERRORS.
TO BE USED, THE APPLIANCE MUST BE WELLEQUIPPED
AND INSTALLED IN A KITCHEN UNIT AND AN ADAPTED AND
APPROVED WORK SURFACE.
THIS DOMESTIC APPLIANCE IS EXCLUSIVELY FOR THE COOKING
OF FOOD, TO THE EXCLUSION OF ANY OTHER DOMESTIC,
COMMERCIAL OR INDUSTRIAL USE.
REMOVE ALL LABELS AND SELFADHESIVES FROM THE
CERAMIC GLASS.
DO NOT CHANGE OR ALTER THE APPLIANCE.
THE COOKING PLATE CANNOT BE USED AS FREESTANDING OR
AS WORKING SURFACE.
THE APPLIANCE MUST BE GROUNDED AND CONNECTED
CONFORMING TO LOCAL STANDARDS.
DO NOT USE ANY EXTENSION CABLE TO CONNECT IT.
THE APPLIANCE CANNOT BE USED ABOVE A DISHWASHER OR A
TUMBLEDRYER:
STEAM MAY DAMAGE THE ELECTRONIC APPLIANCES.

Copyright © 2019, Fast ČR, a. s. Revision 08/2019
EN - 3
THE APPLIANCE IS NOT INTENDED TO BE OPERATED BY MEANS
OF EXTERNAL TIMER OR SEPARATE REMOTE CONTROL SYSTEM.
CAUTION : THE COOKING PROCESS HAS TO BE SUPERVISED.
A SHORT TERM COOKING PROCESS HAS TO BE SUPERVISED
CONTINUOUSLY.
USING THE APPLIANCE
SWITCH THE HEATING ZONES OFF AFTER USING.
KEEP AN EYE ON THE COOKING USING GREASE OR OILS: THAT
MAY QUICKLY IGNITE.
BE CAREFUL NOT TO BURN YOURSELF WHILE OR AFTER USING
THE APPLIANCE.
MAKE SURE NO CABLE OF ANY FIXED OR MOVING APPLIANCE
CONTACTS WITH THE GLASS OR THE HOT SAUCEPAN.
MAGNETICALLY OBJECTS CREDIT CARDS, FLOPPY DISKS,
CALCULATORS SHOULD NOT BE PLACED NEAR TO THE
ENGAGED APPLIANCE.
METALLIC OBJECTS SUCH AS KNIVES, FORKS, SPOONS AND
LIDS SHOULD NOT BE PLACED ON THE HOB SURFACE SINCE
THEY CAN GET HOT.
IN GENERAL DO NOT PLACE ANY METALLIC OBJECT EXCEPT
HEATING CONTAINERS ON THE GLASS SURFACE. IN CASE OF
UNTIMELY ENGAGING OR RESIDUAL HEAT, THIS ONE MAY HEAT,
MELT OR EVEN BURN.
NEVER COVER THE APPLIANCE WITH A CLOTH OR A
PROTECTION SHEET. THIS IS SUPPOSED TO BECOME VERY HOT
AND CATCH FIRE.

Copyright © 2019, Fast ČR, a. s. Revision 08/2019
EN - 4
THIS APPLIANCE CAN BE USED BY CHILDREN AGED FROM 8
YEARS AND ABOVE AND PERSONS WITH REDUCED PHYSICAL,
SENSORY OR MENTAL CAPABILITIES OR LACK OF EXPERIENCE
AND KNOWLEDGE IF THEY HAVE BEEN GIVEN SUPERVISION OR
INSTRUCTION CONCERNING USE OF THE APPLIANCE IN A SAFE
WAY AND UNDERSTAND THE HAZARDS INVOLVED.
CHILDREN SHALL NOT PLAY WITH THE APPLIANCE.
CLEANING AND USER MAINTENANCE SHALL NOT BE MADE BY
CHILDREN WITHOUT SUPERVISION.
PRECAUTIONS NOT TO DAMAGE THE APPLIANCE
RAW PAN BOTTOMS OR DAMAGED SAUCEPANS NOT
ENAMELLED CAST IRON POTS, MAY DAMAGE THE CERAMIC
GLASS.
SAND OR OTHER ABRASIVE MATERIALS MAY DAMAGE CERAMIC
GLASS.
AVOID DROPPING OBJECTS, EVEN LITTLE ONES, ON THE
VITROCERAMIC.
DO NOT HIT THE EDGES OF THE GLASS WITH SAUCEPANS.
MAKE SURE THAT THE VENTILATION OF THE APPLIANCE WORKS
ACCORDING TO THE MANUFACTURER’S INSTRUCTIONS.
DO NOT PUT OR LEAVE EMPTY SAUCEPANS ON THE
VITROCERAMIC HOBS.
SUGAR, SYNTHETIC MATERIALS OR ALUMINIUM SHEETS MUST
NOT CONTACT WITH THE HEATING ZONES. THESE MAY CAUSE
BREAKS OR OTHER ALTERATIONS OF THE VITROCERAMIC GLASS
BY COOLING: SWITCH ON THE APPLIANCE AND TAKE THEM
IMMEDIATELY OUT OF THE HOT HEATING ZONE BE CAREFUL:
DO NOT BURN YOURSELF.

Copyright © 2019, Fast ČR, a. s. Revision 08/2019
EN - 5
WARNING: DANGER OF FIRE: DO NOT STORE ITEMS ON THE
COOKING SURFACE.
NEVER PLACE ANY HOT CONTAINER OVER THE CONTROL
PANEL.
IF A DRAWER IS SITUATED UNDER THE EMBEDDED APPLIANCE,
MAKE SURE THE SPACE BETWEEN THE CONTENT OF THE
DRAWER AND THE INFERIOR PART OF THE APPLIANCE IS LARGE
ENOUGH 2 CM. THIS IS ESSENTIAL TO GUARANTYA CORRECT
VENTILATION.
NEVER PUT ANY INFLAMMABLE OBJECT EX. SPRAYS INTO
THE DRAWER SITUATED UNDER THE VITROCERAMIC HOB. THE
EVENTUAL CUTLERY DRAWERS MUST BE RESISTANT TO HEAT.
PRECAUTIONS IN CASE OF APPLIANCE FAILURE
IF A DEFECT IS NOTICED, SWITCH OFF THE APPLIANCE AND
TURN OFF THE ELECTRICAL SUPPLYING.
IF THE CERAMIC GLASS IS CRACKED OR FISSURED, YOU MUST
UNPLUG THE APPLIANCE AND CONTACT THE AFTER SALES
SERVICE.
REPAIRING HAS TO BE DONE BY SPECIALISTS. DO NOT OPEN
THE APPLIANCE BY YOURSELF.
WARNING: IF THE SURFACE IS CRACKED, SWITCH OFF THE
APPLIANCE TO AVOID THE POSSIBILITY OF ELECTRIC SHOCK.
OTHER PROTECTIONS

Copyright © 2019, Fast ČR, a. s. Revision 08/2019
EN - 6
OTHER PROTECTIONS
NOTE SURE THAT THE CONTAINER PAN IS ALWAYS CENTRED ON
THE COOKING ZONE. THE BOTTOM OF THE PAN MUST HAVE TO
COVER AS MUCH AS POSSIBLE THE COOKING ZONE.
FOR THE USERS OF PACEMAKER, THE MAGNETIC FIELD COULD
INFLUENCE ITS OPERATING. WE RECOMMEND GETTING
INFORMATION TO THE RETAILER OR OF THE DOCTOR.
DO NOT TO USE ALUMINIUM OR SYNTHETIC MATERIAL
CONTAINERS: THEY COULD MELT ON STILL HOT COOKING
ZONES.
NEVER TRY TO EXTINGUISH A FIRE WITH WATER, BUT SWITCH
OFF THE APPLIANCE AND THEN COVER FLAME E.G. WITH A LID
OR A FIRE BLANKET.

Copyright © 2019, Fast ČR, a. s. Revision 08/2019
EN - 7
PART 2: DESCRIPTION OF THE APPLIANCE
Technical characteristics
Type PHS3292C
Total power
Energy consumption for the hob EChob*
3000 W
178.9 Wh/kg
Front heating zone
Nominal power
Standardised cookware category*
Energy consumption ECcw*
Ø 155 mm
1200 W
A
173.8 Wh/kg
Rear heating zone
Nominal power
Standardised cookware category*
Energy consumption ECcw
Ø 190 mm
1800 W
C
183.9 Wh/kg
* Calculated according to the method of measuring performance (EN 60350-2).
Control panel
Power display
[ + ] key On/o key
[ - ] keySelection key

Copyright © 2019, Fast ČR, a. s. Revision 08/2019
EN - 8
PART 3: USE OF THE APPLIANCE
Sensitive touch
Your ceramic hob is equipped with electronic controls with sensitive touch keys. When your nger presses
the key, the corresponding command is activated. This activation is validated by a control light, a letter or a
number in the display and/or a“beep”sound.
Touch only one key on the same time.
Display
Display Designation Function
0Zero The heating zone is activated.
1…9 Power level Selection of the cooking level.
A Heat accelerator No pan or inadequate pan.
E Error message Electronic failure.
H Residual heat The heating zone is hot.
Residual heat indication
After the switch-o of the hob, the heating zone is still hot and indicates [ H ] on the display.
The symbol [ H ] disappears when the heating zone may be touched safely.
When the residual heat indicator light is on, don’t touch the heating zone and don’t put any heat sensitive
object on them. In the case of a general use press only one key at the same time.

Copyright © 2019, Fast ČR, a. s. Revision 08/2019
EN - 9
PART 4: STARTING-UP AND APPLIANCE MANAGEMENT
Before the rst use
Clean your hob with a damp cloth, and then dry the surface thoroughly. Do not use detergent which risks
causing blue-tinted colour on the glass surface.
Starting-up
· Start-up/ switch o the hob:
Action Control panel Display
To start Press key [ 0/l ] [ 0 ]
To stop Press key [ 0/l ] Nothing or [ H ]
· Start-up/ switch o a heating zone:
Action Control panel Display
Increase power Press key [ + ] [ 1 ] to [ 9 ]
Decrease power Press key [ - ] [ 9 ] to [ 1 ]
Stop Press simultaneous [ + ] and [ - ]
or press key [ - ]
[ 0 ] or [ H ]
If no action is made within 20 second the electronics returns in waiting position.
Automatic cooking
All the cooking zones are equipped with an automatic“go and stop”cooking device. The cooking zone starts
at full power during a certain time, then reduces automatically its power on the preselected level.
· Start-up:
Action Control panel Display
Zone selection Press selection key [ 0 ]
Full power setting Press key [ + ] [ 1 ] to [ 9 ]
Automatic cooking Repress key [ + ] [ 9 ] is blinking with [ A ]
Power level selection
(for example « 7 »)
Press key [ - ] [ 9 ] wents to [ 8 ] [ 7 ]
[ 7 ] is blinking with [ A ]
· Switching o the automatic cooking:
Action Control panel Display
Zone selection
(for example « 7 »)
Press selection key [ 7 ] is blinking with [ A ]
Power level selection Press key [ - ] or [ + ] Level selected

Copyright © 2019, Fast ČR, a. s. Revision 08/2019
EN - 10
PART 5: COOKING ADVICES
Examples of cooking power setting
(the values below are indicative)
1 to 2 Melting, Reheating Sauces, butter, chocolate, gelatine
Dishes prepared beforehand
2 to 3 Simmering, Defrosting Rice, pudding, sugar syrup
Dried vegetables, sh, frozen products
3 to 4 Steam Vegetables, sh, meat
4 to 5 Water Steamed potatoes, soups, pasta, fresh vegetables
6 to 7 Medium cooking, Simmering Meat, lever, eggs, sausages
7 to 8 Cooking Potatoes, fritters, wafers
9 Frying, roosting, boiling water Steaks, omelettes, fried dishes, water
PART 6: MAINTENANCE AND CLEANING
Switch-o the appliance before cleaning
Do not clean the hob if the glass is hot: risk of burn.
· Remove light marks with a damp cloth with washing up liquid diluted in a little water. Then rinse with
cold water and dry the surface thoroughly.
· Highly corrosive or abrasive detergents and cleaning equipment are likely to cause scratches and must
be avoided.
· Do not ever use any steam-driven or pressure appliance.
· Do not use any object that may scratch the ceramic.
· Ensure that the bottom of pans is dry and clean. Ensure that there are no grains of dust on your ceramic
hob or on the bottom of the pan. Sliding rough saucepans will scratch the surface.
· Spillages of sugar, jam, jelly, etc. must be removed immediately. You will thus prevent the surface being
damaged.

Copyright © 2019, Fast ČR, a. s. Revision 08/2019
EN - 11
PART 7: WHAT TO DO IN CASE OF A PROBLEM
The hob or the cooking zone doesn’t start-up:
· The hob is badly connected to the electrical system.
· The protection fuse has blown.
· The sensitive keys are covered by grease or water.
· An object is covering the control panel.
The symbol [ E ] displays:
· Call the After-sales Service.
One or all cooking zones cut-o:
· The safety system has engaged
· You forgot to cut-o the cooking zone for a long time.
· One or more sensitive keys are covered.
The control panel displays [ Er03 ]:
· An object or liquid covers the control keys. The symbol disappears as soon as the key is released or
cleaned.
The control panel displays [ ER21 ]:
· The hob is overheated, let it cool and then turn it on again.
The control panel displays [ U400 ], [ Er25 ]or [ U4 ]:
· The hob is not connected to the network. Check the connection and reconnect the hob.
If one of the symbols above persists, call the SAV.

Copyright © 2019, Fast ČR, a. s. Revision 08/2019
EN - 12
PART 8: INSTALLATION INSTRUCTIONS
The installation comes under the exclusive responsibility of specialists.
The installer is held to respect the legislation and the standards enforce in his home country.
How to stick the gasket:
The gasket supplied with the hob avoids all inltration of liquids in the cabinet.
His installation has to be done carefully, in conformity of the following drawing.
Stick the gasket (2) two millimeters from the external edge of the glass, after removing the protection sheet
(3).
Fitting - installing:
· The cut out sizes are:
Reference Cut-size
PHS3292C 280 x 490 mm
· Ensure that there is a distance of 50 mm between the hob and the wall or sides.
· The hobs are classied as“Y”class for heat protection. Ideally the hob should be installed with plenty of
space on either side. There may be a wall at the rear and tall units or a wall at one side. On the other side,
however, no unit or divider must stand higher than the hob.
· The piece of furniture or the support in which the hob is to be tted, as well as the edges of furniture, the
laminate coatings and the glue used to x them, must be able to resist temperatures of up to 100 °C.
· The mural rods of edge must be heat-resisting.
· Not to install the hob to the top of a not ventilated oven or a dishwasher.
· To guarantee under the bottom of the hob casing a space of 20 mm to ensure a good air circulation of
the electronic device.
· If a drawer is placed under the work, avoid to put into this drawer ammable objects (for example:
sprays) or not heat-resistant objects.
· Materials which are often used to make worktops expand on contact with water. To protect the cut out
edge, apply a coat of varnish or special sealant. Particular care must be given to applying the adhesive
joint supplied with the hob to prevent any leakage into the supporting furniture.
This gasket guaranties a correct seal when used in conjunction with smooth work top surfaces.
· The safety gap between the hob and the cooker hood placed above must respect the indications of the
hood manufacturer. In case of absence of instructions respect a distance minimum of 760 mm.
· The connection cord should be subjected, after building, with no mechanical constraint, such for
example of the fact of the drawer.
· WARNING: Use only hob guards designed by the manufacturer of the cooking appliance or indicated by
the manufacturer of the appliance in the instructions for use as suitable or hob guards incorporated in
the appliance. The use of inappropriate guards can cause accidents.

Copyright © 2019, Fast ČR, a. s. Revision 08/2019
EN - 13
PART 9: ELECTRICAL CONNECTION
· It is mandatory to use a power point with a ground terminal, connected in accordance with current
safety regulations.
· If the supply cord is damaged, it must be replaced by the manufacturer, its service agent or similarly
qualied persons in order to avoid a hazard.
· The installation of this appliance and the connection to the electrical system should be entrusted only to
a qualied electrician.
· Protection against the parts under tension must be ensured after installation
· The data of connection necessary are on the stickers place on the hob casing near the connection box.
· The connection to the mains must be made using an earthed plug or via an omnipolar circuit breaking
device with a contact opening of at least 3 mm.
· The electrical circuit must be separated from the network by adapted devices, for example: circuit
breakers, fuses or contactors.
Caution!
This appliance has only to be connected to a network 230 V~ 50/60 Hz.
Connect always the earth wire.
Respect the connection diagram.
The connection box is located underneath at the back of the hob casing. To open the cover use a
medium screwdriver. Place it in the slits and open the cover.
Mains Connection Cable diameter Cable Protection calibre
230V~ 50/60Hz 1 Phase + N 3 x 1,5 mm² H 05 VV - F
H 05 RR - F 16 A *
* Calculated with the simultaneous factor following the standard EN 60 335-2-6.
Connection of the hob
Setting up the congurations:
For the various kinds of connection, use the brass bridges which are in the box next the terminal
Monophase 230V~1P+N
Attach the earth to the terminal“earth”, the neutral N to terminal N, the Phase L1 to terminal L1.
Caution! Be careful that the cables are correctly engaged and tightened.
We cannot be held responsible for any accident resulting from incorrect connection or which could
arise from the use of an appliance which has not been earthed or has been equipped with a faulty earth
connection

Copyright © 2019, Fast ČR, a. s. Revision 08/2019
EN - 14
INSTRUCTIONS AND INFORMATION REGARDING THE DISPOSAL OF USED
PACKAGING MATERIALS
Dispose of packaging material at a public waste disposal site.
DISPOSAL OF USED ELECTRICAL AND ELECTRONIC APPLIANCES
The meaning of the symbol on the product, its accessory or packaging indicates that this product
shall not be treated as household waste. Please, dispose of this product at your applicable
collection point for the recycling of electrical & electronic equipment waste. Alternatively in some
states of the European Union or other European states you may return your products to your local
retailer when buying an equivalent new product. The correct disposal of this product will help save
valuable natural resources and help in preventing the potential negative impact on the
environment and human health, which could be caused as a result of improper liquidation of
waste. Please ask your local authorities or the nearest waste collection centre for further details.
The improper disposal of this type of waste may fall subject to national regulations for nes.
For business entities in the European Union
If you wish to dispose of an electrical or electronic device, request the necessary information from
your seller or supplier.
Disposal in other countries outside the European Union
If you wish to dispose of this product, request the necessary information about the correct disposal
method from local government departments or from your seller.
This product meets all the basic EU regulation requirements that relate to it.
Changes to the text, design and technical specications may occur without prior notice and we reserve the
right to make these changes.

SKLOKERAMICKÁ VARNÁ
DESKA
NÁVOD K OBSLUZE
PHS 3292C

Vážený zákazníku,
Děkujeme, že jste si koupil výrobek značky PHILCO. Aby mohl váš spotřebič sloužit dobře, přečtěte si
všechny pokyny uvedené v tomto návodu k obsluze.
Copyright © 2019, Fast ČR, a. s. Revize 08/2019

Copyright © 2019, Fast ČR, a. s. Revize 08/2019
CZ - 1
Zařízení bylo testováno podle platných směrnic Evropské unie. Zařízení vyhovuje bezpečnostním
ustanovením platným pro elektrické spotřebiče v Evropské unii.
OBSAH
ČÁST 1: BEZPEČNOST......................................................................................................................................2
ČÁST 2: POPIS SPOTŘEBIČE............................................................................................................................7
Technické specikace ....................................................................................................................................................................... 7
Popis ovládacího panelu .................................................................................................................................................................7
ČÁST 3: POUŽITÍ SPOTŘEBIČE........................................................................................................................8
Dotykové ovládání............................................................................................................................................................................. 8
Zobrazení na displeji......................................................................................................................................................................... 8
Indikace zbytkového tepla..............................................................................................................................................................8
ČÁST 4: ZAPNUTÍ A OBSLUHA SPOTŘEBIČE .................................................................................................9
Před prvním použitím.......................................................................................................................................................................9
Zapnutí................................................................................................................................................................................................... 9
Automatické vaření ...........................................................................................................................................................................9
ČÁST 5: RADY K VAŘENÍ ................................................................................................................................10
Příklady nastavení výkonu............................................................................................................................................................10
ČÁST 6: ÚDRŽBA A ČISTĚNÍ ..........................................................................................................................10
ČÁST 7: CO DĚLAT PŘI POTÍŽÍCH..................................................................................................................11
ČÁST 8: NÁVOD K INSTALACI........................................................................................................................12
ČÁST 9: ELEKTRICKÉ PŘIPOJENÍ...................................................................................................................13
Připojení varné desky .....................................................................................................................................................................13
Vážený zákazníku,
děkujeme vám, že jste zvolil naši sklokeramickou varnou desku.
Přečtěte si pozorně tento návod a uschovejte jej k další potřebě, umožní vám to využít všech předností
spotřebiče..

Copyright © 2019, Fast ČR, a. s. Revize 08/2019
CZ - 2
ČÁST 1: BEZPEČNOST
UPOZORNĚNÍ PŘED POUŽITÍM
SPOTŘEBIČ VYBALTE Z OBALU. UJISTĚTE SE, ŽE JSTE PŘED
PRVNÍM POUŽITÍM ODSTRANILI VŠECHNY REKLAMNÍ A
PROPAGAČNÍ ŠTÍTKY.
INSTALACE A PŘIPOJENÍ SPOTŘEBIČE MUSÍ BÝT PROVEDENY
KVALIFIKOVANOU OSOBOU. VÝROBCE NEZODPOVÍDÁ ZA
POŠKOZENÍ SPOTŘEBIČE ANI ŠKODY ZPŮSOBENÉ V DŮSLEDKU
NESPRÁVNÉ MONTÁŽE A ZAPOJENÍ.
ZABUDOVANÉ SPOTŘEBIČE MOHOU BÝT POUŽÍVÁNY POUZE,
POKUD BYLY INSTALOVÁNY DO VHODNÉ JEDNOTKY, KTERÁ
ODPOVÍDÁ PŘÍSLUŠNÝM STANDARDŮM.
TENTO SPOTŘEBIČ JE URČEN POUZE K PŘÍPRAVĚ JÍDLA V
DOMÁCNOSTI, NEMŮŽE BÝT POUŽIT K JINÉMU ÚČELU NEBO
PRO KOMERČNÍ ČI PRŮMYSLOVÉ VYUŽITÍ.
SPOTŘEBIČ NEUPRAVUJTE A NEMĚŇTE.
NEPOUŽÍVEJTE SPOTŘEBIČ KE KRÁJENÍ NEBO SEKÁNÍ POTRAVIN
NAPŘ. CHLEBA. SKLENĚNÝ POVRCH SPOTŘEBIČE NESMÍ BÝT
POUŽÍVÁN JAKO PRACOVNÍ PLOCHA.
PŘIPOJUJTE SPOTŘEBIČ POUZE K ŘÁDNĚ UZEMNĚNÉMU
OBVODU, KTERÝ ODPOVÍDÁ PLATNÝM PŘEDPISŮM ELEKTRICKÉ
BEZPEČNOSTI. POKUD SI NEJSTE JISTI, ZDA POUŽÍVANÝ
ELEKTRICKÝ OBVOD JE ŘÁDNĚ UZEMNĚN, KONTAKTUJTE
KVALIFIKOVANÉHO ELEKTRIKÁŘE.
NEPOUŽÍVEJTE ADAPTÉRY, ROZDVOJKY ANEBO
PRODLUŽOVACÍ KABELY.
SPOTŘEBIČ NESMÍ BÝT UMÍSTĚN NAD MYČKOU NÁDOBÍ,
PRAČKOU ANI SUŠIČKOU: PÁRA MŮŽE POŠKODIT ELEKTRICKÉ
OBVODY.
Table of contents
Languages:
Other Philco Hob manuals

Philco
Philco PHD 451B User manual

Philco
Philco PHD 302 User manual

Philco
Philco PHD 64 BBS User manual

Philco
Philco GH609 User manual

Philco
Philco PHS69C User manual

Philco
Philco PHS 302 C User manual

Philco
Philco PHD 64 FBI User manual

Philco
Philco PHS 692DC User manual

Philco
Philco PH2740IC Specification sheet

Philco
Philco PHD 64 SB User manual

Philco
Philco PHD 64B User manual

Philco
Philco PHS 604 IC User manual

Philco
Philco PHS 604 DC User manual

Philco
Philco PHD 61FS User manual

Philco
Philco PH2313IC User manual

Philco
Philco PHD 61 TB User manual

Philco
Philco PHD 64 TB User manual

Philco
Philco PHD 61 TB User manual

Philco
Philco PH235IC Specification sheet

Philco
Philco PHD 60 IP User manual