ࡩᇓ໗
৹ࢨ֡ཐ 1
1྇ࣁԒ౼Լ؇ྮĩࠌࣞሢ҉ቯሤd
ᄡၒњᇓρሑ
2
1ָႰҸђྑᅒቯԼᅽ྄ ໆߦৄغ؇েሧ ౸୍
ђd
2Ѯટৄغ؇েሧ౸୍ђߦำםd
3ࣞĥ ָ ᅒ ቯ Լ ᅽ ྄ ໆ ሱ ྑ ؇ Ħำםއىᅿቯ
ሤ൪d a
4ࣞᅒৄغ؇েሧ౸୍ђПቯቯሤ൪d
5ᄊĥָᅒቯԼᅽ྄ ໆሱྑ؇Ħ૦مࣞПቯ ࢱއ
ىᅿቯሤ൪d b
6ࣞቯሤࠣനႰҸђሱĩӋᄊĥָᅒቯԼᅽ྄ ໆሱ
ྑ؇Ħ૦مࣞއى ᅿ౼Լ൪d c
7ሹ౼Լت՟؇ܗࢀd
EN
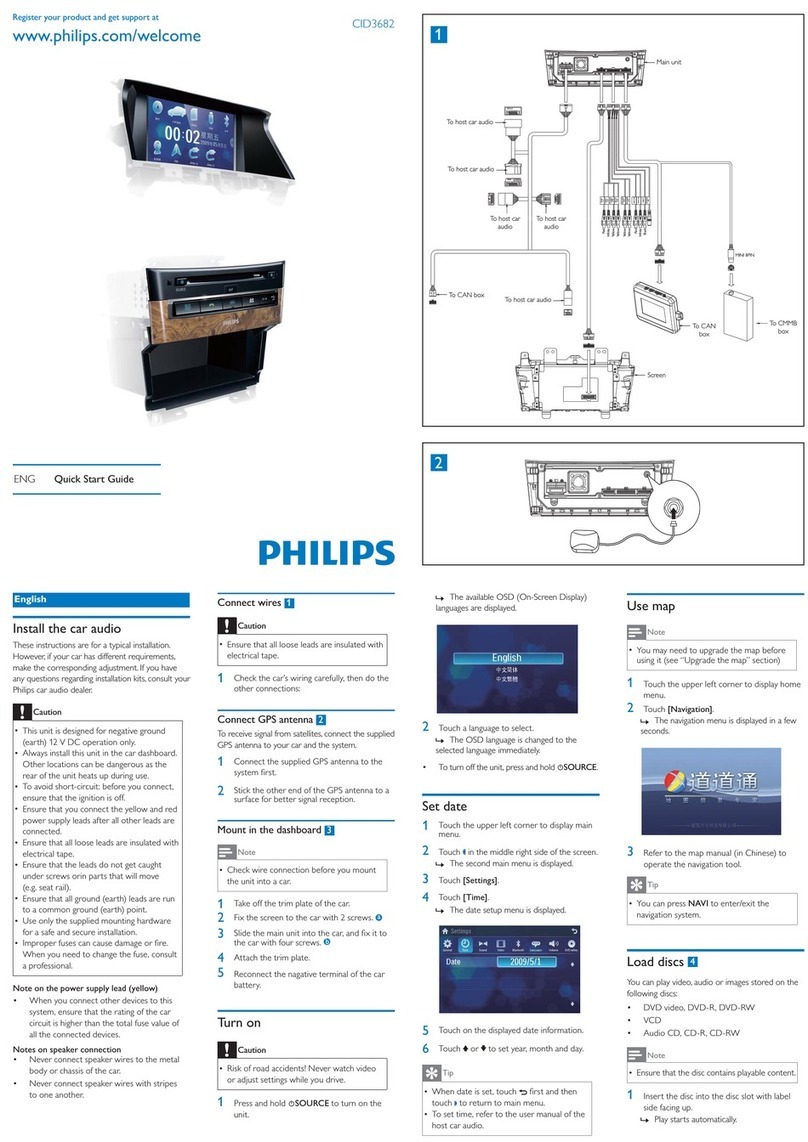
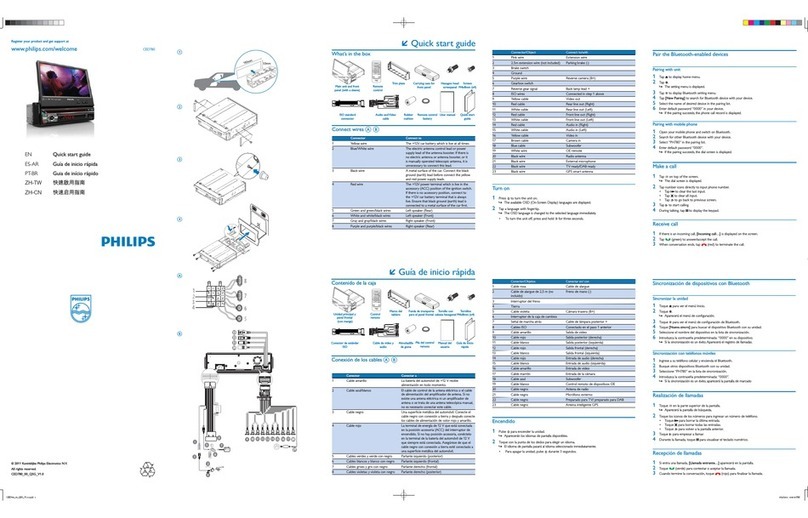
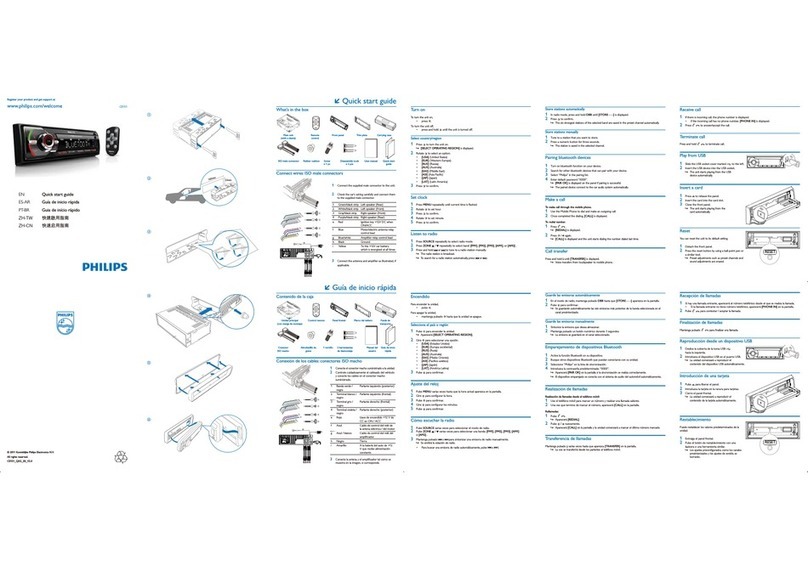
Connect wires
1
1Check the carp
s wiring carefully, then
connec t them to the unit .
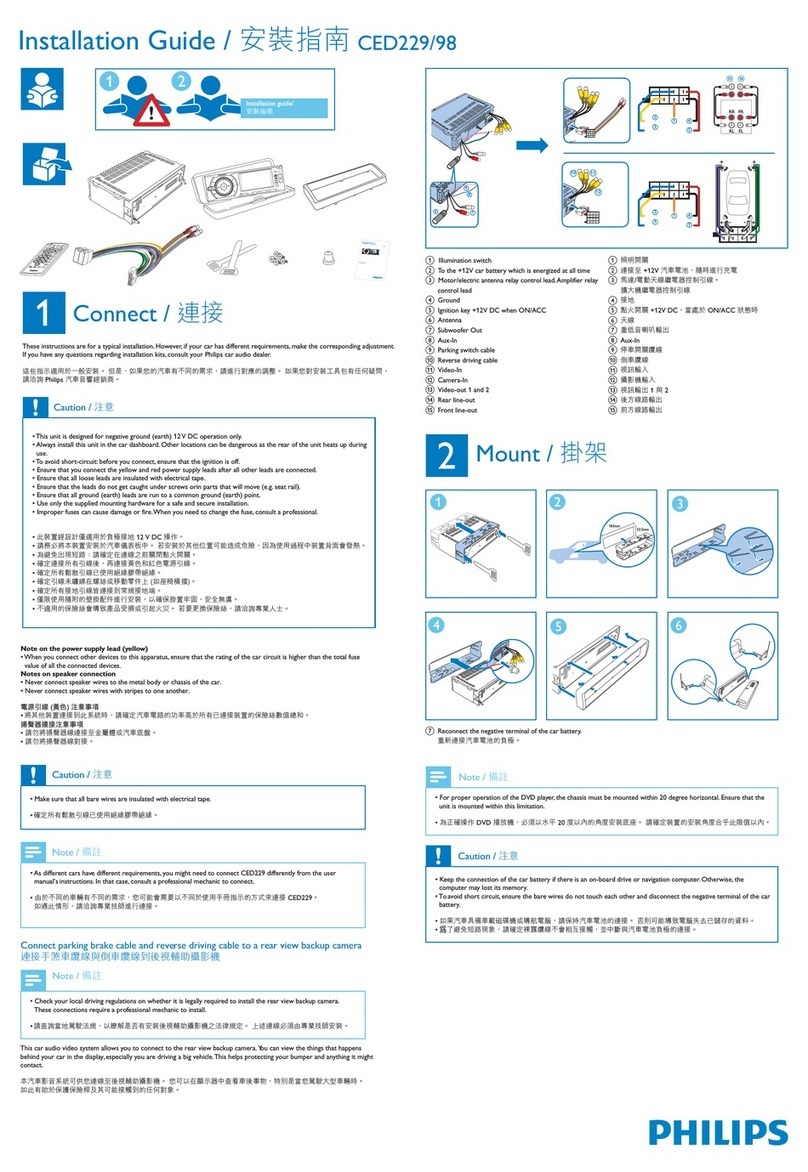
Mount in the dashboard
2
1Remove the original in-car system and the
controller panel of air conditioner from the
dashboard.
2Keep the controller panel of air conditioner
and plastic buckles.
3Fix the plastic buckles (removed from the
original in-car system) to the unit. a
4Attach the controller panel of the original
air conditioner to the unit.
5Fix the mounting brackets to the unit with
screws (removed from the original in-car
system). b
6Slide the unit into the dashboard and fix it
to the car with screws (removed from the
original in-car system). c
7Reconnect the negative terminal of the car
battery.
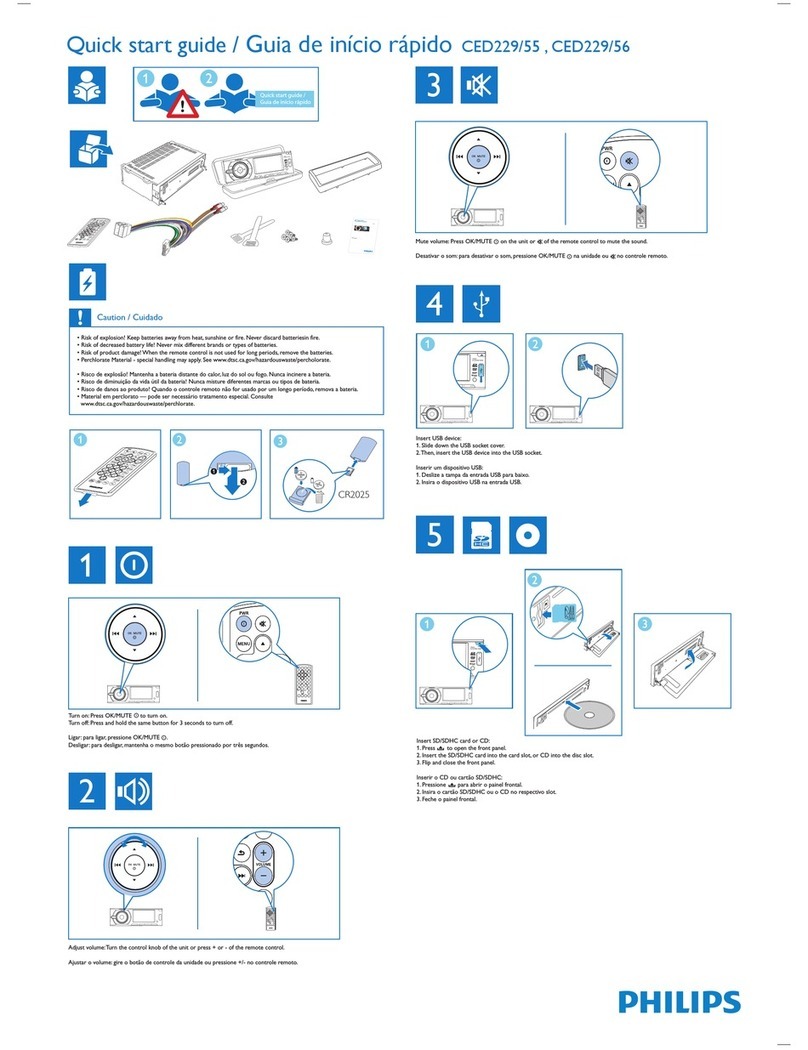
Turn on
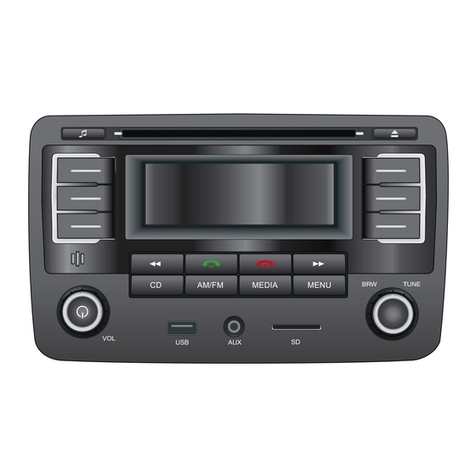
1Press /MUTE/VOL+ to turn on the unit.
The available OSD (On-Screen Display)
»
languages are displayed.
2Tap a language with finger tip.
To turn off the unit, press and hold
•
/MUTE/VOL+ .
/MUTE/VOL+ ِ҉ቯሤd
ూ൪ࣞྣභসᄊ؇ OSD
ĥూྣභĦᄶၟd
»
2ᄊሙࢷೀႤሷᄶၟd
႓ޓҠቯሤĩೊСበ
• /MUTE/VOL+ d
ഥᇆވൌ࡛
1ೀ ྣභቘӴרd
2ೀ [ഥᇆ]d
3ೀ [ൌ࡛]d
Set date and time
1Tap to display main menu.
2Tap [Settings].
3Tap [Time].
Set date
1Tap [Date].
2Tap on the displayed date information.
3Tap or to set year,month and day.
Set clock mode
1Tap [Clock mode].
2Tap on [12Hr] or [24Hr] to select clock
mode.
3ೀ ࡩĩඃሤயcᅧcഒd
ഥᇆൌᇖଊ൘
1ೀ [ൌᇖଊ൘]d
2ೀ [12Hr] ࡩ[24Hr] ာᆖඪሴ୨බd
ഥᇆൌ࡛
1ೀ [ൌ࡛]d
2ೀ๐ྣභ؇ඪࢹd
3ೀ ࡩĩඃሤ࿎ඪcەሴd
ൔႬֽ
ሃ
•ᄊ؛ĥઘݵĦሏಏĩস ပ႓ྗ ࢋd
1ೀూኲ൪ࣺႽྣභቘӴרd
2ೀ [֡ݸ]d
ࢍሴࠌĩࣞྣභߖӴרd
»
Set time
1Tap [Time].
2Tap on the displayed time.
3Tap or to set hour and minute.
Use map
Note
•You may need to upgrade the map (sold
separ ately) before using it (see “Upgrade the
map” section).
1Tap the upper left corner to display home
menu.
2Tap [Navigation].
The navigation menu is displayed in a
»
few seconds.
3Refer to the map manual to operate the
navigation tool.
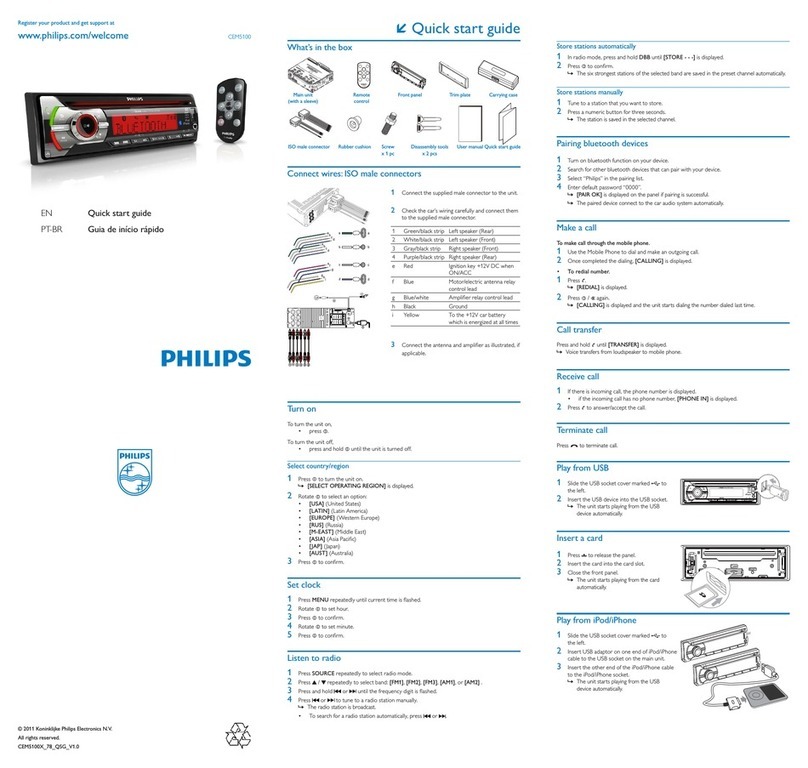
Listen to radio
1Tap
to display home menu.
2Tap [Radio].
3Tap FM or AM to select band:
• FM band options: FM1, FM2, FM3
• AM band options: AM1, AM2
3ೀ FM ࡩAM Ⴝာᆖశٯķ
• FMశٯာķFM1FM2FM3
• AMశٯာķAM1AM2
4٭ᆂ؛ೀ
3
ிসႽӎۄևᅿႽྑޝ௯൪؇శcოశࡩ࿀ķ
• DVD VideocDVD-RcDVD-RW
VCD
•
Audio CDcCD-RcCD-RW
•
1ઙҵಈ୍Զ൪ĩࣞޝ௯Ԏനޝ௯ԎԄd
ӎۄࣞናِঙඵd
»
৹ࢨ USB ഥХ
4
1חঙ USB ܤd
2ࣞி؇ USB ඃ҃Ԏന USB d
ӎۄࣞናِঙඵd
»
Ұೊ SD/MMC 5
1חঙ SD/MMC গѮࠛܤd
2ࣞSD/MMC গԎന SD/MMC গԎԄd
ӎۄࣞናِঙඵd
»
4Briefly tap
to tune to a radio station
by step.
Play disc
3
You can play video, audio or images stored on the
following discs:
• DVD VideocDVD-RcDVD-RW
VCD
•
Audio CDcCD-RcCD-RW
•
1Insert the disc into the disc slot with label
side facing up.
Play starts automatically.
»
Connect USB device
4
1Open the USB cover.
2Insert your USB device to the USB socket.
Play starts automatically.
»
Insert SD/MMC card
5
1Open the SD/MMC card cover.
2Insert the SD/MMC card into the SD/MMC
card slot.
Play starts automatically.
»
Make a call
To connect your Bluetooth device to the unit, you
need to pair the device to the unit.
1Turn on the Bluetooth function on the
device.
2Search for Bluetooth device with the
device.
3Select “CID3610” in the pairing list.
4Enter default password “0000”.
If pairing succeeds. phone call record is»
displayed.
չ߉
႓ࣞ။ඃ҃ሢ҉ቯሤĩிပ႓ࣞܠඃ҃ᄲ҉ቯ
ሤఇٵd
1ࣞتࠧᄲ҉ቯሤఇٵd
2ᄊ҉ඃ҃ศ๎။ඃ҃d
3ာᆖఇٵҸሱ؇qCID3610rd
4ෝനୱഌୃq0000rd
തఇٵՐݡd ࣞྣභົࠧ࢜ૅd
»
5ೀ
ָྑ୍؇Ҹሱศ๎تࠧߞķ
• [ࢨণ]
• [ၜࢨণ]
• [ၜѱ߉]
• [൱ࠓ߉]
• [Sim߉]
• [Ыֽ߉]
ࠋೀ ሒӏחتࠧߞĩࠌೀ
ӏߞd
© 2011 Koninklijke Philips Electronics N.V.
All rights reserved.
CID3610_00_QSG_V1.0
or to selec t the paired phone, then
tap .
6Tap or to search for phone number
from the following list:
• [Missed calls]
• [Received calls]
• [Dialed calls]
• [Phone book]
• [Sim phone book]
• [Local phone book]
Or tap to dial number directly, then tap to
dial.
ࢨ๔߉
ୱഌೈྑĩࣞናِາ๐ᄗتd
1തᄗتĩూ൪؇ [ণ...] ࣞ൜ฏd ٵኄ။
ૼۦࣥࠧd
2ົࠧඪĩೀ ĥࠅെĦসሶሚົࠧd


