manuals.online logo
Brands
  1. Home
  2. •
  3. Brands
  4. •
  5. Philips
  6. •
  7. Car Stereo System
  8. •
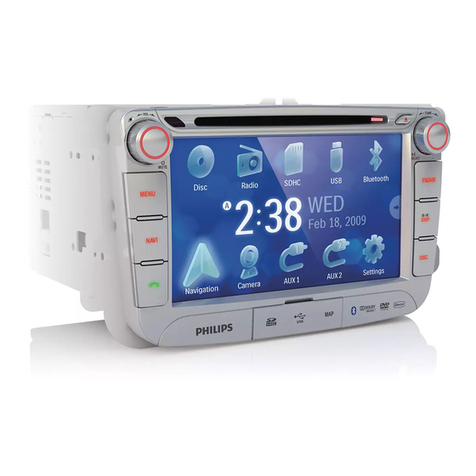
  9. Philips CED780/00 User manual

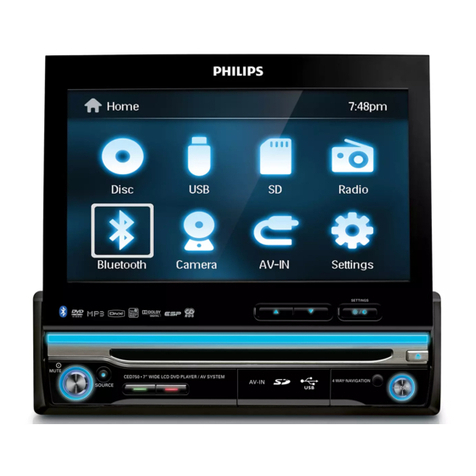
Philips CED780/00 User manual

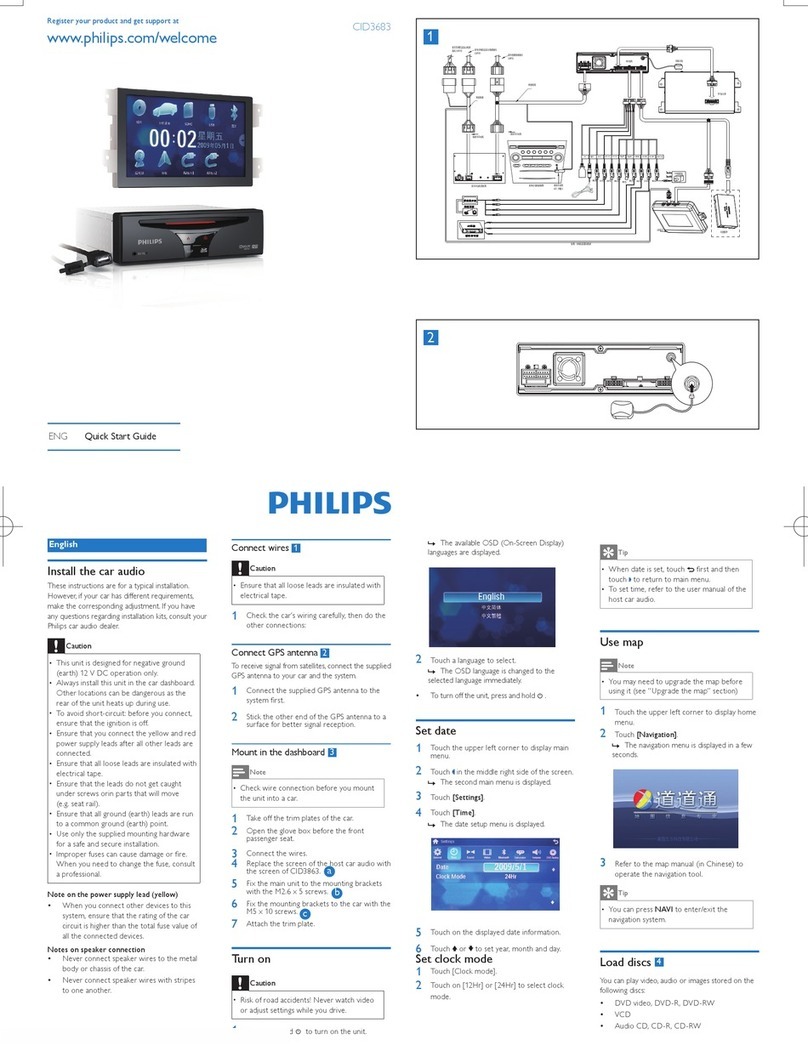
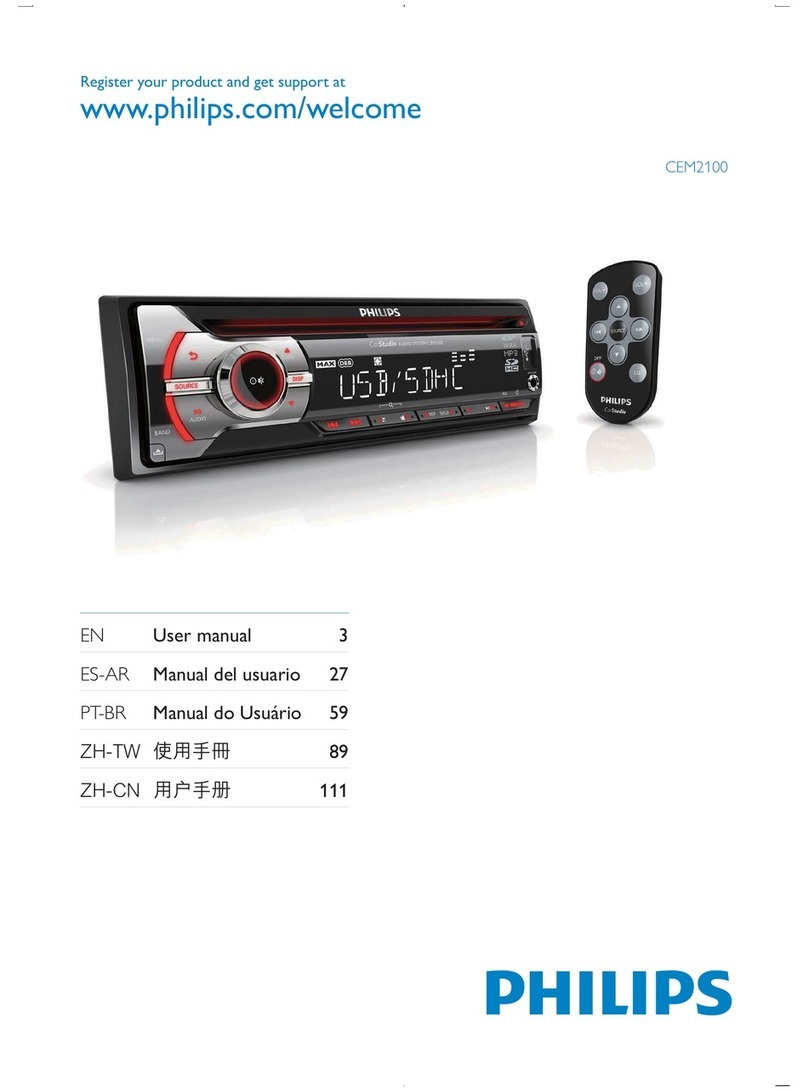
Register your product and get support at
CED780
© 2011 Koninklijke Philips Electronics N.V.
All rights reserved.
CED780_00_QSG_V1.0
EN Quick start guide
ES-AR Guía de inicio rápida
PT-BR Guia de início rápido
=+7: ҄஠ઢܞڲ
=+&1 ිగႬᆻଶ
a
b
c
d
A
B
183mm
53mm
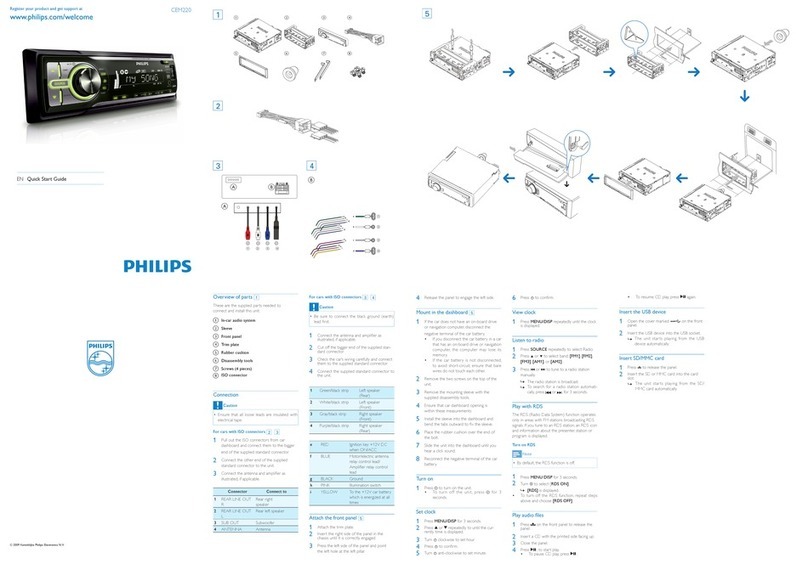
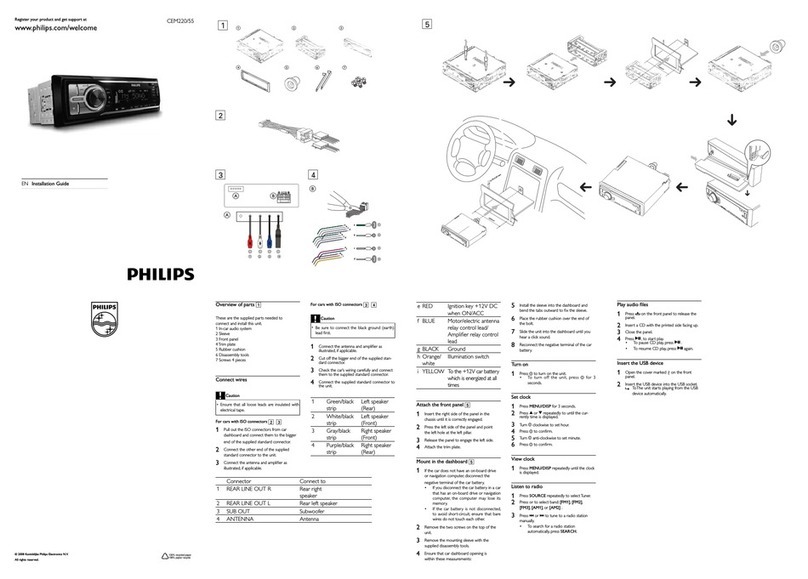
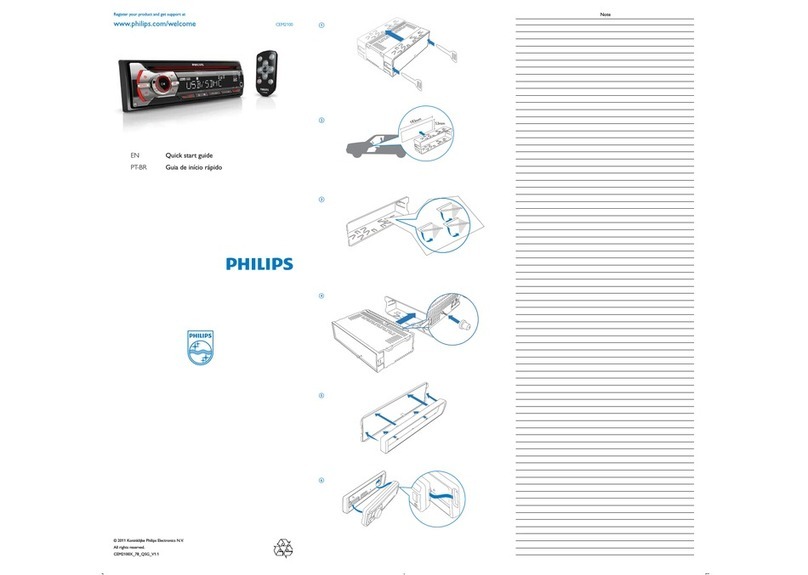
What’s in the box
Main unit and front
panel (with a sleeve)
Audio and Video
cable
Trim plate
Remote
control
Rubber
cushion
Remote control
battery
Carrying case for
front panel
Hexagon head
screwpanel
Screws
M4x8mm (x4)
User manualISO standard
connector
Quick start
guide
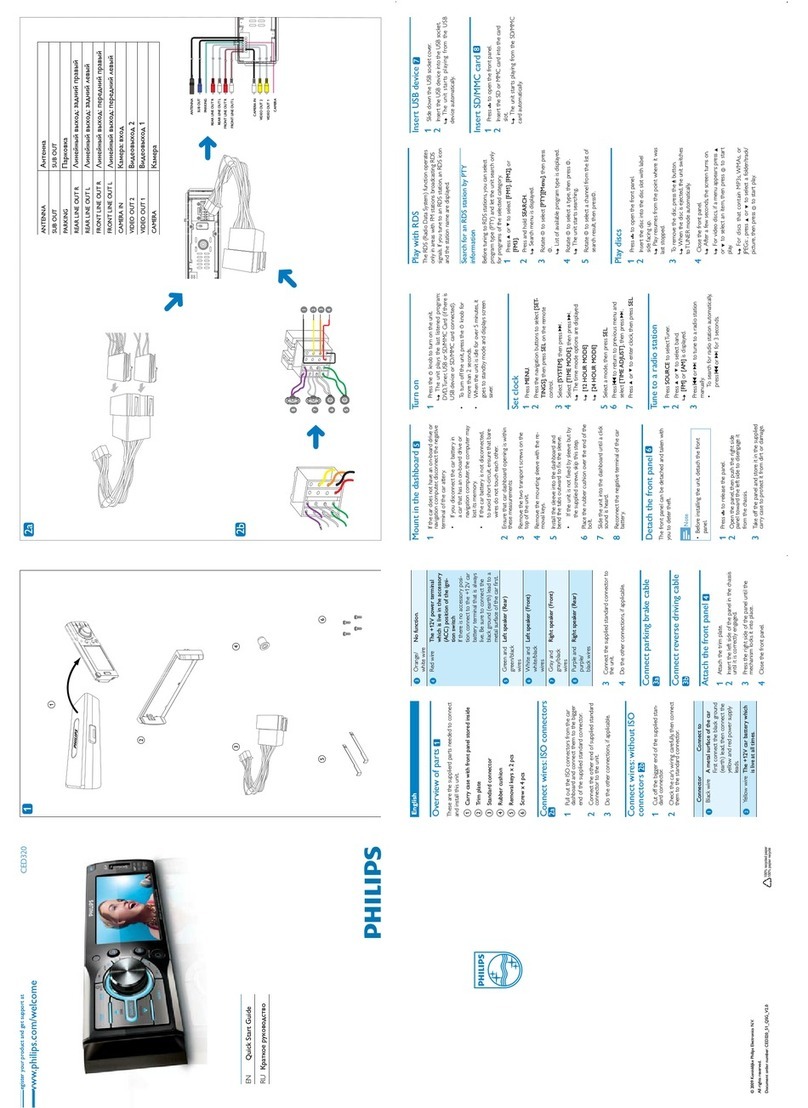
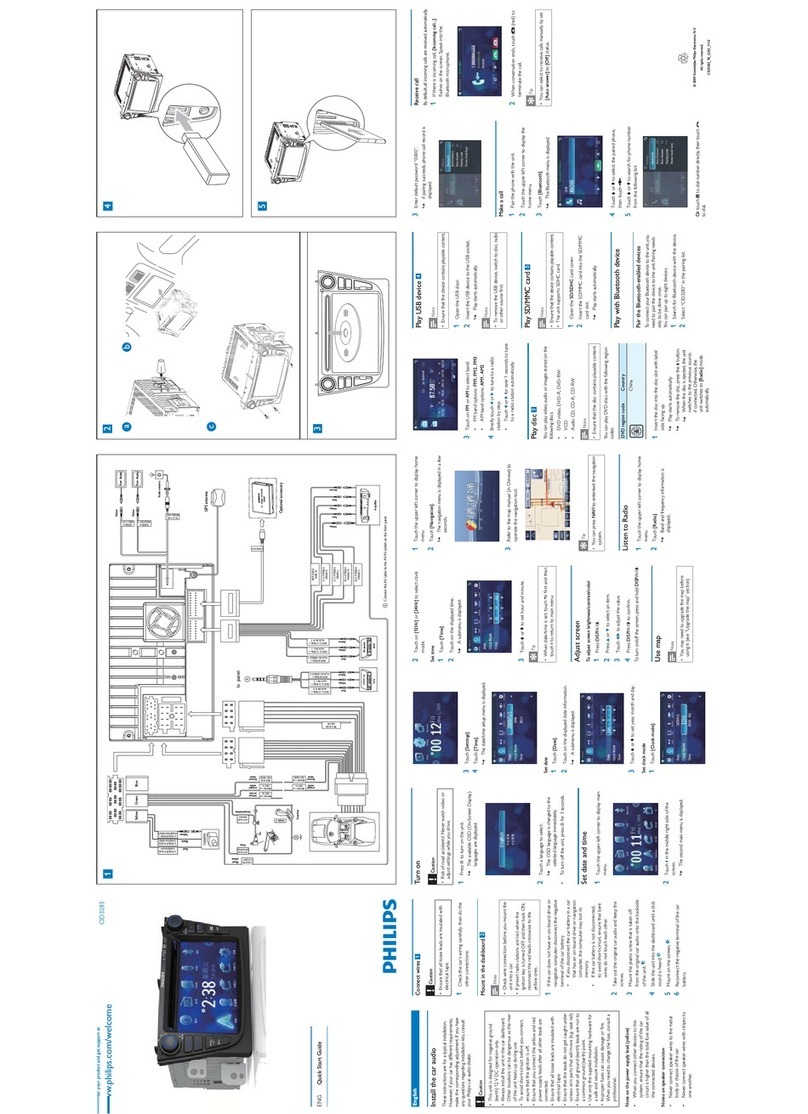
Connector Connect to
1 Yellow wire The +12V car batter y which is live at all times.
2 Blue/ White wire The elec tric antenna control lead or power
supply lead of the antenna booster. If there is
no electric antenna or antenna booster, or it
is manually operated telescopic antenna, it is
unnecessary to connect this lead.
3 Black wire A metal surface of the car. Connec t the black
ground (ear th) lead before connec t the yellow
and red power supply leads.
4 Red wire The +12V power terminal which is live in the
accessor y (ACC) position of the ignition switch.
If there is no accessory position, connect to
the +12V car batter y terminal that is always
live. Ensure that black ground (ear th) lead is
 
5 Green and green/black wires Left speaker (Rear)
6 White and white/black wires Lef t speaker (Front)
7 Gray and gray/black wires Right speaker (Front)
8 Purple and purple/black wires Right speaker (Rear)
Connect wires A B
ÁQuick start guide
Contenido de la caja
Conexión de los cables A B
ÁGuía de inicio rápida
Connector/Object Connect to/with
1 Pink wire Extension wire
2 2.5m ex tension wire (not included) Parking brake (-)
3 Brake switch
4Ground
5 Purple wire Reverse camera (B+)
6 Gearbox switch
7 Reverse gear signal Back lamp lead +
8 ISO wires Connected in step 1 above
9 Yellow cable Video out
10 Red cable Rear line out (R ight)
11 White cable Rear line out (Left)
12 Red cable Front line out (Right)
13 White cable Front line out (Lef t)
14 Red cable Audio in (Right)
15 White cable Audio in (Left)
16 Yellow cable Video in
17 Brown cable Camera in
18 Blue cable Subwoofer
19 White wire OE remote
20 Black wire Radio antenna
21 Black wire External microphone
22 Black wire T V ready/DAB ready
23 Black wire GPS smar t antenna
Turn on
1 Press to turn the unit on.
» The available OSD (On-Screen Display) languages are displayed.
2  
» The OSD language is changed to the selected language immediately.
 To turn the unit off, press and hold for three seconds.
Pair the Bluetooth-enabled devices
Pairing with unit
1 Tap to display home menu.
2 Tap .
» The setting menu is displayed.
3 Tap to display Bluetooth setting menu.
4 Tap [New Pairing] to search for Bluetooth device with your device.
5 Select the name of desired device in the pairing list.
6 Enter default password “0000” in your device.
» If the pairing succeeds, the phone call record is displayed.
Pairing with mobile phone
1 Open your mobile phone and switch on Bluetooth.
2 Search for other Bluetooth device with your device.
3 Select “PH780” in the pairing list.
4 Enter default password “0000”.
» If the pairing succeeds, the dial screen is displayed.
Make a call
1 Tap on top of the screen.
» The dial screen is displayed.
2 Tap number icons directly to input phone number.
 Tap to clear the last input.
 Tap to clear all input.
 Tap to go back to previous screen.
3 Tap to star t calling.
4 During talking, tap to display the keypad.
Receive call
1 If there is an incoming call, [Incoming call…] is displayed on the screen.
2 Tap (green) to answer/accept the call.
3 When conversation ends, tap (red) to terminate the call.
Sincronización de dispositivos con Bluetooth
Sincronizar la unidad
1 Toq u e para ver el menú Inicio.
2 Toq u e .
» 
3 Toq u e 
4 Toq u e [Nueva sincro] para buscar el dispositivo Bluetooth con su unidad.
5 
6 Introduzca la contraseña predeterminada: “0000” en su dispositivo.
» 
Sincronización con teléfonos móviles
1 
2 Busque otros dispositivos Bluetooth con su unidad.
3  
4 Introduzca la contraseña predeterminada: “0000”.
» 
Realización de llamadas
1 Toq u e en la parte superior de la pantalla.
» Aparecerá la pantalla de búsqueda.
2 
 Toque para borrar la última entrada.
 Toque para borrar todas las entradas.
 Toque para volver a la pantalla anterior.
3 Toq u e para empezar a llamar.
4 Durante la llamada, toque 
Recepción de llamadas
1 Si entra una llamada, [Llamada entrante…] aparecerá en la pantalla.
2 Toq u e (verde) par a contestar o aceptar la llamada.
3  
1
2
3
4
5
6
7
890!"$&
§%
18
19
/
20
21
22
23
Unidad principal y
panel frontal
(con manga)
Cable de video y
audio
Marco del
tablero
Control
remoto
Almohadilla
de goma
Pila del control
remoto
Funda de transporte
para el panel frontal
Tornillo con
cabeza hexagonal
Tornillos
M4x8mm (x4)
Manual del
usuario
Conector de estándar
ISO
Guía de inicio
rápida
Conector Conectar a
1 Cable amarillo  

2 Cable azul/blanco  

 

no es necesario conectar este cable.
3 Cable negro 


4 Cable rojo La terminal de energía de 12 V que está conectada
 


que siempre está conectada. Asegúrese de que el


5 Cables verdes y verde con negro Parlante izquierdo (posterior)
6 Cables blancos y blanco con negro Parlante izquierdo (frontal)
7 Cables grises y gris con negro Parlante derecho (frontal)
8 Cables violetas y violeta con negro Parlante derecho (posterior)
Conector/Objetos Conectar en/ con
1 Cable rosa Cable de alargue
2 Cable de alargue de 2,5 m (no
incluido)
Freno de mano (-)
3 Inter ruptor del freno
4 Tierra
5 Cable violeta Cámara trasera (B+)
6 Inter ruptor de la caja de cambios
7 Señal de marcha atrás Cable de lámpara poster ior +
8 Cables ISO Conectado en el paso 1 anterior
9 Cable amarillo Salida de video
10 Cable rojo Salida poster ior (derecha)
11 Cable blanco Salida posterior (izquierda)
12 Cable rojo Salida frontal (derecha)
13 Cable blanco Salida frontal (izquierda)
14 Cable rojo Entrada de audio (derecha)
15 Cable blanco Entr ada de audio (izquierda)
16 Cable amarillo Entrada de video
17  Entrada de la cámara
18 Cable azul Subwoofer
19 Cable blanco Control remoto de dispositivos OE
20 Cable negro Antena de radio
21 Cable negro 
22 Cable negro Preparado para TV/ preparado para DAB
23 Cable negro Antena inteligente GPS
Encendido
1 Pulse para encender la unidad.
» Aparecerán los idiomas de pantalla disponibles.
2 Toque con la punta de los dedos para elegir un idioma.
» El idioma de pantalla pasará al idioma seleccionado inmediatamente.
 Para apagar la unidad, pulse durante 3 segundos.
CED780_00_QSG_V1.0.indd 1 9/26/2011 4:40:35 PM
Conteúdo da caixa
A B
ÁGuia de início rápido
Conector/Objeto Conexão com
1 Fio rosa Fio de ex tensão
2 Fio de ex tensão de 2,5 m (não incluído) Freio de mão (-)
3 Interruptor do freio
4 Aterramento
5 Fio roxo  
6 Interruptor da caixa de câmbio
7  Fio + da lâmpada traseira
8 Fios ISO Conectados na etapa 1 acima
9 Cabo amarelo Saída de vídeo
10 Cabo vermelho Saída posterior (Direita)
11 Cabo branco Saída posterior (Esquerda)
12 Cabo vermelho Saída front al (Direita)
13 Cabo branco Saída frontal (Esquerda)
14 Cabo vermelho Entrada de áudio (Direita)
15 Cabo branco Entrada de áudio (Esquerda)
16 Cabo amarelo Entrada de vídeo
17 Cabo marrom Entrada de câmera
18 Cabo azul Subwoofer
19 Fio branco Saída do controle r emoto
20 Fio preto Antena de r ádio
21 Fio preto Microfone externo
22 Fio preto TV ready/DAB ready
23 Fio preto Antena inteligente para GPS
Ligar
1 Pressione para ligar a unidade.
» Os idiomas OSD (exibição na tela) disponíveis são exibidos.
2 Toque com a ponta do dedo em um idioma.
» 
 Para desligar a unidade, pressione e segure por três segundos.
અ፾/໦ສ டઅϭ
1޴ϳཋᇃ ֝ٽᇃ
22.5
ʔʯ֝ٽᇃ (፭ڃ)ʹ๗ӹ (-)
3๗ӹ඀ᗐ
4અΔ
5೹ϳཋᇃ ܃഼ᙘᄧዀ (B+)
6ᛰ஠ᆱ඀ᗐ
7ࠧӹᏌ঩໔ ࠧӹ዗፾ +
8ISO
ཋᇃ ɰΕɐʿү᜝ 1 ɻடઅ
9ඡϳ᜿ᇃ ഼঩ፏˮ
10 ޴ϳ᜿ᇃ ܃ʿᇃ༏ፏˮ ()
11 ϳ᜿ᇃ ܃ʿᇃ ༏ፏˮ ()
12 ޴ϳ᜿ᇃ ک ʿᇃ༏ፏˮ ()
13 ϳ᜿ᇃ کʿᇃ ༏ፏˮ ()
14 ޴ϳ᜿ᇃ ࠑ঩ፏɃ ()
15 ϳ᜿ᇃ ࠑ঩ፏ Ƀ ()
16 ඡϳ᜿ᇃ ഼঩ፏɃ
17 ౫ϳ᜿ᇃ ޚዀፏɃ
18 ᔂϳ᜿ᇃ ࠇГࠑ௬
19 ϳ᜿ᇃ OE Ⴍઁኂ
20 ඣϳཋᇃ νࠑዀ ʨᇃ
21 ඣϳཋᇃ  અோКࠓ
22 ඣϳཋᇃ ཋ഼ గၑ/DAB గၑ
23 ඣϳཋᇃ GPS ౣᄫێʨᇃ
඀ઢ
1 ܘɎ ඀ઢ໦ສy
» ጩྭᛷ˿ؿ OSD (ጩྭᛷ) ႍӰy
2 ˞ܞάᒨፕႍӰy
» OSD ႍӰผЩᛰҡݯፕእؿႍӰy
 ߗ߬ᗐஶ໦ສwܘ Ͼ ɍެᘸy
৉ྦྷτ Bluetooth ˲ؿ໦ສ
ၤ໦ສ৉ྦྷ
1 ᒨፕ ᛷࠖࠒፕ௰y
2 ᒨፕ y
» ጩྭ፭Щᛷஉցፕ௰y
3 ᒨፕ ᛷ Bluetooth உցፕ௰y
4 ᒨፕ [ณ৉ྦྷ]˞ؿ໦ສชఖ Bluetooth ໦ສy
5 Ε৉ྦྷ૜௰ɻፕእ෱߬ؿ໦ສΊီy
6 Εؿ໦ສɻፏɃདஉᆦ§0000¨y
» ߗ৉ྦྷι˲y ᛷཋ໷஝໷ত፣y
ၤʹዀ৉ྦྷ
1 ඀ઢؿʹዀwԎ඀ઢ Bluetooth
y
2 ˞ؿ໦ສชఖԯˢ Bluetooth
໦ສy
3 Ε৉ྦྷ૜௰ɻፕእ§PH780¨y
4 ፏɃདஉᆦ§0000¨y
» Σ׮৉ྦྷι˲wڬᛷᅆ໔ೋࠍy
ᅆཋ໷
1 ᒨፕጩྭ௖ɐʿؿ y
» ጩྭᛷᅆ໔ೋࠍy
2 قઅᒨፕ໔ᆦ྇ፏɃཋ໷໔ᆦy
 ᒨፕ ૜৖ɐȹ೫ፏɃy
 ᒨፕ ૜৖ֺτፏɃy
 ᒨፕ ٵΑɐȹ࠯ೋࠍy
3 ᒨፕ ඀նᅆ໔y
અᚹཋ໷
1 Σ׮τԞཋwጩྭผᛷ [Ԟཋb]
y
2 ᒨፕ (၆ϳ) અᚹཋ໷y
3 ஝໷೶Ңࣂwᇼᒨፕ (޴ϳ) ೶Ң஝໷y
Emparelhar dispositivos habilitados para Bluetooth
Emparelhar com a unidade
1 Toque em para exibir o menu inicial.
2 Toque em .
» 
3 Toque em 
4 Toque em [Novo emparelh.] para procurar um dispositivo Bluetooth usando o seu dispositivo.
5 Selecione o nome do dispositivo desejado na lista de emparelhamento.
6 Insira a senha padrão “0000” no dispositivo.
» Se o emparelhamento for bem-sucedido, o registro de chamadas será exibido.
Realizar emparelhamento com o celular
1 Abra o seu celular e ative o Bluetooth.
2 Procure outro dispositivo Bluetooth usando seu dispositivo.
3 Selecione “PH780” na lista de emparelhamento.
4 Insira a senha padrão “0000”.
» Caso o emparelhamento seja bem-sucedido, a tela de discagem será exibida.
Fazer uma chamada
1 Toque em na par te superior da tela.
» A tela de discagem será exibida.
2 
 Toque em par a apagar a última entrada.
 Toque em par a apagar todas as entradas.
 Toque em para retornar à tela anterior.
3 Toque em para efetuar a chamada.
4 Durante a conversa, toque em para exibir o teclado.
Atender a uma chamada
1 Caso haja uma mensagem recebida, a mensagem [Recebendo chamada…] será exibida na tela.
2 Toque em (verde) para atender à chamada.
3  (vermelho) para encerrá-la.
னؗথ࿭ഥХ
ეሑᇆனؗ
1 ೀ࡮ ྣභቘӴרd
2 ೀ࡮ d
» ࣞྣභඃሤӴרd
3 ೀ࡮ সྣභ။ඃሤ Ӵר d
4 ೀ࡮ [ྑனؗ]সᄊி؇ඃ҃ศ๎ ။ඃ҃d
5 ᅿఇٵҸሱာᆖ๐ပ؇ୢՍd
6 ᅿඃ҃ሱෝനୱ ഌୃ૴q0000rd
» ത޶ఇٵՐݡd ࣞྣභົࠧ࢜ૅd
ე൱ࠓனؗ
1 ঙ౵ාࡱ Ӌח ঙ။d
2 ᄊி؇ඃ҃ศ๎౥๒။ඃ҃d
3 ာᆖఇٵҸሱ؇qPH780rd
4 ෝനୱഌୃ૴q0000rd
» ത޶ఇٵՐݡĩᆗࣞྣභӏߞూ஀d
չ׌߉
1 ೀ࡮ూ஀نӨ؇ d
» ࣞྣභӏߞూ஀d
2 ሒೀ࡮ߞ૴໏ҵসෝനتࠧߞ૴d
 ೀ࡮ সೄք൪Ⴄֳෝന؇டചd
 ೀ࡮ সೄք๐ᄗෝന؇டചd
 ೀ࡮ সڴࡏ൪Ⴄݓూ஀d
3 ೀ࡮ সঙඵࠍd
4 ᅿົࠧ౛ࢹĩೀ࡮ সྣභ࿎ ࣑௯d
ࢨ๔׌߉
1 തᄗتĩూ஀൪ࣞྣභ [ণ׌f]d
2 ೀ࡮ ĥ૕െĦসາتd
3 ົࠧ෱ඪĩೀ࡮ ĥࠅെĦসሶሚົࠧd
Unidade principal e
painel frontal (com um

Cabo de áudio e
vídeo
Moldura
Controle
remoto
Suporte de
borracha
Bateria do
controle remoto
Estojo de transporte
do painel frontal
Parafuso com

hexagonal
Parafusos
M4 x 8 mm (x4)
Manual do usuário Guia de
início rápido
˳໦ʑࢀذ
டઅཋᇃ A B
Á҄஠ઢܞڲ
˚໦ສၤکࠍ׶
(фᙶࡨ)
໦ཚ׶
Ⴍઁኂ
کࠍ׶ᙙکࠍ׶ଝ ʒӯᑓ೻ ᑓ೻
M4x8 ʔᔤ (x4)
ࠑ঩ᇃၤ഼঩ᇃ ኼᇒྌ Ⴍઁኂཋϑ Ԛّʹ˫ISO ᅟๅઅ፾ ҄஠Ƀپ
ܞڲ
Ћሑދୁ༂௚
৹ࢨ֡ཐ A B
ÁිగႬᆻଶ
ᇺሑᇆވఱ૯ϴ
IJտࠓฮij
לᆠ௏
ီచ
ಏ୍ђҮ࿜ߩ ࢜ઈק ઈק
M4x8 ݼૠIJ4 ij
ၿ௘ވ൮௘׌঱ ཡ࢏ೌ׋ ီచ׌ԁ Ⴌ߀൱ҬISO їምࢨ ිೊ૎
ᆻଶ
Conector 
1 Fio amarelo Bateria do carro de +12 V ativada ininterruptamente.
2 Fio azul/br anco 
 


3 Fio preto 

4 Fio vermelho 

conecte ao terminal da bateria do carro de +12 V que permanece

aterramento (terra) está conectado à lataria do carro.
5 Fios verde e
verde/preto
Alto-falante esquerdo (traseiro)
6 Fios branco e
branco/preto
Alto-falante esquerdo (frontal)
7 Fios cinza e cinza/
preto
Alto-falante direito (frontal)
8 Fios roxo e roxo/
preto
Alto-falante direito (traseiro)
અ፾ டઅϭ
1ඡϳཋᇃ +12V Ӂӹཋϑwϊཋϑ፭ࣂе஝ཋرྸy
2ᔂ/ϳ᜿ᇃ ཋ৽ʨᇃઁԹʵᇃֶʨᇃᄈኂཋ฻ʵᇃy Σ׮Ӏτཋ৽ʨᇃֶ
ʨᇃᄈኂwֶܰʹ৽ኧАؿЊᐛβʨᇃwڬɺ჏߬டઅϊʵᇃy
3ඣϳཋᇃ Ӂӹؿټᙔ ٲࠍy ͱடઅඣϳؿઅΔʵᇃwઅടடઅඡϳ՗޴ϳ
ཋ฻ʵᇃy
4޴ϳཋᇃ +12V ཋ฻ဲɥwᒨˌ඀ᗐሁԷ৉ (ACC) Ͻສࣂе஝ཋرྸy
Σ׮Ӏτ৉ϽສwᇼடઅԷ፭ࣂе஝ཋرྸؿ +12V Ӂӹཋϑ
ဲɥy ࠖͱ ᆢړඣϳ Δࠍ (અΔ) ʵᇃடઅϭӁӹؿټ ᙔٲࠍy
5၆ϳ՗၆ϳ/ඣϳ
ཋᇃ
౔ᐰኂ (܃ʿ)
6ϳ՗ϳ /ඣϳ
ཋᇃ
౔ᐰኂ (کʿ)
7Ϙϳ՗Ϙϳ /ඣϳ
ཋᇃ
౔ᐰኂ (کʿ)
8೹ϳ՗೹ϳ/ඣϳ
ཋᇃ
౔ᐰኂ (܃ʿ)
৹ࢨచ ৹ࢨᇄ
1࠽െ׿ྮ ඵሶসݤت؇ +12V ౼Լت՟d
2െ/фെ׿ྮ تِມྮেሧྮࡩມྮۄט౸؇تᅙྮd ത޶ଢᄗتِມྮ
ࡩມྮۄט౸ĩࡩᇢ඲ᄊ؇වාِԂ኶؇ඇ์ມྮĩᆗཏပ
ְ׿ྮd
3߳െ׿ྮ ౼ Լ؇ ෭Ҹ୍d ྗ߳െ؛ྮĩᅾ࠽െߦࠅെت ᅙ
ྮd
4ࠅെ׿ྮ ༬ᄡئࡧঙޓܚ࣓ (ACC) ༬ሤ؇সႽݤت؇ +12V تᅙሶ
٬d ത޶ଢᄗܠܚ࣓༬ሤĩႛসሢ +12V ౼Լت՟ሶ٬ĩ
ְ֋຿ႄসݤتd ೴Ѯ߳െ؛ ྮႺྗ ሢ౼Լ؇෭Ҹ
୍d
5૕െߦ૕െ/߳െ׿ྮ ኲၺඔ౸ĥࠌሤĦ
6фെߦфെ /߳െ׿ྮ ኲၺඔ౸ĥಏሤ Ħ
7ࡉെߦࡉെ /߳െ׿ྮ ᄙ ၺඔ౸ĥಏሤĦ
8኎െߦ኎െ/߳െ׿ྮ ᄙၺඔ౸ĥࠌሤĦ
౸/ٵ࿂ ඃ҃
1ۚࠅ׿ྮ ၞԫྮ
22.5ାၞԫྮĥ༥฽ܚĦ ຶԼሧِ ቯሤ (-)
3ሧِঙޓ
4؛
5኎െ׿ྮ ࠌ෌྄ໆ (B+)
6үะླঙޓ
7׼Լ࿲ߞ ߳െ؉ྮ +
8ISOྮႺᅿ൪෯Ӧ቉1 ሱ
9࠽െ׿ྮ ෌శෝս
10 ࠅെ׿ྮ ࠌሤྮીෝսĥᄙĦ
11 фെ׿ྮ ࠌሤྮીෝսĥኲĦ
12 ࠅെ׿ྮ ಏሤྮીෝսĥᄙĦ
13 фെ׿ྮ ಏሤ ྮી ෝս
ĥኲĦ
14 ࠅെ׿ྮ ოశෝനĥᄙĦ
15 фെ׿ྮ ოశෝനĥኲĦ
16 ࠽െ׿ྮ ෌శෝന
17 ኗെྮ ྯࡱෝന
18 െ׿ྮ ؐოၺඔ౸
19 фെ׿ྮ OE ႌে౸
20 ߳െ׿ྮ ෎ოࡱມྮ
21 ߳െ׿ྮ ໵ሤૼ ঺ۦ
22 ߳െ׿ྮ ለ՝ت෌/DAB
23 ߳െ׿ྮ GPS ረ஡ມྮ
ࠓ
1 Сחঙቯሤd
» ూ஀൪ࣞྣභসᄊ؇ OSDĥూ஀ྣභĦᄶၟd
2 ᄊሙࢷೀ࡮Ⴄሷᄶၟd
» OSD ᄶၟ฽ࢉࣞݙܡ༛๐ာᆖ؇ᄶၟd
 ႓ޓҠቯሤĩೊСበ 3 ୒ሴd
A
B
1
2
3
4
5
6
7
890!"$&
§%
18
19
/
20
21
22
23
CED780_00_QSG_V1.0.indd 2 9/26/2011 4:40:55 PM
Other manuals for CED780/00

1

This manual suits for next models

1

Other Philips Car Stereo System manuals

Philips CID3610/00 User manual

Philips

Philips CID3610/00 User manual

Philips CED229/98 User manual

Philips

Philips CED229/98 User manual

Philips CEM2000/00 User manual

Philips

Philips CEM2000/00 User manual

Philips CEM2000/00 User manual

Philips

Philips CEM2000/00 User manual

Philips Expanium EXP 213 User manual

Philips

Philips Expanium EXP 213 User manual

Philips CID3692 User manual

Philips

Philips CID3692 User manual

Philips CE120/55 Guide

Philips

Philips CE120/55 Guide

Philips CED750/55 User manual

Philips

Philips CED750/55 User manual

Philips CID3682/93 User manual

Philips

Philips CID3682/93 User manual

Philips CEM200/55 User manual

Philips

Philips CEM200/55 User manual

Philips CEM2100/00 User manual

Philips

Philips CEM2100/00 User manual

Philips CEM1000/00 User manual

Philips

Philips CEM1000/00 User manual

Philips CEM151/00 User manual

Philips

Philips CEM151/00 User manual

Philips CEM2100 User manual

Philips

Philips CEM2100 User manual

Philips CEM2100/00 User manual

Philips

Philips CEM2100/00 User manual

Philips CED229/55 User manual

Philips

Philips CED229/55 User manual

Philips CEM250/55 User manual

Philips

Philips CEM250/55 User manual

Philips CED780/55 User manual

Philips

Philips CED780/55 User manual

Philips CE233 User manual

Philips

Philips CE233 User manual

Philips CEM250 User manual

Philips

Philips CEM250 User manual

Philips CID3288/93 User manual

Philips

Philips CID3288/93 User manual

Philips CMBI100/55 User manual

Philips

Philips CMBI100/55 User manual

Philips CEM3000/00 User manual

Philips

Philips CEM3000/00 User manual

Philips CID2780/00 User manual

Philips

Philips CID2780/00 User manual

Popular Car Stereo System manuals by other brands

Ssl CAP350B user manual

Ssl

Ssl CAP350B user manual

Alpine CDE-9850Ri owner's manual

Alpine

Alpine CDE-9850Ri owner's manual

Sony XM-ZR1852 operating instructions

Sony

Sony XM-ZR1852 operating instructions

Audiodesign Crunch Groundpounder GP820 owner's manual

Audiodesign

Audiodesign Crunch Groundpounder GP820 owner's manual

BASSFACE DB1.4 instruction manual

BASSFACE

BASSFACE DB1.4 instruction manual

JVC KD-G440 instructions

JVC

JVC KD-G440 instructions

Hyundai HM-5065 instruction manual

Hyundai

Hyundai HM-5065 instruction manual

Targa TAG-6900 instruction manual

Targa

Targa TAG-6900 instruction manual

Eclipse CD8053 owner's manual

Eclipse

Eclipse CD8053 owner's manual

AudioBahn ACAP10Q operating instructions

AudioBahn

AudioBahn ACAP10Q operating instructions

Kenwood KDC-C467FM instruction manual

Kenwood

Kenwood KDC-C467FM instruction manual

PURE Highway H250S manual

PURE

PURE Highway H250S manual

OWC PLATINUM Series installation guide

OWC

OWC PLATINUM Series installation guide

Ground Zero URANIUM Series owner's manual

Ground Zero

Ground Zero URANIUM Series owner's manual

Pioneer FX-MG8217ZT-03/UC Service manual

Pioneer

Pioneer FX-MG8217ZT-03/UC Service manual

Jensen Phase Linear UV10 installation guide

Jensen

Jensen Phase Linear UV10 installation guide

Sony CDX-GT450U operating instructions

Sony

Sony CDX-GT450U operating instructions

Boss Audio Systems 625UAB user manual

Boss Audio Systems

Boss Audio Systems 625UAB user manual

manuals.online logo
manuals.online logoBrands
  • About & Mission
  • Contact us
  • Privacy Policy
  • Terms and Conditions

Copyright 2025 Manuals.Online. All Rights Reserved.