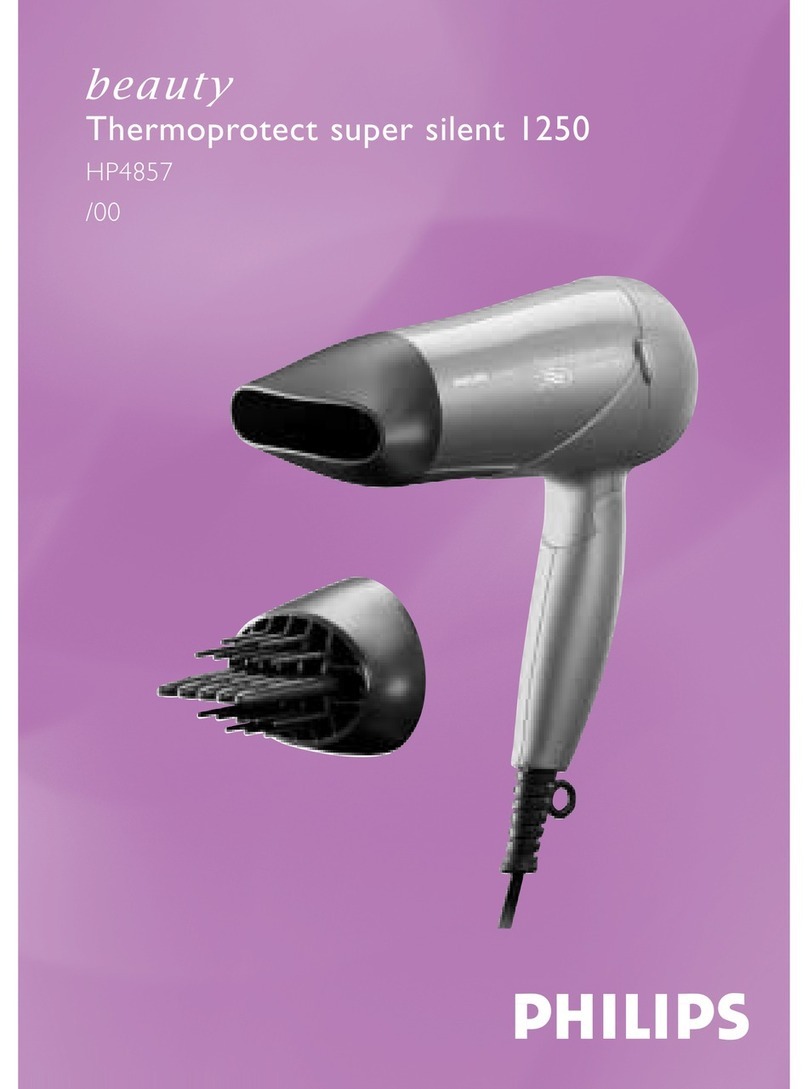
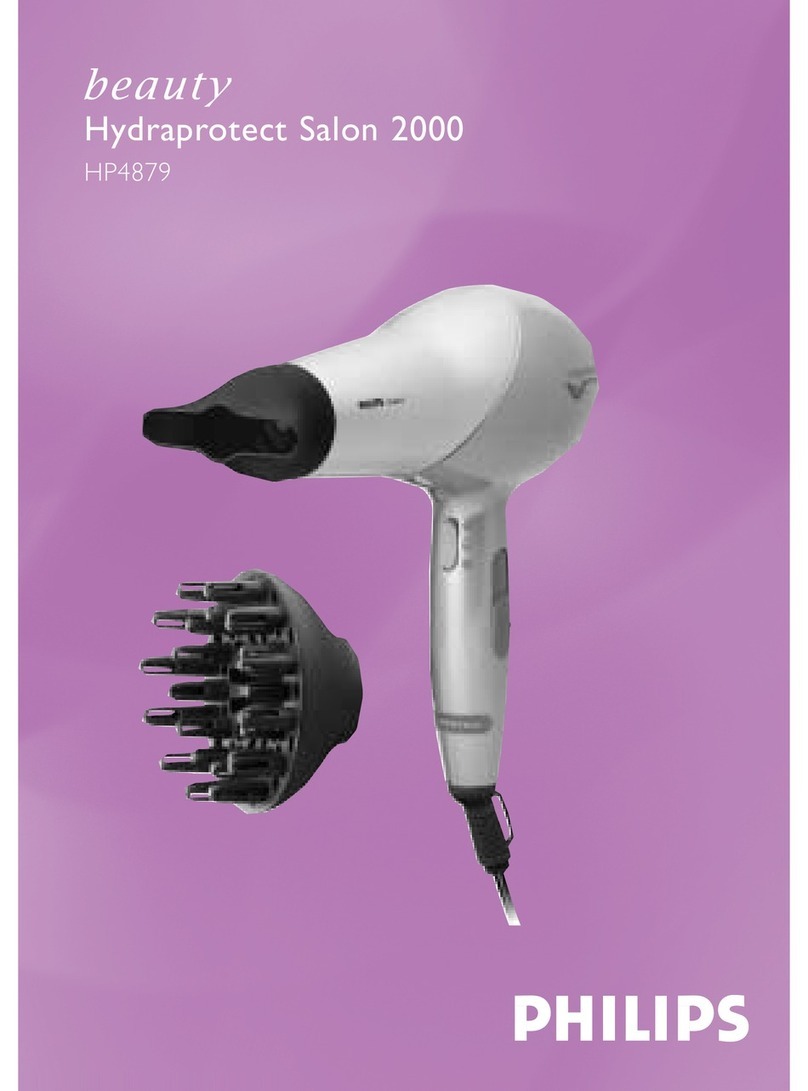
Philips Hydraprotect Salon 2000 HP4879 User manual

Hydraprotect Salon 2000
HP4879
Read manual before use

2

3
3

4

Introduction
Naturally, healthy looking hair contains around 15% moisture. Scientific
tests have shown that continuously drying at a too high temperature
can lead to overdrying, in which case the moisture level of the hair falls
below the natural level of 15%. Hair that has been overdried feels
coarse and looks dull and frizzy.The Philips Hydraprotect Salon 2000 is
equipped with a unique sensor.The sensor technology provides
automatic feedback when your hair is dry; it starts working at a high
temperature to quickly dry wet hair and automatically adjusts to a
lower temperature when the hair is dry, which is shown by the
temperature indicator on the handle.The sensor technology combined
with an ultra strong airflow makes this hairdryer the quickest among
gentle hairdryers.The end result is beautiful shiny hair in top condition!
For more information on this hairdryer or any other Philips beauty
product, visit our web site: www.philips.com/beauty
General description
AAir inlet grille
BRocker switch for temperature settings
-fiQuick-Dry setting
-flHydraprotect setting
-—Cool setting
CAirflow and on/off slide
-O= off
-I= Low airflow especially intended for styling
-II = Medium airflow for drying and styling
-III = Ultra strong airflow for fast drying
DTemperature indicator
EHanging loop
FVolume diffuser
GConcentrator
HSensor
ENGLISH6

Important
◗Check if the voltage indicated on the appliance corresponds to
the local mains voltage before you connect the appliance.
◗Keep this appliance away from water! Do not use this product
near or over water contained in baths, washbasins, sinks etc.
When used in a bathroom, unplug the appliance after use since
the proximity of water presents a risk, even when the hairdryer is
switched off.
◗For additional protection, we advise you to install a residual
current device (RCD) with a rated residual operating current
not exceeding 30mA in the electrical circuit supplying the
bathroom.Ask your installer for advice.
◗Keep the appliance out of the reach of children.
◗Never block the air grilles.
◗If the appliance overheats, it will switch off automatically. Unplug
the appliance and let it cool down for a few minutes. Before you
switch the appliance on again, check the grilles to make sure they
are not blocked by fluff, hair, etc.
◗Always switch the appliance off before putting it down, even if it
is only for a moment.
Using the appliance
Drying
1Put the plug in the wall socket.
2Switch the appliance on by setting the airflow slide to position I, II
or III.
3Select the desired airflow speed by setting the airflow slide to
position I, II or III (fig. 1).
O = Off
I = Low airflow especially intended for styling
II = Medium airflow for drying and styling
III = Ultra strong airflow for fast drying
4Select the desired temperature setting by pressing the rocker
switch.
ENGLISH 7

The Quick-Dry setting
◗fiThe Quick-Dry setting enables you to dry shower-wet hair
very quickly (fig. 2).
It is recommended to use the Quick-Dry setting only on shower-wet
hair to speed up the drying process. When the hair is almost dry, the
sensor automatically adjusts the temperature to a lower level to
prevent the hair from becoming overdried.
The Hydraprotect setting
◗flThe Hydraprotect setting can be used to dry towel-dry hair
(fig. 3).
◗The temperature sensor constantly monitors the moisture
content of the hair during the drying process.The temperature
will be automatically adjusted to a lower, caring level to prevent
the hair from becoming overdried (fig. 4).
Make sure there is no obstruction between your hair and the red
cover of the temperature sensor to avoid malfunctioning of the
appliance.
The Cool setting
◗—The Cool setting fixes the style you have created (fig. 5).
For long-lasting styling results, set the rocker switch to the Cool setting
and direct the cool airflow at your hair to fix your style.
5Dry your hair by making brushing movements with the hairdryer
at a small distance from the hair (fig. 6).
6Select the highest airflow speed (III) in combination with the
Quick-Dry setting for ultra-quick drying.
◗The temperature indicator shows the condition of the hair.When
the temperature indicator starts blinking, the hair is almost dry
(fig. 7).
7Select a lower airflow speed (I-II) for drying short hair or styling
your hair.
ENGLISH8

Attachments
Concentrator
The concentrator enables you to direct the airflow straight at the brush
or comb with which you are styling your hair.
1Connect the concentrator by simply snapping it onto the
appliance (fig. 8).
2Switch the appliance on by setting the airflow slide to position I, II
or III.
3While you are drying your hair with the concentrator, you can
use a brush or comb to style your hair (fig. 9).
4Disconnect the concentrator by pulling it off the appliance.
Volume diffuser
The volume diffuser has been specially developed to gently dry both
straight and curly or wavy hair.
◗The volume diffuser emits a gentle airflow and allows you to give
your style volume and bounce (fig. 10).
1Connect the diffuser by simply snapping it onto the appliance.
Disconnect it by pulling it off (fig. 11).
◗To add volume at the roots, insert the pins into your hair in such
a way that they touch your scalp (fig. 12).
2Make rotating movements with the appliance to distribute the
warm air evenly through your hair (fig. 13).
Curly or wavy hair
◗When you are styling curly or wavy hair, hold the diffuser at a
distance of 10-15 cm from your head to let the hair dry gradually
(fig. 14).
-In the meantime you can style your hair with your free hand or
with a comb.
ENGLISH 9

-You can also scrunch locks of hair in your hand to shape the curls
and waves while drying.This will prevent the curls from sagging or
becoming frizzy.
Long hair
◗To dry long hair, you can spread out locks of hair on top of the
diffuser (fig. 15).
◗Alternatively, you can comb the hair downwards with the pins of
the diffuser while drying (fig. 16).
Styling and drying tips
Here is one style you can create easily and gently with the
Hydraprotect Salon 2000 hairdryer. As you become more familiar with
the appliance, you will discover many other ways to create great styles.
Just use your imagination!
1After washing and conditioning your hair as usual, start drying it
by dabbing the wet hair with a towel, then comb it through
carefully.
2Place the diffuser in your hair so that the tips of the air pins
touch your scalp. By making circular movements with the diffuser,
the hair will be lifted towards the base of the diffuser and the air
pins will dry the hair from the roots upwards.This will add more
volume to your hair. Continue drying until your hair is dry at the
roots.
3Set the airflow to a lower position and continue drying until your
hair is completely dry. Use a comb or brush to style your hair in
the desired way while drying.
4To create volume at the hair ends, hold the diffuser in horizontal
position and place some locks of hair on the base of the diffuser
between the air pins and leave them there for a while.The gentle
airflow will prevent your curls or waves from being blown out of
style while drying.
5Finish off with the cool airflow to fix your style.
Set the rocker switch to the Cool setting and direct the cool airflow at
your hair to fix your style.
ENGLISH10

Cleaning
Always unplug the appliance before cleaning it.
Never rinse the appliance with water.
◗The appliance can be cleaned with a dry cloth.
◗The attachments can be cleaned with a moist cloth or by rinsing
them under the tap.
Remove the attachments from the appliance before cleaning them.
◗Detachable air inlet grille for easy cleaning (fig. 17).
Storage
Always unplug the appliance before storing it.
◗Put the appliance in a safe place and let it cool down.
◗Do not wind the mains cord round the appliance.
◗The appliance can be stored by hanging it from its hanging loop.
Replacement
◗If the mains cord is damaged, it must be replaced by Philips, a
service centre authorised by Philips or similarly qualified persons
in order to avoid a hazard.
◗Always return the appliance to a service centre authorised by
Philips for examination or repair. Repair by unqualified people
could cause an extremely hazardous situation for the user.
Guarantee & service
If you need information or if you have a problem, please visit the Philips
Web site at www.philips.com or contact the Philips Customer Care
Centre in your country (you will find its phone number in the
worldwide guarantee leaflet). If there is no Customer Care Centre in
your country, turn to your local Philips dealer or contact the Service
Department of Philips Domestic Appliances and Personal Care BV.
ENGLISH 11

Solution
Perhaps the socket to which the
appliance has been connected is not
live:
Make sure the socket is live.
The appliance may have overheated
and switched itself off:
Unplug the appliance and let it cool
down for a few minutes. Before you
switch the appliance on again, check
the grilles to make sure they are not
blocked by fluff, hair, etc.
The appliance may not be suitable for
the voltage to which it has been
connected:
Make sure that the voltage indicated
on the type plate of the appliance
corresponds to the local mains
voltage.
The mains cord of the appliance may
be damaged:
If the mains cord is damaged, it must
always be replaced by a service centre
authorised by Philips.
Problem
The appliance does not work at all
Troubleshooting
If problems should arise with your dryer and you are unable to
solve them by means of the troubleshooting guide below, please
contact the nearest Philips service centre or the Philips Customer
Care Centre in your country.
ENGLISH
12

Pendahuluan
Rambut yang kelihatan sihat secara semula jadi mengandungi kira-kira
15% kelembapan. Ujian saintifik menunjukkan yang pengeringan
berterusan pada suhu yang melampau boleh menyebabkan lampau
kering pada rambut, iaitu paras kelembapan rambut menjadi kurang dari
paras kelembapan semula jadi 15%. Rambut lampau kering terasa kasar
dan kelihatan kusam dan berkerinting halus. Philips Hydraprotect Salon
2000 disediakan dengan pengesan yang unik.Teknologi pengesan
memberikan maklumbalas automatik apabila rambut anda kering,
seperti yang dipaparkan oleh penunjuk suhu pada pemegang.Teknologi
pengesan bergabung dengan aliran udara ultra kuat menjadikan
pengering rambut ini pengering paling pantas di kalangan pengering-
pengering rambut yang lembut. Hasilnya ialah rambut sihat yang cantik
dan bersinar!
Untuk maklumat tentang pengering rambut ini atau produk kecantik
Philips yang lain, lawatlah tapak web kami: www.philips.com/beauty
Gambaran Am
AGril salur masuk udara
BSuis jumpelang untuk tetapan suhu
-fiTetapan Kering-Cepat
-flTetapan Hydraprotect
-—Tetapan Sejuk
CSelak aliran udara dan hidup/mati
-O= Mati
-I= Aliran udara rendah khusus untuk pendandanan
-II = Aliran udara sederhana untuk pengeringan dan pendandanan
-III = Aliran udara ultra kuat untuk pengeringan cepat
DPenunjuk suhu
EGelung penggantung
FPenyebar kekembangan
GPenumpu
HPengesan
BAHASA MALAYSIA 13

Penting
◗Periksa jikalau tandaan voltan pada alatan bersamaan dengan
voltan utama setempat sebelum anda menyambungkan alatan.
◗Jauhkan alat dari air! Jangan gunakan barang ini berdekatan dengan
air atau di atas air yang ada di dalam takung mandi, besen basuh,
sink, dll. Kalau digunakan di bilik mandi, cabut alat selepas
penggunaan kerana air yang berdekatan merupakan risiko biarpun
pengering rambut dimatikan.
◗Untuk perlindungan tambahan, kami sarankan agar anda
memasang peranti penguji arus baki (RCD) dengan arus
pengoperasian baki terkadar yang tidak melebihi 30mA di dalam
litar elektrik yang membekalkan kuasa ke bilik air. Sila minta
nasihat pemasang anda.
◗Jauhkan alat daripada kanak-kanak.
◗Jangan sekali-kali menghadang gril udara.
◗Jika peralatan terlalu panas, ia akan terpadam dengan sendiri.
Tanggalkan plag peralatan dan biarkannya menyejuk selama
beberapa minit. Sebelum anda memasang peralatan semula,
periksa gril untuk memastikan ianya tidak tersumbat dengan debu
halus, rambut dan sebagainya.
◗Sentiasa matikan peralatan sebelum meletakkannya, walaupun
untuk seketika.
Menggunakan peralatan
Pengeringan
1Pasang plag ke soket dinding.
2Hidupkan peralatan dengan menetapkan selak aliran udara ke
kedudukan I, II atau III.
3Pilih kelajuan aliran udara yang dikehendaki dengan menetapkan
selak aliran udara ke kedudukan I, II atau III (gamb. 1).
O = Mati
I = Aliran udara rendah khusus untuk pendandanan.
II = Aliran udara sederhana untuk pengeringan dan pendandanan
III = Aliran udara ultra kuat untuk pengeringan cepat
BAHASA MALAYSIA14

4Pilih tetapan suhu yang dikehendaki dengan menekan suis
jumpelang.
Tetapan Kering-Cepat
◗fiTetapan Kering-Cepat membolehkan anda mengeringkan
rambut basah dengan cepat sekali (gamb. 2).
Tetapan Kering-Cepat disarankan hanya untuk rambut yang basah untuk
mempercepatkan proses pengeringan. Bila rambut hampir kering,
pengesan akan menyesuaikan suhu dengan automatik ke paras yang
lebih rendah untuk mengelakkan lampau kering rambut.
Tetapan Hydraprotect
◗flTetapan Hydraprotect boleh digunakan untuk mengeringkan
rambut yang lembab (gamb. 3).
◗Pengesan suhu sentiasa mengawasi kandungan kelembapan rambut
semasa proses pengeringan. Suhu akan disesuaikan dengan
automatik menjadi paras yang lebih rendah dan melindungkan
untuk mengelakkan lampau kering pada rambut (gamb. 4).
Pastikan bahawa tiada hadangan antara rambut anda dan penutup
merah pengesan suhu untuk mengelakkan malfungsi peralatan.
Tetapan Sejuk
◗—Tetapan Sejuk menetapkan dandanan yang telah dicipta
(gamb. 5).
Untuk hasil yang tahan lama, tetapkan suis jumpelang ke tetapan Sejuk
dan halakan udara sejuk ke rambut anda untuk menetapkan dandanan
anda.
5Keringkan rambut anda dengan membuat pergerakan memberus
dengan pengering pada jarak yang dekat dengan rambut (gamb. 6).
6Pilih kelajuan aliran udara tertinggi (III) bersama dengan tetapan
Kering-Cepat untuk pengeringan ultra cepat.
◗Penunjuk suhu menunjukkan keadaan rambut.Apabila penunjuk
suhu mula berkelip, rambut hampir kering (gamb. 7).
7Pilih aliran udara dengan kelajuan rendah (I-II) untuk
mengeringkan rambut pendek atau mendandan rambut.
BAHASA MALAYSIA 15

Alat tambahan
Penumpu
Penumpu membolehkan anda menghalakan aliran udara terus ke berus
atau sikat yang digunakan untuk mendandan rambut.
1Sambungkan penumpu hanya dengan mengetapkannya ke
peralatan (gamb. 8).
2Hidupkan peralatan dengan menetapkan selak aliran udara ke
kedudukan I, II atau III.
3Sambil mengeringkan rambut dengan penumpu, anda boleh
mendandan rambut dengan menggunakan berus atau sikat
(gamb. 9).
4Tanggalkan penumpu dengan menariknya dari peralatan.
Alat penyebar kekembangan
Penyebar kekembangan direka khas untuk mengeringkan rambut lurus
dan kerinting atau beralun dengan lembut.
◗Penyebar kekembangan mengeluarkan aliran udara yang lembut
dan membolehkan anda memberikan gaya rambut anda
kekembangan dan lantunan (bounce) (gamb. 10).
1Pasangkan alat penyebar kekembangan dengan mengetapkannya
pada alat.Tanggalkannya dengan mencabutkannya (gamb. 11).
◗Untuk menambahkan kekembangan pada akar rambut, masukkan
pin ke dalam rambut sehingga pin menyentuh kulit kepala
(gamb. 12).
2Gerakkan peralatan secara memutar untuk menyebarkan udara
panas dengan rata dalam rambut anda (gamb. 13).
BAHASA MALAYSIA16

Rambut kerinting atau beralun
◗Kalau mendandan rambut keriting atau beralun, pegang alat
penyebar kekembangan sejauh 10-15sm dari kepala anda untuk
mengeringkan rambut secara beransur-ansur (gamb. 14).
-Sambil itu, anda boleh mendandan rambut anda dengan tangan yang
lagi satu atau dengan sikat.
-Anda boleh juga membentukkan kerinting atau alun dengan tangan
anda semasa pengeringan. Ini akan mengelakkan kerinting dari
melendut atau menjadi kerinting halus.
Rambut panjang
◗Untuk mengeringkan rambut panjang, anda boleh meratakan
gumpalan rambut di atas alat penyebar kekembangan (gamb. 15).
◗Sebaliknya, anda boleh menyikat rambut anda ke bawah dengan
pin-pin alat penyebar semasa pengeringan (gamb. 16).
Dandanan dan petua pengeringan
Inilah satu gaya yang boleh dicipta dengan mudah dan lembut dengan
menggunakan pengering rambut Hydraprotect Salon 2000 Philips.
Semakin anda membiasakan diri dengan peralatan itu, anda akan
mendapati cara lain untuk mencipta gaya-gaya yang hebat. Hanya
gunakan imaginasi anda!
1Setelah mencuci dan merapikan rambut seperti biasa, mulalah
mengeringkan rambut basah dengan tuala, kemudian menyisirnya
secara hati-hati.
2Letakkan alat penyebar kekembangan di dalam rambut anda
supaya penghujung pin udara menyentuh kulit kepala anda.
Dengan menggerakkan penyebar secara membulat, rambut akan
diangkat ke arah dasar penyebar dan pin-pin udara akan
mengeringkan rambut dari akar ke atas. Ini akan menambahkan
kekembangan pada rambut anda.Teruskan pengeringan sehingga
rambut anda kering di akar.
BAHASA MALAYSIA 17

3Tetapkan aliran udara ke kedudukan yang lebih rendah dan
teruskan mengering sehingga rambut benar-benar kering.
Gunakan sikat atau berus untuk mendandan rambut anda seperti
yang dikehendaki semasa pengeringan.
4Untuk mencipta kekembangan di hujung rambut, pegang alat
penyebar dalam kedudukan melintang dan letakkan beberapa
gumpalan rambut pada dasar penyebar di antara pin-pin udara dan
biarkan begitu untuk seketika.Aliran udara yang lembut akan
mengelakkan kerinting atau alunan pada rambut daripada
mengerbang semasa pengeringan.
5Selesaikan dengan aliran udara sejuk untuk menetapkan dandanan
anda.
Tetapkan suis jumpelang ke tetapan Sejuk dan halakan aliran udara sejuk
ke rambut untuk menetapkan dandanan.
Pembersihan
Sentiasa cabutkan plag peralatan sebelum membersihkannya.
Jangan sekali-kali membilas alat ini dengan air.
◗Peralatan boleh dibersihkan dengan kain kering.
◗Alat-alat tambahan boleh dibersihkan dengan kain lembab atau
dengan membilas di bawap paip.
Tanggalkan alat tambahan dari alat ini sebelum pembersihan.
◗Gril saluran masuk udara boleh cerai untuk pembersihan mudah
(gamb. 17).
Penstoran
Sentiasa cabut plag peralatan sebelum menstorkannya.
◗Te mpatkan peralatan di tempat yang selamat dan biarkannya
menyejuk.
◗Jangan lilit wayar utama mengelilingi peralatan.
◗Peralatan boleh disimpan dengan menggantungkannya dari gelung
penggantungnya.
BAHASA MALAYSIA18

Penggantian
◗Jika wayar utama rosak, ia mesti digantikan oleh Philis, pusat servis
yang dibenarkan oleh Philips atau pihak-pihak yang telah
diluluskan bagi mengelakkan bahaya.
◗Sentiasa pulangkan peralatan kepada pusat perkhidmatan yang
diluluskan oleh Philips untuk pemeriksaan atau pembaikian.
Pembaikian oleh orang yang tidak mahir boleh menyebabkan
situasi yang tersangat bahaya kepada pengguna.
Jaminan & perkhidmatan
Jika anda memerlukan maklumat atau jika anda mempunyai masalah, sila
lawati Laman Jaringan Philips pada www.philips.com atau hubungi Pusat
Perkhidmatan Pelanggan Philips di negara anda (anda akan dapati
nombor telifonnya dalam risalah jaminan sedunia). Jika tiada pusat
perkhidmatan pelanggan di negara anda, rujuk kepada pengurus
tempatan Philips atau hubungi Jabatan Perkhidmatan Peralatan
Domestik Philips dan Perkhidmatan Peribadi BV.
BAHASA MALAYSIA 19

Penyelesaian
Soket di mana peralatan bersambung
mungkin tidak hidup:
Pastikan soket itu hidup.
Peralatan mungkin menjadi terlampau
panas dan terpadam dengan sendiri.
Cabutkan plag peralatan dan
biarkannya menyejuk untuk beberapa
minit. Sebelum anda menghidupkan
alat ini semula, periksa grilnya untuk
memastikan tidak terdapat gumpalan
debu halus, rambut, dll., tersekat
padanya.
Peralatan mungkin tidak bersesuaian
dengan kuasa voltan yang bersambung
dengannya:
Pastikan voltan yang ditandakan pada
plet jenis peralatan berpadanan
dengan kuasa voltan utama setempat.
Wayar utama peralatan mungkin rosak:
Jika wayar utama rosak, ia mesti
sentiasa digantikan oleh pusat khidmat
yang diluluskan oleh Philips.
Masalah
Peralatan tidak berfungsi
Penyelesaian masalah
Jika timbulnya masalah dengan pengering rambut anda dan anda
tidak dapat menyelesaikannya dengan bantuan panduan
penyelesaian masalah di bawah, sila hubungi pusat khidmat Philips
terdekat atau Pusat Khidmat Pelanggan Philips di negara anda.
BAHASA MALAYSIA
20
Table of contents
Other Philips Hair Dryer manuals

Philips
Philips HP8292/00 User manual

Philips
Philips HP8295/00 User manual

Philips
Philips HPS920 User manual

Philips
Philips HP4847 User manual

Philips
Philips HP8100/22 User manual

Philips
Philips HP4930/20 User manual

Philips
Philips HP4834/10 User manual

Philips
Philips HP8203 User manual

Philips
Philips HP4897 User manual

Philips
Philips HP 4814/PB User manual

Philips
Philips HP4935/01 User manual

Philips
Philips HP8183/00 User manual

Philips
Philips HP4825/00 User manual

Philips
Philips HP 4833 User manual

Philips
Philips HP8203 User manual

Philips
Philips HP4880/87 User manual

Philips
Philips HP4924/00 User manual

Philips
Philips HP4879 User manual

Philips
Philips HP8143 User manual

Philips
Philips HP8102/00 User manual