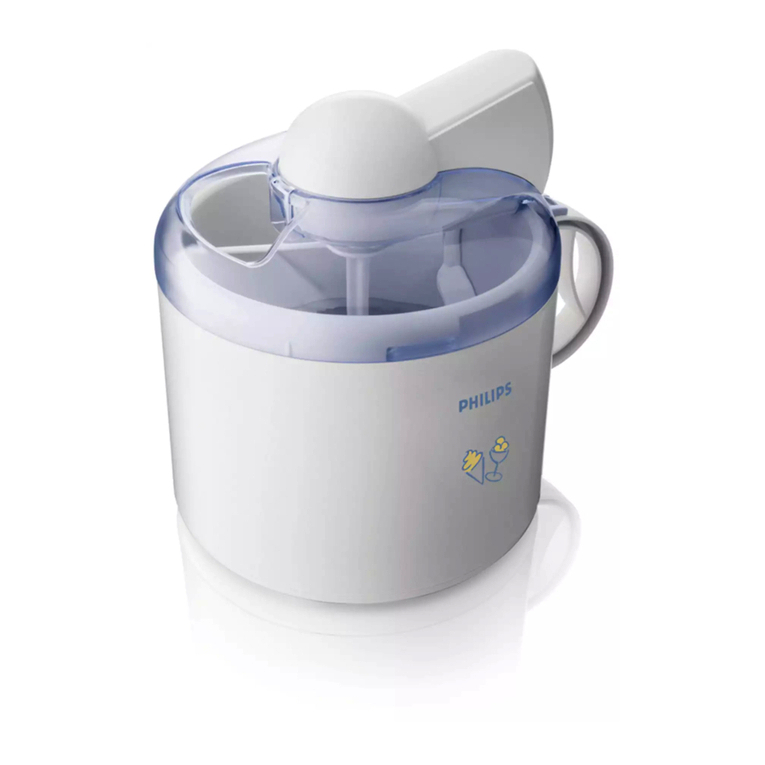
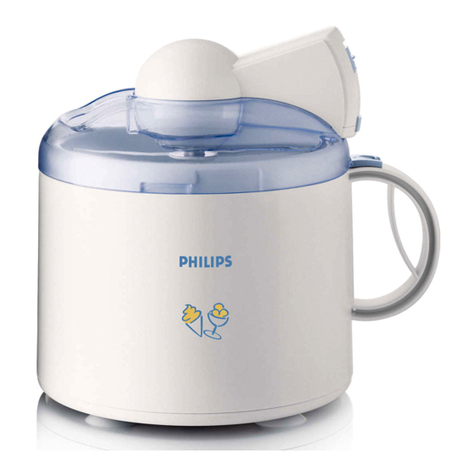
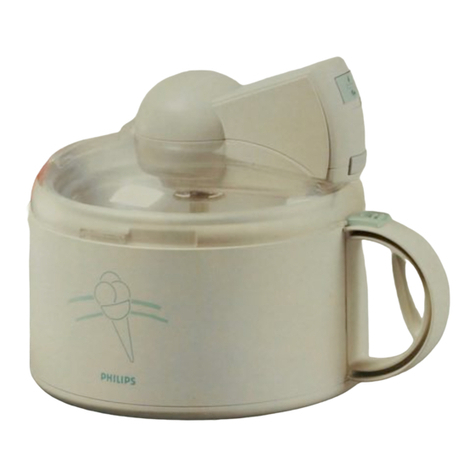
Philips HR2304 User manual

HR2304

2

3
1

4

HR2304
ENGLISH 6
DEUTSCH 10
FRANÇAIS 15
ITALIANO 20
NEDERLANDS 24

6
Introduction
Congratulations on your purchase and welcome to Philips! To fully benet from the support that
Philips offers, register your product at www.philips.com/welcome.
General description (Fig. 1)
AMotor unit
BOn/off switch
CRelease button to remove the motor unit from the lid
DRelease slide to detach the lid with motor unit from the bowl
EMains cord
FLid
GFilling opening
HStirrer
ICooling disc
JBowl
Important
Read this user manual carefully before you use the appliance and save it for future reference.
Danger
Never immerse the motor unit in water nor rinse it under the tap.
Warning
Check if the voltage indicated on the appliance corresponds to the local mains voltage before
you connect the appliance.
Do not use the appliance if the plug, the mains cord or the appliance itself is damaged.
If the mains cord is damaged, you must have it replaced by Philips, a service centre authorised by
Philips or similarly qualied persons in order to avoid a hazard.
This appliance is not intended for use by persons (including children) with reduced physical,
sensory or mental capabilities, or lack of experience and knowledge, unless they have been given
supervision or instruction concerning use of the appliance by a person responsible for their
safety.
Children should be supervised to ensure that they do not play with the appliance.
Caution
Never use any accessories or parts from other manufacturers or that Philips does
not specically recommend. If you use such accessories or parts, your guarantee becomes
invalid.
This appliance is intended for household use only. If the appliance is used improperly or for
professional or semi-professional purposes or if it is not used according to the instructions in
the user manual, the guarantee becomes invalid and Philips refuses any liability for damage
caused.
When you make ice cream, hygiene is of the utmost importance. Make sure that all parts of the
ice-cream maker are entirely clean, especially the parts that come into contact with the ice-
cream mixture.
If ingredients freeze onto the cooling disc, the stirrer does not function properly. To prevent this,
only put ingredients in the bowl while the stirrer is rotating and do not switch off the
appliance before the ice cream is ready.
Never insert an object, e.g. a spoon, into the bowl while the appliance is operating.
Never exceed the quantities indicated in the recipes.
-
-
-
-
-
-
-
-
-
-
-
-
ENGLISH

Safety shut-off function
The ice-cream maker is equipped with a safety shut-off function. After 120 minutes of operation and
also if overloading occurs, the motor is switched off automatically.
Electromagnetic elds (EMF)
This Philips appliance complies with all standards regarding electromagnetic elds (EMF). If handled
properly and according to the instructions in this user manual, the appliance is safe to use based on
scientic evidence available today.
Preparing for use
Freezing the cooling disc
1 Make sure that the cooling disc is clean and dry.
2 Put the cooling disc in the freezer or in the freezer compartment of a refrigerator to cool it
to the required temperature of -18°C/0°F or colder.
It takes 18 to 24 hours to freeze the cooling disc.
Do not place other objects on top of or against the cooling disc while it is being frozen.
3 Store the cooling disc with the bottom pointing downwards in a well-closed plastic bag in the
freezer to prevent ice from forming on the cooling disc. In this way, the disc is always ready
for use.
4 Remove the cooling disc from the freezer after you have prepared the ingredients for the ice
cream.
Note:Always make sure that the cooling disc is properly frozen when you put it in the ice-cream maker.
Using the appliance
How does the ice-cream maker work?
The ice-cream maker contains a frozen cooling disc. This disc quickly cools down the ingredients
while the stirrer rotates.The mixture is stirred until it has turned into ice cream.
Note: The cooling disc is lled with a non-toxic saline solution.
Making ice cream
1 Prepare the mixture of ingredients for the ice cream in a separate bowl.
Preferably use ingredients at refrigerator temperature.
Note: You can nd delicious recipes and many tips in the separate recipe booklet.
Note: Do not exceed the quantities indicated in the recipes. If you do, the ice-cream may become less
compact.
2 Remove the cooling disc from the freezer and take it out of the plastic bag.
Make sure your hands are dry when you handle the frozen cooling disc.
3 Check if the disc is properly frozen and free of ice.
If the disc is properly frozen, its contents have turned hard all over.
If the disc is not properly frozen, you hear a crunching sound when you press the bottom of the
disc with your thumbs.
If a thin lm of white frost has developed on the cooling disc, remove it with a wooden or
plastic spatula. Do not use metal utensils for this purpose to prevent damage.
-
-
-
ENGLISH 7

Do not rinse the frozen cooling disc, as this cause a thick lm of ice to develop on the outside of
the disc right away.
4 Place the frozen cooling disc in the bowl of the ice-cream maker (Fig. 2).
5 Insert the front edge of the motor unit into the lid. (Fig. 3)
6 Push the motor unit downwards into the lid until it locks into place (‘click’) (Fig. 4).
7 Insert the stirrer into the hole of the motor unit (‘click’) (Fig. 5).
8 Place the lid with motor unit on the bowl in the correct position.Turn the lid clockwise until
it locks into place (‘click’) (Fig. 6).
9 Put the mains plug in the wall socket and switch on the appliance.
Always switch on the appliance before you put the ingredients in the bowl.This is necessary to
prevent the ingredients from freezing onto the cooling disc right away.
10 Pour the mixture of ingredients into the ice-cream maker through the lling opening in the
lid.
11 Let the ice-cream maker work until the ice cream has the right consistency.
The preparation time greatly depends on the type of ice-cream mixture and the temperature of the
ingredients. It takes about 40 minutes to make compact ice cream and about 20 minutes to make
soft ice cream.
Tips
Do not switch off the appliance too early. If you switch off the appliance too soon, the
ingredients freeze onto the cooling disc. This makes it impossible for the stirrer to continue
rotating in case the ice cream is not ready yet.
Do not let the ice-cream maker operate too long. Switch it off as soon as you see that the ice
cream starts to melt at the surface or on the sides.
It is not possible to make another batch of ice cream right away, because the cooling disc must
rst be properly frozen again. If you want to be able to make two batches of ice cream in a
row, order an extra cooling disc.
After use
1 To remove the lid, pull the release slide towards you (1) and turn the lid anticlockwise
(2) (Fig. 7).
2 Remove the ice cream from the bowl.
3 Pull the stirrer out of the motor unit. (Fig. 8)
4 Press the release button and remove the motor unit from the lid (Fig. 9).
5 Remove the cooling disc from the bowl (Fig. 10).
Cleaning
Always disassemble the ice-cream maker and clean its parts after use.
1 Make sure the appliance is unplugged.
2 Clean the lid (without the motor unit!), the stirrer and the bowl in hot water with some
washing-up liquid. Clean the cooling disc in lukewarm water (max. 40°C/100°F) with some
washing-up liquid.
These parts are not dishwasher-proof!
3 Clean the motor unit with a damp cloth.
-
-
-
ENGLISH8

Never immerse the motor unit in water nor rinse it under the tap.
Replacement
The following accessories are available from your dealer:
Transparent lid (no. 4822 441 80844)
Stirrer (no. 4822 690 40258)
Cooling disc (no. HR2968 or no. 4822 511 90025)
Bowl (no. 4822 418 40898)
Tip: An extra cooling disc (HR2968) enables you to prepare larger quantities of ice cream or two
different avours.
Environment
Do not throw away the appliance with the normal household waste at the end of its life, but
hand it in at an ofcial collection point for recycling. By doing this, you help to preserve the
environment (Fig. 11).
Guarantee & service
If you need information or if you have a problem, please visit the Philips website at www.philips.com
or contact the Philips Customer Care Centre in your country (you nd its phone number in the
worldwide guarantee leaet). If there is no Customer Care Centre in your country, go to your local
Philips dealer or contact the Service Department of Philips Domestic Appliances and Personal Care
BV.
Troubleshooting
If problems arise with your ice-cream maker and you cannot solve them with the information below,
please contact the nearest Philips service centre or the Philips Customer Care Centre in your
country.
Problem Cause Solution
The appliance
does not start
operating.
There is a connection
problem.
Check if the plug is inserted in the wall socket
properly. Remove the mains plug from the
wall socket and reinsert it.
The lid has not been
properly attached to the
bowl.
Place the lid with motor unit on the bowl in
the correct position.Turn the lid clockwise
until it locks into place (‘click’).
The stirrer does
not rotate.
You put the mixture of
ingredients in the bowl
before you switched on the
appliance.This has caused the
ingredients to freeze onto
the cooling disc.
Always switch on the appliance before you
put the ingredients in the bowl.
The cooling disc
cannot be
removed from
the bowl.
The cooling disc has frozen
onto the bottom and walls
of the bowl.
Let the cooling disc defrost for a few hours
until it has come loose from the bottom and
walls of the bowl.You can speed up this
process by pouring some lukewarm water
into the bowl.
-
-
-
-
,
ENGLISH 9

10
Einführung
Herzlichen Glückwunsch zu Ihrem Kauf und willkommen bei Philips! Um den Support von Philips
optimal zu nutzen, registrieren Sie Ihr Produkt bitte unter www.philips.com/welcome.
Allgemeine Beschreibung (Abb. 1)
AMotoreinheit
B Ein-/Ausschalter
C Entriegelungstaste zum Abnehmen der Motoreinheit vom Deckel
D Entriegelungsschieber zum Abnehmen des Deckels mit der Motoreinheit von der Schüssel
E Netzkabel
FDeckel
G Einfüllöffnung
H Rührarm
I Kühlscheibe
J Schüssel
Wichtig
Lesen Sie diese Bedienungsanleitung vor dem Gebrauch des Geräts aufmerksam durch und
bewahren Sie sie für eine spätere Verwendung auf.
Gefahr
Tauchen Sie die Motoreinheit niemals in Wasser. Spülen Sie sie auch nicht unter ießendem
Wasser ab.
Warnhinweis
Prüfen Sie, bevor Sie das Gerät in Betrieb nehmen, ob die Spannungsangabe auf dem Gerät mit
der örtlichen Netzspannung übereinstimmt.
Verwenden Sie das Gerät nicht, wenn der Netzstecker, das Netzkabel oder das Gerät selbst
defekt oder beschädigt ist.
Ist das Netzkabel defekt, darf es nur von einem Philips Service-Center oder einer von Philips
autorisierten Werkstatt durch ein Original-Ersatzkabel ausgetauscht werden, um Gefährdungen
zu vermeiden.
Dieses Gerät ist für Benutzer (einschl. Kinder) mit eingeschränkten physischen, sensorischen
oder psychischen Fähigkeiten bzw. ohne jegliche Erfahrung oder Vorwissen nur dann geeignet,
wenn eine angemessene Aufsicht oder ausführliche Anleitung zur Benutzung des Geräts durch
eine verantwortliche Person sichergestellt ist.
Achten Sie darauf, dass Kinder nicht mit dem Gerät spielen.
Achtung
Verwenden Sie keine Zubehörteile anderer Hersteller oder solche, die von Philips nicht
ausdrücklich empfohlen werden. Falls Sie derartiges Zubehör benutzen, erlischt die Garantie.
Dieses Gerät ist nur für den Gebrauch im Haushalt bestimmt. Bei unsachgemäßem Gebrauch
oder Verwendung für halbprofessionelle oder professionelle Zwecke oder bei Nichtbeachtung
der Anweisungen in der Bedienungsanleitung erlischt die Garantie. In diesem Fall lehnt Philips
jegliche Haftung für entstandene Schäden ab.
Bei der Zubereitung von Speiseeis ist perfekte Hygiene äußerst wichtig. Alle Teile des Eiscreme-
Automaten müssen vollkommen sauber sein; dies gilt insbesondere für die Teile, die mit den
Zutaten in Berührung kommen.
Wenn die Zutaten an der Kühlscheibe festfrieren, funktioniert der Rührarm nicht einwandfrei.
Geben Sie Zutaten daher nur bei laufendem Rührarm in die Schüssel, und schalten Sie das
Gerät erst aus, wenn das Eis fertig zubereitet ist.
Stecken Sie keine Gegenstände (z. B. einen Löffel) in die Schüssel, solange das Gerät in Betrieb
ist.
-
-
-
-
-
-
-
-
-
-
-
DEUTSCH
Verarbeiten Sie keine größeren Mengen als in den Rezepten angegeben.
Abschaltautomatik
Das Gerät ist mit einer sicheren automatischen Abschaltung ausgestaltet, die den Motor nach
120 Minuten sowie bei zu großer Füllmenge selbsttätig ausschaltet.
Elektromagnetische Felder (EMF; Electro Magnetic Fields)
Dieses Philips Gerät erfüllt sämtliche Normen bezüglich elektromagnetischer Felder (EMF). Nach
aktuellen wissenschaftlichen Erkenntnissen ist das Gerät sicher im Gebrauch, sofern es
ordnungsgemäß und entsprechend den Anweisungen in dieser Bedienungsanleitung gehandhabt
wird.
Für den Gebrauch vorbereiten
Die Kühlscheibe einfrieren
1 Die Kühlscheibe muss sauber und trocken ist.
2 Lassen Sie die Kühlscheibe im Tiefkühlgerät oder Gefrierfach des Kühlschranks auf die
erforderliche Temperatur von -18 °C oder tiefer gefrieren.
Das Gefrieren der Kühlscheibe dauert 18 bis 24 Stunden.
Legen Sie kein anderes Gefriergut auf oder unmittelbar neben die Kühlscheibe, während diese
tiefgekühlt wird.
3 Bewahren Sie die Kühlscheibe mit der Unterseite nach unten in einem fest verschlossenen
Gefrierbeutel im Gefrierfach auf. So verhindern Sie, dass sich Eis auf der Kühlscheibe bildet.
Die Scheibe ist dann jederzeit einsatzbereit.
4 Nehmen Sie die Kühlscheibe erst dann aus dem Gefrierfach, wenn Sie alle Zutaten für das Eis
vorbereitet haben.
Hinweis: Die Kühlscheibe muss ausreichend tiefgefroren sein, wenn sie in den Eiscreme-Automaten gelegt
wird.
Das Gerät benutzen
Die Arbeitsweise des Geräts
Die tiefgefrorene Kühlscheibe wird in den Behälter gelegt. Diese Scheibe kühlt die Mischung schnell
bei rotierendem Rührarm. Die Mischung wird gerührt, bis sie zu Speiseeis geworden ist.
Hinweis: Die Kühlscheibe ist mit einer nicht giftigen Salzlösung gefüllt.
Eiscreme zubereiten
1 Bereiten Sie die Eismischung in einer separaten Schüssel vor.
Es empehlt sich, die Zutaten bis zur Verarbeitung im Kühlschrank aufzubewahren.
Hinweis: Köstliche Rezepte und viele Tipps nden Sie im beigefügten Rezeptheft.
Hinweis: Verarbeiten Sie keine größeren Mengen als in den Rezepten angegeben. Die Eiscreme wird sonst
nicht richtig fest.
2 Nehmen Sie die Kühlscheibe aus dem Gefrierfach, und entfernen Sie den Gefrierbeutel.
Achten Sie darauf, dass Ihre Hände trocken sind, wenn Sie mit der tiefgefrorenen Kühlscheibe
umgehen.
3 Prüfen Sie, ob die Scheibe richtig tiefgefroren und eisfrei ist.
Wenn die Kühlscheibe die richtige Temperatur hat, ist der gesamte Inhalt hart.
-
-
DEUTSCH 11

Ist die Kühlscheibe nicht richtig tiefgefroren, hören Sie ein Knirschen, wenn Sie die Unterseite
der Scheibe mit den Daumen eindrücken.
Sollte sich ein dünner Frostbelag auf der Kühlscheibe gebildet haben, entfernen Sie diesen mit
einem Schaber aus Holz oder Kunststoff. Verwenden Sie keine Metallgegenstände, um
Beschädigungen zu vermeiden.
Spülen Sie die gefrorene Kühlscheibe nicht ab, da sonst sofort eine dicke Eisschicht an der
Oberäche der Scheibe entsteht.
4 Setzen Sie die tiefgefrorene Kühlscheibe in die Schüssel des Eiscreme-Automaten (Abb. 2).
5 Setzen Sie dieVorderkante der Motoreinheit in den Deckel. (Abb. 3)
6 Drücken Sie die Motoreinheit in den Deckel, bis sie hörbar einrastet (Abb. 4).
7 Setzen Sie den Rührarm in die Öffnung an der Motoreinheit, bis er hörbar einrastet (Abb. 5).
8 Setzen Sie den Deckel mit der Motoreinheit in die richtige Position auf der Schüssel. Drehen
Sie den Deckel im Uhrzeigersinn, bis er hörbar einrastet (Abb. 6).
9 Stecken Sie den Netzstecker in die Steckdose, und schalten Sie das Gerät ein.
Schalten Sie stets das Gerät ein, bevor Sie die Zutaten in die Schüssel geben. Nur so können Sie
verhindern, dass die Zutaten sofort an der Kühlscheibe festfrieren.
10 Gießen Sie die gemischten Zutaten durch die Einfüllöffnung im Deckel in den Eiscreme-
Automaten.
11 Lassen Sie den Eiscreme-Automaten laufen, bis die Eiscreme die richtige Konsistenz hat.
Die Zubereitungszeit hängt von der Art der Eismischung und der Temperatur der Zutaten ab. Die
Zubereitung von normalem Speiseeis dauert ca. 40 Minuten, während Softeis in ca. 20 Minuten
fertig ist.
Tipps
Schalten Sie das Gerät nicht zu früh aus. Wenn das Gerät zu früh ausgeschaltet wird, friert die
Mischung an der Kühlscheibe fest, der Rührarm kann sich nicht mehr drehen, und die Eiscreme
kann ggf. nicht fertig zubereitet werden.
Lassen Sie das Gerät nicht zu lange laufen. Schalten Sie es aus, sobald das Eis an der Oberäche
oder an den Seiten zu schmelzen beginnt.
Es ist nicht möglich, gleich im Anschluss eine weitere Portion Eiscreme herzustellen, da die
Kühlscheibe erst wieder richtig tiefgefroren werden muss. Wenn Sie zwei Portionen Eiscreme
unmittelbar nacheinander zubereiten möchten, bestellen Sie eine zweite Kühlscheibe.
Nach dem Gebrauch
1 Nehmen Sie den Deckel ab, indem Sie den Entriegelungsschieber zu sich ziehen (1) und den
Deckel dann gegen den Uhrzeigersinn drehen (2) (Abb. 7).
2 Entnehmen Sie die Eiscreme aus der Schüssel.
3 Ziehen Sie den Rührarm aus der Motoreinheit. (Abb. 8)
4 Drücken Sie die Entriegelungstaste, und nehmen Sie die Motoreinheit vom Deckel (Abb. 9).
5 Nehmen Sie die Kühlscheibe aus der Schüssel (Abb. 10).
Reinigung
Nach jedem Gebrauch sollten Sie den Eiscreme-Automaten stets zerlegen und die einzelnen Teile
reinigen.
1 Ziehen Sie den Netzstecker aus der Steckdose.
-
-
-
-
-
DEUTSCH12

2 Reinigen Sie den Deckel (ohne die Motoreinheit!), den Rührarm und die Schüssel in heißem
Wasser mit etwas Spülmittel. Reinigen Sie die Kühlscheibe in lauwarmem Wasser (höchstens
40 °C warm) und etwas Spülmittel.
Diese Teile sind nicht spülmaschinengeeignet!
3 Reinigen Sie die Motoreinheit mit einem feuchten Tuch.
Tauchen Sie die Motoreinheit niemals in Wasser. Spülen Sie sie auch nicht unter ießendem
Wasser ab.
Ersatz
Das nachstehende Zubehör ist über Ihren Händler erhältlich:
Durchsichtiger Deckel (Nr. 4822 441 80844)
Rührarm (Nr. 4822 690 40258)
Kühlscheibe (Nr. HR2968 oder Nr. 4822 511 90025)
Schüssel (Nr. 4822 418 40898)
Tipp: Hinweis: Mit einer zusätzlichen Kühlscheibe (HR2968) können Sie größere Mengen bzw. zwei
verschiedene Eissorten zubereiten.
Umweltschutz
Werfen Sie das Gerät am Ende der Lebensdauer nicht in den normalen Hausmüll. Bringen Sie
es zum Recycling zu einer ofziellen Sammelstelle. Auf diese Weise helfen Sie, die Umwelt zu
schonen (Abb. 11).
Garantie und Kundendienst
Benötigen Sie weitere Informationen oder treten Probleme auf, wenden Sie sich bitte an Ihren
Philips-Händler, oder setzen Sie sich mit einem Philips Service-Center in Ihrem Land in Verbindung
(Telefonnummer siehe Garantieschrift). Besuchen Sie auch die Philips Website www.philips.com. Sie
können auch direkt die Service-Abteilung von Philips Domestic Appliances and Personal Care BV
kontaktieren.
Fehlerbehebung
Sollten Probleme mit Ihrem Eiscreme-Automaten auftauchen, die sich mithilfe der nachstehenden
Informationen nicht beheben lassen, setzen Sie sich bitte mit dem Philips Service-Center in Ihrem
Land in Verbindung.
Problem Ursache Lösung
Das Gerät startet
nicht.
Es gibt ein Problem mit der
Stromversorgung.
Prüfen Sie, ob der Netzstecker richtig in der
Steckdose steckt. Ziehen Sie den Stecker
aus der Steckdose, und stecken Sie ihn
wieder hinein.
Der Deckel sitzt nicht richtig
auf der Schüssel. Setzen Sie den Deckel mit der Motoreinheit
in der richtigen Position auf die Schüssel.
Drehen Sie den Deckel im Uhrzeigersinn, bis
er hörbar einrastet.
-
-
-
-
,
DEUTSCH 13

Problem Ursache Lösung
Der Rührarm
dreht sich nicht.
Sie haben das Gerät nicht
eingeschaltet, bevor Sie die
Mischung in die Schüssel
gegeben haben. Deshalb sind
die Zutaten an der Kühlscheibe
festgefroren.
Schalten Sie stets das Gerät ein, bevor Sie
die Zutaten in die Schüssel geben.
Die Kühlscheibe
lässt sich nicht
aus der Schüssel
nehmen.
Die Kühlscheibe ist am Boden
und an den Wänden der
Schüssel festgefroren.
Lassen Sie die Kühlscheibe mehrere Stunden
lang auftauen, bis sie sich von der Schüssel
lösen lässt. Sie können diesen Vorgang
beschleunigen, indem Sie lauwarmes Wasser
in die Schüssel gießen.
DEUTSCH14

15
Introduction
Félicitations pour votre achat et bienvenue dans l’univers Philips ! Pour proter pleinement de
l’assistance Philips, enregistrez vos produits sur le site à l’adresse suivante : www.philips.com/
welcome.
Description générale (g. 1)
ABloc moteur
BBouton marche/arrêt
CBouton de déverrouillage pour séparer le bloc moteur du couvercle
DBouton de déverrouillage pour séparer le couvercle et le bloc moteur du bol
ECordon d’alimentation
FCouvercle
G Orice de remplissage
HAgitateur
IDisque accumulateur de froid
JBol
Important
Lisez attentivement ce mode d’emploi avant d’utiliser l’appareil et conservez-le pour un usage
ultérieur.
Danger
Ne plongez jamais le bloc moteur dans l’eau et ne le rincez pas sous le robinet.
Avertissement
Avant de brancher l’appareil, vériez que la tension indiquée sur l’appareil correspond à la
tension secteur locale.
N’utilisez jamais l’appareil si la che, le cordon d’alimentation ou l’appareil lui-même est
endommagé.
Si le cordon d’alimentation est endommagé, il doit être remplacé par Philips, un
Centre Service Agréé ou un technicien qualié an d’éviter tout accident.
Cet appareil n’est pas destiné à être utilisé par des personnes (notamment des enfants) dont les
capacités physiques, sensorielles ou intellectuelles sont réduites, ou par des personnes manquant
d’expérience ou de connaissances, à moins que celles-ci ne soient sous surveillance ou qu’elles
aient reçu des instructions quant à l’utilisation de l’appareil par une personne responsable de
leur sécurité.
Veillez à ce que les enfants ne puissent pas jouer avec l’appareil.
Attention
N’utilisez jamais d’accessoires, ni de pièces d’autres fabricants ou qui n’ont pas été
spéciquement recommandés par Philips. Votre garantie ne sera pas valable en cas d’utilisation
de tels accessoires ou pièces.
Cet appareil est destiné à un usage domestique uniquement. S’il est employé de manière
inappropriée, à des ns professionnelles ou semi-professionnelles, ou en non-conformité avec les
instructions du mode d’emploi, la garantie peut être caduque et Philips décline toute
responsabilité concernant les dégâts occasionnés.
L’hygiène est très importante lors de la préparation de la glace. Assurez-vous que tous les
éléments de la sorbetière sont parfaitement propres, notamment ceux en contact avec la glace.
Si les ingrédients gèlent sur le disque de refroidissement, l’agitateur ne peut pas fonctionner
correctement. Pour éviter cela, ne placez des ingrédients dans le bol que lorsque l’agitateur
tourne et laissez l’appareil allumé jusqu’à ce que la glace soit prête.
N’insérez jamais d’objet, par ex. une cuillère, dans le bol pendant que l’appareil fonctionne.
Ne dépassez jamais les quantités indiquées dans les recettes.
-
-
-
-
-
-
-
-
-
-
-
-
FRANÇAIS

Fonction d’arrêt automatique
La sorbetière est dotée d’une fonction de sécurité. Après avoir fonctionné pendant 120 minutes ou
en cas de surcharge, le moteur s’arrête automatiquement.
Champs électromagnétiques (CEM)
Cet appareil Philips est conforme à toutes les normes relatives aux champs électromagnétiques
(CEM). Il répond aux règles de sécurité établies sur la base des connaissances scientiques actuelles
s’il est manipulé correctement et conformément aux instructions de ce mode d’emploi.
Avant utilisation
Congélation du disque de refroidissement
1 Le disque de refroidissement doit être propre et sec.
2 Placez le disque de refroidissement dans le congélateur ou le freezer de façon à ce qu’il
atteigne la température requise de -18 °C (voire inférieure).
La congélation du disque de refroidissement dure entre 18 et 24 heures.
Ne placez aucun objet sur le disque de refroidissement lorsqu’il est en cours de congélation.
3 Rangez le disque de refroidissement avec la base orientée vers le bas dans un sac en plastique
fermé dans le freezer pour éviter l’accumulation de glace. De cette façon, il sera
toujours prêt à l’emploi.
4 Ôtez le disque de refroidissement du freezer après avoir préparé les ingrédients pour la
glace.
Remarque : Vériez toujours que le disque de refroidissement est gelé avant de le placer dans la
sorbetière.
Utilisation de l’appareil
Comment fonctionne la sorbetière ?
La sorbetière est dotée d’un disque de refroidissement qui refroidit rapidement les ingrédients
lorsque l’agitateur tourne. Celui-ci cesse de tourner lorsque la glace est prête.
Remarque : Le disque de refroidissement est rempli d’une solution saline non toxique.
Confection de la glace
1 Préparez les ingrédients nécessaires à la réalisation de la glace dans un bol séparé.
Utilisez de préférence des ingrédients à température réfrigérée.
Remarque : Consultez le livre de recettes fourni séparément pour trouver de délicieuses recettes et de
nombreux conseils.
Remarque : Ne dépassez pas les quantités indiquées dans les recettes, vous risqueriez d’obtenir une
glace plus liquide.
2 Sortez le disque de refroidissement du congélateur et retirez-le du sac en plastique.
Veillez à avoir les mains sèches lorsque vous manipulez le disque de refroidissement.
3 Vériez que le disque est gelé et sans glace.
Le disque de refroidissement est gelé lorsque son contenu a complètement durci.
Pour vérier l’état de congélation, pressez la base du disque de refroidissement avec vos pouces.
Si vous entendez un craquement, cela signie que la congélation n’est pas complètement
terminée.
-
-
FRANÇAIS16

Si une ne pellicule de glace se forme sur le disque de refroidissement, ôtez-la à l’aide
d’une spatule en bois ou en plastique. N’utilisez pas d’objet métallique pour éviter de
l’endommager.
Ne rincez pas le disque de refroidissement gelé à l’eau car cela entraînerait la formation
immédiate d’une épaisse pellicule de glace sur la surface extérieure du disque.
4 Placez le disque de refroidissement gelé dans le bol de la sorbetière (g. 2).
5 Insérez le bord avant du bloc moteur dans le couvercle. (g. 3)
6 Abaissez le bloc moteur jusqu’à ce qu’il s’enclenche (clic) (g. 4).
7 Insérez l’agitateur dans l’orice du bloc moteur (clic) (g. 5).
8 Placez le couvercle et le bloc moteur correctement sur le bol. Faites tourner le couvercle
dans le sens des aiguilles d’une montre jusqu’à ce qu’il s’enclenche (clic) (g. 6).
9 Branchez la che du cordon d’alimentation sur la prise murale pour mettre l’appareil en
marche.
Allumez toujours l’appareil avant de placer les ingrédients dans le bol pour qu’ils ne gèlent pas
immédiatement sur le disque de refroidissement.
10 Versez le mélange d’ingrédients dans la sorbetière via l’orice de remplissage du couvercle.
11 Laissez la sorbetière allumée jusqu’à ce que la glace prenne la consistance adéquate.
Le temps de préparation dépend essentiellement du type de mélange et de la température des
ingrédients. Il faut environ 40 minutes pour faire de la glace traditionnelle et 20 minutes pour de la
glace à l’italienne.
Conseils
N’éteignez pas l’appareil trop tôt. Les ingrédients risqueraient de geler sur le disque de
refroidissement et, si la glace n’est pas prête, l’agitateur ne pourrait plus tourner.
Ne laissez pas la sorbetière fonctionner trop longtemps. Éteignez-la lorsque vous remarquez
que la glace commence à fondre à la surface ou sur les parois du bol.
Il n’est pas possible de confectionner une autre quantité de glace immédiatement car vous
devez de nouveau congeler le disque de refroidissement. Pour pouvoir préparer une autre
quantité sans attendre, vous devez commander un disque supplémentaire.
Après utilisation
1 Pour retirer le couvercle, tirez le bouton de déverrouillage vers vous (1) et tournez le
couvercle dans le sens inverse des aiguilles d’une montre (2) (g. 7).
2 Retirez la glace du bol.
3 Sortez l’agitateur du bloc moteur. (g. 8)
4 Appuyez sur le bouton de déverrouillage et retirez le bloc moteur du couvercle (g. 9).
5 Retirez le disque de refroidissement du bol (g. 10).
Nettoyage
Démontez toujours la sorbetière et nettoyez ses éléments après utilisation.
1 Assurez-vous que l’appareil est débranché.
2 Nettoyez le couvercle (sans le bloc moteur !), l’agitateur et le bol à l’eau chaude savonneuse.
Nettoyez le disque de refroidissement à l’eau tiède savonneuse (max. 40 °C).
Ne nettoyez pas ces éléments au lave-vaisselle !
-
-
-
-
FRANÇAIS 17

3 Nettoyez le bloc moteur avec un chiffon humide.
Ne plongez jamais le bloc moteur dans l’eau et ne le rincez pas sous le robinet.
Remplacement
Les accessoires suivants sont disponibles auprès de votre revendeur :
Couvercle transparent (n° 4822 441 80844)
Agitateur (n° 4822 690 40258)
Disque de refroidissement (n° HR2968 ou n° 4822 511 90025)
Bol (n° 4822 418 40898)
Conseil : Si vous commandez un disque de refroidissement supplémentaire (HR2968), vous pourrez
préparer de la glace en plus grande quantité ou deux parfums différents.
Environnement
Lorsqu’il ne fonctionnera plus, ne jetez pas l’appareil avec les ordures ménagères, mais
déposez-le à un endroit assigné à cet effet, où il pourra être recyclé.Vous contribuerez ainsi à
la protection de l’environnement (g. 11).
Garantie et service
Si vous souhaitez obtenir des informations supplémentaires ou si vous rencontrez un problème,
visitez le site Web de Philips à l’adresse www.philips.com ou contactez le Service Consommateurs
Philips de votre pays (vous trouverez le numéro de téléphone correspondant sur le dépliant de
garantie internationale). S’il n’existe pas de Service Consommateurs Philips dans votre pays,
renseignez-vous auprès de votre revendeur Philips local ou contactez le « Service Department of
Philips Domestic Appliances and Personal Care BV ».
Dépannage
Si vous rencontrez des problèmes avec votre sorbetière et que vous ne parvenez pas à les résoudre
à l’aide des informations ci-dessous, adressez-vous au Centre Service Agréé Philips le plus proche ou
au Service Consommateurs Philips de votre pays.
Problème Cause Solution
L’appareil ne se
met pas en
marche.
Il s’agit d’un problème de
branchement.
Vériez si l’appareil a été correctement
branché. Débranchez le cordon d’alimentation
de la prise secteur, puis rebranchez-le.
Le couvercle n’a pas été
correctement xé au bol. Placez le couvercle et le bloc moteur
correctement sur le bol. Faites tourner le
couvercle dans le sens des aiguilles d’une
montre jusqu’à ce qu’il s’enclenche (clic).
L’agitateur ne
tourne pas.
Vous avez placé le mélange
d’ingrédients dans le bol
avant d’avoir allumé
l’appareil et les ingrédients
ont gelé sur le disque de
refroidissement.
Allumez toujours l’appareil avant de placer les
ingrédients dans le bol.
-
-
-
-
,
FRANÇAIS18

Problème Cause Solution
Ne retirez pas le
disque de
refroidissement
du bol.
Le disque de refroidissement
a gelé au fond et sur les
parois du bol.
Laissez le disque dégivrer et se décoller du
fond et des parois du bol pendant quelques
heures. Pour l’ôter plus rapidement, vous
pouvez verser un peu d’eau tiède dans le bol.
FRANÇAIS 19

20
Introduzione
Congratulazioni per l’acquisto e benvenuti in Philips! Per trarre il massimo vantaggio dall’assistenza
Philips, registrate il vostro prodotto su www.philips.com/welcome.
Descrizione generale (g. 1)
A Gruppo motore
BInterruttore accensione/spegnimento
CRilasciate il pulsante per staccare il gruppo motore dal coperchio
DRilasciate l’interruttore a scorrimento per togliere il coperchio con il gruppo motore dal
contenitore
E Cavo di alimentazione
FCoperchio
GForo di riempimento
HFrusta
IDisco refrigerante
JContenitore
Importante
Prima di utilizzare l’apparecchio, leggete attentamente il presente manuale e conservatelo per
eventuali riferimenti futuri.
Pericolo
Non immergete mai la base motore nell’acqua e non sciacquatela mai sotto l’acqua corrente.
Avviso
Prima di collegare l’apparecchio, vericate che la tensione riportata sulla spina corrisponda alla
tensione disponibile.
Non utilizzate l’apparecchio se la spina, il cavo di alimentazione o l’apparecchio stesso sono
danneggiati.
Nel caso in cui il cavo di alimentazione fosse danneggiato, dovrà essere sostituito presso i centri
autorizzati Philips, i rivenditori specializzati oppure da personale debitamente qualicato, per
evitare situazioni pericolose.
L’apparecchio non è destinato a persone (inclusi bambini) con capacità mentali, siche o
sensoriali ridotte, fatti salvi i casi in cui tali persone abbiano ricevuto assistenza o formazione per
l’uso dell’apparecchio da una persona responsabile della loro sicurezza.
Adottate le dovute precauzioni per evitare che i bambini giochino con l’apparecchio.
Attenzione
Non usate mai accessori o parti di altri produttori o non specicatamente consigliati da Philips.
Nel caso in cui utilizziate detti accessori o parti, la garanzia decade.
L’apparecchio è destinato a uso domestico. Se viene utilizzato impropriamente, per scopi
professionali o semiprofessionali o in maniera non conforme alle istruzioni per l’uso, la garanzia
viene annullata e Philips declina qualsiasi responsabilità per qualsivoglia danni causati.
Nella preparazione del gelato, l’igiene riveste un ruolo fondamentale. Controllate che tutte le
parti della gelatiera siano perfettamente pulite, sopratutto quelle che verranno a contatto con il
composto del gelato.
Se gli ingredienti si congelano sul disco refrigerante, la frusta non funziona correttamente. Per
evitare questo inconveniente, inserite gli ingredienti nel recipiente solo quando la frusta è in
funzione e non spegnete l’apparecchio prima che la gelatiera abbia concluso la preparazione.
non inserite mai oggetti, ad esempio un cucchiaio, nel contenitore mentre l’apparecchio è in
funzione.
Non superate le quantità indicate nelle ricette.
-
-
-
-
-
-
-
-
-
-
-
-
ITALIANO
Other manuals for HR2304
1
Table of contents
Languages:
Other Philips Ice Cream Maker manuals

Philips
Philips HR2305 User manual

Philips
Philips HR2298 User manual

Philips
Philips HR 2305/B User manual

Philips
Philips HR 2303 User manual

Philips
Philips HR 2300 User manual

Philips
Philips HR2305 Quick guide

Philips
Philips HR2305/55 User manual

Philips
Philips HR2305/02 User manual

Philips
Philips HR2304/70 User manual

Philips
Philips HR2305 User manual