Important
◗Always follow basic safety precautions when using electrical
appliances.
◗Read these directions for use carefully before using the appliance
and save them for future reference.
◗Check if the voltage indicated on the bottom of the appliance
corresponds to the mains voltage in your home before you
connect the appliance.
◗Plug the appliance into an earthed wall socket.
◗Position the appliance so that:
- the mains cord does not hang over the edge of a table or
worktop;
- children cannot touch the appliance when it is in use;
- it stands on a flat,stable surface and is surrounded by sufficient
free space.
◗Make sure the mains cord does not come into contact with or too
close to the hot surfaces of the appliance.
◗Put the appliance in a safe place,away from fire hazards such as
curtains.
◗Always preheat the plates before putting any items between them.
◗Unplug the appliance after use.
◗Do not let the appliance operate unattended.
◗Avoid touching the metal parts as they become very hot.
◗Let the appliance cool down completely before changing the
plates,cleaning the appliance or putting it away.
◗Make sure you mount the plates securely when you change them.
◗Never touch the plates with sharp or abrasive items,as this will
damage the non-stick surface.
◗Always clean the appliance after use.
Unplug the appliance and allow it to cool down completely before
removing the plates and cleaning the appliance.
◗Never immerse the appliance in water and prevent water from
entering the appliance.
◗If the mains cord of this appliance is damaged,it must only be
replaced by Philips or a service centre authorised by Philips,as
special tools and/or parts are required.
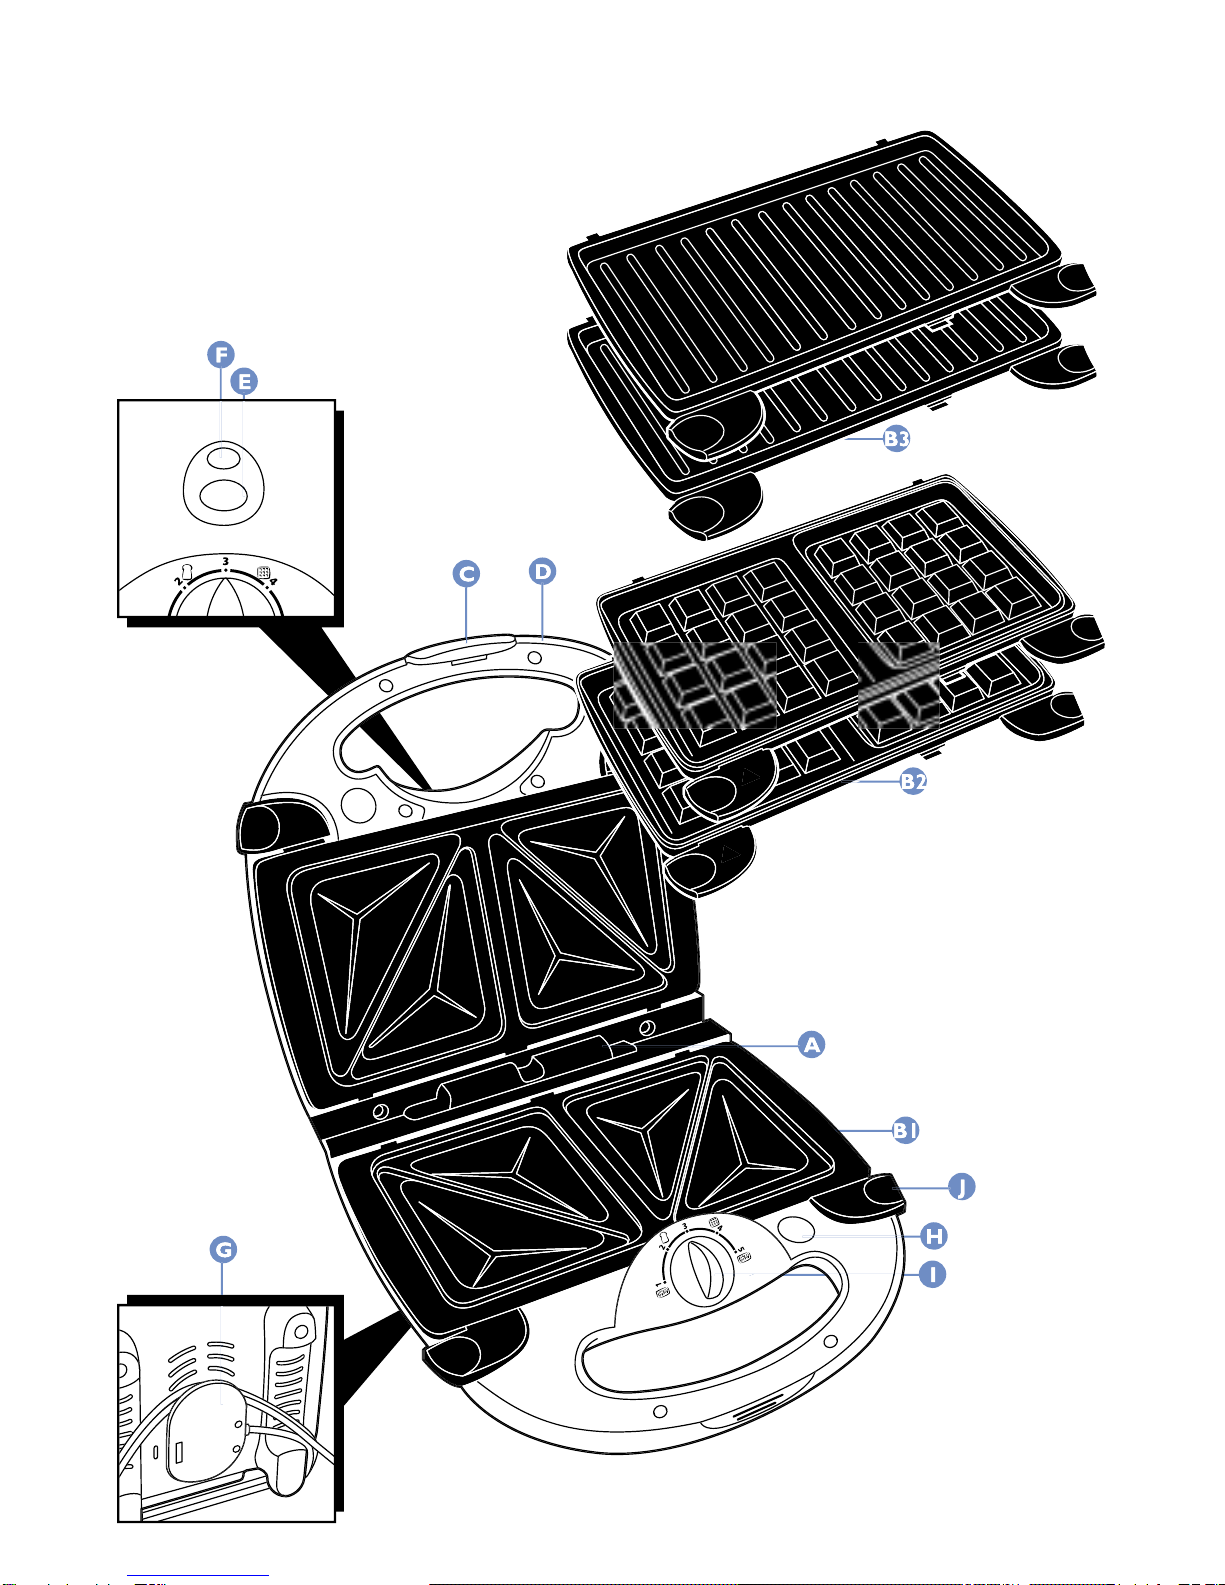
General Description
AVario Lock`
The hinge system automatically adapts to the removable plates that
are put in the appliance.
BRemovable plates (dishwasher-proof) Sandwich plates (B1:cut &
seal and rectangular-shaped, Waffle plates (B2:Belgian and Nordic,
Grilling plates (B3):
- - HD 2420 (Belgian waffle maker,cut & seal sandwich maker,contact
grill).
- - HD 2421 (Belgian waffle maker,rectangular-shape sandwich maker,
contact grill).
ENGLISH6