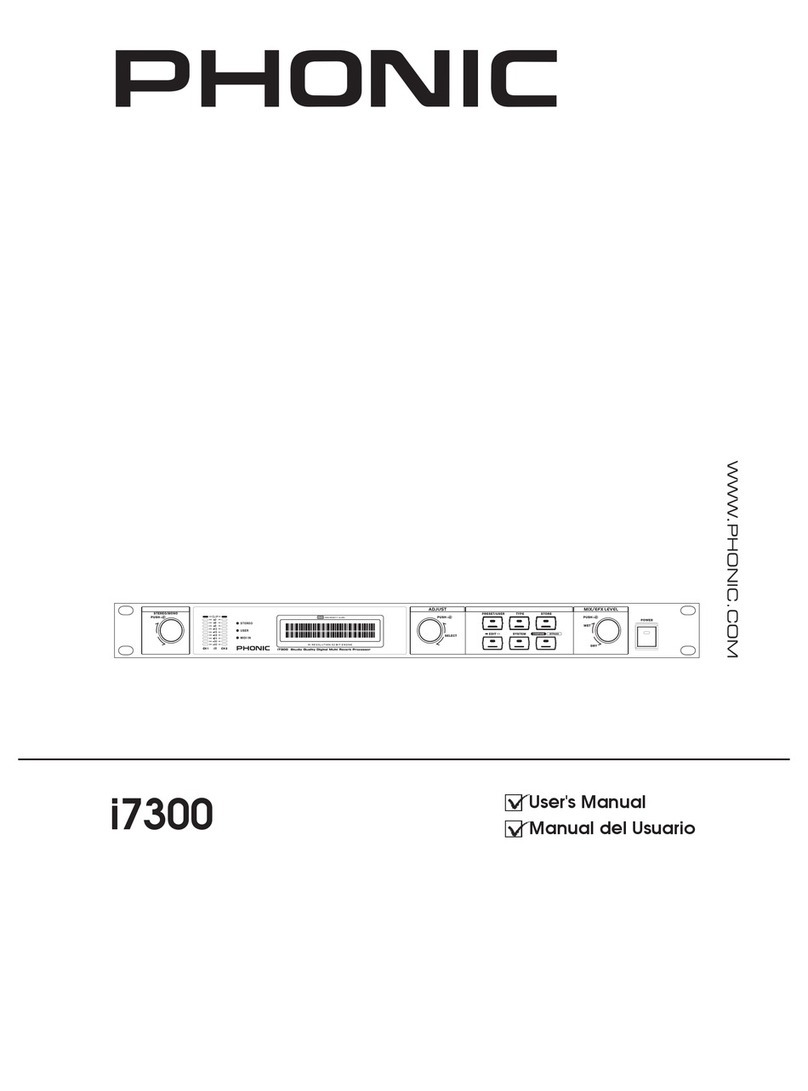
Phonic i7300 ReverbMaster User manual

User’s Manual
Manual del Usuario
使用手册
i7300
ReverbMaster
数字多重效果混响器
English / Español / 简体中文

i7300
ReverbMaster
数字多重效果混响器
CONTENTS CONTENIDO 目录
Phonic preserves the right to improve or alter any information within this document without prior notice
Phonic se reserva el derecho de mejorar o alterar cualquier información provista dentro de este documento sin previo aviso
PHONIC保留不预先通知即可更新本手册的权利
V1.0 12/05/2008
Introduction4
Features4
Preliminary Setup4
Controls, Connections and Displays5
Using The i73008
Using the MIDI Function
10
Editing Presets
11
Specications15
MIDI Data Format16
Preset Tables 45
Applications 46
Introducción 18
Características 18
Conguración preliminaria 18
Controles, conexiones y displays19
Usando i7300 22
Usando función midi 24
Editando presets 25
Especicaciones 29
Formato de dato midi 30
Tablas de preset 45
Aplicaciones 46
简介 32
产品特色 32
初级安装 32
控制,连接,显示 33
产品使用 36
MIDI功能使用 38
编辑预设 39
规格 43
MIDI数据格式 44
预设表 45
应用 46

1. Read these instructions before operating this
apparatus.
2. Keep these instructions for future reference.
3. Heed all warnings to ensure safe operation.
4. Follow all instructions provided in this document.
5. Do not use this apparatus near water or in locations
where condensation may occur.
6. Clean only with dry cloth. Do not use aerosol or liquid
cleaners. Unplug this apparatus before cleaning.
7. Do not block any of the ventilation openings. Install
in accordance with the manufacturer
’
s instructions.
8. Do notinstallnearany heatsources suchas radiators,
heat registers, stoves, or other apparatus (including
.
9. Do not defeat the safety purpose of the polarized or
grounding-type plug.Apolarized plug has two blades
with one wider than the other. A grounding type plug
has two blades and a third grounding prong. The wide
blade or the third prong is provided for your safety. If
the provided plug does not into your outlet, consult
an electrician for replacement of the obsolete outlet.
10. Protect the power cord from being walked on or
pinched particularly at plug, convenience receptacles,
and the point where they exit from the apparatus.
11. Only use attachments/accessories by the
manufacturer.
12. Use only with a cart, stand, tripod, bracket, or
table by the manufacturer, or sold with
the apparatus. When a cart is used, use caution
when moving the cart/apparatus
combination to avoid injury from tip-
over.
13. Unplug this apparatus during lighting
storms or when unused for long
periods of time.
14. Refer all servicing to service personnel.
Servicing is required when the apparatus has been
damaged in any way, such as power-supply cord or
plug is damaged, liquid has been spilled or objects
have fallen into the apparatus, the apparatus has
been exposed to rain or moisture, does not operate
normally, or has been dropped.
IMPORTANT SAFETY INSTRUCTIONS
CAUTION: TO REDUCE THE RISK OF ELECTRIC SHOCK,
DO NOT REMOVE COVER (OR BACK)
NO USER SERVICEABLE PARTS INSIDE
REFER SERVICING TO QUALIFIED PERSONNEL
The lightning flash with arrowhead symbol, within an
equilateral triangle, is intended to alert the user to the
presence of uninsulated
“
dangerous voltage
”
within the
product
’
magnitude to constitute a risk of electric shock to persons.
The exclamation point within an equilateral triangle is in-
tended toalertthe usertothepresenceofimportant operat-
ingandmaintenance (servicing)instructionsinthe literature
accompanying the appliance.
WARNING: To reduce the risk of or electric shock, do
not expose this apparatus to rain or moisture.
CAUTION: Use of controls or adjustments or performance
of procedures other than those may result in
hazardous radiation exposure.
The apparatus shall not be exposed to dripping or splashing and that no objects with liquids, such as vases,
shall be placed on the apparatus. The MAINS plug is used as the disconnect device, the disconnect device shall
remain readily operable.
Warning: the user shall not place this apparatus in the area during the operation so that the mains switch
can be easily accessible.
CAUTION
RISK OF ELECTRIC SHOCK
DO NOT OPEN

4 i7300
INTRODUCTION
Thank you kindly for purchasing another quality Phonic
product which, no doube, will prove to be a valuable
invertment, The i7300 ReverbMaster is a complex, yet
simple machine; complex in that it packs the power to
enhance your adudio in outstanding ways, however
simple enough for any novice audio user to utilize.
The i7300’s controls are few and detailed. The three jog
wheelsandsix control buttonsprovidedgiveeasycontrol
over menus and options, whereas the LCD display gives
you a clear, concise overview of the different functions
the i7300 can perform. The amazing 32-bit DSP reliably
accmplishes the complex task of creating such rened
reverberations on audio that need a little (or a lot of)
avor.
This manual thoroughly details the use and functions of
the i7300 ReverbMaster. Though many people don’t nd
it necessary to read manual, it is strongly recommended
you do read the entire manual careful before storing it in
a convenient and safe place for future reference.
FEATURES
● Dedicated rotary controls and illuminated keys for
quick and easy operation
● Large LCD display
● High headroom and resolution with 24-bit A/D and D/A
converters and 256/512 times oversampling
● Internal 32-bit processor with 44.1 kHz sampling rate
● Ture stereo performance and variable stereo image
parameters
● 100 factory programs and 100 user programs
● Dual 10-segment LED level meters
● Balanced XLR and 1/4” TRS connectors for input and
output
● Operating levels of +4 dBu and -10 dBV independently
selectable for input and output
● Foot switch connector for hands-free program
selection and bypass
● MIDI capability allowing real-time program selection
and dump
PRELIMINARY SETUP
1.The i7300 con be applied to a standard professional
audio rack and will take up one unit of rack space.
2.An appropriate input device should be connected to
the Analog In jacks on the rear of the unit. This would
most commonly be a mixer, but you could also connect
to the device from other signal processors. Your choice,
of course.
3.An appropriate output device should be applied to
the Analog Out jacks, also on the rear of the unit. This
could include, but is not limited to, mixers and multi-track
recorders.
4.The supplied AC power cable should be plugged into
the corresponding port on the rear of the machine and
into a wall-socket of a suitable voltage.
5.Take a break and grab a cup of coffee. Have a biscuit
or two, if you like. You deserve it.
6.Turn the device on using the Power switch located at
the front of the unit.

5i7300
CONTROLS, CONNECTIONS AND DISPLAYS
Front Panel
1. Input Level / Stereo – Mono Control
Turn this control to adjust the sensitivity of the input signal
between +6 and -40 dB (and -∞ dB, effectively muting
the device). Pushing the control down will allow you to
alternate the input signal between onrmal stereo, reverse
stereo, mono left or mono right This control is always
separate from the presets, menaing that recalling a preset
will not change your current input level or mono / stereo
settings.
2. Input Level Meter
The LCD level meter allows you to read the input signal
levelindB,referencedtotheinternaldigitalmaximum.This
will provide an indication as to the amount of headroom
available until the audio reaches the maximum digital
output level and is dynamically clipped. When bypass
mode is activated, this display will change to show the
current input and output level of the audio signal.
3. MIDI In Indicator
The MIDI indicator displays the MIDI signal connection
and delivery status, meaning it will illuminate when MIDI
data is being received by the i7300. For more information
on MIDI operation, please refer to the MIDI section of this
manual.
4. User Indicator
The User Indicator illuminates when a user preset is
currently being used, edited, tested or viewed by the user.
This allows you distingusih between user and factory
presets with ease.
5. Stereo Indicator
The stereo indicator illuminates whenever the i7300 input
is in Stereo Normal or Stereo Reverse mode. This LED
will not illuminate when the input mode is set as Mono
Right or Mono Left.
6. LCD Display
TheLCDtypicallydisplaysdetailsofthecurrentlyseclected
program, basic parameters being edited, as well as a
variety of other information related to the ReverbMaster’s
functions.The LCDScreen is notparticularlyhard tomake
out, but here are some pointers to make it easier to read.
The display has 2 lines: the rst line will generally show
the reverb program type (“R” – Room – “H” – Hall – “P” –
Plate – and “S” – special), followed by the preset number
(a number from 1 to 25) and preset name; whereas the
second line will display any properties being edited, such
as the input level, mix level, reverb parameters, etcetera.
7. Adjust Control
This control is used to scroll through various parameter
options of the i7300. Pushing the control down will allow
youjumpinto programs toeditvarious parameters, aswell
as nalize your selections when all editing is complete.

6 i7300
8. Preset / User Key
The Preset / User ke is used to recall one of the 100
factory presets. Pushing this key a second time will allow
you to recall a preset previously stored in a user preset
position (which is indicated by the small User indicator to
the left of the LCD display). After pushing the preset key
to enter either the Factory Preset or User Preset menus,
you are able to user the Adjust Control to scroll through
the various presets.
9. Type Key
When selecting presets, pressing this key allows you to
select the type of effect program to use: HALL, ROOM,
PLATE, or SPECIAL. Each of these types will have 25
presets to select from.
10. Store Key
The store key is used to save user-modied programs in
one of the 25 user preset slots, as specied by the user.
Simply press the Store key, chose a preset location, edit
the preset name and press the Store key once more to
nalize.
11. Edit Key
PressingtheEditkeywillallowyoutoadjustvariousreverb
properties, to further rene you effect. After pressing th
Edit key, a set of parenthesis will appear around the Pre
option on the bottom line of the LCD display. You can
then use the Adjust Control to scroll to the “Main” and
“Post” options, and press theAdjust Control to enter these
menus. Editing of parameters will be discussed in greater
depth further along in this manual.
12. System Key
Pressing the System key allows you to access the
parameter menus, allowing you to adjust the properties of
various functions, such as Footswitch operation and MIDI
controllability. Pushing the System key will enable you
to scroll through these menus; then pressing the Adjust
control will allow you enter the selected menu and adjust
the parameters.
13. Compare / Bypass key
This key acts as a bypass or compare key, depending
on your current use (as explained later in the manual).
Pushing it will either disable all effects or return you to
your previous effect.
14. Mix / EFX Level Control
This control adjusts the dry/wet mixing ratio between 0
and 100%, as displayed on the bottom line of the LCD
display. Pushing the control allows you to adjust the EFX
Level between 0 and 100%.
15. Power Switch
The power switch allows you to turn the ReverbMaster
on and off.

7i7300
BackPanel
16. Audio Input Connectors
These balanced linput combo connectors (accepting
both XLR and 1/4” TRS jacks) are for the connection of
external devices (such as a mixer or playback feed) to
feed the i7300.
17. Audio Output Connectors
These balanced XLR and 1/4” TRS outputs are for
connecting the i7300 to external devices (such as a mixe
or multi-track recorder) for output of the analog return
signal.
18. Operating Level (In) -10dB / +4dBu
Use this switch to set the input level of the ReverbMaster.
Set at -10dBV for use in conjunction with semi-pro
or consumer level devices or at +4dBu for use with
professional audio gear.
19. Operating Level (Out) -10dB / +4dBu
Usethisswitchto set the outputleveloftheReverbMaster.
Set at -10dBV for use in conjunction with semo-pro
or consumer level devices or at +4dBu for use with
professional audio gear.
20. Foot Switch Connector
Connecting a footswitch to this 1/4” TRS phone jack
allows you to either bypass your current effect, or control
the current preset selection – as specied by the user
– making remote, hands-free control of the ReverbMaster
possible.
21. MIDI Connectors
The ReverbMaster sends and receives MIDI data via
these connectiors. The In connector receives MIDI
signals, where the out connector sends MIDI signals
to MIDI external devices. The Thru, on the other hand,
sents the MIDI control data received by the IN, to another,
parallel MIDI device for daisy chaning of MIDI devices.
22. AC Power Cable Connector and Fuse Holder
Connect ht esuppliedAC power cord to this connector and
insert the cord’s plug into a wall-socket of suitable voltage.
To replace the i7300’s fuse, remove the fuse cover, take
the old fuse out and replace with another fuse, ensuring
it is the same as is needed by the device (as indicated on
the furse holder cover).

8 i7300
Using The i7300
Changing the Input Level
The input level jog wheel should be used to change the
level of input that is being fed into the input ports on the
rear of the i7300. Turning the jog wheel will allow you
to chage the input level between -∞ and 6dB, as will be
displayed on the bottom line of the LCD screen. If, when
changing the input level, the jog wheel is not used for 2
seconds the LCD will revert back to the previous screen.
The input level control is also independent of preset
programs (meaning the input level is not changed when
recalling a preset).
Alternating Between Input Modes
To change he input type, simply press the input level jog
wheel; this will allow you to alternate between stereo
normal, stereo reverse, mono right and mono left. When
stereo normal or stereo reverse are selected the Stereo
indicator to the left of the LCD display will illuminate (this
indicator will. Of course, not illuminate when in either
mono mode). The input mode of the i7300, like the input
level, is in no way changed when recalling a preset.
Selecting a Preset
To select a preset, rst press the Preset / User key on the
front of the i7300; this will enter you into a preset select
mode, allowing you to use the Adjust control to select a
preset. Pressing the Type key will allow you to switch to
different effect types (Hall, Room, Plate and Special).
Each of which has 25 presets that can be browsed by
using the Adjust control. Each preset is individually
named to describe the effect, and is applied automatically
when scrolled to. Pushing the Adjust control will select
the effect and exit the Preset selection mode of the
ReverbMaster.
Selecting User Presets
Userpresetsarechosenbasicallythesamewayasfactory
ones. First press the Preset / User ke twice, after which
the User LED to the left of the LCD display will illuminate.
From here on, using the Type key and the Adjust control
will allow you to peruse the user presets in the exact
same way as selecting factory presets. When you have
found the preset most suitable for what you need, simply
press the Adjust control down to nalize.
Changing the Mix Level
Use the Mix Level jog wheel to change the ratio of
processed to unprocessed audio (or the saturation of
processed audio over unprocessed). When ou turn
this jog wheel the LCE will show “Wet dry mix” and a
percentage between 0 and 100 on the bottom line (at 0,
or dry, the audio remains completely unprocessed). If the
jog wheel remains unused for 3 seconds the screen will
revert back to whatever was there before using the mix
level jog wheel.
Changing The EFX Level
To edit the Efx level, rst push the Mix Level jog wheel
down twice, then turn to edit between 0 and 100 percent;
effectively changing the total effect output level. If the jog
wheel remains unused of 3 seconds the screen will revert
back to the previous screen.

9i7300
Setting The Footswitch
Changing Function
First, press the System button; the rst option that appears
will be “Foot Switch.” Simply turn the Adjust Control to
alternate the function of the foot switch between “Program
select” and “Bypass”modes. You selection is applied
automatically.
Changing Effect Selection Properties
When the footswitch’s functions is set to ‘Program select,’
pushing to System key twice will bring up a menu that
allows you to alter the properties of this preset selection.
Byturning toAdjustControlyou canchange the footswitch
program select “destination” program, between 1 to 100.
This means you can use the foot switch to jump through
then start all over again.
Compare / Bypass
TheCompare/Bypasskey,locatedontheReverbMaster’s
fron panel, generally acts as a bypass key, stopping any
effects from being applied to the audio. Pressing it a
second time will deactivate bypass mode and return to
your chosen effect. When the bypass key is pressed the
key’s imbedded LED will illuminate.
You can also activate a bypass on each of the separate
stages of Reverb (The Pre, the Post and the Main Effect
– as shown in the diagram below). By simply pressing the
edit key and disabling them through their corresponding
menus (ie. Turning them Off). The bypass can be
deactivated by turning them on once more.
When editing effects, the Compare/Bypass key acts as a
Compare Key, allowing you to revert back to the original
preset used before starting to edit the effect – enabling
you to hear the difference in the two effects. Pushing the
button a second time will revert you back to the edited
program.
Storing Edited Presets
First of all, complete all your alterations to your effect
in “Edit” mode (changing reverb time, delay or other
corresponding options). Then, to store, simply press the
store key, where you will then be allowed to select which
preset slot you wish to ll. Use the Adjust Control to scroll
to the preset slot you wish to use and press the control
down to conrm. This will then move you to the name edit
section, where you can edit the individual letters of the
preset name. The curser is located underneath the letters
of the title. Use the Adjust Control to scroll to any letter
you wish to change, press the control down to select, and
use the control once more to scroll through the various
letters and characters that can be used. Pressing the
control once more will nalize, and you can then move
to the next letter you want to edit. Pressing the Store key
again will complete the saving process.
Auto Saving Settings
The i7300 will automatically save changes to any
parameters you may set (presets, reverb edits, MIDI
settings, etcetera), and keep them – even after the power
is turned off.This ensures none of your settings are lost in
the event of power outages.

10 i7300
Using The MIDI Function
Selecting A MIDI Channel
MIDI signals can easily be sent and received by the i7300
– it is simply a case of knowing which channel you want
to send and receive through. Pressing the System key
until the screen displays “Midi Rx Ch” on the top line, and
then turning theAdjust Control, will allow you to select the
channel at which the i7300 will accept MIDI signals (you
can also turn MIDI off through this option). If unsure what
Channel your MIDI device uses, selecting OMNI will allow
the i7300 to receive MIDI signals on all channels. This is
the preferable channel setting when only a single MIDI
device is used.
Daisy Chaining MIDI Signals
By simply plugging a MIDI cable into the Thru port on the
rear panel of the i7300, and then into another MIDI In,
you have affectively produced a MIDI daisy chain. The
signal that is sent to then MIDI In on the rst device is then
conveyed through to the second. This can, of course, be
done multiple times by connecting the MIDI In of a third
– and so on. However, daisy chaining of numerous MIDI
devices will eventually cause degradation of the MIDI
data.
Bulk Dumping of MIDI Data
MIDIdumpingallowsyoutostoreyourpresetsandsettings
on a Personal Computer and recall them at a later time.
To do so, you rst need MIDI Connector on your PC (or a
MIDI to USB adaptor of some sort), as will as a program
that will receive bulk dumps on your personal computer.
After preparing your PC to receive a MIDI dump, press
the System button a few times until the “Midi dump” option
appears on screen . Turn theAdjust control to the left until
“Transmit?” appears on the bottom line. Provided your PC
is ready, pressing the Adjust Control in should transmit
your current settings and presets to the PC. Do not under
any circumstances remove or detach any cords, shut down
your computer or turn off the ReverbMaster while MIDI
data is being transmitted. Once your dump is completed,
you can simply continue to use the i7300 as you were prior
to your MIDI dump.
Retrieving Dumped MIDI Data
So you learnt how to dump MIDI data, and you have
successfullyaccomplishedaMIDIdump.Congratulations!
Now you have to get it back again. To do so, return to
the “Midi dump” option by pressing the System button.
Then turn theAdjust Control until you reach the “Receive”
option. Press theAdjust Control in and you’re ready to go.
Open your MIDI dump le and use the MIDI sent option
of your PC’s MIDI program to sent the data back to the
waiting i7300.
Please Note: under no circumstances should you
ever sent edited or corrupted MIDI dumps back to the
ReverbMaster, as the end result will be quit undesirable.
When re-transmitting data to the i7300 please ensure it
was in no way altered between the initial dump and the
return-dump, and that the initial dump was successful.
Altering the MIDI Program Map
When you have certain external MIDI devices connected
to the MIDI in of the i7300, these devise can be used to
change the preset programs of the i7300 while in use.
Yes, similar to a foot switch’s function; however more
specic, in that any program selected through the MIDI
device can be instantaneously recalled on the i7300,
without switching through all presets.
To change the program mapping of MIDI, push to System
button a few times until the title “Midi program table” is
displayed on screen, and then turn the Adjust Control to
change the MIDI program number. After nding the MIDI
program number you wish to change, push the Adjust
Control down and turn to alter the preset used (you can
choose from the 100 factory presets and the 100 user
dened presets).
11i7300
Editing presets
Editing the built in preset program and creating your own, unique reverb is not particularly difcult, if you know what you’r
doing; and this is where you will nd out how to do it. First of all, keey in moind that each program is made up of a Pre EFX,
a Post EFX and the Main reverberation (as indicated in the ow chart below). Recalling any factory preset (or user dened
preset). Recalls the settings of these three stages of reverberation for that particular program. They can be changed by
rst pressing the Edit key.
When pressed, you can then use the Adjust Control to scroll left and right to the Pre, Main and Post menu options. Press
theAdjust Control in to enter any of these menus (you can
jump out to the main menu at any time by pressing the Edit
key once again). Once within the menus, you can once
again use the Adjust Control to scroll left and right through
the different editable parameters. Again, press the Adjust
Control to alter the parameters.
Main Effect Parameters
Below are the main reberb parameters, all of which can be edited or rened to create your own, distinct reverb program.
Editable Property Range Description
RevTime 0.05 to 10.00 sec Deterimines the over-all reverberation time
PreDly 0 to 200 ms Allows users to activate a delay before the main reverb activates
Er/Lev 0 to 100 This helps you adjust the Early reections level (the initial reection that
leads the main reverb)
HeRatio 0.01 to 1.00 Determines the ratio for hi-frequency parts of the reverb effect
LoRatio -90 to 24 Determines the ratio for Low-frequency parts of the reberb effect
HPF 0 Hz to 6 kHz Determines the frequency at which a high pass lter will activate
LPF 34 Hz to 10.0 kHz Allows you to dene at which frequency a low pass lter willactivate
Density 0 to 100 Alters the density of the reverberation
ST Img -100 to 100 Allows you to widen and narrow the stereo image of reverberation

12 i7300
Pre and Post Effects
One the following few pages you will be able to nd the various types of Pre and Post effects you are able to apply to help
create your reverb, as well as their editable parameters. Please note that, for the exception of the pre ad post EQ. the
following effect types can be set as either a pre or a post effect, however not as both the pre and post simultaneously.
Operating levels of +4 dBu and -10 dBV independently selectable for input
Editable Property Range Description
Stereo Link On or Off Activating Stereo Link enables all changes to either channel being applied to
the other
L1 Gain -16 to +16 dB Enables you to increase or decrease the level of the left EQ band 1 at the
selected frequency
L2 Gain -16 to +16 dB Enables you to increase or decrease the level of the left EQ band 2 at the
selected frequency
L1 Fq (Frequency) 20 Hz to 20 kHz Used to select to frequency at which the audio will be cut or boosted for left EQ
band 1
L2 Fq (Frequency) 20 Hz to 20 kHz Used to select to frequency at which the audio will be cut or boosted for left EQ
band 2
L1 Q 0.1 to 10 Determines the bandwidth of left EQ band 1
L2 Q 0.1 to 10 Determines the bandwidth of left EQ band 2
R1 Gain -16 to +16 dB Enables you to increase or decrease the level of the right EQ band 1 at the
selected frequency
R2 Gain -16 to +16 dB Enables you to increase or decrease the level of the right EQ band 2 at the
selected frequency
R1 Fq (Frequency) 20 Hz to 20 kHz Used to select the frequency at which the audio will be cut or boosted for Right
EQ band 1
R2 Fq (Frequency) 20 Hz to 20 kHz Used to select the frequency at which the audio will be cut or boosted for Right
EQ band 2
R1 Q 0.1 to 10 Determines the bandwidth of left EQ band 1
R2 Q 0.1 to 10 Determines the bandwidth of left EQ band 2
Flanger
Editable Property Range Description
LFO 0.1 to 10 Low Frequency Oscillator (ie. It oscillates low frequencies)
Pre Delay 1 to 200 ms Enables a delay before the Flanger effect is activated
Depth 0 to 100 Allows users to adjust the depth of modulation
Phase 0 to 180° Used to adjust the phasing of left and right channels
LPF 34 Hz to 10 kHz Determines the frequency at which a low pass lter will activate
Balance 0 to 100 50 being the center, this allows users to adjust the balance of the Flanger
reverb
Mode Typ Sine, Trg or Saw Determines the type of curve used to modulate the anger
FB -100 to 100 Created feedback with positive or negative phasing

13i7300
Chorus
Editable Property Range Description
LFO 0.1 to 10 Low Frequency Oscillator (ie. Oscillates low frequencies)
Pre Delay 1 to 200 ms Enalbes a delay before the Chorus effect is activated
Depth 0 to 100 Allows users to adjust the depth of modulation
Phase 0 to 180° Used to adjust the phasing of left and right channels
LPF 34 Hz to 10 kHz Determaines the frequency at which a low pass lter will activate
Balance 0 to 100 50 being the center, this allows users to adjust the balance of the Chorus
reverb
Mode Typ Sine, Trg or Saw Determaines the type of curve used to modulate the Chorus reverb
Phaser
Editable Property Range Description
LFO 0.1 to 10 Low Frequency Oscillator (ie, it oscillates low frequencies)
Depth 0 to 100 Allows users to adjust the depth of modulation
Delay 0.0 to 5.0 Enables a delay before the Phaser effect is activated
Phase 0 to 180° Used to adjust the phasing of left and right channels
FB -100 to 100 Creates feedback with positive or negative phasing
Mod Typ Sine, Trg or Saw Allows users to select waveform used for low frequency oscillation
Balance 0 to 100 50 being the center, this allows users to adjust the balance of the Phaser
reverb
Pan
Editable Property Range Description
Speed 0.1 to 10 Hz Allows you to select the pan speed between 0.1 and 10 Hz
Profundidad 0 a 100 Determines the depth of the pan modulation
Type I <--> D, D-->I, I-->D Allows you to selecty from the 3 types of panning
Mod Typ Sine, Trg or Saw Allows users to select waveform used for low frequency oscillation
Delay
Editable Property Range Description
L Dly 0.00 to 2.55 Allows you to choose the delay time of the left channel
R Dly 0.00 to 2.55 Allows you to choose the delay time of the right channel
C Dly 0.00 to 2.55 Allows you to choose the delay time of a center channel
FB Dly 0.00 to 2.55 Allows you to choose a feedback delay time
L Lvl 0 to 100 Allows you to choose the delay level of the left channel
R Lvl 0 to 100 Allows you to choose the delay level of the right channel
C Lvl 0 to 100 Allows you to choose the delay level of a center channel
FB 0 to 100 Allows you to create feedback at a percentage between 0 and 100

14 i7300
Tremo
Editable Property Range Description
Speed 0.1 to 10 Hz Determines the frequency of modulation
Depth 0 to 100 Allows users to adjust the depth of modulation
Phase 0 to 180° Used to adjust the phasing of left and right channels
Mod Typ Sine, Trg or Saw Allows users to select waveform used for low frequecny oscillation
Gate
Editable Property Range Description
St/Link On or Off Stereo Link mode allows you to edit both the left and right gates
simultaneously
L Thrs -50 to 0 Determines the threshold of the left gate
LAtck 0 to 200 Allows you to select the attach rate of the left gate
L Rele 0.01 to 2.55 Determines the release rate of the left gate
L Hold 0.00 to 2.55 Allows users to dene the time that the gate will remain open
L Range -INF, -50 to 0 Allows users to dene the range of the left gate
R Thrs -50 to 0 Determines the threshold of the right gate
R Atck 0 to 200 Allows you to select the attach rate of the right gate
R Rele 0.01 to 2.55 Determines the release rate of the right gate
R Hold 0.00 to 2.55 Allows user to dene the time that the gate will remain open
R Range -INF, -50 to 0 Allows users to dene the range of the right gate
Compressor
Editable Property Range Description
St/Link On or Off Stereo Link mode allows you to edit both the left and right gates
simultaneously
L Thrs -50 to 0 Determines the threshold of the left compressor
LAtck 0 to 200 Allows you to select the attach rate of the left compressor
L Rele 0.01 to 2.55 Determines the release rate of the left compressor
L Ratio 1.0 to 10.0, -INF Allows you to dene the ratio of compression that will be applied
R Thrs -50 to 0 Determines the threshold of the right compressor
R Atck 0 to 200 Allows you to select the attack rate of the right compressor
R Rele 0.01 to 2.55 Determines the release rate of the right compressor
R Ratio 1.0 to 10.0, -INF Allows you to dene the ratio of compression that will be applied

15i7300
SPECIFICATIONS
Input
Connectors balanced Combo (XLR and 1/4” TRS)
Nominal Level +4 dB or -10 dB (selected by rear panel switch)
Impedance 50 K Ohms
Nominal Level +16 dBu
Output
connectors Balanced XLR and 1/4” TRS
Nominal Level +4 dB o -10 dB (selected by rear panel switch)
Impedance 500 Ohms
Max. Output Level +16 dBu
System
Frequency Response 20 Hz to 20 KHz +/-0.5 dB
Dynamic Range 96 dB typical
THD 0.003 % typ. @ +4 dBu, 1KHz
Noise < -80 dB
Crosstalk < -80 dB
Digital Processing
Converters 24 Bits AD/DA and 32/40 bits Sigma-Delta DSP, 256/512-times Oversampling
Sampling Frequency 44.1 KHz
Program Memory
Memory Areas Program (read-only), User (read/write)
Memory conguration Four program types (HALL, ROOM, PLATE, SPECIAL), each with 25 preset programs per
type and 25 user set programs per type.
Front Panel
Switches Preset/User, Type, Bypass/compare, Store, Setut, Edit
Rotary Controls Input Level, Adjust, Mix Level / EFX Level
Display Digital-LCD Display, Stereo-LED, User-LED, MIDI IN-LED
Rear Panel
Connectors Input L/R (COMBO), Output L/R (XLR) (1/4” Phone Jack), Foot Switch (1/4” phone jack),
MIDI interface 5-Pin-DIN-Socket IN/OUT/THRU
Power Requirements
USA / Canada ~120 VAC, 60 Hz
U.K. / Australia ~240 VAC, 50 Hz
Europe ~230 VAC, 50 Hz
Fuse 100-120 VAC: 1 A, 200-240 VAC: 500mA
Power consumption 20 Watts
Mains Connection Standard IEC receptacle
Physical
Dimensions (H x W x D) 51.3 x 482 x 207.6 mm (2.02” x 18.98” x 8.17”)
Weight 2.5 kg (5.5 lbs)

16 i7300
Midi Data Format
System Exclusive Bulk Dumps
When a System Exclusive Bulk Dump is performed on the Phonic i7300, the data is transmitted as follows.
Legend: d = data content
c = checksum


18 i7300
INTRODUCCIÓN
Gracias por su compra de otro producto de calidad
de Phonic que sin duda será una inversión valiosa. El
i7300 ReverbMaster es un equipo complejo pero simple;
complejo porque llena de potencia para alzar su audio en
maneras excepcionales, sin embargo, es sucientemente
simple para cualquier usuario de audio novato para
utilizar.
Los controles de i7300 son pocos y detallados. Las
tres jog wheels y seis botones de control proporcionan
un control fácil sobre los menues y opciones, en tanto
el display LCD le da una vista general clara, concisa
de las diferentes funciones que i7300 puede hacer. El
asombroso DSP de 32 bits logra la compleja tarea de
crear tales reverberaciones renadas en el audio que
necesita un poco (o mucho) de sabor.
Este manual detalla el uso y las funciones de
i7300 ReverbMaster. Aunque a mucha gente no le
parece necesario leer los manuales, se le sugiere
encarecidamente que lea el manual completo
cuidadosamente antes de guardarlo en un lugar
conveniente y seguro para referencia futura.
CARACTERISTICAS
● Controles giratorios dedicados y teclas iluminadas
para operación rápida y fácil
● Display LCD grande
● Gran capacidad y resolución con convertidores A/D y
D/A de 24 bits y sobremuetreo de 256/512 veces
● Procesador interno de 32 bits con índice de muestreo
44.1 kHz
● Verdadero funcionamiento de estéreo y parámetros
de imagen de estéreo variable
● 100 programas de fábrica y 100 programas de
usuario
● Medidores de nivel LED duales de 10 segmentos
● Conectores balanceados XLR y 1/4” TRS para entrada
y salida
● Niveles de operación de +4 dBu y -10 dBV
independientemente seleccionable para entrada y
salida
● Conector de interruptor de pedal para selección de
programa con mano libre y bypass
● Capacidad MIDI permite selección y deshecho de
programa en tiempo real
CONFIGURACIÓN PRELIMINARIA
1. El i7300 puede ser aplicado a un rack de audio
profesional estándar y ocupará una unidad de espacio
rack.
2. Un dispositivo de entrada apropiado debería ser
conectado a jacks de Entrada Análoga en la parte
trasera de la unidad. Lo más común sería una
mezcladora, pero usted también podría conectar al
dispositivo desde otros procesadores de señal. Es su
elección por supuesto.
3. Un dispositivo de salida apropiado debería ser apli-
cado a jacks de Salida Análoga, también en la parte
trasera de la unidad. Ésto podría incluir, pero no
limitado, a mezcladoras y grabadoras de multi-pistas.
4. El cable de energía AC suministrado debería ser
enchufado dentro del puerto correspondiente en la
parte trasera de equipo y dentro de una toma corriente
de pared de voltaje compatible.
5. Tome un descanso, sirvase una taza de café, una o
dos galletas, si quiere. Usted lo merece!
6.Enciendaeldispositivousandoelinterruptorde Energía
ubicado en la parte frontal de la unidad.

19i7300
CONTROLES, CONEXIONES Y DISPLAYS
Panel Frontal
1. Control de Nivel de Entrada / Estéreo-Mono
Gire este control para ajustar la sensibilidad de la señal
de entrada entre +6 y -40 dB (y -∞dB, enmudece
efectivamente el dispositivo). Pulsando el control le
permitirá alternar la señal de entrada entre estéreo normal,
estéreo reverso, mono izquierdo o mono derecho. Este
control está siempre separado de los presets, signica
que llamar un preset no cambiará su nivel de entrada
actual o conguraciones de mono/estéreo.
2. Medidor de Nivel de Entrada
El medidor de nivel LED le permite leer el nivel de la señal
de entrada en dB, referenciado al máximo digital interno.
Proveerá una indicación en cuanto a la cantidad de la
capacidad disponible hasta que el audio llega a nivel
máximo de salida digital y es dinámicamente recortado.
Cuando el modo bypass está activado, este display
cambiará para mostrar el nivel actual de entrada y salida
de la señal de audio.
3. Indicador de Entrada MIDI
El indicador MIDI muestra la conexión de señal MIDI y
el estado de entrega, signica que se iluminará cuando
el dato MIDI está siendo recibido por i7300. Para más
información sobre la operación MIDI, por favor consulte
la sección MIDI de este manual.
4. Indicador de Usuario
El Indicador del Usuario se ilumina cuando un preset del
usuario está siendo utilizado, editado, testeado o viendo
por el usuario actualmente. Le permite distinguir entre
presets de usuario y de fábrica con facilidad.
5. Indicador de Estéreo
El indicador de estéreo se ilumina cuando la entrada de
i7300 está en modo Estéreo Normal o Estéreo Reverso.
Este LED no se iluminará cuando el modo de entrada
está seteado como Mono Derecho o Mono Izquierdo.
6. Display LCD
El LCD muestra generalmente detalles de programa
seleccionado actualmente, parámetros básicos siendo
editados y también una variedad de otra información
relacionada con las funciones de ReverbMaster. La
Pantalla LCD no es particularmente difícil de entender,
pero hay algunos indicadores que lo hace más fácil de
leer.Laexhibición tiene 2líneas:la primera líneamostrará
generalmente el tipo de programa de reverberación (“R”-
Room- “H”-Hall- “P”-Plate y “S”-Special), seguido por el
número de preset (de 1 a 25) y el nombre de preset; en
tanto la segunda línea mostrará cualquier propiedad que
está siendo editada, tales como nivel de entrada, nivel de
mezcla, parámetros de reverberación, etc.
7. Control de Ajuste
Este control es usado para desplazarse por varias
opciones de parámetro de i7300. Al pulsar el control le
permitirásaltar aprogramasparaeditarvariosparámetros
y nalizar sus selecciones cuando todas las ediciones
están completas.
Tipo de preset
Número de preset Nombre de preset
Menues

20 i7300
8. Tecla Preset / Usuario
La tecla Preset/Usuario es usada para llamar a uno
de los 100 presets de fábrica. Pulsando esta tecla una
segunda vez le permitirá llamar a un preset almacenado
previamente en una posición de preset de usuario (que
es indicado por el pequeño indicador de Usuario a la
izquierda de LCD display). Luego de pulsar la tecla preset
para ingresar a los menues de Preset de Fábrica o Preset
del Usuario, usted puede usar el Control de Ajuste para
desplazarse por los varios presets.
9. Tecla de Tipo
Cuando se selecciona presets, presionando esta tecla le
permitirá seleccionar el tipo de programa de efecto para
usar: HALL, ROOM, PLATE o SPECIAL. Cada uno de
estos tipos tendrá 25 presets para seleccionar.
10. Tecla de Almacenamiento
La tecla de almacenamiento es usada para guardar
programas modicados por el usuario en uno de los 25
espacios de preset de usuario, como especicado por el
usuario.Simplemente presione lateclaAlmacenar(Store),
elija la ubicación de preset, edite el nombre de psreset
y presione la tecla Almacenar(Store) una vez más para
nalizar.
11. Tecla de Editar
Al presionar la tecla Editar (Edit) le permitirá ajustar
varias propiedades de reverberación, para renar más
su efecto. Luego de presionar la tecla Editar, un set de
paréntesis aparecerá cerca de la opción Pre en la línea
inferior de display LCD. Usted puede entonces usar el
Control deAjuste para desplazarse a las opciones “Main”
y “Post” y, presione el Control de Ajuste para ingresar a
estos menues. La edición de los parámetros será tratada
con mayor profundidad a lo largo de este manual.
12. Tecla de Sistema
Al presionar la tecla de Sistema le permite acceder a
menues de parámetro, dejandole ajustar las propiedades
delasvariasfunciones,talescomooperacióndeinterruptor
de pedal y controlabilidad de MIDI. Pulsando la tecla de
Sistemalepermitirá desplazarseporestos menues; luego
presionando el control de Ajuste le permitirá ingresar al
menú seleccionado y ajustar los parámetros.
13. Tecla de Comparación / Bypass
Esta tecla actúa como una tecla de bypass o de
comparación, dependiendo de su uso actual (como
se explica más adelante en este manual). Pulsandola
desactivará todos los efectos o retorna a su efecto
previo.
14. Control de Nivel de Mezcla / EFX
Este control ajusta la proporción de mezcla seca/mojada
entre 0 y 100%, como se muestra en la línea inferior de
display LCD. Pulsando el control le permite ajustar el
Nivel EFX entre 0 y 100%.
15. Interruptor de Energía
El interruptor de energía le permite encender y apagar el
ReverbMaster.
Other manuals for i7300 ReverbMaster
2
Table of contents
Languages:
Other Phonic Recording Equipment manuals

Phonic
Phonic SupraCurve A6600 User manual

Phonic
Phonic i2600 User manual

Phonic
Phonic FIREFLY 302 USB User manual

Phonic
Phonic DFX 2000 User manual

Phonic
Phonic A6600B User manual

Phonic
Phonic MQ3300 User manual

Phonic
Phonic MICRO VI User manual

Phonic
Phonic DFX256 User manual

Phonic
Phonic FIREFLY 302 USB User manual

Phonic
Phonic i7300 ReverbMaster User manual