For detailed specifications, product tutorials and more, please visit www.photoflex.com®
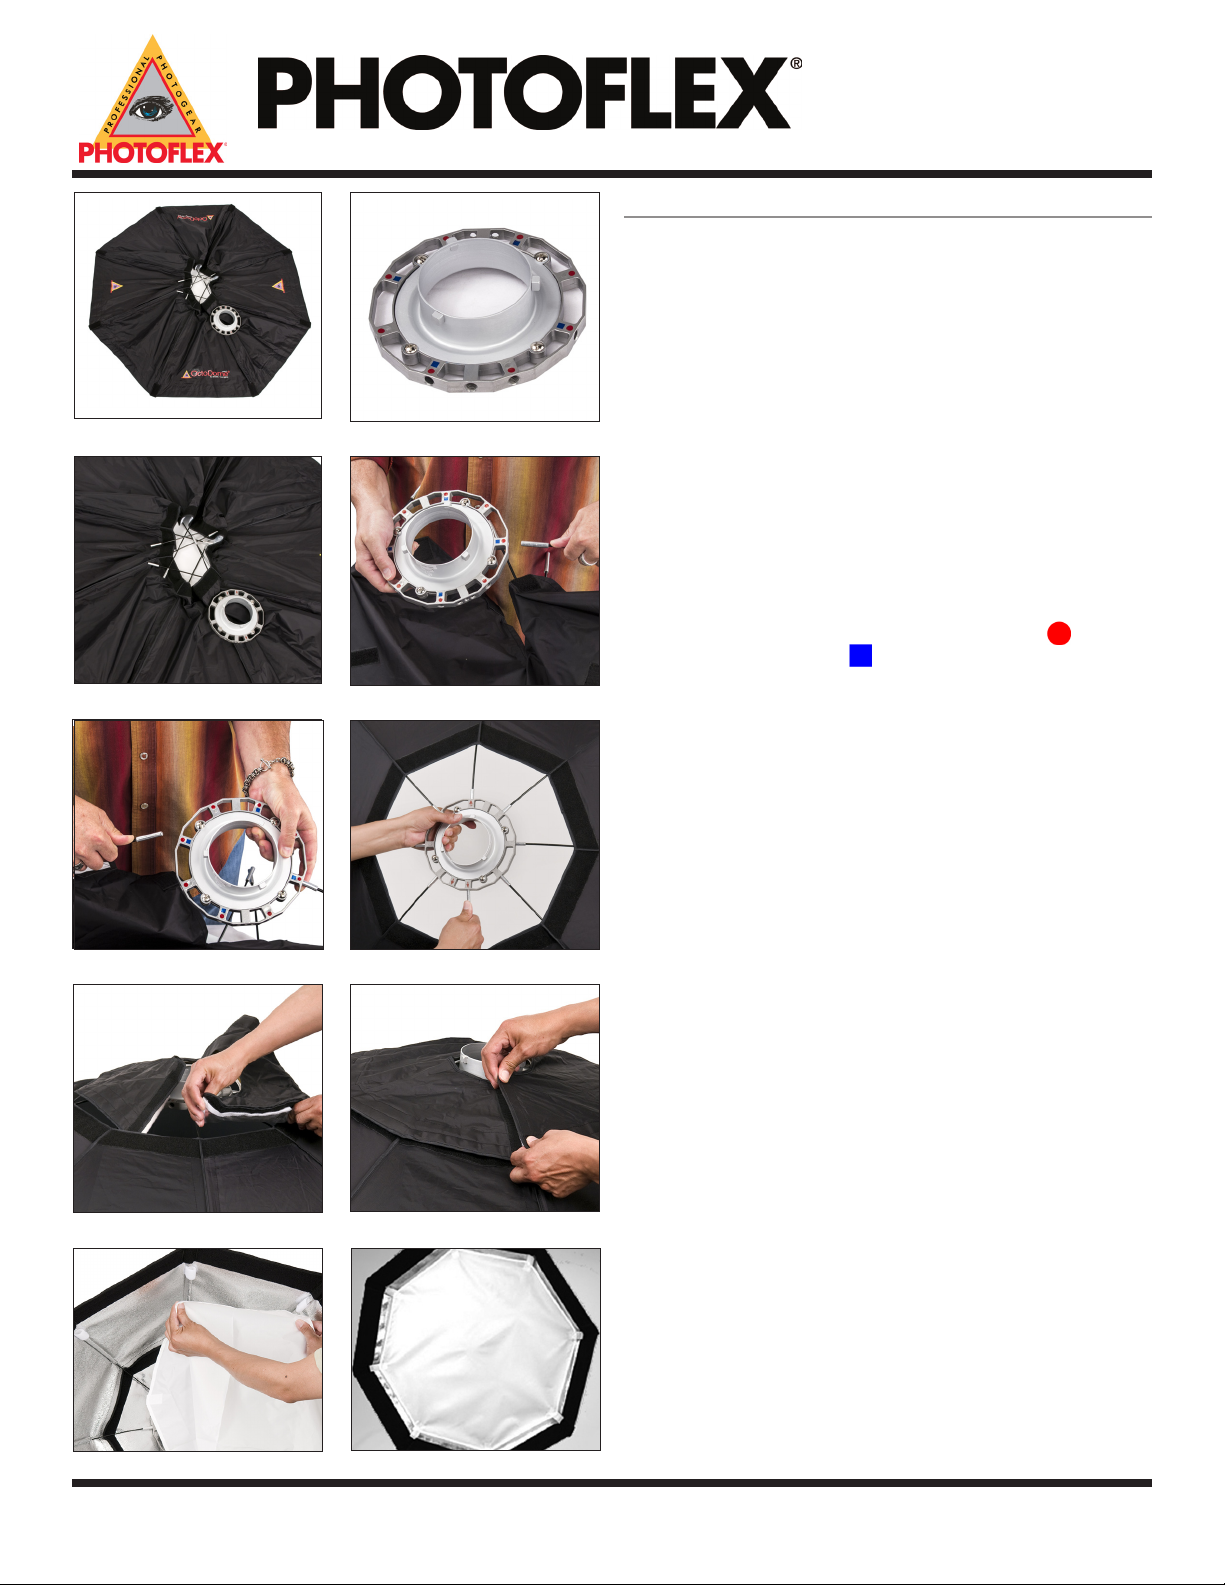
Figure 2.Figure 1.
Figure 3.
Figure 6.Figure 5.
Figure 4.
Figure 7. Figure 8.
Figure 9.
OctoDome® White
Before assembling your OctoDome sobox, make sure all components
are present. You will need:
• OctoDome sobox
• Photoex OctoConnector (to t your strobe light - sold separately)
• Eight rods
• Rear cowling patch
• Inner bae
• Face diuser
NOTE: In most cases, the sobox connector is designed to connect with
your light head in the same manner as your light head’s accessories. Make
sure your OctoConnector is the correct one designed for your light.
Assemble the Sobox to the Connector
Figure 1. Place softbox face down on a flat, clean surface.
Figure 2. The connector has nine rod receptacle holes, three of which
are tapped. Current model OctoConnectors use circle icons ( ) for
OctoDomes and squares icons ( ) for rectangular Softboxes. Use the
circle icons for your Octodome.
Figure 3. Posion connector at the center of the sobox. The connector
front (with the rounded screw heads) should face away from the
sobox and the connector back (with the bolt nuts) should face into the
sobox. Fig. 3
Inserng rods into the connector
NOTE: Two of the holes used in the OctoConnector are tapped.
Figure 4. Insert the rst rod.
Figure 5. Insert the second rod into the hole diagonally opposite the
rst hole.
Figure 6. Insert the remaining rods
Figure 7. Posion the rear patch assembly over the corresponding
Velcro® on the rear of the OctoDome.
Figure 8. Press the cowling assembly in place around the rear of the sobox.
Installing the inner bae
Figure 9. The inner bae has Velcro® tabs at each corner. These tabs
connect to the Velcro loops on each inner seam of the OctoDome.
Connect each corner of the inner bae to each Velcro loop inside the
OctoDome.
Figure 10. The bae is installed.
Figure 10.
Instrucons for OctoDome®: White Item #s: XT-ODXS 870458 / XT-ODS 870359 / XT-ODM 870362 / XT-ODL 870366


