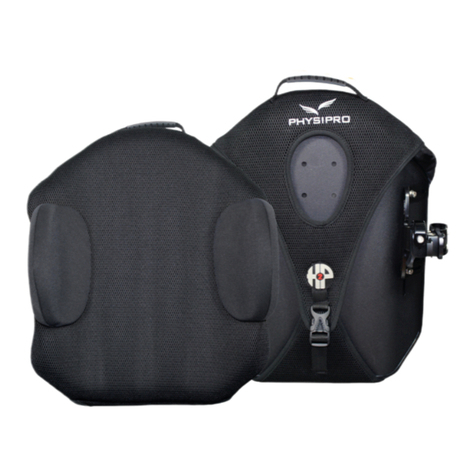
Physipro HP2 back User manual

Owners manual
This manual contains important informations
about this product. Please hand to the user
upon delivery.
Manuel d’utilisation
Ce livret contient d’importantes informations
relatives à ce produit. Merci de remettre à
l’utilisateur final lors de la livraison.

Table of content / Table des matières
INTRODUCTION - ENGLISH ............................................... 3
HP2TM BACKREST ........................................................................................... 4
SPECIFICATIONS ............................................................................................ 4
RECOMMENDATIONS .................................................................................. 6
WARNINGS ...................................................................................................... 7
INSTALLATION ............................................................................................... 8
ADJUSTMENT S............................................................................................. 12
MAINTENANCE ............................................................................................. 19
WARRANTY ................................................................................................... 21
INTRODUCTION – FRANÇAIS ..........................................
23
DOSSIER HP2MC ............................................................................................ 24
SPÉCIFICATIONS ........................................................................................... 24
RECOMMANDATIONS ............................................................................... 26
AVERTISSEMENTS ...................................................................................... 27
INSTALLATION ............................................................................................. 28
AJUSTEMENT S............................................................................................. 32
ENTRETIEN ..................................................................................................... 39
GARANTIE ...................................................................................................... 41
2
Extension plate (Option) ..................................................... 11
Height Adjustment ............................................................... 12
Depth Adjustment ............................................................... 13
Tilt Adjustment ...................................................................... 15
LATERAL SUPPORTS (Option) .................................................................. 16
Adjustable & Foldable and adjustable ........................... 16
Contour ..................................................................................... 18
Plaque d'extension plate (Option) ................................... 31
Ajuster la hauteur .................................................................. 32
Ajuster la profondeur ........................................................... 33
Ajuster l'inclinaison du dossier ......................................... 35
APPUIS-THORACIQUES (Option) .......................................................... 36
Réglables et Rabattables et réglables ............................. 36
Contour ...................................................................................... 38

November 2022
INTRODUCTION - ENGLISH
Physipro Inc. is proud to count you among its customers and would like to thank
you for the confidence you have shown by purchasing our product.
This user manual was created to provide you with all the information needed
to allow you to use our product in a safe and optimal way. For all adjustments
and settings, we strongly recommend you contact your distributor.
Physipro Inc., relieves itself of all liability should physical injury or property
damage occur due to the lack of maintenance or misuse of our product, or from
modifications made to the product without the prior written consent of
Physipro Inc.
For Physipro Inc., your satisfaction is our highest priority.
PRODUCT INFORMATION
Date of purchase:
Supplier:
Address:
Telephone:
The product presented in this manual may not be an exact representation of
your product. However, the instructions provided in this manual are still valid.
Physipro Inc. reserves the right to modify or change this manual without notice.
Owner’s manual
3

CONVENTIONAL BACKREST
The Conventional rigid modular backrest is custom-made for each client using
their anthropometric measurements. The Conventional backrest helps improve
posture by preventing pelvic tilt. The lateral supports increase the user stability
and balance and can be used in an effort to control spinal scoliosis. The
backrest is attached to the backpost with a system of hooks and brackets that
allow height, depth and angle adjustments. The Conventional rigid modular
backrest provides postural correction and comfort.
Available in adult and pediatric models.
This item meets the requirements of California 116 & 117, NFPA 701, CE marking
and NF EN1021-1, EN1021-2 norms.
SPECIFICATIONS
Back plate
Aluminium or Plastic
Standard backrest padding
Plastazote, Medium density memory foam and urethane
Mounting hardware
Hook and Bracket system
Conventional Backrest
4
1
5
2
3
4
1. Mounting bracket
2. Swing-away stabilizer
3. Mounting hook
(2 or 5 adjustment holes)
4. Fixed stabilizer
5. Bracket anchor

Owner’s manual
5
RECOMMENDATIONS
To ensure your backrest provides optimal protection and comfort and
to extend your product lifespan, the following precautions should be
applied.
•Before use, it is important to verify the quality and condition of the
backrest components, please refer to Maintenance guide in section
Maintenance, page 12.
•Physipro Inc. backrest are reserved exclusively for use on mobility aids
(manual or power wheelchairs).
•Always install backrest with the provided mounting hardware.
•Never push or lift wheelchair with backrest, doing so may cause the
backrest to detach from the wheelchair and can result in injury or
damage.
•Before installation, make sure the backrest is compatible with the
wheelchair’s dimensions.
•Never place a towel, a blanket, a folded bed sheet or any other
material between the user and the backrest, this will diminish the
backrest efficiency and increase the risk of developing skin lesions.
•It is preferable to wear clothes made of cotton, that are not too tight and do
not have seams on pressure points.
•Before use, let the backrest get to room temperature to limit
discomfort caused by excessively hot or cold surfaces.
•Remove any foreign object (crumbs, debris, tubing, etc.) from
backrest surface.
•Clean on a regular basis and visually inspect all components of the
cushion periodically.
•It is recommended to consult your therapist in the month following the
installation of a new cushion to make sure it is efficient.
November 2022

6
WARNINGS
Consult a healthcare professional: Physipro Inc. recommends that a health
care professional such as a doctor or therapist, experienced in seating
and positioning, be consulted to determine, and install the required seating
system and make any necessary adjustments.
Center of gravity: Installing a backrest on a wheelchair may affect the center
of gravity of the wheelchair and may cause the wheelchair to tip backwards,
potentially resulting in injury. To ensure optimal stability of your wheelchair after
the addition of a new backrest, always assess for the potential need for anti-tippers
or amputee axle adapter brackets to be added or adjusted to increase stability.
Backrest dimensions: The dimensions of the backrest must be adapted to
the user and the wheelchair, if not, the backrest’s benefits will be reduced or
eliminated.
Backrest and cover compatibility: The backrest cover must be well-fitted and
used as directed in this manual to prevent the formation of skin lesions. An
oversized or undersized cover will reduce or eliminate the effectiveness of the
backrest and can reduce stability.
Environment: Avoid exposing foam to fluids or moisture for prolonged periods.
Avoid exposing the backrest to extreme cold or heat. Never place backrest near
open flame.
Instability/Fall risk: Never place other products or materials (except those
specified in this manual) between the user and the backrest or underneath the
backrest, doing so, will cause instability and increase the risk of injury from a fall.
Positioning of backrest: Always refer to the orientation indicators, located on
the backrest and the cover, to properly position backrest on wheelchair. Proper
positioning is essential to ensure maximum comfort and pressure relief.
Skin inspection: Backrest should be tested before prolonged use. To avoid the
appearance of skin redness due to pressure points, Physipro Inc. recommends
shifting your weight as frequently as possible and performing a pressure relief
technique at least once every two (2) hours. You should regularly check (at least
once a day) for skin redness especially around bony prominences. If skin redness
or discoloration develops, discontinue use of the cushion. If discoloration does
not disappear within thirty (30) minutes consult a Healthcare professional
immediately. Be aware that no backrest can substitute the need for proper skin
hygiene, a balanced diet and frequent position changes.
Transport: Crash tests have not been conducted on these products and even if
the mobility aid in which it is installed has obtained the ISO-717619, it will not be
maintained.
Conventional Backrest

Owner’s manual
7
INSTALLATION
Please read all the following instructions before beginning installation. The
steps required to properly install the Conventional backrest must be
followed in the order that they are listed.
1 - Installing the mounting brackets on the back plate
1.
2.
3.
Firmly press mounting bracket A
to the back plate.
Place bracket anchor B over the
mounting bracket A.
Insert screw C through washer D,
bracket anchor B and back plate
and then tighten nut E firmly.
Product should be as shown:
A E
D B
C
Note: It is important to align and level
the brackets on left and right side,
both horizontally and vertically.
November 2022

8
2 - Installing the mounting hooks on the brackets
1. Align backrest mounting hook A to mounting bracket B and determine
the desired mounting depth.
2. Insert M5 screws C through the appropriate adjustment hole of the
mounting hook and the bracket and then place washers D and nuts E
on screws C.
3. Tighten nuts E firmly.
4. Repeat process 1 to 3 for all four mounting hooks.
B A
E C
D Product should be as shown:
D
E
Conventional Backrest

Owner’s manual
9
3 - Installing the fixed stabilizers
1. Loosen M6 clamping screws A of
each stabilizer B.
2. Place stabilizers B on the
backposts at the desired height.
3. Reinsert M6 screws A and firmly
tighten nuts C on each stabilizer B.
Aligned stabilizer Misaligned stabilizers
A
B
C
B
C
A
November 2022

4 - Installing the swing-away stabilizers
10
C
A
B
1. Loosen M5 screw A to extend
2. Place stabilizers on the backposts
at desired height.
A
3. Tighten M5 screw A to secure clamps B
and C.
Note – Like the fixed stabilizers, it is
important to align and level the swing-
away stabilizers, both horizontally and
vertically.
4. Loosen screws D and pivot
the stabilizers outwards
before installing the
back plate.
Product
should be as
shown:
D
Conventional Backrest
clamps B and C.

Owner’s manual
11
5 - Installing the back plate
1. Place the mounting hooks A
on the backposts.
A
A
A
A
2. Slide back plate downward
till mounting hooks A rest
on stabilizers B and C.
3. Pivot the swing-away stabilizers C
inwards and tighten screws D to
secure back plate in place.
November 2022
C
D
D
C
B
B
C
C

MAINTENANCE
Regular cleaning eliminates the accumulation of dirt and grime and may help
extend the life of your backrest. It is recommended to visually inspect the
backrest during the cleaning process.
Maintenance Guide
Upon receiving your backrest, it is important to complete all the inspections
listed in the Maintenance Guide to ensure the proper function and condition of
the backrest and mounting hardware.
Checklist Weekly Montly
Backrest
•Inspect components for rust or
damage.
•Make sure the backrest is not
deformed. X
Hardware
•Verify the solidity and condition
of mounting hardware.
•Ensure swing -away stabilizers
operates properly. X
Cleaning the outer cover:
1. Remove cover from backrest and fasten the zipper.
2. Machine wash in cold water on the gentle cycle or hand wash with a mild
detergent.
3. Allow to air dry completely.
4. Reinstall cover on the foam base.
WARNING
Do not iron.
Laterals
•Make sure that the laterals are
fastened properly.
•Inspect components for rust or
damage.
X
X
X
X
12
Conventional Backrest

Cleaning the back plate: The aluminum or plastic back plate can be
cleaned with warm water and a mild liquid detergent.
No other maintenance is required.
Cleaning the backrest padding:
1. Remove outer cover and incontinence cover, if necessary.
2. Wipe foam padding lightly with a damp cloth, without soap or detergent.
3. Use a clean dry cloth to gently press on padding to absorb excess moisture,
then let air dry completely.
4. Reinstall cover(s) on the backrest.
WARNINGS
Do not use soap.
Do not submerge in water.
Do not use washer or dryer to clean
the backrest padding.
Never store backrest in direct sunlight or expose to excessive humidity
or heat.
Never place backrest near sharp objects or in an area where it may be
struck.
Storage
Backrest must be stored in a dry and secure area.
WARNINGS
Life span
The estimated life span of your backrest is three (3) years.
Disposal of Medical Devices
Do not burn or throw away medical devices outside of designated areas.
13
Owner’s manual
November 2022

14
Conventional Backrest
WARRANTY
The warranty periods for the parts and components of the Conventional Backrest
are as stated: Backrest: Twenty-four (24) months
Lateral supports : Twelve (12) months
Outer cover: Six (6) months
This limited warranty covers defects in material and workmanship on all the
standard or optional parts and components of this product, from the date of
shipment, for the duration stated above.
Parts and components that are replaced or repaired under one of these warranties
will remain subject to the warranty for the remainder of the warranty period. Physipro
Inc. agrees to repair or replace, free of charge, any defective part or component
for the full duration of the warranty period.
This warranty does not apply to:
a)
Products that were misused, neglected or have not been maintained and stored in
accordance with the recommendations of the manufacturer.
b)
Products that were intentionally or accidentally altered, or products that have been
damaged through repairs or modifications made wi thout the prior written consent of
Physipro Inc. or o f an authorized retailer.
c)
Normal wea r and tear or damages caused by the user such as punctures, tears, or burns.
Warranty service
If a defect is detected during the warranty period, please contact the retailer from whom you
purchased your Physipro Inc. product as soon possible. Please refrain from using your product
until an inspection has been made by a qualified technician.
In the event you do not receive satisfactory warranty service, please write directly to Physipro
Inc. at the address listed below or send us an e-mail at order@physipro.com, please include
the retailer’s name and address, a brief description of the defect, the invoice date, and the
products serial number, if applicable. DO NOT RETURN product prior to receiving a written
return authorization from Physipro Inc.
The defective unit or parts must be returned for warranty inspection within thirty (30) days of
the return authorization date at the following address:
Physipro Inc.
370, 10th Avenue South, Sherbrooke, Quebec, J1G 2R7
Exclusions and limitations
Compliance with the safety precautions and recommendations mentioned in this manual is
crucial to avoid injury to the user or other persons. Inadequate or inappropriate adjustments
will increase the risk of accident. It is important to thoroughly read the manual before making
any adjustments. Physipro Inc. will not be held responsible for bodily injury or property
damage caused by misuse or incorrect adjustments made to its product by an unqualified
person.
Physipro Inc. disclaims all liability for damages that occur during transportation or are the
result of situations beyond its control.
The foregoing warranty is exclusive and in lieu of all other expressed warranties.

INTRODUCTION – FRANÇAIS
Physipro Inc. est fier de vous compter parmi ses clients et tient à vous remercier
particulièrement pour la confiance que vous lui démontrez en vous procurant l’un
de ses produits.
Le présent manuel d’utilisation a été conçu pour vous permettre d’utiliser votre
produit en toute sécurité et de façon optimale. Pour tous les ajustements et
réglages nécessaires, Physipro Inc. vous demande de vous adresser
systématiquement à votre distributeur.
Physipro Inc. se dégage de toute responsabilité relative aux dommages corporels
ou matériels résultant d’un mauvais usage, d’un manque de précaution dans
l’utilisation de ses produits ou d’une modification apportée sans son
consentement écrit.
Pour Physipro Inc., votre satisfaction demeurera toujours une priorité.
INFORMATIONS SUR LE PRODUIT
Date d’achat : _______________________________________________________
Distributeur : _______________________________________________________
Adresse : __________________________________________________________
Téléphone: ________________________________________________________
Il se peut que le produit présenté dans le présent manuel ne soit
pas une représentation exacte du produit que vous avez en main.
Cependant, les instructions fournies dans le présent manuel sont néanmoins
valides pour votre produit.
Physipro Inc. se réserve le droit de modifier ce manuel sans préavis.
15
Manuel d’utilisation
Novembre 2022

16
DOSSIER CONVENTIONNEL
Le dossier modulaire rigide Conventionnel est fabriqué sur mesure pour chaque
client à partir de ses mesures anthropométriques. Ce dossier contribue à
améliorer la posture en prévenant la bascule du bassin. Les supports latéraux
augmentent la stabilité et l'équilibre de l'utilisateur et peuvent être utilisés dans
le but de contrôler la scoliose. Le dossier est fixé au montant du dossier à l'aide
d'un système de crochets et d'équerres qui permettent de régler la hauteur, la
profondeur et l'angle. Le dossier Conventionnel vous permet d’obtenir la
correction posturale et le confort recherchés.
Disponible en modèles adulte et pédiatrique.
Cet article répond aux exigences California 116 & 117, NFPA701 et aux normes
NF EN1021-1, EN1021-2 et CE.
SPÉCIFICATIONS
Plaque de dossier
Aluminium ou plastique
Mousse standard
Plastazote, mousse mémoire médium et uréthane
Quincaillerie de fixation
Système de crochets et d'équerres
1
5
2
3
4
1. Équerre
2. Stabilisateur rabattable
3. Crochet d’ancrage
(2 ou 5 trous d'ajustement)
4. Stabilisateur fixed
5. Ancrage d'équerre
Dossier Conventionnel

17
RECOMMANDATIONS
Pour assurer une protection et un confort optimal et pour prolonger la durée
de vie du produit, les précautions ci-dessous doivent être appliquées :
•Avant utilisation, il est important de vérifier la qualité et la condition des
composantes du dossier, référez-vous à la liste de vérification de la section
Entretien, page 30;
•Les dossiers de Physipro Inc. sont réservés exclusivement à l’utilisation sur
une aide technique à la mobilité (fauteuil à propulsion manuelle ou
électrique);
•Utiliser toujours la quincaillerie fournis pour l’installation du dossier;
•N’utilisez pas le dossier pour pousser ou soulever le fauteuil. Une utilisation
inadéquate peut provoquer le détachement imprévu du dossier du
fauteuil, ce qui pourrait provoquer des blessures graves à l’usager ainsi
qu’endommager le fauteuil;
•Avant l’installation, vérifier la compatibilité dimensionnelle du dossier et de la
largeur du fauteuil roulant;
•Ne pas intercaler de serviette, drap plié ou toute autre matériel entre l’usager et
le dossier, les performances du dossier pourraient en être réduites ou
annulées et le risque de lésions cutanées pourrait augmenter;
•Des vêtements en coton, peu serrés et si possible sans coutures sur les zones
d’appuis sont préférables;
•Avant utilisation, laisser le dossier à température ambiante pour éviter un
inconfort dû à la chaleur ou le froid;
•Veiller également à l’absence de tout corps étranger (miettes, débris,
tubulures, etc.) sur la surface du dossier;
•Nettoyer régulièrement et inspecter périodiquement la condition des
composantes du dossier.
•Il est recommandé de consulter votre thérapeute dans le mois suivant
l’installation d’un nouveau dossier pour s’assurer de son efficacité
Manuel d’utilisation
Novembre 2022

AVERTISSEMENTS
Consulter un professionnel de la santé : Physipro Inc. recommande de
consulter un professionnel de la santé, tel qu’un médecin ou
un ergothérapeute, expérimenté dans l’assise et le positionnement,
afin de déterminer et d’installer le système d’assise requis et de
procéder aux ajustements nécessaires.
Centre de gravité : Installer un nouveau cousin sur un fauteuil roulant
risque de changer le centre de gravité de celui-ci, pouvant ainsi entraîner un
risque de blessure. Toujours vérifier si des dispositifs d’anti-
basculement ou d’adaptateurs d’essieux pour amputés doivent être
ajoutés ou ajustés pour assurer la stabilité du fauteuil.
Dimension du dossier : Il est important que le dossier soit d’une grandeur
adaptée pour l’usager et son fauteuil, sans quoi, les bénéfices du dossier
peuvent être réduits ou éliminés.
Correspondance dossier et housse : Le dossier et sa housse doivent
être compatibles au niveau de leur dimension et doivent être utilisés tel
que décrit dans ce manuel. Un manque de compatibilité entre la housse
et le dossier pourrait diminuer ou annuler les performances du dossier et
le risque de lésions cutanées pourrait augmenter. L’utilisateur
pourrait également se retrouver dans une position instable et/ou chuter.
Environnement : Éviter les contacts humides prolongés avec la mousse.
Éviter d’exposer le dossier au froid ou à la chaleur extrêmes. Ne jamais
placer près d’une flamme nue.
Instabilité/risque de chute : Ne pas placer d’autres produits ou
matériaux (sauf tel qu’indiqué dans ce manuel) sous votre dossier ou
entre l’usager et le dossier. L’utilisateur pourrait se retrouver dans une
position instable et/ou chuter.
Positionnement : Toujours vérifier et positionner le dossier selon
l’indication de l’orientation inscrit sur le dossier et la housse. Le bon
positionnement du dossier est essentiel pour assurer un confort maximal
et un soulagement de la pression.
Transport : Les tests de collision n’ont pas été effectués sur ce dossier et
même si l’aide technique à la mobilité sur laquelle il est installé a
obtenu ISO-717619, l’ISO ne sera pas maintenue.
Vérification de la peau : Le dossier doit être essayé avant tout usage
prolongé. Afin d’éviter l’apparition de rougeurs dues à des points de
pression, nous vous conseillons d’effectuer des petits changements de
position aussi souvent que possible. Il est également nécessaire de vérifier
régulièrement (au moins une fois par jour) si des rougeurs apparaissent sur
votre peau, notamment autour des protubérances osseuses et dans la zone
axillaire. Si des rougeurs ou une décoloration de la peau est observé,
arrêtez l'usage du dossier immédiatement. Si la décoloration ne disparaît
pas dans les trente (30) minutes, consultez un professionnel de la santé
immédiatement. Soyez-conscient qu’aucun dossier ne saurait être substitué
à une bonne hygiène de la peau, un régime alimentaire adapté et un
changement fréquent de position.
18
Dossier Conventionnel

19
Manuel d’utilisation
Novembre 2022
INSTALLATION
Les étapes suivantes expliquent comment procéder à l’installation complète du
dossier Conventionnel. Il est conseillé de suivre les étapes dans l’ordre indiqué.
1 - Installer les équerres sur la plaque de dossier
1.
2.
3.
Bien appuyer l’équerre A sur la
plaque de dossier;
Déposer l’ancrage d’équerre B
sur l’équerre A;
Insérez la vis C avec la rondelle D
dans l'ancrage d'équerre B et la
plaque de dossier et serrer la vis
avec l'écrou E.
Voici ce que vous devriez obtenir :
A E
D B
C
Note: Il est très important d’aligner le
côté droit et le gauche au même
niveau. De plus, vérifier que
l’alignement vertical est le même de
chaque côté.

20
Dossier Conventionnel
2 - Installer les crochets d'ancrage sur les équerres
1. Bien aligner le crochet d’ancrage A contre l’équerre B et déterminer la
profondeur désirée;
2. Insérer les vis M5 C dans les trous d’ajustement appropriés du crochet
d'ancrage et de l'équerre et assembler avec les rondelles D et l’écrous E;
3. Serrez fermement les écrous E;
4. Répéter les opérations 1 à 3 pour les quatre crochets d'ancrage.
B A
E C
D Voici ce que vous devriez obtenir :
D
E
Other manuals for HP2 back
1
Table of contents
Languages:
Other Physipro Medical Equipment manuals
Popular Medical Equipment manuals by other brands

Getinge
Getinge Arjohuntleigh Nimbus 3 Professional Instructions for use

Mettler Electronics
Mettler Electronics Sonicator 730 Maintenance manual

Pressalit Care
Pressalit Care R1100 Mounting instruction

Denas MS
Denas MS DENAS-T operating manual

bort medical
bort medical ActiveColor quick guide

AccuVein
AccuVein AV400 user manual