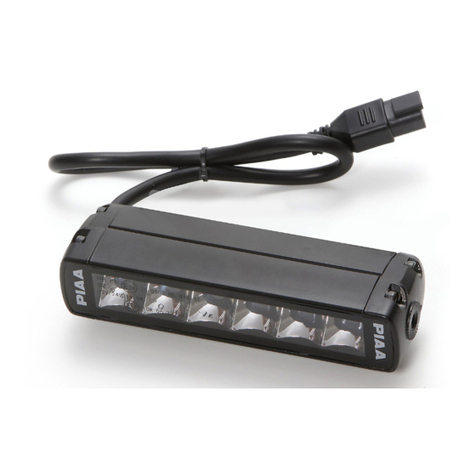
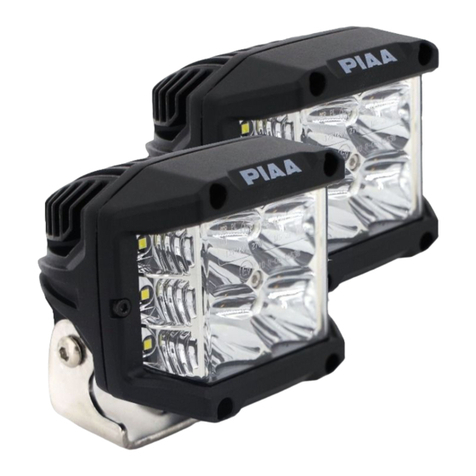
Piaa LP550 User manual

-1-
PKI-0037-4
LP550/LP560
InstallationInstructions
ThankyouverymuchforpurchasingPIAAproduct.
Pleasereadthisentiremanualbeforeinstallationanduseofthisproduct.
Pleasereadthecautionarypointsbeforeinstallationtoensuresafeutilizationoftheproduct.
●Thelampandtheswitchharnessareintendedforautomobileuse.Donotuseforanyotherpurpose.
●Thislampisintendedforuseinrain(dayornight),duringfoggyorsnowyconditionswherevisibilityishampered.
Donotuseduringnormaldrivingconditions.
●Donotoperatetheswitchwhiledriving.
●Ifthelampiskeptonwhentheengineisnotrunning,itmaydrainthebattery.
●Makesurethelampisinstalledsecurelybeforedrivingthevehicle.Ifaproblemisfound,fixitimmediately.
●Checkforanyloosescrewsthatholdthelampinplacebeforedriving.Ifyoufindanyloosescrewsorbolts(ifabracketis
used),tightenthemsecurely.Ifyounoticealoosepartwhiledriving,inspectthesectionimmediatelyandmakethenecessary
adjustments.
●AvoidrepeatedlyturningthelampoffandonasitmayreducetheoveralllifeoftheLED.
●Somevehiclesproduceahighvoltageelectricchargewhentheengineisstarted.Avoidloadingextravoltagetolampsby
turningtheswitchoffwhenyoustartengine.
● Avoidneedlessdisassemblyofthelamportheswitchharnessasitmaycauseittofail.
●Ifthelampand/ortheswitchharnessisremovedandsetasideforsafekeeping,wipeawayalldustorgrimeandstoreina
placefreeofmoisture.
●Ifthelensiscrackedordamagedinanyway,verifywhetherthereisanydamagetotheharness.Ifthereisanydamageto
thecordcovering,replaceitimmediately.
●Avoidinjurywhenreplacingtheharnessandtheswitchharness.Pleasedisposeofitasanon-combustibleitem.
※ The and marksindicatedinthismanualare
cautionary pointsrelatedtotheinstallationoftheproduct.
Toensuresafeandsecureinstallationoftheproduct,pleasefollowthesepointsclosely.
Touser … Pleasekeepthismanualandareceiptwiththenameoftheshop
whereyouboughtit.
Whengivingthisproducttoathirdparty,alwaysincludethismanual
togetherwiththeproduct.
Toshopownersinstallingtheproduct … Afterinstallationoftheproduct,makesurethecustomerisprovided
withthisowner'smanual.
●Thelampbecomesveryhotwhenturnedon.Whenparkingyourcarnearflammableitemssuchasdriedleaves,turnoffthe
lampasitmaycauseafire.
●Donotlookdirectlyintothelightforlongperiods.Doingsomaycauseeyeirritationorvisualimpairment.

-2-
PKI-0037-4
●Inorderforthelamptoperformatitsfullpotential,usetherelayharnessesmanufacturedbyPIAA.
●Allworkproceduresshouldbecarriedoutinalocationwithadequatespace.Placetheshiftleverinneutralorintheparking
position.Turnofftheengineandsettheparkingbrake.
●Makesuretheenginecompartmentisadequatelycoolbeforestartingwork.Donotbeginworkifenginepartssuchasradiator,
oil-coolerorturbopartsarestillhot.
●Donotaddadditionalholestothemainbodyofthelamp.Also,donotapplyadhesivesorstickerstothelampparts.
●Donotmodifythelampharnessortheswitchharnessinanyway.Suchmodificationsmaycauseittooverheatorshort.Insome
cases,itmaycausethevehicletocatchfire.PIAAwillnotbeliablefordamagecausedbysuchmodifications.
●Whenremovingthebatteryterminals,donottouchthe(-)and(+)terminalssimultaneously.Anelectricalshockmayoccur.
Wearrubbergloveswhencarryingoutsuchworkprocedures.
●Makesurethe(-)and(+)terminalsdonotmakecontactwithmetal.Itcanbeextremelydangerousifashortoccurs.
●Makesureallboltsaretightlysecure.Ifthereareanylooseboltstightenthemaccordingly.
●Afterinstallingthelamp,adjustthelampsothebeamshinesatleast40minfrontofthevehicle.Also,adjustthelampalittle
towardtheleftsothatitdoesnotshinedirectlyintotheeyesoftheopposingdriverofavehicle.(astrafficlawsstipulate-
refertop.6foradjustmentprocedures)
●Afterinstallingthelamp,makesuretheheadlamps,wipersandhornareworkingnormally.
●Whenthebatteryterminalisremoved,memoryrelatedtotheclock,radio,audiosystemetc,willbeaffected.Afterallwork
proceduresarecompleted,resettotheoriginalsettings.(Foradjustmentproceduresrefertoyourcar'sinstructionmanual)
Pleasereadtheinstallationproceduresthoroughlybeforehand.
●Beforeyoubeginalwaysremovethe(-)and(+)terminals.
Alwaysremovethe(-)terminalfirstandmakesureashortdoesnotoccur.
●Whenremovingthebatteryterminals,alwaysturnthekeytoOFFandremoveit.Turnallotherelectricalunitsoffsuchas
thelightswitch.
●Whenremovingthebatteryterminals,ifacord(foranelectricalunit)isconnected,windalengthofvinyltapearoundthe
(-)and(+)terminalstoclearlyidentifythem.
●Verifythe(+)terminal(white)andearth(black)beforeconnecting.
●Donotobtain(+)voltagefromthealternator.
●Obtainthe(+)currentnecessaryfortheswitchfromthe(+)currentusedforthelightswitch.
(Donotusethesamecurrentusedforacomputer,radiooraudiosystem)
●Installtheswitchharnessinapositionwhereitwillnotmakecontactwithhightemperaturesurfacessuchastheengine,
radiatororenginecompartment.
●Arrangetheswitchharnesssothatitdoesnotmakecontactwithmovingparts.
●Donotplacetheswitchharnessonhigh-voltagewiressuchasbrakeorair-conditioningwires.
●Iftheswitchharnessmakescontactwithapartoftheengine,applyalengthofordinarycushionedtapearoundtheharness.
●Whenconnectingtheconnector,insertuntilyouhearanaudibleclick
●Whenremovingtheconnector,holdthemainbodyoftheconnectorandpullitout.Ifexcessforceisusedtopullthecord,it
maydamagetheconnection,whichcouldcauseittooverheat.
●Makesuretheharnessdoesnotsag.Useaharnessbandofvinyltapetosecureitinplacetowiringinsidetheenginecompartment.
●Beforeconnectingittothebattery,verifythewiringarrangement.
●Whenconnectingthebatteryterminalandorotherelectricalunits,donotmistakethe(-)and(+)terminals.Alwaysstartwith
the(+)terminal.
●Afterallwiringiscomplete,confirmthatitworksproperly.Ifitfailstoactivate,referto【4】Troubleshootingsection
ofthismanual.
●Wheninstallingthewiringharness,strictlyfollowthecautionarypointsmentionedbelow.Incorrectorfaultywiringmaycause
thelamptooperateimproperly.Insomecases,itmaycausethevehicletocatchfire.
CautionRegardingWiring/Pleasereadthoroughly

-3-
PKI-0037-4
③ Switch
(1pc)
※Pleaseusethetoolsindicatedbelow.
● Phillipsheaddriver
※ Verifyallthepartsareincluded.Ifapartismissing,pleasecontactyourlocaldistributor.
ProductDetails
● Pliers
ToolsRequired
① Lampmainunit(2units)
⑤ One-touchconnector
(1pc)
⑥ Wiretie(5pcs)
④Hexagonalwrench
(1pc)
● 19mmwrench
⑦Double-sticktape
forswitch (1pc)
● DonotuseanImpactwrenchwhenmountingthelamp.
● Overtorqueingthemountingnutonthebasecouldcause
basefailureandvoidthewarranty.
● Youmustutilizethewasher,lockwasher,andrubberbase.
● Torquespecificationsonthebasemountingnutis20ft/lbs(27N/m)
Impactwrench
20ft/lbs(27N/m)
⑧ Rubbercap
(2pcs)
⑨Dummyconnector
(1pc)
② Pre-assembledrelayharness
withfuse【LR-39】(1set)

-4-
PKI-0037-4
● Whenusingacommerciallysuppliedlampbracket,beforeremovingtheboltthatisalready
installedonthecarbody,makesurethatitissafetodoso.
● Thelampshouldbemountedinanareasufficienttosupportitssizeandweight.
Failuretodosomayresultinexcessvibrationleadingtoshorterbulblifeandorphysical
damagetothelamporyourvehicle.
● Donotattempttoinstallthelampdirectlytoanyplasticpartofthecarbody.
Ifthelampneedstobeinstalledontheplasticreinforcementmaterialsshouldbeplacedon
bothsidesoftheplasticpart.
● Wheninstalling,makesurethelampbody,lensandrimarenottouchingthebumperand
otherplasticparts.Suchplasticpartsmightdeform.
● Thelampinstallationsurfaceshouldbeflat.
● Thelampshouldbetightenedtothedegreethatthelampbodycannotbemovedbyhand.
● Thelampsaredesignedtobemountedupright.Itisveryimportantthatyoumakesurethat
thePIAAetchedinthelensreadsrightsideup.
Flatwasher
Nut
Forlampinstallation,aholewithadiameter
of12mmisrequired.Makenecessarypreparation
suchasinstallationoflampbracket.
Flatwasher
Nut
【1】Lampinstallation
Tighteningtorque:
20ft/lbs(27N/m)
Springwasher
Springwasher
Rubbercushion
Rubbercushion

-5-
PKI-0037-4
【2】RelayHarnessInstallationSequence
Thenumbersshowninthefigurebelowindicatethesequencethepartsshouldbeinstalled.
Removethe(-)terminalfromthe
battery.
Removethe(+)terminalfromthe
battery.
Bringtherelayconnectorintothe
interiorofthevehicleandconnect
totheswitch’sconnector.
Takethe(+)cord(white)andusingthe
one-touchconnector,tieittogethertothe
vehicle’s(+)cord.
Ifonly1lampwillbeinstalled,sealtheunusedconnector
withtheRubbercapandDummyconnectorincludedinkit.
Connectthelampharness
totheconnector.
Firstgroundtheterminal
thentakethe(-)cord
(black)andconnectitto
the(-)terminal.
Takethe(+)terminal
cord(white)andattach
ittothe(+)terminaland
connecttothebattery.
Attachthe(-)
terminaltothe
battery.
Afterlamphasbeeninstalled,verifytherelay
harnessdoesnotmakecontactwiththe
engine’smovingpartsorsectionsthatemit
extremeheat.Usethewiretieincludedand
securetoharnessesinsideenginecompartment.
Harness Wiretie
※ Useapairofplierstoverifytheone-touch
connectorissecure.
Switch
Relay
Battery
Cord
One-touch
connector
(+)cord(white)
(-)cord(Black)
Makesuretoproperly
securetherelayunit
usingboltsoraharness.
Theharnessmustalso
befacingdownward.
Double-sticktapeforswitch.
Placeinareathatiseasily
accessiblefromdriver’sseat.
Facingdown
(+)cord(white)
Rubbercap Dummy
connector

-6-
PKI-0037-4
Whenusingthelampforextendedperiodsoftime,werecommendthatagrillcoverbeusedoverthemain
lampunitinordertopreventunduedamage.
1
Lampmainunit
Grillcover
【3】ProceduresforInstalling/Removingthegrillcover
Forinstallingthegrillcover,firsttakethesmalltabontheupperedgeofthecoverandlineitupwiththesloton
lampunitandsnapitinplace.Thencontinuetosnaptheremainingtabsinplace.
Forremovingthegrillcover,firsttaketheoneside-tabonthegrillcoverandliftitovertheslotonthelampunit,then
continuewiththeuppertab.
●Thegrillcoverisstructurallybuiltsothatitdoesnotcomeloosewhilethevehicleisinmotion.
Therefore,beextremelycarefulwhenremovingandinstallingthegrillcoverasitisaverytightfit.
installation
slots
Theinstallationslotsarelocatedat
4positionsonthelampunit;left/
rightandtop/bottom.
Theinstallationtabsarelocatedat
3positionsonthegrillcoverleft/
rightandtop.
Viewoflampunit
fromabove. The installation slots
onthelampunit.
Tabs
Tabs
Lamp
cover
2

-7-
PKI-0037-4
1 Afterinstallation,ifthelampdoesnotactivate
→ Checkthewiringandmakesuretherearenofaultyorirregularconnections.
●Iftheswitchilluminationdoesnotlightup.
→ Verifythe(+)wirefromtheswitchisproperlyconnected.Ifitisnotcorrectlyconnecteditwillnotactivate.
→ Verifythefuselocatedonthevehicle'swiringsystem.(theswitch's(+)wireshouldbeconnectedtothe
fusebox).Ifitisburnedout,connectittoanothercircuit.
→ Iftheswitchitselfisfaulty,thesamesymptomsmayexist.Werecommendthattheentireswitchunit
bereplaced.
→ Checkthefusefortheswitchharness.Ifitisburnedout,followinstructionsindicatedin
[3FusereplacementProcedures].
●Theswitchilluminationlightsupbutwhenoperatingdoesnotwork.
→ Checktheconnecting(-)cordtothebodyearth.
→ Theremaybecaseswhereeachterminalrelatedtospecificsectionsmaybeincorrectlyconnected.
Checkforanylosewiresandalsofordirtorgrime.
→ ChecktheswitchoperationIfanabnormalityisfound,replaceitaccordingly.
2 IftheLEDsuddenlyfailstolightup…
→ Checkthefuselocatedonthevehicle'swiringsystem.Ifitisburnedout,replaceaccordingly.
→ Checkthefusefortheswitchharness.Ifitisburnedout,followinstructionsindicatedin
[3FusereplacementProcedures].
→ Theremaybecaseswhereeachterminalrelatedtospecificsectionsmaybeincorrectlyconnected.
Checkforanylosewiresandalsofordirtorgrime.
→ Checktheswitchoperationifanabnormalityisfound,replaceitaccordingly.
3 Fusereplacementprocedures
→ Ashortcircuitmayhaveoccurred.Checkthewiringsystem.Ifanytypeofdamageis
foundreplaceaccordingly.(Non-replacementmayposeapotentialdanger)(Shortcircuitsaremainly
causedwhenwiresarecaughtintheassemblyorwhenthereisagapinthesleeveconnectedtothe
lampharness).
【4】Troubleshooting……
Verifyeachsectionaccordingtothefollowing.
Typically,drivinglightsaremountedabovethefrontbumperabout14cm-30inchesfromthegroundtoprovide
extrahighbeamillumination.Drivinglightscanbemountedbelowthebumper,althoughtheywillnotbeaseffective
becausethelightwillhitthegroundsoonerandreducetherangeofthelight.
Visualaimismadewiththecenterofthebeamhotspot1.5inchesbelowthelampcenterat25feetwiththelamp
facingstraightforward.(seebelow.)
● Donotusedrivinglightsinto
oncomingtraffic.
Drivinglightsshouldneverbe
theonlyforwardlightsource.
Drivinglightsshouldonlybe
usedwiththeheadlamphigh
beams.
1.5
DRIVING / SpotLightAiming

-8-
PKI-0037-4
【5】PIAALIMITEDWARRANTY
Withtheexceptionofbulbs,PIAACorporation,USA("PIAA")warrantsitsproductstobefreefrom
defectsinworkmanshipandmaterialsundernormaluseforaslongastheoriginalpurchaserownsthem.
EXCLUSIONS
ThisLimitedWarrantyspecificallyexcludesdefectsresultingfrommisuse,abuse,neglect,alteration,
modification,improperinstallation,unauthorizedrepairs,submersion,theft,vehiclecrash,orbyany
othertypeofimpact.ExceptfortheLimitedWarrantystatedabove,therearenowarrantiesofPIAA
productsoranypartthereof,whetherexpressorimplied.Anyimpliedwarrantyofmerchantability
oranywarrantyoffitnessforaparticularpurposeisexpresslydisclaimed.Somestatesdonot
permitthedisclaimerofimpliedwarranties.
LENSCRACKS
Crashorimpactdamageisnotcovered.Thiscanbedeterminedbyachiporscrapeonthelensorthe
housing.Stresscrackssometimesoccurwhenthelensissubjectedtosuddenandextremetemperature
changes.Astresscrackhasnochiporothersignofimpact.Stresscracksarecoveredunderwarranty.
EXCLUSIONOFDAMAGES
InnoeventshallPIAAbeliableforanydamageswhatsoever(including,withoutlimitation,consequential
damages,incidentaldamages,ordamagesforlossofuse,lossofbusinessprofits,businessinterruption,
lossofbusinessinformation,lossoftime,inconvenience,orotherlosses)arisingoutoftheuse,misuse,
orinabilitytouseaPIAAproduct.PIAAreservestherighttochangethedesignitsproductswithoutany
obligationtomodifyanypreviousproduct.Thiswarrantygivesyouspecificlegalrights.Youmayalso
haveotherrightsthatvaryfromstatetostate.
REPAIRANDREPLACEMENT
IfaPIAAproductissuspectedofbeingdefective,itmustbesubmittedfreightprepaid,toeitheran
authorizeddealerordistributorforwarrantyinspection.Thereceiptorotherproofofpurchaseanda
descriptionoftheproblemmustbeincluded.Thereturnedproductwillbeinspected.Iftheproductis
foundtobedefectiveandcoveredbythisLimitedWarranty,thesoleremedyisrepairorreplacement,at
PIAA'soption.Arepairedorreplacementproductwillbeshippedbackatnocharge,andwillbewarranted
tobefreefromdefectsinworkmanshipandmaterialsundernormaluseforaslongastheoriginal
purchaserownsit.Removal,installation,orreinstallationcostsarenotcoveredbythisLimitedWarranty.
PIAA CORPORATION
www.piaa.com
www.piaa.co.jp
This manual suits for next models
1
Table of contents
Other Piaa Automobile Accessories manuals
Popular Automobile Accessories manuals by other brands

Thule
Thule RAPID SYSTEM 1527 Fitting instructions

travall
travall TDG 1492 Fitting instructions

Hirschmann Car Communication
Hirschmann Car Communication HIT AUTA 70 B installation instructions

Rear view safety
Rear view safety RVS-718 DCT instruction manual

JCROffroad
JCROffroad OGFL-BR6G installation instructions

Classic Accessories
Classic Accessories QUAD GEAR instructions