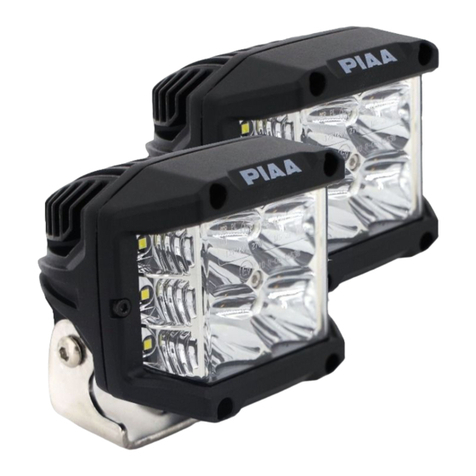
Piaa LP570 User manual

-1-
PKI-0017-2
LP570
InstallationInstructions
ThankyouverymuchforpurchasingPIAAproduct.
Pleasereadthisentiremanualbeforeinstallationanduseofthisproduct.
Pleasereadthecautionarypointsbeforeinstallationtoensuresafeutilizationoftheproduct.
●Thelampandtheswitchharnessareintendedforautomobileuse.Donotuseforanyotherpurpose.
●Thislampisintendedforuseinrain(dayornight),duringfoggyorsnowyconditionswherevisibilityishampered.
Donotuseduringnormaldrivingconditions.
●Donotoperatetheswitchwhiledriving.
●Ifthelampiskeptonwhentheengineisnotrunning,itmaydrainthebattery.
●Makesurethelampisinstalledsecurelybeforedrivingthevehicle.Ifanabnormalityisfound,adjustitimmediately.
●Checkforanyloosescrewsthatholdthelampinplacebeforedriving.Ifyoufindanyloosescrewsorbolts(ifabracketis
used),tightenthemsecurely.Ifyounoticealoosepartwhiledriving,inspectthesectionimmediatelyandmakethenecessary
adjustments.
●AvoidrepeatedlyturningthelampoffandonasitmayreducetheoveralllifeoftheLED.
●Someofvehiclesareproducedhighvoltagesofelectricchargewhenyoustartengine.Avoidloadingextravoltagetolamps,
pleaseturntheswitchoffwhenyoustartengine.
● Avoidneedlessdisassemblyofthelamportheswitchharnessasitmaycauseittofail.
●Ifthelampand/ortheswitchharnessisremovedandsetasideforsafekeeping,wipeawayalldustorgrimeandstoreinan
placefreeofmoisture.
●Ifthelensiscrackedordamagedinanyway,verifywhetherthereisanydamagetotheharnessortheswitchharnessthatitis
connectedto.Ifthereisanydamagetothecordcovering,replaceitimmediately.
●Avoidinjurywhenreplacingtheharnessandtheswitchharness.Pleasedisposeofitasanon-combustibleitem.
※ The and marksindicatedinthismanualare
cautionarypointsrelatedtotheinstallationoftheproduct.
Toensuresafeandsecureinstallationoftheproduct,pleasefollowthesepointsclosely.
Touser … Pleasekeepthismanualandareceiptwhichcanberecognizedthe
shopnameyouboughtat.
Whengivingthisproducttoathirdparty,alwaysincludethismanual
togetherwiththeproduct.
Toshopownersinstallingtheproduct … Afterinstallationoftheproduct,makesurethecustomerisprovided
withthisownerʼ smanual.
●Thelampbecomesveryhotwhenturnedon.Whenparkingyourcarnearflammableitemssuchasdriedleaves,turnoffthe
lampasitmaycauseafire.
●Donotlookdirectlyintothelightforlongperiods.Doingsomaycauseeyeirritationorvisualimpairment.

-2-
PKI-0017-2
●Inorderforthelamptoperformatitsfullpotential,userelayharnessesmanufacturedbyPIAA.
●Allworkproceduresshouldbecarriedoutinalocationwithadequatespace.Placetheshiftleverinneutralorintheparking
position.Turnofftheengineandsetthesidebrake.
●Makesuretheenginecompartmentisadequatelycoolbeforestartingwork.Donotbeginworkifenginepartssuchasradiator,
oil-coolerorturbopartarestillhot.
●Donotaddadditionalholestothemainbodyofthelamp.Also,donotapplyadhesivesorstickerstothelampparts.
●Donotmodifythelampharnessortheswitchharnessinanyway.Suchmodificationsmaycauseittooverheatorshort.Insome
cases,itmaycausethevehicletocatchfire.PIAAwillnotbeliablefordamagecausedbysuchmodifications.
●Whenremovingthebatteryterminals,donottouchthe(-)and(+)terminalssimultaneously.Anelectricalshockmayoccur.
Wearrubbergloveswhencarryingoutsuchworkprocedures.
●Makesurethe(-)and(+)terminalsdonotmakecontactwithmetal.Itcanbeextremelydangerousifashortoccurs.
●Makesureallboltsaretightlysecure.Ifthereareanylooseboltstightenthemaccordingly.
●Afterinstallingthelamp,adjustthelampsothebeamshinesatleast40minfrontofthevehicle.Also,adjustthelampalittle
towardtheleftsothatitdoesnotshinedirectlyintotheeyesoftheopposingdriverofavehicle.(astrafficlawsstipulate-
refertop.6foradjustmentprocedures)
●Afterinstallingthelamp,makesuretheheadlamps,wipersandhornareworkingnormally.
●Whenthebatteryterminalisremoved,memoryrelatedtotheclock,radio,audiosystemetc,willbeaffected.Afterallwork
proceduresarecompleted,resettotheoriginalsettings.(Foradjustmentproceduresrefertoyourcarʼ sinstructionmanual)
Pleasereadtheinstallationproceduresthoroughlybeforehand.
●Beforeyoubeginalwaysremovethe(-)and(+)terminals.
Alwaysremovethe(-)terminalfirstandmakesureashortdoesnotoccur.
●Whenremovingthebatteryterminals,alwaysturnthekeytoOFFandremoveit.Turnallotherelectricalunitsoffsuchas
thelightswitch.
●Whenremovingthebatteryterminals,ifacord(foranelectricalunit)isconnected,windalengthofvinyltapearoundthe
(-)and(+)terminalstoclearlyidentifythem.
●Verifythe(+)terminal(white)andearth(black)beforeconnecting.
●Donotobtain(+)voltagefromthealternator.
●Obtainthe(+)currentnecessaryfortheswitchfromthe(+)currentusedforthelightswitch.
(Donotusethesamecurrentusedforacomputer,radiooraudiosystem)
●Installtheswitchharnessinapositionwhereitwillnotmakecontactwithhightemperaturesurfacessuchastheengine,
radiatororenginecompartment.
●Arrangetheswitchharnesssothatitdoesnotmakecontactwithmovingparts.
●Donotplacetheswitchharnessonhigh-voltagewiressuchasbrakeorair-conditioningwires.
●Iftheswitchharnessmakescontactwithapartoftheengine,applyalengthofordinarycushionedtapearoundtheharness.
●Whenconnectingtheconnector,insertuntilyouhearanaudible“click”
●Whenremovingtheconnector,holdthemainbodyoftheconnectorandpullitout.Ifexcessforceisusedtopullthecord,it
maydamagetheconnection,whichcouldcauseittooverheat.
●Makesuretheharnessdoesnotsag.Useaharnessbandofvinyltapetosecureitinplacetowiringinsidetheenginecompartment.
●Beforeconnectingittothebattery,verifythewiringarrangement.
●Whenconnectingthebatteryterminalandorotherelectricalunits,donotmistakethe(-)and(+)terminals.Alwaysstartwith
the(+)terminal.
●Afterallwiringiscomplete,confirmthatitworksproperly.Ifitfailstoactivate,referto “【4】Troubleshooting” section
ofthismanual.
●Whendoingwiringwork,strictlyfollowthecautionarypointsmentionedbelow.Incorrectorfaultywiringmaycausethelamp
tooperateimproperly.Insomecases,itmaycausethevehicletocatchfire.
CautionRegardingWiring/Pleasereadthoroughly

-3-
PKI-0017-2
※Pleaseusethetoolsindicatedbelow.
● Phillipsheaddriver
※ Verifyallthepartsareincluded.Ifapartismissing,pleasecontactyourlocaldistributor.
ProductDetails
switch
● Tape ● Pliers
ToolsRequired
① Lampmainunit(2units) ③ Pre-assembledrelayharness
withfuseandswitch[1set]
⑤ One-touchconnector
(1pc)
⑥ Wiretie
(5pcs)
④Hexagonalwrench
(1pc)
● 19mmwrench
⑦Double-sticktape
(1pc)
② Lampcover(2pcs)

-4-
PKI-0017-2
•Whenusingacommerciallysuppliedlampbracket,beforeremovingtheboltthatisalready
installedonthecarbody,makesurethatitissafetodoso.
•Thelampshouldbemountedinanareasufficienttosupportitssizeandweight.
Failuretodosomayresultinexcessvibrationleadingtoshorterbulblifeandorphysical
damagetothelamporyourvehicle.
•Donotattempttoinstallthelampdirectlytoanyplasticpartofthecarbody.
Ifthelampneedstobeinstalledontheplasticreinforcementmaterialsshouldbeplacedon
bothsidesoftheplasticpart.
•Wheninstalling,makesurethelampbody,lensandrimarenottouchingthebumperandother
plasticparts.Suchplasticpartsmightdeform.
•Thelampinstallationsurfaceshouldbeflat.
●ランプを市販のテープや両面テープ等で仮止めしてください。
● Thelampshouldbetightenedtothedegreethatthelampbodycannotbemovedbyhand.
Flatwasher
Nut
Forlampinstallation,aholewithadiameter
of12mmisrequired.Makenecessarypreparation
suchasinstallationoflampbracket.
Flatwasher
Nut
【1】Lampinstallation
Tighteningtorque:30N-m
Orientationoflogo
Springwasher
Springwasher
Rubbercushion
Rubbercushion

-5-
PKI-0017-2
Thenumbersshowninthefigurebelowindicatethesequencethepartsshouldbeinstalled.
Removethe(-)termi-
nalfromthebattery.
Removethe(+)termi-
nalfromthebattery
Bringtherelayconnectorintothe
interiorofthevehicleandconnect
totheswitchʼ sconnector.
Takethe(+)cord(white)andusingthe
one-touchconnector,tieittogethertothe
vehicleʼ s(+)cord.
Connectthelampharnesstothe
connector.
Firstgroundtheterminalthentake
the(-)cord(black)andconnectit
tothe(-)terminal.
Takethe(+)terminal
cord(white)andattach
ittothe(+)terminaland
connecttothebattery
Attachthe(-)terminal
tothebattery
Afterlamphasbeeninstalled,verifytherelay
harnessdoesnotmakecontactwiththe
engineʼ smovingpartsorsectionsthatemit
extremeheat.Usethewiretieincludedand
securetoharnessesinsideenginecompartment.
【2】RelayHarnessInstallationSequence
Harness
Wiretie ※ Useapairofplierstoverifythe
one-touchconnectorissecure.
Switch
Relay
Battery
Cord
One-touchconnector
(+)cord(white)
(-)cord(Black)
Makesuretoproperly
securetherelayunit
usingboltsoraharness.
Theharnessmustalso
befacingdownward.
Double-sticktapeforswitchesPlace
inareathatiseasilyaccessiblefrom
driverʼ sseat.
Facingdown
(+)cord

-6-
PKI-0017-2
Whenusingthelampforextendedperiodsoftime,werecommendthatalampcoverbeusedoverthemain
lampunitinordertopreventunduedamage.
LED
2
13
Lampmainunit
Lampcover
【3】ProceduresforInstalling/Removingthelampcover
Forinstallingthelampcover,firsttakethesmalltabontheupperedgeofthecoverandlineitupwiththe
slotonlampunitandsnapitinplace.Thencontinuetosnaptheremainingtabsinplace.
Forremovingthelampcovershowninfigure
1.2
below,takeonetabonthelampcoverandliftitoverthe
slotonthelampunit,thencontinuewiththeremaining
3
tabs.
●Thelampcoverisstructurallybuiltsothatitdoesnotcomeloosewhilethevehicleisin
motion.Therefore,beextremelycarefulwhenremovingandinstallingthelampcoveras
itisaverytightfit.
installation
slots
Theinstallationslotsarelocated
at4 positionson thelamp unit;
left/rightandtop/bottom.
Tabs
Theinstallationtabsarelocated
at4 positionsonthelampcov-
er;left/rightandtop/bottom.
Viewoflampunit
fromabove. Theinstallation
slotsonthelamp
unit.
Tabs
Tabs
Tabs
Lamp
cover
installation
slots

-7-
PKI-0017-2
1 Afterinstallation,ifthelampdoesnotactivate
→ Checkthewiringandmakesuretherearenofaultyorirregularconnections.
●Iftheswitchilluminationdoesnotlightup.
→ Verifythe(+)wirefromtheswitchisproperlyconnected.Ifitisnotcorrectlyconnectitwillnotactivate.
→ Verifythefuselocatedonthevehicleʼ swiringsystem.(theswitchʼ s(+)wireshouldbeconnectedtothe
fusebox).Ifitisburnedout,connectittoanothercircuit.
→ Iftheswitchitselfisfaulty,thesamesymptomsmayexist.Werecommendthattheentireswitchunit
bereplaced.
→ Checkthefusefortheswitchharness.Ifitisburnedout,followinstructionsindicatedin
[3FusereplacementProcedures].
●Theswitchilluminationlightsupbutwhenoperatingdoesnotwork.
→ Checktheconnecting(-)cordtothebodyearth.
→ Theremaybecaseswhereeachterminalrelatedtospecificsectionsmaybeincorrectlyconnected.
Checkforanylosewiresandalsofordirtorgrime.
→ ChecktheswitchopelationIfanabnormalityisfound,replaceitaccordingly.
2 IftheLEDsuddenlyfailstolightup…
→ Checkthefuselocatedonthevehicleʼ swiringsystem.Ifitisburnedout,replaceaccordingly.
→ Checkthefusefortheswitchharness.Ifitisburnedout,followinstructionsindicatedin
[3FusereplacementProcedures].
→ Theremaybecaseswhereeachterminalrelatedtospecificsectionsmaybeincorrectlyconnected.
Checkforanylosewiresandalsofordirtorgrime.
→ Checktheswitchopelationifanabnormalityisfound,replaceitaccordingly.
3 FusereplacementProcedures
→ Ashortcircuitmayhaveoccurred.Checkthewiringsystem.Ifanytypeofdamageis
foundreplaceaccordingly.(Non-replacementmayposeapotentialdanger)(Shortcircuitsaremainly
causedwhenwiresarecaughtintheassemblyorwhenthereisagapinthesleeveconnectedtothe
lampharness).
Verifyeachsectionaccordingtothefollowing.
【4】Troubleshooting……
Typically,drivinglightsaremountedabovethefrontbumperabout14cm-30inchesfromthegroundtoprovide
extrahighbeamillumination.Drivinglightscanbemountedbelowthebumper,althoughtheywillnotbeaseffective
becausethelightwillhitthegroundsoonerandreducetherangeofthelight.
Visualaimismadewiththecenterofthebeamhotspot1.5inchesbelowthelampcenterat25feetwiththelamp
facingstraightforward.(seebelow.)
● Donotusedrivinglightsinto
oncomingtraffic.
Drivinglightsshouldneverbe
theonlyforwardlightsource.
Drivinglightsshouldonlybe
usedwiththeheadlamphigh
beams.
1.5
DRIVING / SpotLightAiming

-8-
PKI-0017-2
【5】PIAALIMITEDWARRANTY
Withtheexceptionofbulbs,PIAACorporation,USA("PIAA")warrantsitsproductstobefreefrom
defectsinworkmanshipandmaterialsundernormaluseforaslongastheoriginalpurchaserownsthem.
EXCLUSIONS
ThisLimitedWarrantyspecificallyexcludesdefectsresultingfrommisuse,abuse,neglect,alteration,
modification,improperinstallation,unauthorizedrepairs,submersion,theft,vehiclecrash,orbyany
othertypeofimpact.ExceptfortheLimitedWarrantystatedabove,therearenowarrantiesofPIAA
productsoranypartthereof,whetherexpressorimplied.Anyimpliedwarrantyofmerchantability
oranywarrantyoffitnessforaparticularpurposeisexpresslydisclaimed.Somestatesdonot
permitthedisclaimerofimpliedwarranties.
LENSCRACKS
Crashorimpactdamageisnotcovered.Thiscanbedeterminedbyachiporscrapeonthelensorthe
housing.Stresscrackssometimesoccurwhenthelensissubjectedtosuddenandextremetemperature
changes.Astresscrackhasnochiporothersignofimpact.Stresscracksarecoveredunderwarranty.
EXCLUSIONOFDAMAGES
InnoeventshallPIAAbeliableforanydamageswhatsoever(including,withoutlimitation,consequential
damages,incidentaldamages,ordamagesforlossofuse,lossofbusinessprofits,businessinterruption,
lossofbusinessinformation,lossoftime,inconvenience,orotherlosses)arisingoutoftheuse,misuse,
orinabilitytouseaPIAAproduct.PIAAreservestherighttochangethedesignitsproductswithoutany
obligationtomodifyanypreviousproduct.Thiswarrantygivesyouspecificlegalrights.Youmayalso
haveotherrightsthatvaryfromstatetostate.
REPAIRANDREPLACEMENT
IfaPIAAproductissuspectedofbeingdefective,itmustbesubmittedfreightprepaid,toeitheran
authorizeddealerordistributorforwarrantyinspection.Thereceiptorotherproofofpurchaseanda
descriptionoftheproblemmustbeincluded.Thereturnedproductwillbeinspected.Iftheproductis
foundtobedefectiveandcoveredbythisLimitedWarranty,thesoleremedyisrepairorreplacement,at
PIAA'soption.Arepairedorreplacementproductwillbeshippedbackatnocharge,andwillbewarranted
tobefreefromdefectsinworkmanshipandmaterialsundernormaluseforaslongastheoriginal
purchaserownsit.Removal,installation,orreinstallationcostsarenotcoveredbythisLimitedWarranty.
PIAA CORPORATION
www.piaa.com
www.piaa.co.jp
Table of contents
Other Piaa Automobile Accessories manuals