PICO RTC DS3231 User manual

Pico RTC DS3231
(https://www.waveshare.com/pico-
rtc-ds3231.htm)
Precision RTC Module for Raspberry Pi
Pico, Onboard DS3231 Chip
Pico RTC DS3231
From Waveshare Wiki
Jump to: navigation, search
Overview
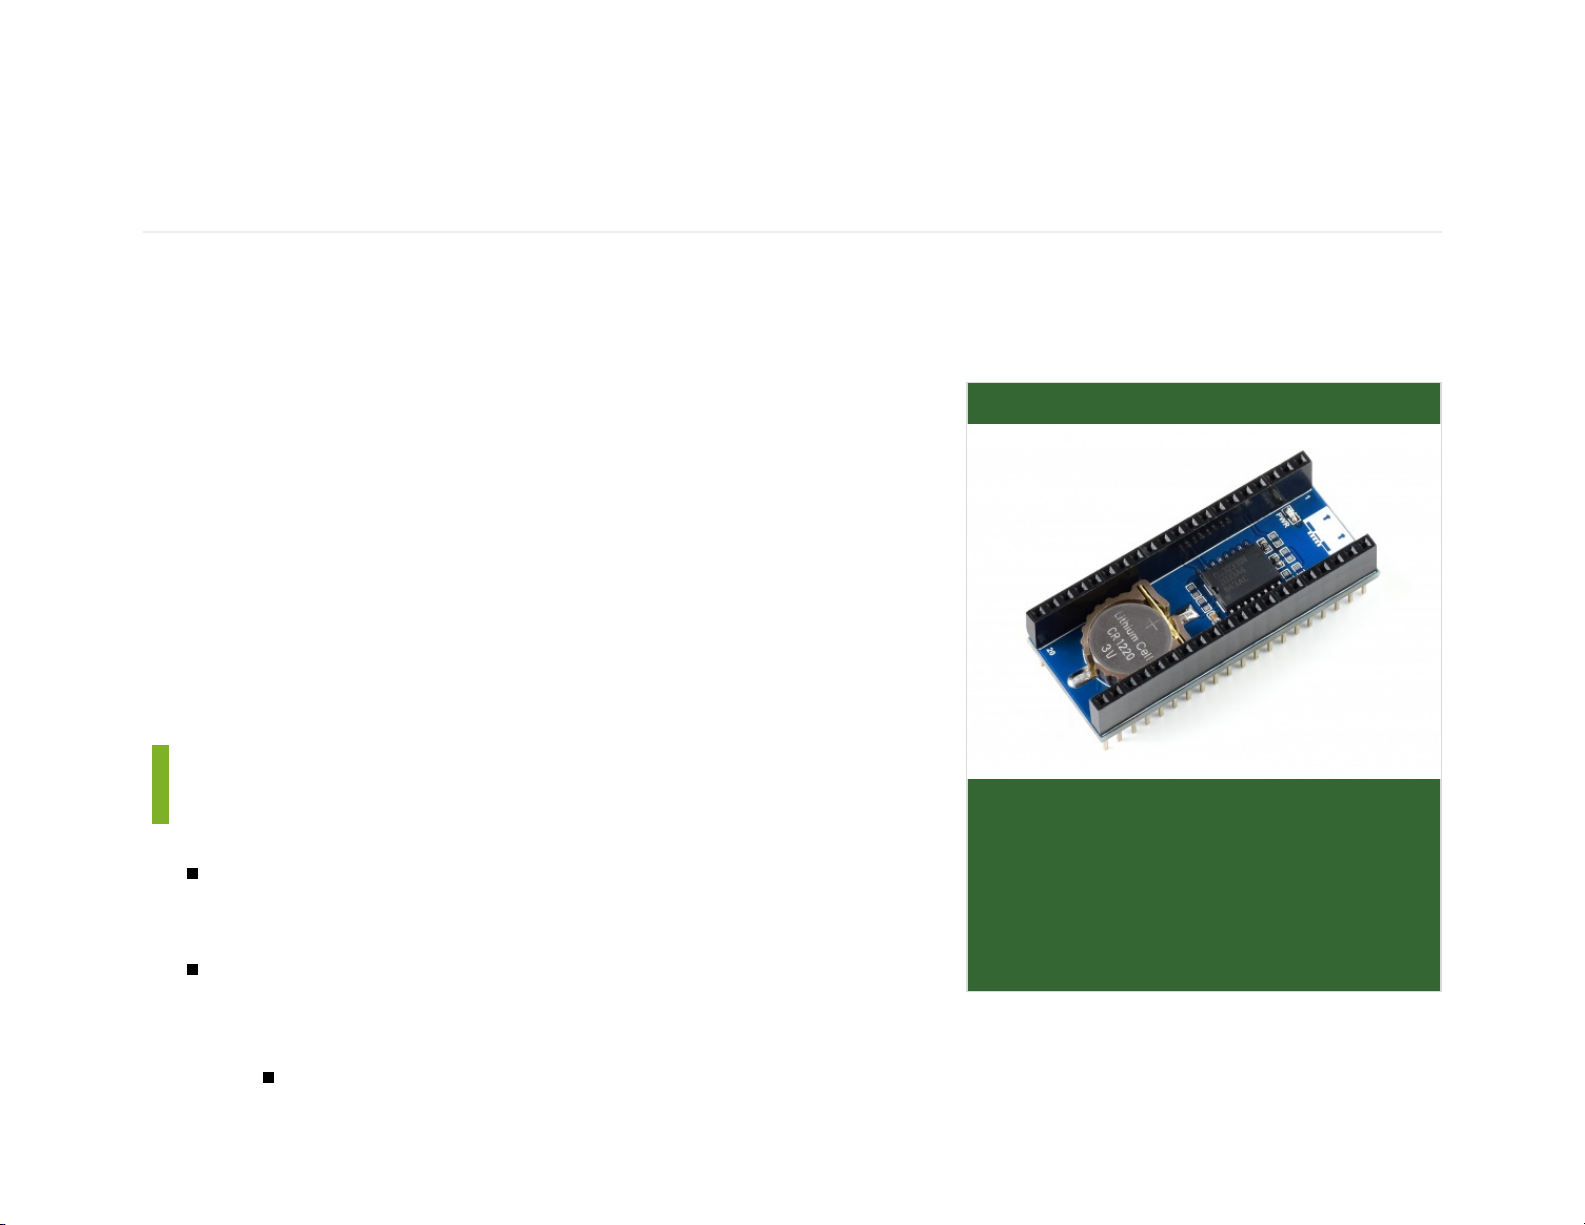
The Pico-RTC-DS3231 is an RTC expansion module
specialized for Raspberry Pi Pico. It incorporates high
precision RTC chip DS3231 and uses an I2C bus for
communication. More external sensors are allowed to be
connected thanks to the stackable design.
Features
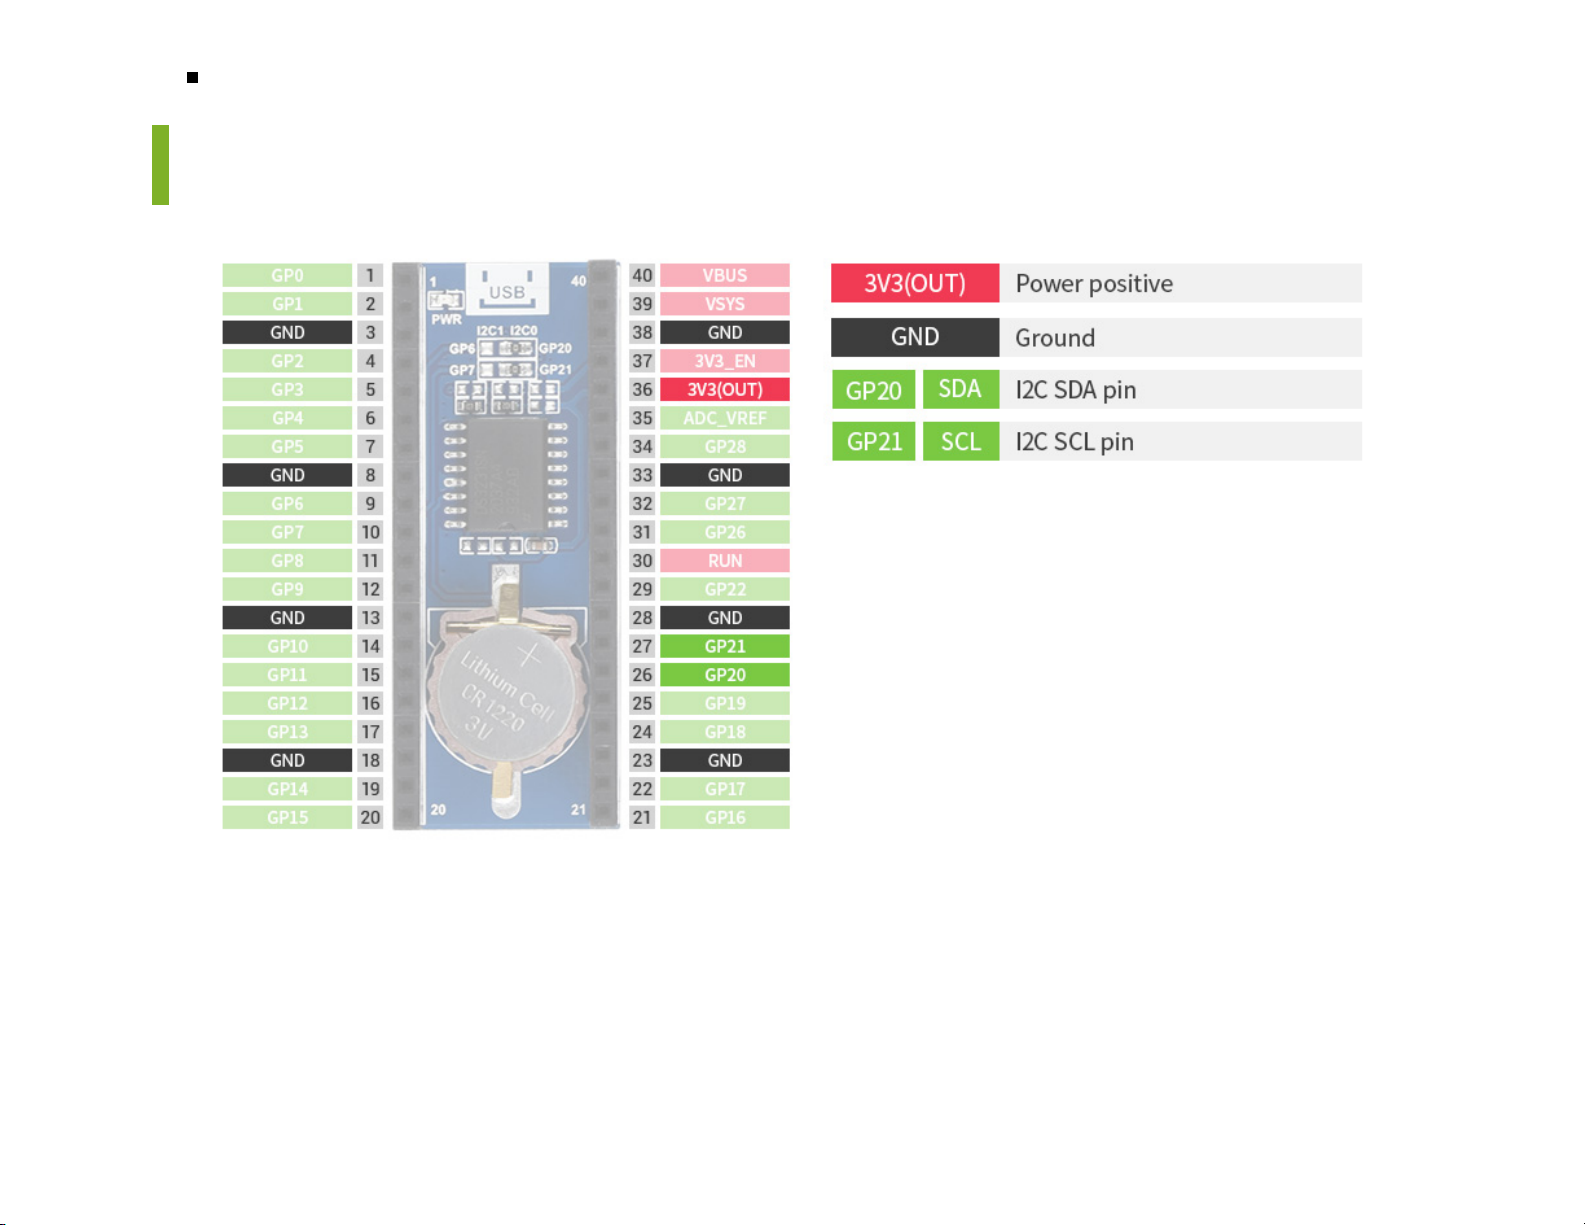
Standard Raspberry Pi Pico header, supports
Raspberry Pi Pico series.
Onboard high precision RTC chip DS3231, with backup
battery holder.
Real-Time Clock Counts Seconds, Minutes, Hours, Date of the Month, Month, Day
of the Week, and Year with Leap-Year Compensation Valid Up to 2100.

Optional format: 24-hour OR 12-hour with an AM/PM indicator.
2 x programable alarm clock.
Provide online documentation (Raspberry Pi Pico C/C++ and MicroPython example
demos).
Specification
Operating voltage: 3.3V
Backup battery voltage: 2.3V~5.5V
Operating temperature: -40°C ~ 85°C

the Raspberry Pi Chapter (https://datasheets.raspberrypi.com/pico/getting-started-with
-pico.pdf).
2. For the Windows environment setting, you can refer to link (https://files.waveshare.com/
upload/6/65/Getting-started-with-pico.pdf).
This tutorial uses the VScode IDE for development in a Windows environment.
Raspberry Pi
1. Log in Raspberry Pi With SSH (https://www.waveshare.com/wiki/Log_in_Raspberry_Pi_ter
minal_by_SSH) or press Ctrl+Alt+T at the same time while using the screen to open the
terminal.
2. Download and unzip the demo codes to the directory Pico C/C++ SDK. Reference
tutorial (https://www.waveshare.com/wiki/Raspberry_Pi_Pico) for users who have not yet
installed the SDK.

#Note that the directory of SDK may be different for different users, you need to check
the actual directory. Generally, it should be ~/pico/.
wget -P ~/pico https://files.waveshare.com/upload/2/26/Pico-rtc-ds3231_code.zip
cd ~/pico
unzip Pico-rtc-ds3231_code.zip
c
1. Hold the BOOTSEL button of Pico, and connect the USB interface of Pico to Raspberry Pi
then release the button.
2. Compile and run the pico-rtc-ds3231 examples:
cd ~/pico/pico-rtc-ds3231_code/c/build/
cmake ..
make
sudo mount /dev/sda1 /mnt/pico && sudo cp rtc.uf2 /mnt/pico/ && sudo sync && sudo umount
/mnt/pico && sleep 2 && sudo minicom -b 115200 -o -D /dev/ttyACM0
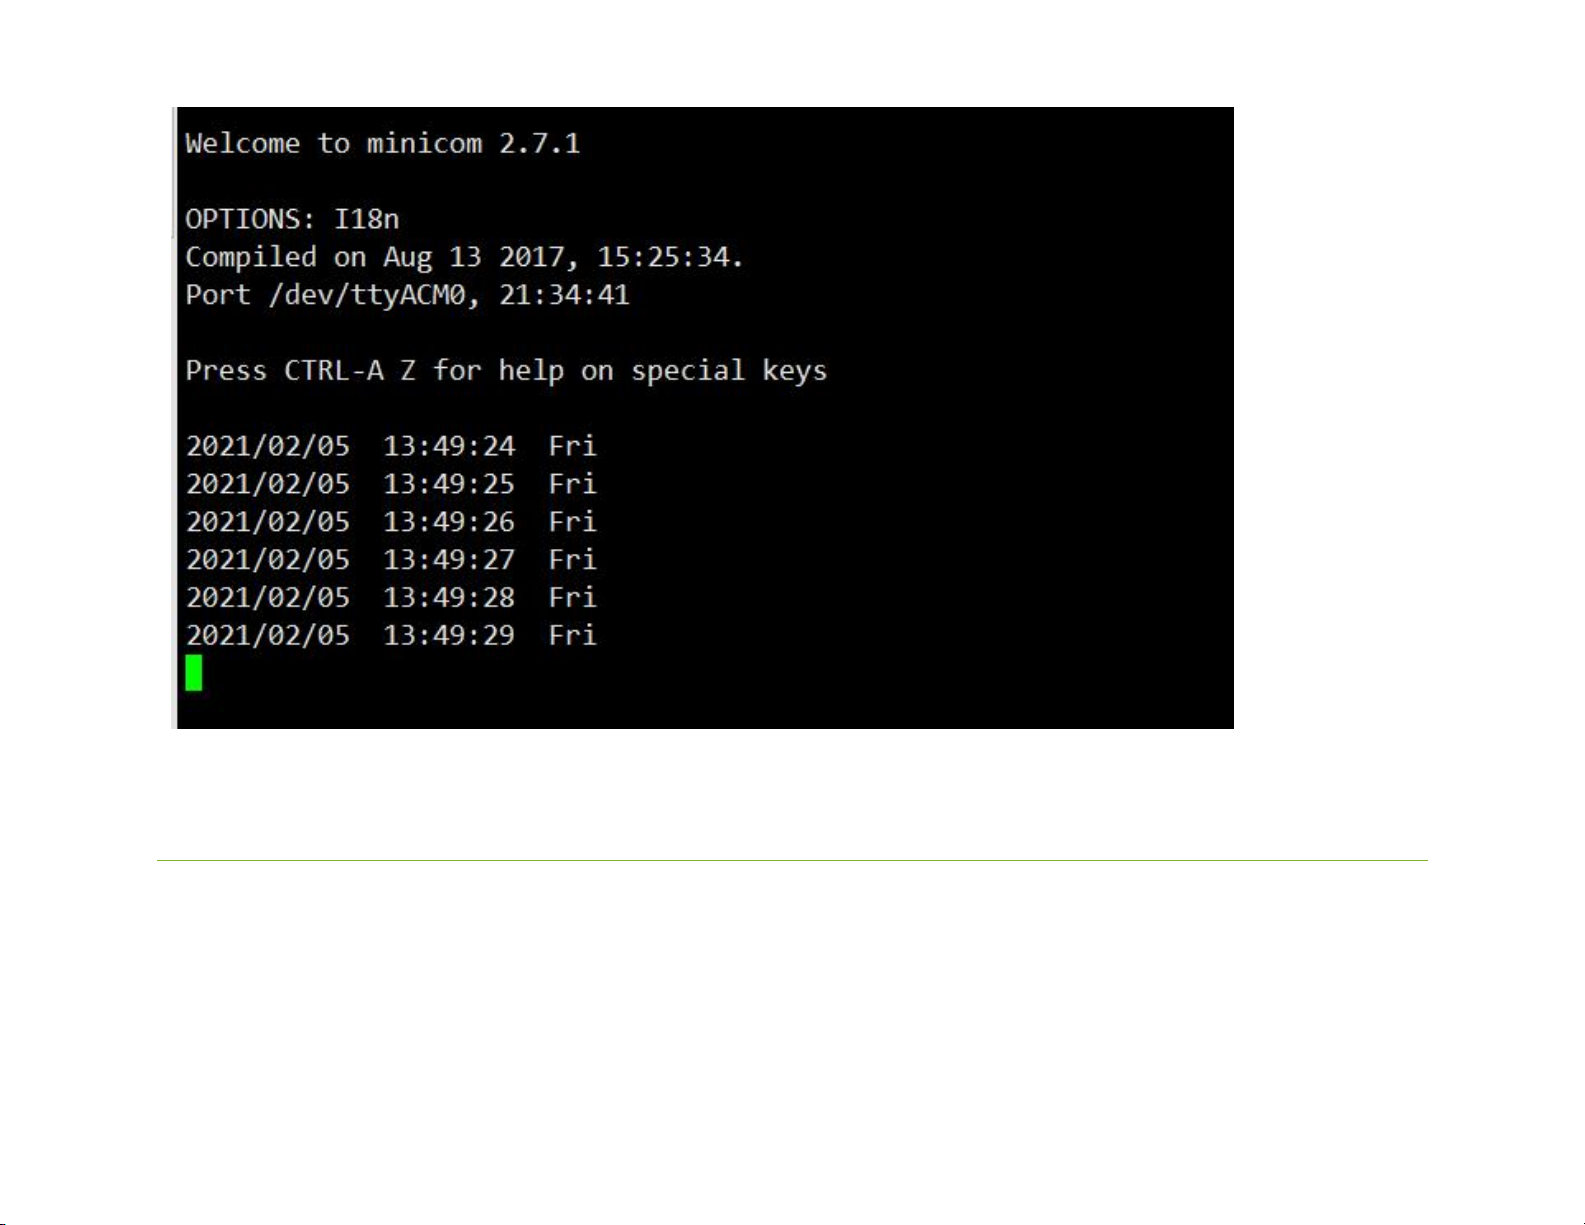
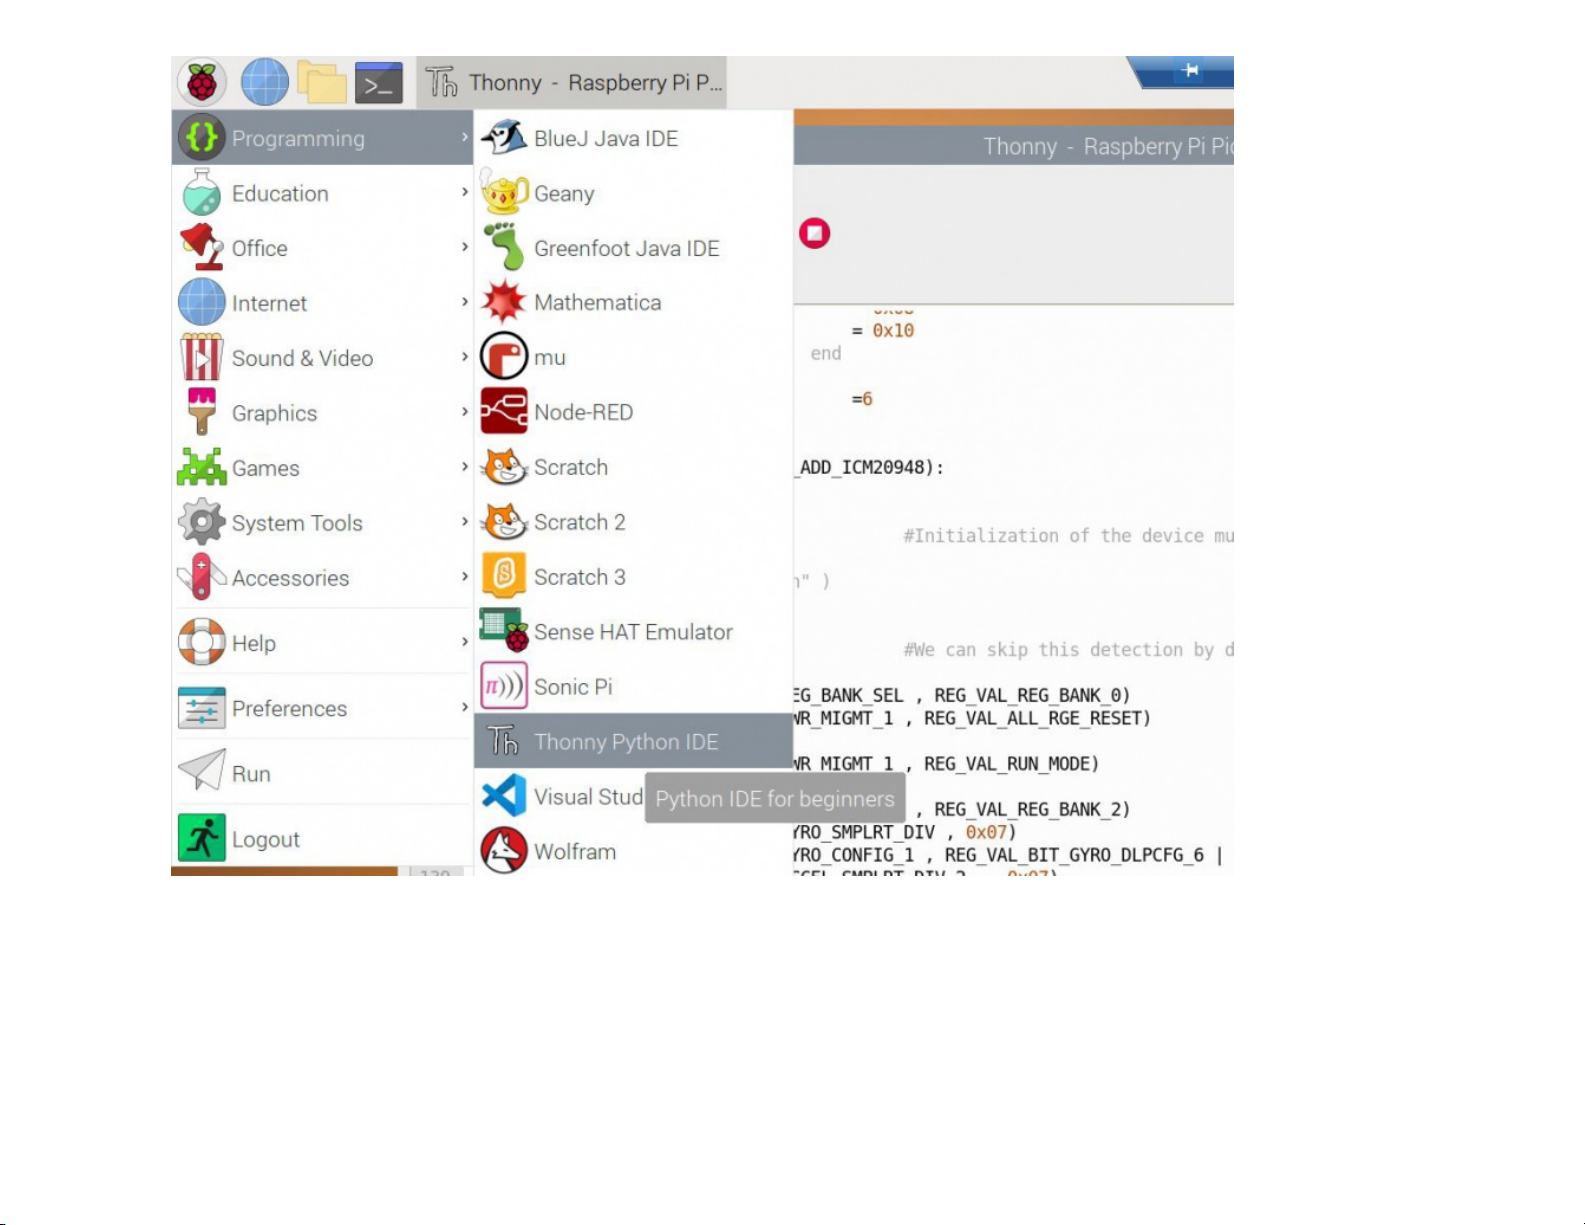
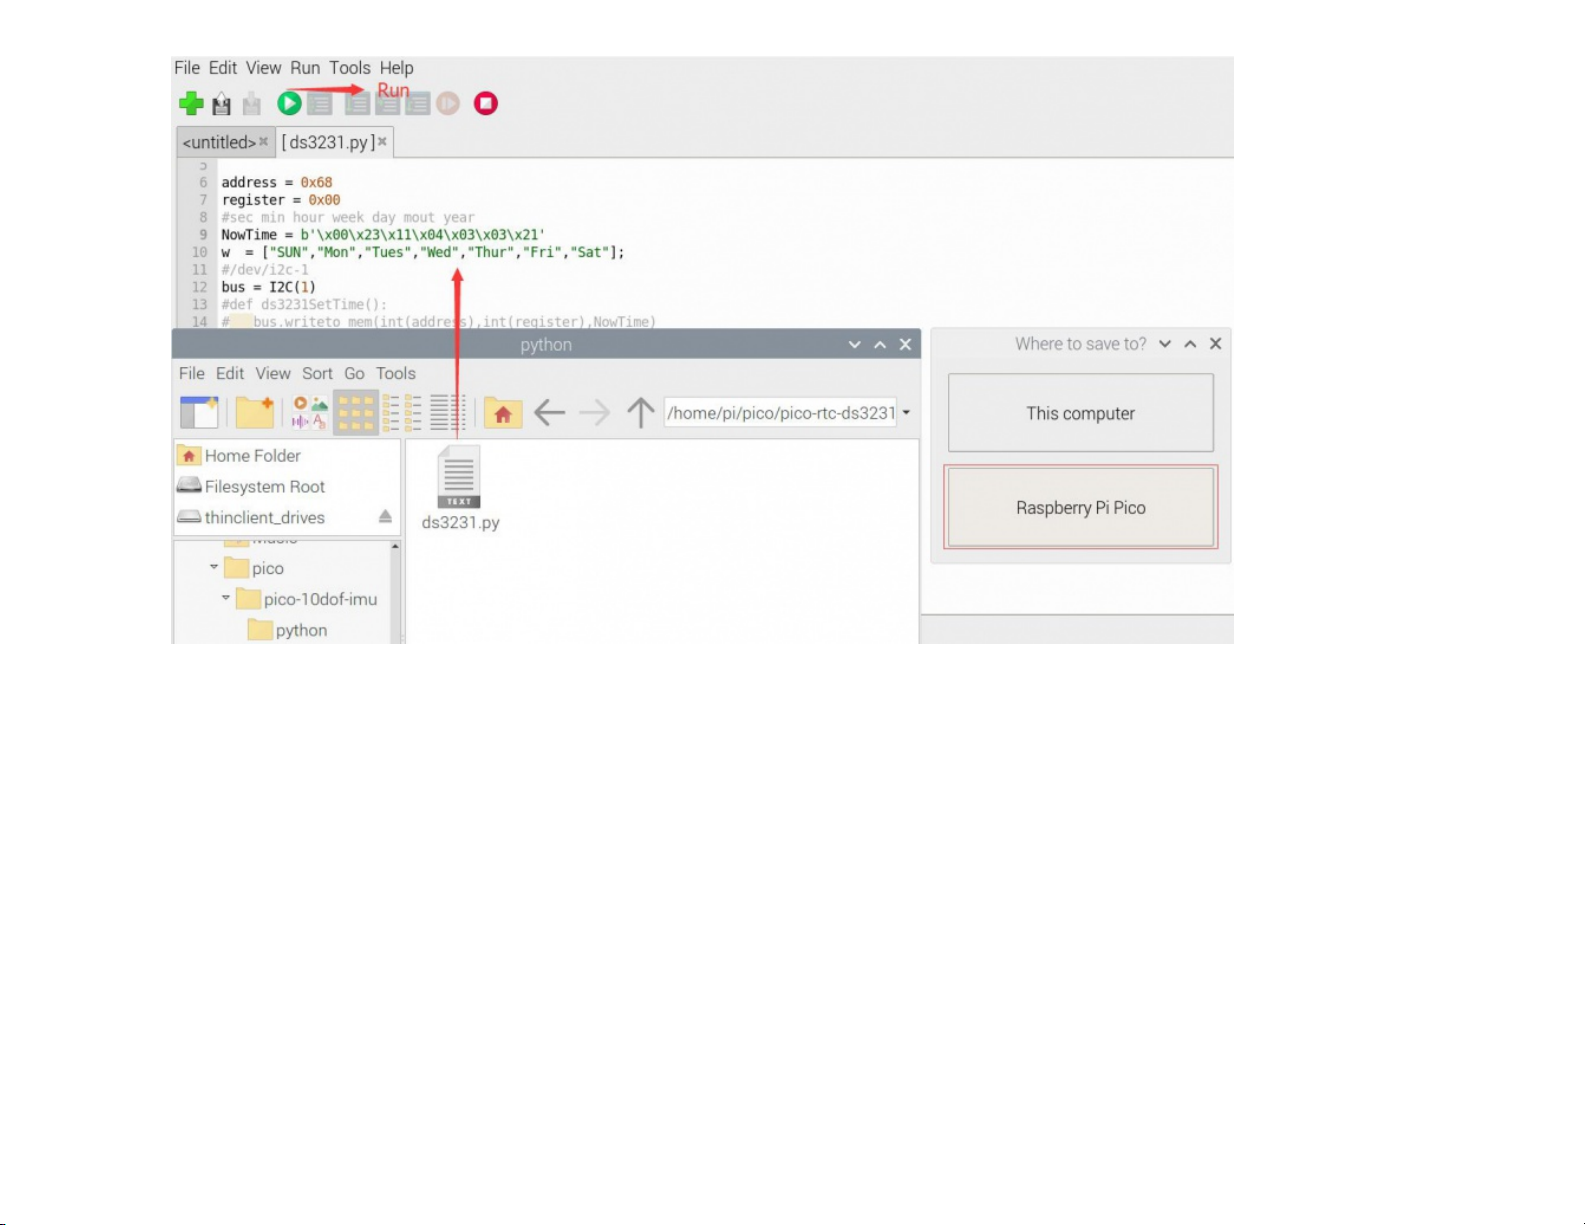
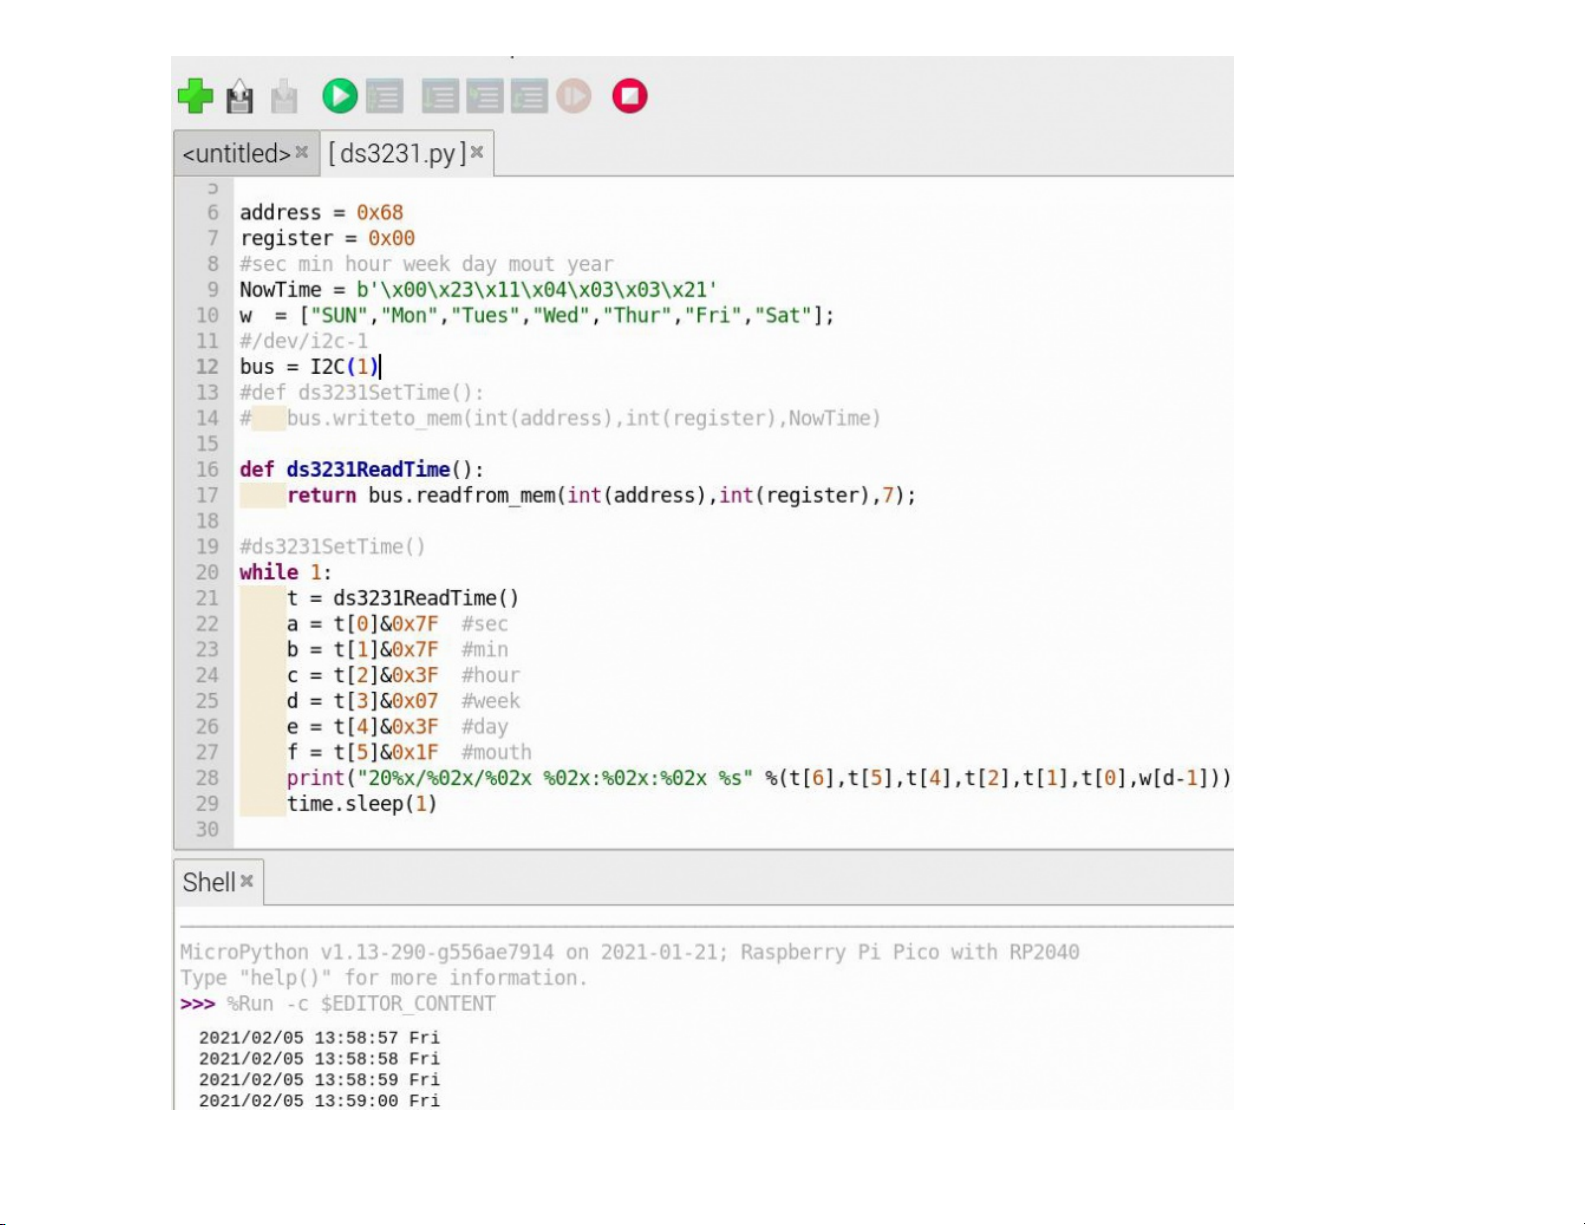
Windows
Download and unzip the demo (https://files.waveshare.com/upload/2/26/Pico-rtc-ds323
1_code.zip) to your Windows desktop, refer to Raspberry Pi's guides to set up the
Windows software environment settings.
Press and hold the BOOTSEL button of Pico, connect the USB of Pico to the PC with a
MicroUSB cable. Import c or python program into Pico to make it run.
Use the serial tool to view the virtual serial port of Pico's USB enumeration to check the
print information, the DTR needs to be opened, the baud rate is 115200, as shown in the
picture below:

(/wiki/File:Pico-RTC-DS3231007_(1).jpg)
Others
The LED light are not used by default, if you need to use it, you can solder a 0R resistor
on the R8 position. Click to view the schematic diagram (https://files.waveshare.com/upl
oad/0/08/Pico-RTC-DS3231_Sch.pdf).
The INT pin of DS3231 is not used by default. if you need to use it, you can solder the 0R
resistor on the R5,R6,R7 positions. Click to view the schematic diagram (https://files.wave
share.com/upload/0/08/Pico-RTC-DS3231_Sch.pdf).
Solder the R5 resistor, connect the INT pin to the GP3 pin of Pico, to detect the
output status of the DS3231 alarm clock.
Solder the R6 resistor, connect the INT pin to the 3V3_EN pin of Pico, to turn off
the Pico power when the DS3231 alarm clock outputs low level.
Solder the R7 resistor, connect the INT pin to the RUN pin of the Pico, to reset
Pico when DS3231 alarm clock outputs low level.
Resource
Document
Schematic (https://files.waveshare.com/upload/0/08/Pico-RTC-DS3231_Sch.pdf)

[Expand]
[Expand]
DS3231 Datasheet (https://files.waveshare.com/upload/9/9b/DS3231.pdf)
Demo codes
Demo codes (https://files.waveshare.com/upload/2/26/Pico-rtc-ds3231_code.zip)
Development Software
Thonny Python IDE (Windows V3.3.3) (https://files.waveshare.com/upload/7/73/Thonny-
3.3.3.zip)
Zimo221.7z (https://files.waveshare.com/upload/c/c6/Zimo221.7z)
Image2Lcd.7z (https://files.waveshare.com/upload/3/36/Image2Lcd.7z)
Pico Quick Start
Download Firmware
MicroPython Firmware Download
C_Blink Firmware Download
Video Tutorial
Pico Tutorial I - Basic Introduction

[Expand]
[Expand]
[Expand]
[Expand]
[Expand]
Pico Tutorial II - GPIO
Pico Tutorial III - PWM
Pico Tutorial IV - ADC
Pico Tutorial V - UART
Pico Tutorial VI - To be continued...
MicroPython Series
【MicroPython】 machine.Pin Function (https://www.waveshare.com/wiki/%E3%80%90M
icroPython%E3%80%91_Machine.Pin_Functions)
【MicroPython】 machine.PWM Function (https://www.waveshare.com/wiki/%E3%80%9
0MicroPython%E3%80%91machine.PWM_Function)
【MicroPython】 machine.ADC Function (https://www.waveshare.com/wiki/%E3%80%90
MicroPython%E3%80%91machine.ADC_Function)
【MicroPython】 machine.UART Function (https://www.waveshare.com/wiki/%E3%80%9
0MicroPython%E3%80%91machine.UART_Function)
【MicroPython】 machine.I2C Function (https://www.waveshare.com/wiki/%E3%80%90M
icroPython%E3%80%91machine.I2C_Function)
【MicroPython】 machine.SPI Function (https://www.waveshare.com/wiki/%E3%80%90M
icroPython%E3%80%91machine.SPI_Function)

【MicroPython】 rp2.StateMachine (https://www.waveshare.com/wiki/%E3%80%90Micro
Python%E3%80%91PIO_Function)
C/C++ Series
【C/C++】 Windows Tutorial 1 - Environment Setting (https://www.waveshare.com/wiki/
Pico_C/C%2B%2B_Windows_Tutorial_1)
【C/C++】 Windows Tutorial 1 - Create New Project (https://www.waveshare.com/wiki/Pi
co_C/C%2B%2B_Windows_Tutorial_2)
Arduino IDE Series
Install Arduino IDE
1. Download the Arduino IDE installation package from Arduino website (https://www.ardu
ino.cc/).

(/wiki/File:Arduino_IDE_Pico.png)
3. Click to install after downloading.
(/wiki/File:RoArm-
M1_Tutorial_II02.gif)
4. Note: You will be prompted to install the driver during the installation process, we
can click Install.
Install Arduino-Pico Core on Arduino IDE
1. Open Arduino IDE, click the File on the left corner and choose "Preferences".
Table of contents
Other PICO Computer Hardware manuals
Popular Computer Hardware manuals by other brands

Emerson
Emerson Liebert Intellislot Unity Card user manual

ADS Technologies
ADS Technologies USBX-500 user guide

Pico Macom
Pico Macom DSP806 Specifications

One Stop Systems
One Stop Systems OSS-412-BP user manual

Bosch
Bosch D5370-USB installation manual

TC-Helicon
TC-Helicon VOICEPRISM PLUS User's manual supplement